EM6500s Generator

EM6500s Generator

Are you looking for a generator that’s powerful enough to use for home backup or powering electric tools while still being portable? The EM6500s is Honda’s most powerful residential model, offering up to 7,000 watts of peak power along with an advanced control system that provides steady current that is safe for the most sensitive electronics. It also uses heavy-duty components including the company’s most advanced GX-Series engine, so it’s tough enough for commercial users.

Performance

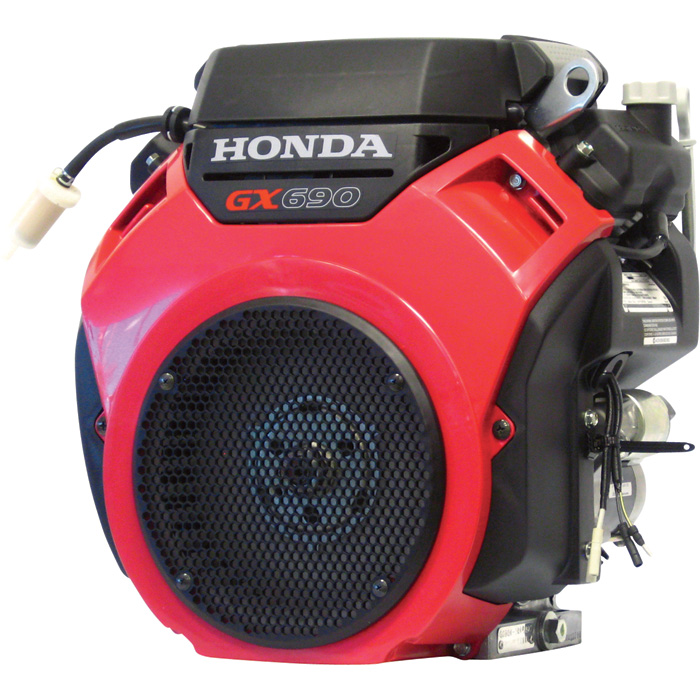
The EM6500s is powered by Honda’s iGX 390 engine. The iGX’s ECU handles the choke, throttle, and ignition automatically, taking the guesswork out of starting and operation. Honda’s Eco-Throttle automatically adjusts engine RPM to meet load requirements to reduce fuel consumption and noise. At 50% load, this generator can run up to ten and a half hours on one 6.2 gallon tank of fuel. A built-in gauge makes it easy to plan for downtime when refueling. The engine is fitted with a battery-powered electric starter. If the battery is dead, the engine can still be started using the back-up recoil starter.

All of this is packed into a frame with folding handles and wheels, making it easy to move around job sites or set up for emergency power. While running, the noise from this generator is between 64-66 dB, which is about as loud as a chainsaw.

What Can This Generator Power?

The EM6500s can produce 6,500 watts of steady power with a peak of 7,000 watts for up to 10 seconds. This peak power comes into play with reactive loads: devices with electric motors need extra power when they start up, but once underway, their power demand drops. Here are some common appliances that can be powered with this model:

  • Energy Star-certified refrigerator or freezer
  • Microwave
  • Sump pump
  • Furnace fan
  • Hair dryer
  • Electronics including TVs and computers
  • Garage door opener
  • Power tools

Plentiful, Clean Electricity

This model’s iAVR intelligent automatic voltage regulation reduces voltage fluctuation up to 50% compared to other AVR systems. It does this by uses iGX’s electronic control system to all but eliminate RPM fluctuations when loads change. By evening out electricity supplied to the inverter, the EM6500s is able to deliver clean, steady power that won’t burn out electronics.

For connections to household appliances, there are two 20 amp duplex outlets for a total of four GFCI-protected 125-volt sockets. For higher demand applications, there are two locking plugs: one 30 amp 125-volt socket and one 30 amp socket that can be used in 125 or 250-volt modes. By flipping a switch on the panel, the dual mode socket can be set to 125 volts without limiting the generator’s maximum output. All outlets are protected by circuit breakers to prevent overload in case of a short.

There’s also a 12-volt connector that taps into the charging system for the generator’s starter battery. By attaching an optional charging cord, the generator can be used to charge automotive batteries.

Accessories

Honda knows these generators have applications in home and work use, so they’ve created accessories accordingly. For home backup power, there’s an available remote start kit and a transfer switch to wire the generator directly into the house electrical system. For those who want to use this generator for power at job sites, Honda offers a hanger kit to hoist it up buildings or keep it out of reach of thieves.

Warranty

The EM6500s and its iGX engine are guaranteed for three years of residential or commercial use.

Get the Parts and Accessories You Need for Your Honda Generator

Hondalawnparts.com is an authorized Honda Engines and Honda Power Equipment dealer, letting us offer the full line of Honda OEM parts and accessories for the EM6500s including transfer switches, cables, and maintenance parts. Browse our site’s generator accessory section, or find the right part for your equipment by using our advanced search engine. When you enter your model and serial number, our site can show you factory diagrams and descriptions so you can be sure you’re buying something that’s compatible with your model. We can ship your order to any address in the U.S. or Canada.

Using the WT30x Trash Pump

Honda_WT30

Honda’s WT30X is a staple of the construction and property management, providing portable power to drain waterlogged and flooded areas. Whether you’re a new owner or drainage is a regular part of your work day, these tips will help you get maximum performance from this trash pump.

Specifications vs. Real World Performance

Honda lists the following specs for this pump:

— Handles debris up to 1 1/16 inch
— Pumps up to 317 gallons per minute
— 82-foot head
— 26-foot suction head
— 90 second priming time at 16.4 feet

However, actual performance can vary widely depending on how and where you set up your pump.

Suction head decreases by two feet for every 1,000 feet of elevation. If you need to use your pump at altitudes above 13,000 feet, the pump will need to be lower than the surface of the water.

Even though it can handle large rocks and debris, a strainer must be attached to the suction hose to prevent anything over the maximum size limit from reaching the pump housing.

The maximum flow rate is under ideal conditions. For the best performance, you should use the shortest hoses, the shortest suction head and shortest total head possible. Priming time will take longer as head and hose length increases.

Always check the hoses and seals for signs of damage before using the pump. Even small leaks can hinder performance.

Using the Pump Safely

If there’s a problem with the pump, it can be shut off immediately by turning off the ignition.

This pump is built to handle construction materials and other trash. It is not safe to use with corrosive fluids including sea water and mine runoff.

Priming

The pump case needs to be filled with water to keep the seals cool while it pulls water through the suction hose during startup. Before starting the engine, remove the cap on the top of the pump next to the suction hose and add water. The pump case should hold just under four gallons of liquid.

Starting

There are a few minor differences that make starting this pump’s engine different from other small engines.

Depending on the version of pump you’re using, the ignition switch will either be on the starter housing or bolted to the frame. This switch should be turned on after setting the choke and throttle and before pulling the starter rope. The engine comes with Honda’s Oil Alert system, which will cut the ignition if there isn’t enough oil to lubricate the engine. If the engine won’t start or it stops abruptly, start by checking the oil level in the crankcase.

The throttle only needs to be about a third of the way open to get the engine started. Once the engine is warm, the throttle can be opened to get the right pumping speed. The throttle lever is above and to the right of the choke and fuel valve controls.

Cleaning the Pump Case

The inside of the pump should be cleaned after each use. Honda includes a special wrench for this purpose that attaches to the frame using a wing nut.

Remove the drain plug on the base of the pump, then loosen the four cover knobs on the pump cover. Slide the pump cover and volute case off of the pump. The o-ring that seals the two halves of the pump should stay in the groove on the volute case.

Clean out any debris inside the pump.

Make sure the o-ring is in place and in good condition, then reinstall the pump cover. Hand-tighten the cover knobs before tightening them down with the wrench. Reinstall the drain plug. Add water to the pump just like you would when priming it and check for leaks. If everything looks good, remove the drain plug again to let the water drain out, then reinstall the plug.

Get the Parts You Need for Your Trash Pump

Hondalawnparts.com carries the full line of Honda replacement parts. That includes OEM hoses, strainers, seals and everything else you need to use and repair your WT30. We have a section on our website dedicated to pump accessories, while our search engine can find parts based on your pump or engine’s model and serial number. We can ship your order to any location in the US or Canada.

Fixing and Replacing the Tires on Your Snowblower

Fixing and Replacing the Tires on Your SnowblowerHave a flat on your Honda snowblower? Just got it out of storage to find a tire has come off a rim? Here’s what you need to do to fix it and keep it from happening again.

Tube or Tubeless?

All Honda snowblowers built in the past two decades that use pneumatic tires are tubeless. That means if you have a leak, it’s in the tire itself. It also means that if the tire separates from the rim, the bead needs to be reseated to reinflate the tire.

Tire Pressure

Tire pressure should be checked before each use, even if you got your snowblower out the day before. If the temperature drops 10°F, tire pressure can drop up to one PSI. Tires can also lose one PSI each month they’re in storage. Honda’s snowblower tires are designed to operate at 8.5 PSI, so it doesn’t take much for the pressure to drop significantly between uses.

Removing and Replacing a Wheel

Removing the wheel will make it much easier to work on the tire. Honda offers some tires and wheels as a complete set, letting you replace a bent rim and tire in one step.

1. Disconnect the spark plug wire to prevent an accidental start.
2. Lift up the rear of the snowblower so that the tires are off the ground.
3. Depending on the model, there will be either a bolt or a Clevis pin on the axle. Remove this part, and slide the wheel off of the axle.
4. Slide the new wheel onto the axle and tighten down the bolt or reinstall the pin.
5. Air up the tire before lowing the snowblower to keep the bead from separating it from the rim.

Reseating a Tire

If the tire pressure is too low, rolling the snowblower can cause the tire bead to roll off of the rim. If that happens, it can be reseated by using air pressure to push out the sidewalls of the tire:

1. Remove the wheel.
2. Hold the tire and wheel in a way that lines the bead up with the rim.
3. Connect the air valve to a compressor or a pressurized air tank. You may need to go over the recommended operating pressure to push the bead onto the rim, but try not to go above the maximum pressure on the sidewall. The goal isn’t to put a lot of air in the tire, it’s to put the air in quickly to get the bead to meet with the rim.

Most of the time, the tire will expand and seat on the rim with just air pressure. If the bead still doesn’t want to seat, there are a few things you can try:

— Apply grease on the inside lip of the wheel. This helps the tire slide up to the rim, and can reduce the amount of air escaping as you air up the tire.
— Remove the valve stem. This reduces resistance when airing up the wheel. Be gentle handling the wheel and tire when reinstalling the stem as the lack of air pressure can let the bead slide off of the rim again.

— Tie a ratchet strap or a rope around the tire tread. This pressure will help push out the sidewall so the bead doesn’t have as far to go to meet with the rim. To tighten a rope, slide a piece of pipe between it and the tire and twist, wrapping the rope around the bar.

It is possible to spray the rim with starter fluid and light it to pull the tire onto the rim, but it should be obvious that this is extremely dangerous. If the tire is that difficult to fit, it’s worth getting a complete wheel and tire instead of setting your snowblower and yourself on fire.

Replacing a Tire

If there are cracks in the rubber or damage to the tire, it should be replaced.

1. Remove the wheel from the snowblower.
2. Push in the tire valve to release any remaining air inside the tire.
3. Use a set of tire levers or spoons to pull the bead over the rim. Once one bead is off the wheel, lift up the tire and pull the other bead over.
4. Fit the new tire onto the wheel using the spoons or levers.
5. Use the process above for reseating the bead. Air up the tire to the correct pressure, then install the wheel on the snowblower.

Getting New Tires and Wheels for Your Snowblowers

www.hondalawnparts.com is a certified Honda Power Equipment dealer, so we’re able to ship any OEM part currently available to any address in the U.S. or Canada. Check out our wheels section to find a replacement for your snowblower, or use our search system to find the right part for your model.

What Type of Pump Do I Need?

What Type of Pump Do I Need?From powering fountains to cleaning construction sites, Honda makes a pump that will do the job. Which pump is right for your needs? Knowing how each design functions can help you narrow down your choices from Honda’s 16 model lineup.

Flow Rates in the Real World

The flow rates below are in ideal conditions, but there are two factors that can reduce the actual flow rate once put in use:

The head, which is the difference in height between the end of the intake hose, the pump and the end of the outlet hose, will affect pumping performance. If all three points are at about the same height, the pump should work at the rated gallons per minute. If the height difference is high, say, when pumping water out of a well, the pump has to overcome gravity, reducing the flow rate.

When it comes to trash and chemical pumps, the fluid being moved may be heavier than water, which further decreases pumping speeds.

Before you buy a pump, check the detailed specifications to make sure the pump will be able to support the total head you’ll need the pump to handle. If you need to maintain a specific flow rate, download Honda’s free “Pump Select software“. It can do the flow calculations for you and make model recommendations.

The gallon per minute rating may get the most attention, but the main factor when selecting a pump is its intended use:

Portable De-Watering

The WX Series is built for high portability with the WX10 weighing just 13 lbs. These models are great for occasional use for gardening, boat maintenance, and general household usage, moving between 32 and 74 gallons of water per minute.

General De-Watering

The WB series trades the WX’s low weight for more pumping power. Commercial grade components including silicone carbide seals and anti-vibration mounts help with long term reliability. They can move between 164 and 290 gallons per minute.

Nozzles, Sprinklers and Long Distance Applications

The WH series is built for high-pressure applications while still being portable, making them a great choice for irrigation and fire suppression. These models can pump up to 119 GPM under pressures as high as 64 psi.

Chemicals

The WMP20 is designed with materials that resist corrosion and damage from a wide range of industrial and agricultural chemicals as well as salt water. Keep in mind that while it can handle both base and acidic fluids, it can’t pump just anything: Honda keeps an updated list of approved chemicals on their site. This pump has a maximum flow rate of 220 GPM.

Trash, Debris, and Big Jobs

The WT Series is built for moving massive amounts of water that is mixed with solids up to 1 1/16 inches in diameter. A quick clean out port and design features for easy maintenance make these pumps more than up to the task of handling the demands of contractors and rental businesses. These pumps can move between 185 and 433 gallons of water per minute, although high trash content will reduce performance.

Severe Duty and Slow Seepage

The WDP30 uses a positive displacement diaphragm pump that can move water that contains up to 25% solids including mud and trash. This design can also run dry without harming the seals, while a rock channel in the volute case and spring-loaded connecting rod protect the components from impacts. That capability comes at a cost of pumping speed, limiting it to 80 GPM.

Fixed Locations

Honda’s WSP electric pumps are powered by 120 AC current, making them a great choice in areas that have frequent need of pumping and have ready power access. These units have switches to pump automatically once the water reaches a certain level, and they’re also set up so they can be put in continuous use. Electric pumps are great for draining water from tanks and containers including pools and hot tubs as well as removing seepage in basements and powering fountains and garden irrigation systems.

Most models are designed for plain water, but the WSP 50 and 100 models are both trash pumps, able to handle solids up to two inches in diameter. Pumping speed ranges from 40 to 150 gallons per minute.

Servicing and Accessories

Need to fix your current Honda pump or replace the hoses? Hondalawnparts.com has everything you need. As a certified Honda Power Equipment dealer, we carry parts and accessories for all of Honda’s small engines and equipment. Our site makes it easy to find the parts you’re looking for by integrating factory parts diagrams into our search engine so you can see where the part fits on your pump. We ship across both the U.S. and Canada.

The EB2800i and EG2800i: Honda’s New Open Frame Inverter Generators

Honda OFI Generators_EB2800i and EG2800i copy

This year, Honda has added two new fully framed inverter generators to their lineup: the EB2800i and the EG2800i. These units are small enough to be portable while still delivering reliable performance for both industrial and home users, helping to bridge the gap between Honda’s small portable generators and their large, rolling full frame units.

EB2800i

This industry-focused model is powered by a GC190LA engine. This prosumer power plant balances reliability with ease of use by including features like automatic decompression, electronic ignition and an automatic choke make this motor easy to start. The choke, engine switch and performance indicators are built into the control panel for easy access.

As the name suggests, this generator produces a peak of 2,800 watts for load spikes with a constant maximum output of 2,500 watts. This electricity runs through an inverter, creating a clean waveform that’s safe to use with electronics. Honda’s Eco-Throttle system adjusts engine speed automatically to match the load for up to 12 hours of runtime from the 2.1 gallons fuel tank. Even if you manage to keep it at 100% load, the engine will run a little over 5 hours before refueling. While operating, this generator produces between 61 and 69 dBa, which is about as loud as a conversation or being inside a busy office.

A pair of 120-volt duplex outlets provide four places to plug in devices. These outlets have independent GFCI protection, shutting off one outlet when there’s a short while the other outlet will keep functioning. This generator is both OSHA and ETL compliant and it comes with a USDA-qualified spark arrester/muffler, so it’s safe to use in almost any work environment.

The generator’s components are built into a full frame to protect them from damage while providing plenty of areas to lift it for transport. Total weight is just 67 lbs, making it easy for two people to carry the unit or lift it into the back of a truck. Want to make it easier to move around? Honda offers a kit to add wheels so it can be rolled to the work site.

EG2800i

While this may be the residential version of the EB2800i, that doesn’t mean it skimps on features. Everything from the engine to the inverter carries over with the only difference showing up at the control panel. Instead of two duplex plugs, there are two individual 20 amp 120-volt outlets and a 30 amp 125v outlet for a locking plug. This third outlet makes it easy to hook this generator up to a home electrical system using a transfer switch. Want more flexibility? The locking plug outlet can be used with an extension cord to provide an indoor power point with multiple standard outlets while leaving the generator outside where its exhaust fumes won’t get trapped. As for the 120-volt outlets, each one has its own circuit protection so a short won’t shut off the other outlet.

Warranty

Honda covers both models for three years of residential use and one year of commercial use.

Getting Parts for the EB2800i and EG2800i

Whether you have the newest generator or an old mower, you can get parts for it from www.hondalawnparts.com. We’re not just an official Honda Small Engine Equipment dealer, we’ve built Honda’s own parts diagrams into our site, making it easy to find what you need to keep your equipment running. We can ship anything you need to any address in the U.S. and Canada.

Honda GX Series V-Twin Engines

gx v-twinHonda’s GX Series V-twins are built for high demand applications including everything from generators to UTVs, delivering power with the company’s signature reliability and ease of operation. No matter what your GX powers, there are a few things you should do to get the most out of your engine.

Controls

All the controls on these motors are placed on a control panel, located to the right of the fan cover. From top to bottom, there’s a throttle, choke knob, engine switch, oil alert indicator and an hour meter. There are a couple things you should know about how these controls work on the GX:

  • Don’t see a throttle or a choke lever? Some equipment mounts the throttle remotely, typically placing it on a handle. This is almost guaranteed with vertical shaft models.
  • The choke is engaged by pulling the choke knob out.
  • The hour meter will display the current operation hours when the ignition switch is on, but it only counts time when the engine is running.
  • These engines have a fuel cut solenoid that lets fuel enter the carburetor when the ignition switch is in the “On” and “Start” positions, and then closes the fuel line when the switch is off. If the battery becomes disconnected, the solenoid will close the fuel line, causing the engine to stall. Some models also have a separate fuel valve on the fuel tank that needs to be opened when the engine will be used, then closed when it is put away.
  • Honda’s Oil Alert system will shut down the engine if the oil level inside the crankcase gets too low, preventing potential engine damage. If the system is tripped, the indicator light will turn on. If the engine stops suddenly, check both the light and the oil level.

Starting

The throttle should be about 1/3 of the way from the lowest “Min.” position, and the choke should be closed unless the motor is being restarted. If there is a fuel valve on the tank, make sure it’s open. To turn over the motor, turn the ignition switch to “On,” then twist it to “Start” until the engine fires up. If the engine isn’t running after 5 seconds, release the ignition switch and wait 10 seconds to let the starter motor cool off before trying again. Once the engine is running, it should idle for a couple minutes to let it warm up.

Stopping

Move the throttle to the “Min.” position, then turn the ignition to “Off.” If equipped, close the fuel valve.

Oil

On horizontal shaft engines, the oil is poured into a filler neck located at the top of the right side cylinder head. The oil can be checked using the automotive-style dipstick behind this cylinder. On vertical shaft models, there will be a combination filler neck cap and dipstick behind the right-hand cylinder. The oil level should be checked after the engine has idled for a couple minutes and is then shut off. The level should be between the two marks on the dipstick. On vertical shaft models, the cap should not be threaded into the filler neck when using the dipstick to check the oil level.

GX Series engines are designed to use 5W30 or 10W30 oil in most operating conditions. If you need to operate the motor at temperatures below 10 degrees F (-15 degrees C) a synthetic 5W30 is recommended. SAE 30 can be used at temperatures above 50 degrees F (10 degrees C).

Oil can be drained by removing a plug bolt at the base of the engine. The GX series also uses a spin-on oil filter, which should be replaced each time the oil is changed.

Air Filter

The air cleaner is behind a latched cover between the cylinders. Vertical shaft motors use a series of panels, while horizontal shaft motors use round filter elements.

The air cleaner uses both a paper element and a foam element. The foam element should be cleaned by washing it with a mild detergent or a non-flammable solvent. Once dry, soak it in clean engine oil and squeeze out any excess. The paper element should be tapped against a hard surface to loosen any dirt between the pleats.

Spark Plugs

The spark plug gap should be between 0.028-0.031 inches (0.7-0.8 mm.) The plugs can be removed and installed using a 5/8 inch plug wrench or socket. When installing, screw the plug into the engine by hand to ensure it doesn’t cross thread, then tighten it down 1/8-1/4 turn after it seats if it’s used, or ½ turn if it is new.

Getting Parts

Need something for your Honda GX V-twin? You can get it from www.hondalawnparts.com. We’re a certified Honda Small Engine Equipment dealer, so we carry everything for their motors. When you search for parts on our site, you’ll see factory parts diagrams and descriptions so you can quickly find what you need. We ship parts across the U.S. and Canada.

Honda iGX Engine Overview

Honda iGX EngineThe electronically-controlled Honda iGX has been making its way into a wide range of equipment including Honda’s own EM and EB series generators. At first glance, it’s easy to confuse a Honda iGX motor with their GX Series, found in pretty much every piece of commercial-grade small engine equipment. That’s understandable since the iGX is a GX at its core, but the iGX has some unique features that change how you need to operate and care for these motors.

What Makes an iGX engine different?

The iGX is based on the GX Series engine, the same design that has been a cornerstone of small engine equipment across the industry, used in everything from generators to pressure washers.

The biggest change is the Electronic Control Unit (ECU.) It can read engine conditions and adjust the governor and throttle, keeping the engine at just the right speed to meet current load demands. The result is fast power response and up to a 15% increase in fuel economy. It’s no wonder that these engines first saw use in generators.

These engines also use CDI ignition with variable timing and a rev limiter. By varying ignition with engine speed, these motors can produce more power over a wide RPM range.

Low Profile Models

For equipment where space is at a premium, Honda offers low profile versions of these engines. These are easy to identify by the large plastic panel next to the recoil starter. This is the cover for the air cleaner. The muffler is located at the rear of the engine, while fuel is stored on the equipment itself instead of a tank bolted to the motor.

The Honda Oil Alert System

The Oil Alert system is designed to protect the engine if it doesn’t have enough oil to stay lubricated. It works a little differently on the iGX than it does on other Honda engines: on some motors, the ECM, located directly above the carburetor, has a small LED light. If it flashes twice, the Oil Alert system has been triggered. On other models, the Oil Alert light is clearly visible next to the ignition switch and will either blink continuously or stay on once the system has been triggered. Most models will shut down to protect the motor, but if a shutdown may be dangerous due to the type of attached equipment, the motor may keep running. If you see the light come on, try to shut down the motor as quickly and safely as possible. Add more oil as needed before starting the engine again.

Starting the Engine

To start an engine with electric start, turn the ignition switch to “Start.” On these engines, the choke is engaged automatically. If it doesn’t start after 5 seconds, release the switch and wait 10 seconds before starting again. If it refuses to start, switch the manual start lever, located next to the ECM, to “On.” Turn the ignition to “On,” then use the recoil starter to start the engine. Don’t move the manual start lever until shutting down the motor.

To start an engine without electric start, locate the fuel lever (lower lever) and choke lever (upper lever) on the carburetor. If you have a low profile engine, which places the muffler and air cleaner behind the engine instead of above it, there will only be a choke lever. If you have an iGX270 or 390, the choke is automatic, so the sole lever is for fuel. Set the fuel lever to open and the choke to closed, as applicable. Turn the ignition switch to “On” and use the recoil starter to start the motor.

Fuses

One or more automotive fuses are used to protect the motor’s electrical system. These fuses are in a clearly marked fuse box on the side of the iGX440, while other motors will have an in-line fuse behind the ignition switch panel on electric start models. A burnt fuse will keep the engine from starting.

Low Power at High Altitude

It should be no surprise when engines make less power at higher altitudes due to the thinner air, but in the case of these engines, this loss in power is due to an incorrect fuel mixture. Honda recommends having the carburetor set up for high altitude use if your motor spends most of its time running at altitudes above 5,000 feet (1,500 m.)

Engine Identification

The serial number and engine model on any iGX can be found on the crankcase directly above the oil drain plug.

Getting Parts for the iGX

www.hondalawnparts.com is a certified Honda Small Engine Equipment dealer, carrying everything you need for Honda small engines and equipment from older lawn tractors to advanced powerplants like the iGX. Our site makes finding parts easy thanks to factory parts diagrams and information built into our search engine. We can ship your order to any address in the U.S. and Canada.

Accessories and Options for Honda Tillers

honda tillerYou can do more with a Honda tiller than just till. The company offers several attachments and kits that can adapt your FG110, FC600, FRC800 or F220 to perform common landscaping jobs that would normally require specialized equipment.

Border/Edger

Want to get a clean border around gardens, sidewalks, and other landscaping features? The FG110 border/edger replaces the tiller blades with a wheel and cutting blade, letting you roll next to edges and cut into the soil to create an even border. The wheel and blade can be swapped, letting you cut from the left or right side of the tiller. The edger is available for the FG110. Continue reading

How to Troubleshoot your Honda Engine

Honda has a sturdy lineup of engines that are expertly designed to last as long as possible. The engines have some of the best longevity in the industry and it’s not unusual to see Honda engines still working well for decades after they were first built. Despite this great record, all engines, even Honda engines, require good maintenance and care habits. Any engine can malfunction or have mechanical issues from time to time. It’s not always easy to diagnose such problems either, as there are numerous small parts inside the engine, not to mention fluids and other aspects. The main key to troubleshooting is taking a trial and error approach, fixing each problem as it comes up.

When the Engine Won’t Start

Probably the most concerning problem for any Honda owner is when the engine won’t start. It is also usually the most common problem and often has the simplest solutions as well. Some common issues with engines not starting include old air filters or simply being low on fuel.
Continue reading

The Honda Twin Blade Advantage – Why it Matters

The typical Honda lawn mower is packed with great features that enhance its performance and leave a home’s outdoor spaces looking professionally maintained, but one feature stands out among the rest: Honda’s “Twin Blade Advantage.” This unique blade feature is designed to enhance how each blade of grass is processed by the mower, making it easy to achieve a consistent, professional looking result with each pass over the lawn. When choosing a Honda lawn mower, it’s important to understand what the Twin Blade Advantage does and why it’s so essential to a professional result every time.