Storing Your Honda Mower

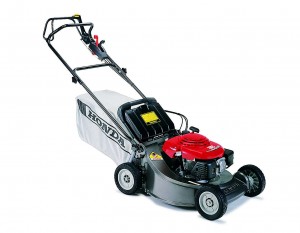
HRR and HRS Mowers: Honda Quality and Innovation for the Home OwnerFall is over, and that means it’s finally time to stop mowing. Before you put your Honda mower into storage, there are a few things you should do to protect your machine and make it easier to put back to work next spring.

Fuel

All gasoline, even if it’s treated with a stabilizer, will turn stale during long-term storage, leading to problems with lacquering and corrosion. Honda recommends draining the fuel system if the mower will be stored for longer than three months.

If your engine has a sediment cup, removing this cup and turning the fuel valve on will let the tank and fuel system drain out. GCV engines don’t have this cup, but the fuel tank can be drained by removing the gas cap and tipping the mower on its side. Collected fuel can be used in your car’s fuel tank.

Once the tank is empty, start the engine and let it run until it stalls. This removes any remaining fuel in the lines and carburetor.

Oil and Lubrication

Even slightly used oil contains acidic compounds left over from combustion that can damage your mower during storage. Changing the oil now will protect your engine. As long as you don’t start the engine when it’s cold, it’s fine to use oil recommended for summer temperatures. For most engines, that’s 10W30 motor oil.

HRC mowers come with sealed cables that don’t require maintenance. Cables on all other models should be covered in a light oil or silicone spray to prevent rust. Water displacers and penetrating oils like WD-40 and Liquid Wrench will eventually drip off of the cables, leaving them unprotected.

Honda recommends lubricating the cylinder with oil. To do this, remove the spark plug, pour one teaspoon of oil through the plug hole, Pull the recoil starter several times: this will spread the oil across the cylinder wall and push out any excess. Reinstall the plug. When you start your mower next year, don’t be surprised if it smokes for a few seconds: that’s just the oil burning off.

Cleaning

Now is a good time to clean the grass bag. Rinse off the fabric with a garden hose to remove trapped dirt and debris. Let the bag drip dry before storage.

Do not use a pressure washer or garden hose to clean the rest of your mower. This can force water into the engine where it can mix with the oil and seep through bearings, damaging components. Use a brush to remove dirt and debris collected around the engine, particularly around the cooling fins. A putty knife can be used to remove grass cakes onto the mowing chamber.

Use touch-up paint to cover up areas where the original paint has chipped off. Exposed metal parts can be protected from rust by applying a light coating of oil.

Battery

Electric start models have a small battery inside the box that houses the start button. This battery should be removed and charged both before and after long-term storage.

An automotive battery charger is too powerful for this battery. Honda makes a low amperage charger specifically for these batteries. The battery can be attached to this charger for up to 24 hours. Charging longer can cause overheating, damaging the battery.

Storing

Your mower should be stored in a clean, dry place. Keep the mower away from sources of ignition, including power tools, heaters and electric motors: even with the tank and carburetor drained, there may be enough fuel residue to release flammable vapors.

Don’t cover the mower with a tarp. This can trap moisture, promoting rust.

The handle can be folded down to save space:
1. Remove the grass bag and frame. These can be stored separately or placed on top of the mower.
2. Loosen the knobs on the handle joints.
3. Tilt the top of the handle forward, making sure that the cables aren’t being kinked.

Get the Quality Parts You Need for Your Honda

Want to get a few things fixed before the next mowing season? Hondalawnparts.com is a certified Honda Power Equipment and Honda Engines dealer, so we carry everything you need for your mower from bags to blades. Finding parts is easy: just select your model and serial number, and our site will show you parts listings and factory information specific to your mower or engine. We can ship your order to any address in the United States or Canada.

Servicing GC Series Engines

Honda GCThey may not be commercial engines, but Honda’s GC engines have proven to deliver reliable, efficient power in a wide range of mowers and home power equipment. Here’s everything you need to know to keep the horizontal shaft GC and vertical shaft GCV running reliably.

Maintenance Schedule

First 30 days or 5 hours of operation: Change the oil.
Every 90 days or 25 hours: Clean the engine air filter
Every 120 days or 50 hours: Change the oil. Check the flywheel brake (if equipped.)
Yearly or every 100 hours: Check the spark plug and spark arrester (if equipped.)
Every two years or 200 hours: Replace the spark plug and air filter element.

Oil

These engines are designed to use oil that meets SAE classification SJ or later. 5W30 and 10W30 are recommended. SAE 30 can be used at temperatures above 50ºF.

To check the oil, remove the dipstick from the filler neck. Wipe off any oil, then reinsert the dipstick without screwing it back into the engine.

To drain the oil on a GC engine, remove the dipstick followed by the drain bolt and washer on the base of the engine. Once the oil has drained, screw the drain bolt back in, using a new washer to get a tight seal.

To drain the oil on a GCV engine, remove the dipstick and tilt the engine, letting the old oil flow pour out of the oil filler neck.

Add oil via the filler neck. GC engines hold about 20 ounces of oil, while GCV engines hold about 12 ounces of oil. The oil level should come to the top mark on the dipstick.

Air Filter

To access the filter, push in the two tabs on the airbox cover and swing it out of the way. When reinstalling, the paper fins on the filter element should face out toward the cover.

To clean the filter, tap it against a hard surface or use compressed air to blow out any dirt between the pleats. Limit air pressure to 30 psi; higher pressures can force dirt into the filter medium.

Spark Plug

To remove the spark plug, disconnect the spark plug cap and clean out any surrounding dirt to keep it from getting into the engine. Use a spark plug wrench or socket to remove the plug from the cylinder head.

The spark plug gap should be 0.028-0.030 in. Replace the plug if it has signs of damage to the electrode or insulator.

When reinstalling the plug, tighten it by hand, then turn another 1/8-1/4 turn. If you’re putting in a new plug, turn the plug ½ of a turn to crush the washer and get a tight seal around the combustion chamber.

Flywheel Brake

This brake is included in some versions of the GCV. To check the brake, start the engine, set the throttle lever to “Fast” and release the brake lever. The engine should stop quickly. If it doesn’t, check the brake for wear:

1. Remove the three flange nuts from the top of the recoil starter. Remove the starter from the engine.
2. Remove the fuel tank and set aside. The fuel line does not need to be disconnected.
3. Check the thickness of the brake shoe, located next to the flywheel. If it’s under 3 mm, have the brake replaced by a service technician.
4. Reassemble the engine in reverse order.

Spark Arrester

This metal screen can be added to the exhaust pipe of any GC or GCV to comply with local fire codes.

To clean the arrester, wait at least 30 minutes after the engine has been on to ensure the exhaust is completely cool. Remove the three bolts holding the protector onto the muffler, then remove the bolt or screw holding the arrester inside the tailpipe.

To clean the arrester, scrub off any carbon with a wire brush. Replace the arrester if it is damaged or splitting. Reassemble the arrester and muffler in reverse order.

Storage

Wait until the engine has been off for at least half an hour to ensure it’s completely cool. Clean off any dirt using a moist rag. Do not use a pressure washer or garden hose: this can force water inside the engine.

Once clean, fix paint chips by adding a layer of touch-up paint and coat unpainted metal with a light oil. Remove the spark plug and pour one to two teaspoons of clean engine oil into the cylinder. Pull the starter several times to distribute the oil around the cylinder and piston, then reinstall the plug. It’s normal to have a smoky exhaust when the engine is first started. This is just the oil burning off.

Need Something for Your Honda Engine?

Hondalawnparts.com is more than an online retailer: we’re an authorized Honda Engines dealer, so we’re able to ship OEM parts across the U.S. and Canada. Our search engine can filter results by model and serial number so you’ll only see factory parts listings and diagrams specific to your model.

Which Type of Water Pump is Right for You?

Which Type of Water Pump is Right for You?If you need a pump, Honda probably makes something to fit your needs. Which type of water pump is right for you? It depends on where the pump is used and the type of water that needs to be moved. Here’s what you need to consider when choosing a pump.

Types of Pumps

Honda makes pumps in four general categories, each with a specific purpose in mind.

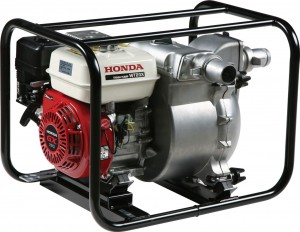
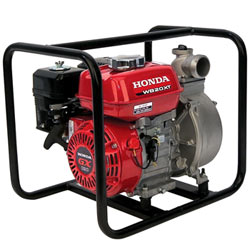
De-watering: These pumps are built to handle clean water with debris up to 3/8 of an inch in diameter, which is the size of a marble. Models include the lightweight WX, general purpose WB and high-pressure WH.

General purpose: The WMP20 is the only Honda pump approved for industrial and agricultural chemicals. It comes with a housing and seals designed for chemical resistance, but it can also be used to pump water.

Construction: These pumps are built for high volume applications and water with high solids content. WT trash pumps are basically beefed-up de-watering pumps, capable of handling solids up to two inches in diameter. That’s between the size of a golf ball and a billiard ball. The WDP diaphragm pump is built for severe conditions. It can pump water with up to 25% debris content and with solids up to 2.4 inches in diameter, and it won’t overheat if run dry.

Submersible pumps: These electric pumps are perfect for fixed locations. They’re fitted with float switches, activating the pump when the surrounding area starts to flood. The WSP50 and WSP100 are trash pumps, while the other models are de-watering pumps.

Choosing a Pump for Removing Water

To match the pump to your application, you need to consider both the amount and size of debris in the water. These are general guidelines for common applications:

Clear, silt and slimy water – All pumps
Muck water – All models except WSP submersible
Slow seepage – WDP diaphragm pump
Fast seepage – All models
Manholes and cofferdams – All models except for WX lightweight de-watering pumps
Quarries: WH high-pressure de-watering pumps, WMP multi-purpose, WT trash and WSP submersible
High solid content: WT and WDP construction pumps or WSP50 and WSP100 submersible trash pumps
Deep piling: WSP submersible pumps
Industrial and agricultural chemicals: WMP multi-purpose pump

Choosing a Pump to Supply Water

Water used to supply equipment is usually clean or almost clean, so the main consideration is flow rate. These are general guidelines for common equipment and applications:

Mixers, pavers, concrete curing and non-potable water wagons – WB general purpose de-watering, WMP multi-purpose and WT trash pumps
Sprinklers and nozzles – WH high-pressure de-watering pumps
Fountains and garden irrigation – WSP submersible pumps

Head and Flow Rate

Head is the vertical distance the pump can move water. This is divided into suction head, the maximum height at the end of the intake hose and the intake of the pump, and discharge head, the height between the discharge port and the end of the discharge hose. Submersible pumps draw water in from the bottom of the pump housing, so they only have a discharge head.

Quoted flow rates and head are under ideal conditions. The actual flow rate will decrease as head increases, and both head and flow rate will decrease as hose length increases. The suction head is controlled by surrounding air pressure: quoted lift is at sea level, while real world lift will decrease by about a foot for every 500 feet of elevation. Chemicals and trash-filled water can be heavier than clean water, which further decreases pump rates.

To take the confusion out of selecting a pump, Honda offers a free program called “Pump Select.” Once you give the program information about your operating conditions, it can recommend a pump that will best fit your needs.

Getting the Parts and Accessories You Need for Your Honda Pump

Hondalawnparts.com has more than just lawn equipment parts: we carry everything for Honda engines and power equipment, including pumps. We have a section dedicated to pump accessories so you can put together the hoses and filters you need for your application, or you can find OEM replacement parts by selecting your model and serial number. Our site has built-in factory parts diagrams and descriptions to help you find what you’re looking for. We ship across the U.S. and Canada.

Winterizing Water Pumps

Winterizing Water pumps

Winter is on its way, which means it’s time to think about putting up your Honda water pump for the season. Depending on the model, that may mean removing a submerged pump from a well at a vacation home, stopping work on moving water between ponds or knowing that you won’t need to worry about flooding until the snow melts off. No matter how you use your pump, there are a few things you should do to ensure your equipment will be ready to be put back to work next spring.

Before You Begin

Before working on the pump, disconnect the spark plug to prevent an accidental start. Give the engine some time to cool off before working on it: some parts of the engine including the head and exhaust can remain hot up to a half hour after the motor has shut off.

Running the pump without water, even on self-priming models, can cause the pump seals to overheat and melt. If you need to warm up the engine to change the motor or gear box oil, make sure the pump is shut off.

Cleaning the Pump

The pump chamber should be flushed with water using a garden hose. To ensure all water is drained from the pump, it should be tilted so that the discharge side of the pump is lower than the suction side. Never tilt the pump the other direction: while water may still flow out, this also tilts the engine in a way that will flood the carburetor. A few drops of water may still be inside the pump case, but this isn’t enough to cause freeze damage, and there’s no need to run anti-freeze through the pump for protection.

Electric Pumps

Ice can damage the pump, whether it forms on the pump body or on the power cable. If temperatures are going to dip below freezing, the pump should be pulled out of the well or sump where it’s being used. While it’s out, this is a good time to remove the impeller cover and clean out any debris.

Yearly Service

Servicing your pump now will save you from having to do so when you first need it next season.

If the pump has a separate gear box, the oil should be changed. The engine should be run for a few minutes to warm up the oil so it flows out easily. Refill the gear box with a GL5-rated 80W90 gear oil.

Some models have grease points for the pump connecting rod. In most cases, Honda recommends NLGI Category 2 grease. These components are shielded from water, so marine grease is not required.

The air filter should be inspected and cleaned. Remember that foam elements need to be re-oiled after cleaning and the air box should be wiped out before reassembly.

All nuts and bolts on the pump and engine should be checked for tightness.

Engine

Any fuel inside the engine should be removed before storage. Honda recommends draining fuel that is over a month old or three months old if it has been treated with a stabilizer. Some small engines like the Mini 4 Stroke may need to be tilted to let gas flow out of the tank, while other motors with a removable sediment cup will have a bolt on the base of the carburetor that can be removed to drain the entire fuel system. Either way, this fuel should be drained into a suitable gasoline container and disposed of properly. Using this fuel in your car is fine, as fuel injected motors are less sensitive to stale fuel and the fuel you add will be diluted by the fresh gas already in the tank.

If the engine has a fuel valve, set it to “Off” to prevent any residual fuel from leaking out during storage.

Have an electric pump? The motor shouldn’t need anything outside of normal maintenance before storage, and it should be left alone to make sure it stays sealed off from water, which can cause a short or electrocution during operation.

Storing

Storing the pump indoors will help prevent damage from UV light and extreme temperatures. Since there may be a little fuel left in the motor, it’s best to keep it stored away from ignition sources including power tools, furnaces and anything else that produces a spark or flame.

Keep the pump uncovered. If a tarp is laid over it, moisture can become trapped, promoting rust.

Getting Parts for Your Honda Pump

Hondalawnparts.com carries parts for everything from submersible electric pumps to trash pumps and everything in between. Our site makes finding what you need easy by letting you see factory parts diagrams and descriptions for your model, and we can ship those parts to any address in the U.S. and Canada.

Maintaining Your EB2800i or EG2800i Generator

Maintaining Your EB2800i or EG2800i Generator

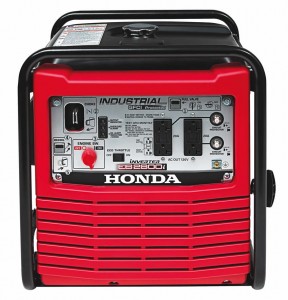
The EB2800i and EG2800i are the latest generators from Honda, and as with any new design, maintenance requirements and procedures are a little different from older models. Here’s what you need to know to keep your generator running like new for years to come.

Safety

Carbon monoxide build-up from the generator’s exhaust can kill you. Even if you’re just starting the motor to check how it’s running, it should first be moved outdoors.

Unless you’re changing the oil, make sure the engine has had time to cool down before you start working it. Some parts, like the exhaust, can stay hot enough to cause burns up to a half hour after use.

Oil

The engine oil should be changed after the first 5 hours or month of use, then every 50 hours or 6 months thereafter. Always check the engine oil before using the generator.

To check the oil, remove the dipstick/filler cap from the oil filler neck, located on the engine at the back of the generator. Wipe the dipstick clean, then insert it into the filler neck without screwing it in. The level should be between the marks on the dipstick.

To change the oil, let the engine run long enough to get warm, but not hot to help the oil flow out of the engine, taking dirt and sludge along with it.

Support the generator on blocks, keeping it level to provide space to slide an oil drain pan underneath it. The drain bolt is located at the base of the engine to the left of the dipstick. Remove the dipstick/filler cap and the bolt to let oil flow out of the engine. Once the oil has drained, reinstall the plug using a new sealing washer.

Using a funnel, refill the engine with SAE 10W30 oil. The oil level is correct when it reaches the edge of the filler neck. Reinstall the dipstick/filler cap.

Air Filter

Check the air filter before using the generator, and clean it every 25 hours or three months of use. If you use the generator in a dusty area, clean the filter more frequently.

The air cleaner box is located on the left side of the generator near the control panel. To access the filter, push in the tabs on the top of the cover and swing the cover downward. The air filter should come out with the cover.

The air filter uses three components: a paper element, a foam element and a plastic screen that separates these elements. Dust can be cleaned from the paper element by knocking it against a hard surface. The foam element should be cleaned by rinsing it in warm water and dish detergent. Once dry, soak the foam element in clean engine oil. Squeeze out any excess oil before installing. The easiest, cleanest way to do this is by putting the filter and oil in a resealable plastic bag.

When reinstalling the filter elements, the foam element should be placed above the tabs inside the cover. Follow this with the plastic screen and the paper element. Reinstall the cover on the motor, making sure the rubber seal fits into the groove on the inner half of the air box.

Spark Plug

Check the plug every year or 100 hours of operation, and change it every two years or 250 hours.

The spark plug is located at the top of the engine. It can be reached from the back of the generator between the two humps in the gas tank.

To remove the spark plug, disconnect the plug wire, then unscrew the plug with a 13/16 inch or 21 mm plug socket or wrench. The plug should be replaced if it’s fouled, has a worn electrode or shows cracks in the insulator. The plug gap should be between 0.028-0.031 inches (0.7-0.8 mm.)

To reinstall, screw the plug in by hand to keep it from cross-threading. Tighten down the plug with the plug socket or wrench, tightening 1/8-1/4 of a turn once the plug is seated. If the plug is new, tighten it 1/2 turn to ensure the plug washer makes a tight seal. Reconnect the plug wire.

Spark Arrester

The arrester should be cleaned every year or 100 hours. Unlike other Honda equipment, these generators always come with an arrester from the factory.

Disconnect the spark plug wire to prevent an accidental start. Remove the screw on the side of the exhaust opening with a Phillips or 4 mm screwdriver and slide the plug arrester out of the muffler. Use a wire brush to clean carbon deposits off of the arrester screen. If there are cracks or holes in the arrester, it should be replaced. Reinstall the arrester and reconnect the plug wire.

Getting Parts for Your Honda Generator

From spark plugs to spark arresters, if it’s Honda, you can get it from www.hondalawnparts.com. As a certified Honda Power Equipment dealer, we’re able to ship the full line of Honda OEM parts and accessories across the U.S. and Canada.

Finding and Fixing Mower Noises

honda mower

Is your mower making a strange noise? As the mowing season draws to a close, your mower has more and more hours put on it since its spring service, making it more likely that something will need attention. Finding the source of noises and correcting them now can help you avoid costly repairs later on.

Loudness

Honda makes some of the quietest small engines on the market, but they still produce enough noise to cause hearing damage. Hearing protection should be worn when using a mower just as you would with any other outdoor power equipment, but added noise may be a cause for concern.

If everything seems fine and the engine is just unusually noisy, check the muffler. Before pulling it off of the motor, wait at least a half hour after running the mower to let it cool down completely. Inspect the muffler for holes, and make sure the seal between the exhaust and the engine is intact.

Squeaking

While most greased components are sealed, other areas may occasionally need a light oil or silicone lubricant applied to keep them moving freely. This includes the controls, cables, wheels, and the handle, both where it bolts to the mower and where it folds for storage. Squeaking noises from the engine can be caused by grass and debris packed against the flywheel or engine shaft, or it could indicate a slightly bent shaft.

Some models have sealed cables and wheel bearings which won’t need to be greased. If the squeaking is coming from one of these wheels, spin it to make sure it’s moving freely. If it’s not, the wheel will need to be replaced.

Rattling

Engine vibrations can loosen bolts and nuts over time. Go over your machine and check the tightness of each fastener. Here’s where to check, from the most likely to the least likely source:

– Handle
– Controls
– Muffler cover
– Engine cover
– Wheels
– Deck

Vibration

Some vibration is normal, but excess vibration is usually tied to the mower blade. Remove the blade from the mower and check for bends and cracking; if either is present, the blade needs to be replaced. To check the balance, hang the blade on a nail by its center hole. If one side sits lower, file off a little of the surface until the blade sits even on the nail.

Honda’s MicroCut system uses two blades and a set of washers that need to be installed in a specific order to prevent vibrations. The small blade should be put on first with the top flat edge pointing to the left, while the lower blade goes underneath with the curved ends pointed upward and the top edge to the right. There should be one washer between the blades and a second washer between the blades and the bolt.

The blade bolt on all mowers needs to be tight enough to stay on and prevent the blade from coming loose, but not so tight that it stretches the threads. Torque specs for this bolt can be found in the owner’s manual.

Knocking

Even on engines equipped with Oil Alert, it’s a good idea to start with checking the oil, as a lack of lubrication can cause knocking and quickly lead to engine damage.

Light pinging is normal on engines under a heavy load, but if it occurs constantly, it’s probably caused by the fuel. If you’re running fresh automotive gasoline, it should have a high enough octane to keep this from happening, but its knock resistance can drop as it ages and degrades. Always use fuel within a month from purchase, or three months if treated with a stabilizer. “White gas,” commonly used in camp stoves, is gasoline, but it has a much lower octane rating. Even pouring a little from a leftover tank can reduce the fuel’s antiknock properties that it can cause pre-detonation.

If the fuel is fresh, check the ignition system. The spark plug should be clean and have the correct gap. If the wrong model of a spark plug is used, it can heat up to the point that it ignites the gas before the spark does. The coil may also need to be repositioned to change the ignition timing. Excess carbon build-up can also cause pre-ignition, but usually, this is only seen on motors that have been used for hundreds of hours.

Stop the Noise with Help from Honda Lawn Parts

As a certified dealer for Honda Power Equipment and Honda Engines, www.hondalawnparts.com can provide you with the parts you need to fix your mower, whether you just need a new blade or a major component. We ship across the U.S. and Canada.

Tips for Buying a Used Honda Mower

Tips for Buying a Used Honda Mower

A used Honda mower can be a great addition to your lawn care arsenal, whether you want a spare mower for your landscaping business or you’d like something that’s the price of a big box store mower without having to settle for low quality. It’s also a good time of the year to pick up a mower as owners pick up new models on end-of-season sales and make plans to move before next spring. If you decide to go this route, what should you look for?

Checking the Engine

Honda’s legendary reliability aside, engines are usually the last thing to break on mowers. However, there are a few things worth checking before testing the mower:

The air filter should be easily accessible and can usually be opened without tools. Wipe off any debris and check for damage: if the elements are full of dirt, it’s likely that the rest of the mower hasn’t been taken care of, either.

The general engine condition can be assessed by checking the spark plug. If the electrode end is light gray or brown, everything is running correctly. Ash indicates misfiring, oily build-up indicates oil or too much gas in the combustion chamber, and soot is caused by a rich fuel mixture, usually caused by a clogged air filter.

Look down through the screen next to the starter to inspect the flywheel. It’s held onto the stub shaft by a small square key. If the key is missing, the ignition timing will be off. If the holes for the key are damaged, the flywheel or crankshaft may need to be replaced, which is a difficult and costly repair.

Deck

Minor surface rust is nothing to worry about, but dents can hamper the mower’s ability to generate a vacuum to pull grass towards the blade. Severe dents can shift the position of the engine mount, making the blade cut at an angle.

Check the levers to make sure they move freely and the cables are moving parts on the engine and deck. If it has a bag, take it off and make sure the rear of the deck opens all the way when the mower is set to bagging mode.

Check the condition of the blades and underside of the deck. When tipping a walk-behind mower, always tilt it so that the carburetor and fuel tank are pointed up. There should be no play in the blade. If it’s cracked or worn, it will need to be replaced. Uneven wear can cause vibrations when running.

Testing the Mower

Before starting the motor, make sure there’s oil inside the crankcase and the fuel line is free of cracks to ensure your test run won’t end with a damaged motor or a fire. The dipstick is designed to measure fuel when placed at the edge of the filler neck; if it’s pushed or screwed in, the oil level will read too high.

Make sure to ask about how old the fuel in the tank is: modern gas doesn’t age well, which can lead to hard starting. Even when treated with a stabilizer, fuel shouldn’t be used if over three months old.

Scalloping indicates a misaligned blade. This may be a matter of the wheels not being at the same height setting, but if they’re equal, there is something wrong with the deck or blade.

If the blade looked fine during the inspection, severe vibrations are likely due to a bent engine shaft, which is a costly and difficult repair.

Your Used Mower’s First Service

Even if the mower you bought was properly maintained, there are a few things you should do to ensure your mower is ready to use:

– Drain the fuel system and add new fuel. Some models have a sediment cup on the carburetor that will need to be cleaned.

– Change the oil.

– Clean the air filter. Foam elements can be washed with a non-flammable solvent or soap and water, then saturated with clean engine oil. Paper elements can be tapped against a hard surface to loosen dirt.

– Sharpen and balance the blade.

– Lubricate the cables. Some models have sealed cables which don’t require maintenance.

Getting Parts for Your “New” Mower

Hondalawnparts.com is a certified Honda Power Equipment dealer, and our massive warehouse helps us keep popular items in stock for fast shipping across the U.S. and Canada. Our site has built in factory information including parts diagrams and descriptions, making it easy to find what you need to get your mower running like new.

How to Test Your Lawn’s Soil

honda fertilizerTesting soil is standard practice for professional landscapers, but if you’re new to this process, it can be daunting. How do you know you’re getting a good sample, and how do you act on the results?

Preparing a Soil Sample

If you have areas that need different soil characteristics, say, a lawn and a flower garden, you should perform a test for each area. The soil should be dry and all tools should be cleaned beforehand to ensure a reliable reading. Make sure to get the sample sent in at least a couple weeks ahead of when you plan on fertilizing to ensure you’ll have the results in on time.

Start by digging several holes 6-8 inches deep. These holes should be spaced out around the soil and include areas where plants are thriving and failing.

Slice into the side of each hole all the way down and place into a bucket. Once you have soil from each hole, mix it together and spread it out on a newspaper. Once it’s dry, it can be packaged and sent to the lab.

Understanding Test Results

The results you get from your soil test will vary: most DIY kits only test acidity, while a test from your local extension office will include nutrient information so that you can apply the correct chemicals and fertilizers to help your lawn flourish. What do these results mean?

Soil Acidity
Acidity is rated in pH, which is a number between 1 and 14. 7 is neutral, while lower numbers are acidic or “sour,” and higher numbers are alkaline or “sweet.” Most plants thrive in soil with a pH of 6.2-7.2, while some plants including blueberries and rhododendrons prefer more acidic soil. Soil is usually alkaline in the central and southwest U.S, and acidic in the rest of the country.

Nutrients
This includes phosphorus (P,) potassium (K,) calcium (Ca,) magnesium (Mg,) and sulfur (S.) Micronutrients including iron, manganese, copper, zinc, and boron may also be listed in areas with sandy soils.

Toxic chemicals
Aluminum (Al) can harm root construction and reduce phosphorus solubility, although acidic soil-loving plants are usually less affected. Aluminum is hard to extract, but decreasing soil acidity can reduce its solubility.
Lead (Pb) can be absorbed by plants, making it unsafe to eat vegetables grown in soil with a lead content higher than 300 ppm (parts per million.)

Adjusting pH

Acidic soils can be brought closer to neutral by using lime, which is simply powdered limestone.

Alkaline soils can be acidified with sulfur, gypsum, Sphagnum peat moss or organic compost. Peat moss can be expensive and compost may not be readily available, making sulfur and gypsum the most common treatments.

Picking the Right Fertilizer

While fertilizer blends are marketed for specific purposes, their function comes down to the formulation. Somewhere on the fertilizer bag will be a set of three numbers, such as “18-9-9.” These indicate the proportion of nitrogen, phosphorus, and potassium, sometimes labeled “N-P-K.” The “P” stands for phosphate (P2O2) and the “K” refers to potash (K2O,) materials used to provide plant-available nutrients. Each number is a percentage, but these elements will never add up to 100 since part of the fertilizer needs to be fillers to make it easier to handle.

Each nutrient helps plants in different ways:

Nitrogen is a critical component for the manufacturing of chlorophyll, which is used by plants to capture and process sunlight. High nitrogen fertilizers are promoted for use with new seeds.

Phosphorus is used to build roots and helps plants flower, so it’s often sold as “bloom booster.”

Potassium helps with a wide range of functions including drought resistance, cold resistance and the building of roots and chlorophyll.

Your soil report will show you exactly what your top soil is deficient in, letting you apply fertilizer accordingly. Always err on the side of caution as too much of any nutrient can cause plant burning and even death.

Micronutrient fertilizers are also available, but since adverse effects are unlikely, these mixes include every micronutrient so they can correct any deficiencies.

Soil Additives

Other nutrients can be added using chemicals:

– Lime and gypsum add calcium.
– Lime and Epsom salts (magnesium sulfate) add magnesium
– Gypsum, potassium sulfate, sul-po-mag, manure, and compost add sulfur

Since lime makes soil more alkaline and both sulfur and gypsum make it more acidic, these chemicals should be avoided if your soil already has the right pH.

Take the Work Out of Fertilizing

Whether you’re using your mower to mulch grass, turning garden soil with a tiller or using a spreader to deposit fertilizer, chances are that equipment is built by Honda or uses one of their engines. Where can you turn when you need to maintain or repair this equipment? www.hondalawnparts.com. We’re a certified dealer so we can provide you with the OEM parts you need, whether you live in the U.S. or Canada.

Servicing a Honda Mini Four Stroke

GXV50 engine

Honda’s mini four strokes are designed to replace two stroke engines in applications ranging from string trimmers to tillers, which means they need to function in any position. To do this, they use a unique internal design that makes caring for them a little different from standard two and four stroke motors. Here’s what you need to know to maintain the GX25, GX35, GXH50 and GXV50 engines in this lineup.

Fuel

These engines can run off of straight automotive gasoline that has at least an 86 octane rating and contains a maximum of 10% ethanol or 5% methanol. Fuel freshness is important: gasoline should be used within one month of purchase, or within three months if it has been treated with a fuel stabilizer. Briefly running the engine on fuel mixed with two stroke oil shouldn’t damage it, but this fuel should be drained out as soon as possible. The tank and carburetor should also be drained before putting the engine in storage.

To remove fuel from the engine, make sure the oil cap is screwed in fully, then unscrew the fuel cap. Tip the engine so that the gas flows into a fuel container. Once empty, squeeze the priming bulb until all the gas has been drawn out of the carburetor.

Oil

Despite a unique oiling system that mists the oil through the entire motor no matter the position, checking and changing the oil isn’t much different from any other Honda engine.

To check the oil, the engine needs to be positioned so that the gas tank is below the motor. On vertical shaft GX22 and GX31 engines, this may involve tilting the equipment over. Remove the oil filler cap/dipstick, wipe it clean, then insert it back into the filler neck without screwing it in. The oil should come up to at least the bottom mark on the stick. Honda recommends checking the level before each use or every 10 hours of continuous use.

To change the oil, remove the dipstick and tilt the engine, letting the oil flow into a container for recycling. Doing this while the motor is still warm will help the oil pour out faster. Set the engine in the oil check position and add oil until it comes up to the edge of the filler neck. 10W30 oil is recommended, while 5W30 can be used if the motor will be operated at temperatures below 32°F (0°C.) The oil should be changed after the first 10 hours of use to remove contaminants from breaking it in. After that, replace the oil every 6 months or 50 hours of use.

When storing the engine at the end of the season, remove the spark plug and pour a teaspoon of oil into the plug hole. Pull the starter handle a few times to distribute the oil inside the cylinder, then reinstall the spark plug. When the motor is started again, it’s normal for the engine to smoke a little as this oil is burnt off.

Air Filter

Honda recommends checking the air filter for contaminants before each use and cleaning it every three months or 25 hours. On tillers, the air filter can be accessed by squeezing the tabs on the top and bottom of the cover and sliding the cover outward. On all other engines, simply push in the tabs at the top of the cover, then tilt the cover downward.

To clean the filter, remove it from the air box and either rinse it in water and a mild detergent or spray it down with a non-flammable solvent. Once the element is dry, soak it in clean engine oil and squeeze out any excess oil. Wipe out the air box before reinstalling the filter.

Spark Arrester

The spark arrester can collect carbon deposits that should be scrubbed off with a wire brush every 100 hours of use. Let the engine cool for at least 15 minutes before attempting this repair to avoid burns.

Depending on the motor design, there will either be a small cover over the muffler, or a cover that goes over the entire top of the engine. Large covers serve as a mounting point for the spark plug wire; the wire bracket will need to be unbolted before unbolting the cover itself.

Once the cover is off, the arrester can be removed from the exhaust opening by removing a single screw. When scrubbing off the deposits, inspect the spark arrester and replace it if it has holes or cracks.

Getting Parts for Your Mini Four Stroke

Hondalawnparts.com is a certified dealer for Honda Engine and Honda Power Equipment, so we have all the OEM parts you need to keep your motor in top condition. Our search engine lets you see where parts fit on factory diagrams, making it easy to order what you need. We can ship your order to any address in the U.S. and Canada.

The Honda Miimo: Automation Comes to the Lawn

honda-miimo-4

It’s been a long time coming: 5 years since it was first shown to the public and four years on the market in Europe, we’re finally going to get Honda’s robotic mower. While the Miimo has been compared to the Roomba, this tiny rechargeable mower takes a new approach to mowing that makes it unlike anything on the market. However, that doesn’t mean you should throw out your walk-behind mower just yet: it comes with some limitations that make it more of a niche product than a replacement for human-operated devices.

A New Way to Mow

The Miimo can handle slopes up to 25 degrees and can cut to a height ranging between 0.8 and 2.4 inches like most mowers, but it doesn’t cut grass like a traditional mower. It uses three tiny blades mounted to a fan designed to increase mowing chamber vacuum. This combination cuts off just 0.12 inches (three millimeters) of grass with each pass. These tiny clippings are absorbed into the top layer of the soil without requiring the multiple cuts of a mulching mower, and since it doesn’t need an operator, the Miimo can cut far more often to maintain grass height for an even finish through the season.

Navigation

The Miimo’s navigation is controlled primarily through a set of boundary wires that are installed by a certified technician when the mower is first purchased. This wire outlines the edges of the yard as well as obstacles including trees and landscaping features. Depending on the area, this wire can be under or on top of the ground surface, making for a clean installation.

When mowing, the unit uses sensors to both pick up the positions of the boundary wires and scan around its immediate location for obstacles. The fully floating cover has its own sensor system that tells the mower if a collision is detected.

Cutting Modes and Times

This mower uses two independent wheel motors, letting it maneuver like a ZTR; Honda says this lets the mower turn around obstacles without ever needing to back up, saving considerable time when mowing. The onboard computer can be set to approach mowing in 5 different ways:

– Random mode turns the mower at a wide angle when it detects a boundary wire.

– Directional turns the mower at a narrow-angle when it detects a wire, helping it maneuver in narrow areas near gardens and sheds.

– Mixed mode lets the mower switch between random and directional modes as needed.

– Spiral mode tells the mower to concentrate on areas that are likely to have the highest growth.

– Edge mode tells the mower to mow along the boundary lines first.

Why so many cutting modes? In most cases, the Miimo won’t be able to cut an entire lawn all at once, so it needs to make the most out of each charge. The Miimo HRM 310 can mow for up to 30 minutes between charges, while the HRM 520 comes with a bigger battery that can last up to 60 minutes. The cutting width is only 8.7 inches, which severely limits the coverage per charge. Once the battery is at 30%, the mower drives back to its docking station and will need to recharge for about a half hour before mowing again.

Security

What if someone decides to walk off with your fancy robot mower or it tips over? If the Miimo loses contact with the ground, it will shut off immediately and sound an alarm. The only way to reactivate the unit is by typing in a PIN.

Is This Mower a Good Choice for My Yard?

If you have a small lawn and you want to take out a significant chunk of the maintenance, the Miimo may be a good fit. However, it isn’t going to eliminate yard work. It can’t cut large amounts of growth at one time, and it can’t bag clippings that could spread weeds, so you may still need to pull out a walk-behind mower now and then. With the ability to cover ¾ of an acre at most, its use is limited to small suburban lawns.

No Matter What You Choose, We Have the Parts to Keep Your Honda Equipment Working

Whether you let an HRM 310 do the cutting or you use a walk-behind HRC for your landscaping business, you can get everything you need for your Honda small engine equipment at www.hondalawnparts.com. As a certified Honda dealer, we’re able to supply you with parts for all of their small engines and equipment from mowers to water pumps, and we can ship those parts to any address in the U.S. and Canada.