Frequently Asked Questions about Honda Mowers

HRR and HRS Mowers: Honda Quality and Innovation for the Home Owner
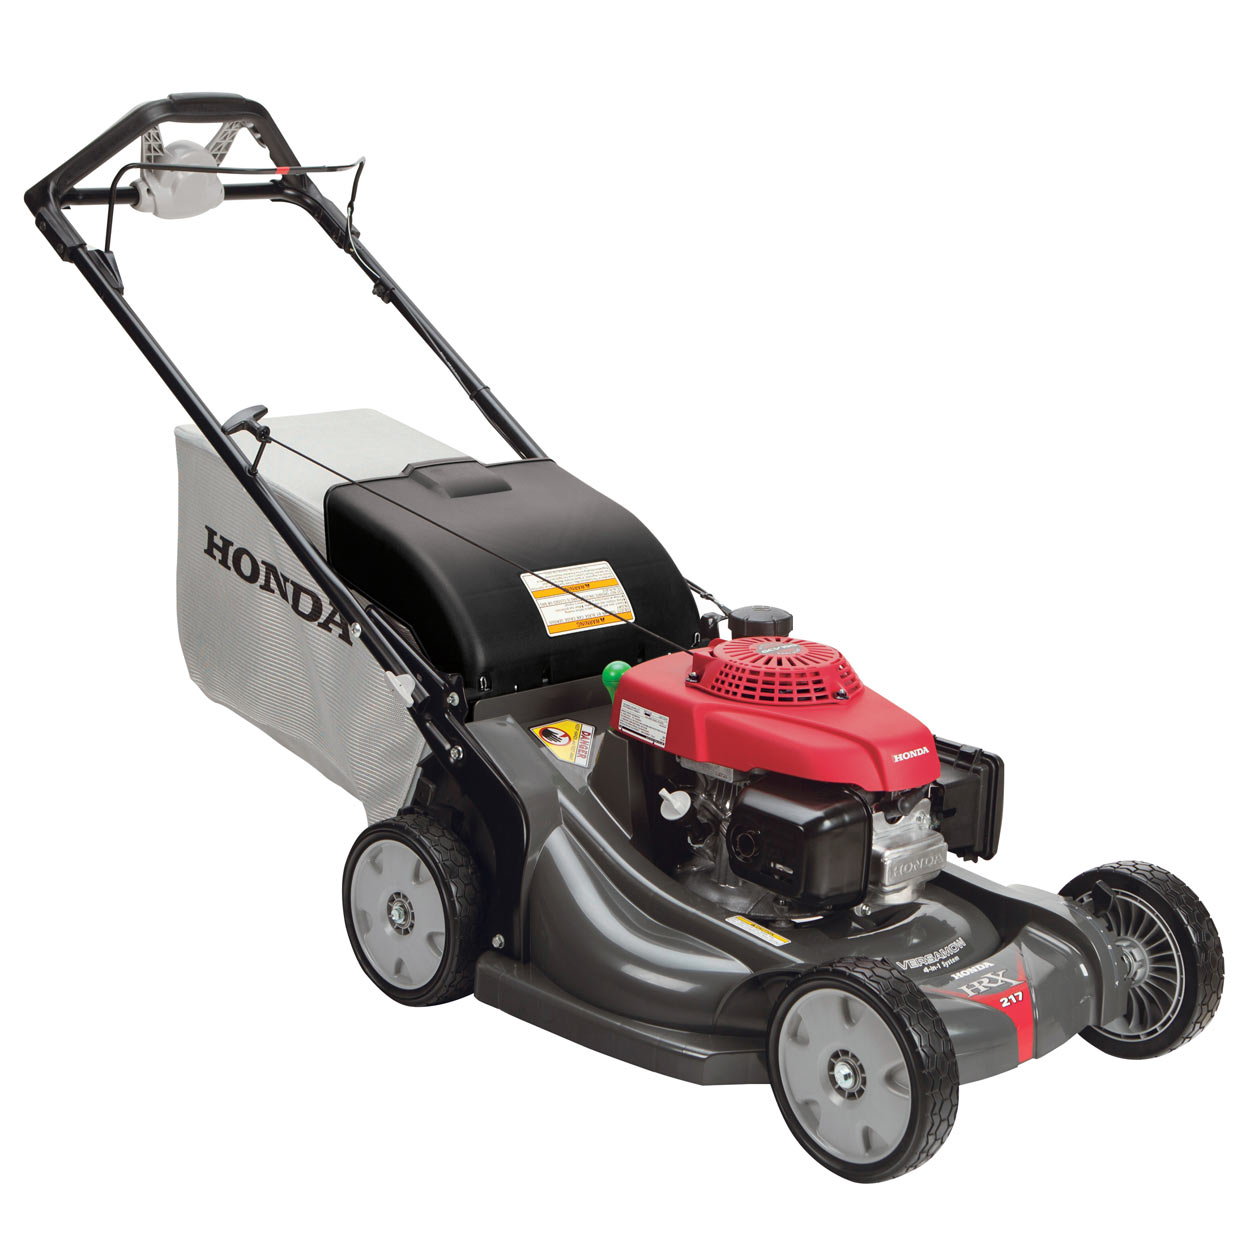
Is there something bugging you about your new mower? Do you think you could get better performance from it? These are the most frequently asked questions about Honda mowers from setting them up to getting parts that fit.

Why Can’t I Tilt the Handle Into Place?

The flywheel brake is engaged, which is putting tension on a cable running on the side of the handle. Closing the bail will let you swing the handle into its operating position.

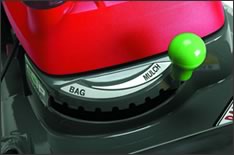
How Do I Discharge Clippings?

Set the Clip Director to “Bag” or “1.” If you don’t have a bag attached to the mower, clippings will fall out of the rear chute onto the ground.

Do I Need a Spark Arrester?

A spark arrester is a metal screen that traps sparks from the exhaust, preventing them from igniting vegetation. These devices may be required in areas experiencing a drought or that have highly flammable plants.

Arresters are not included from the factory, but they can be added to any Honda mower. The arrester attaches to the exhaust opening with a single screw and can be removed for cleaning. Over time, carbon buildup can fill the screen, restricting exhaust flow. This buildup can be removed with a wire brush.

How Do I Charge the Battery in My Mower?

Electric start models use a small battery mounted in a housing below the start button. The mower’s charging system recharges the battery as you mow. During the mowing season, this should be enough to keep the battery ready to start the engine.

Power may drop off during storage, requiring a recharge. This battery is too small to be safely charged with an automotive battery charger. Honda makes a low amp charger specifically for these small batteries. To use it, remove the battery from the starter box and connect it to this charger for 8-24 hours.

How Short Should I Cut My Lawn?

When cutting, the blade should trim the leaves, but not go through stems or crowns. Most turf grasses should be trimmed to around two inches tall.

Limit cutting to 1/3 of the grass’ total length. Cutting more at one time will make it harder for the grass to recover.

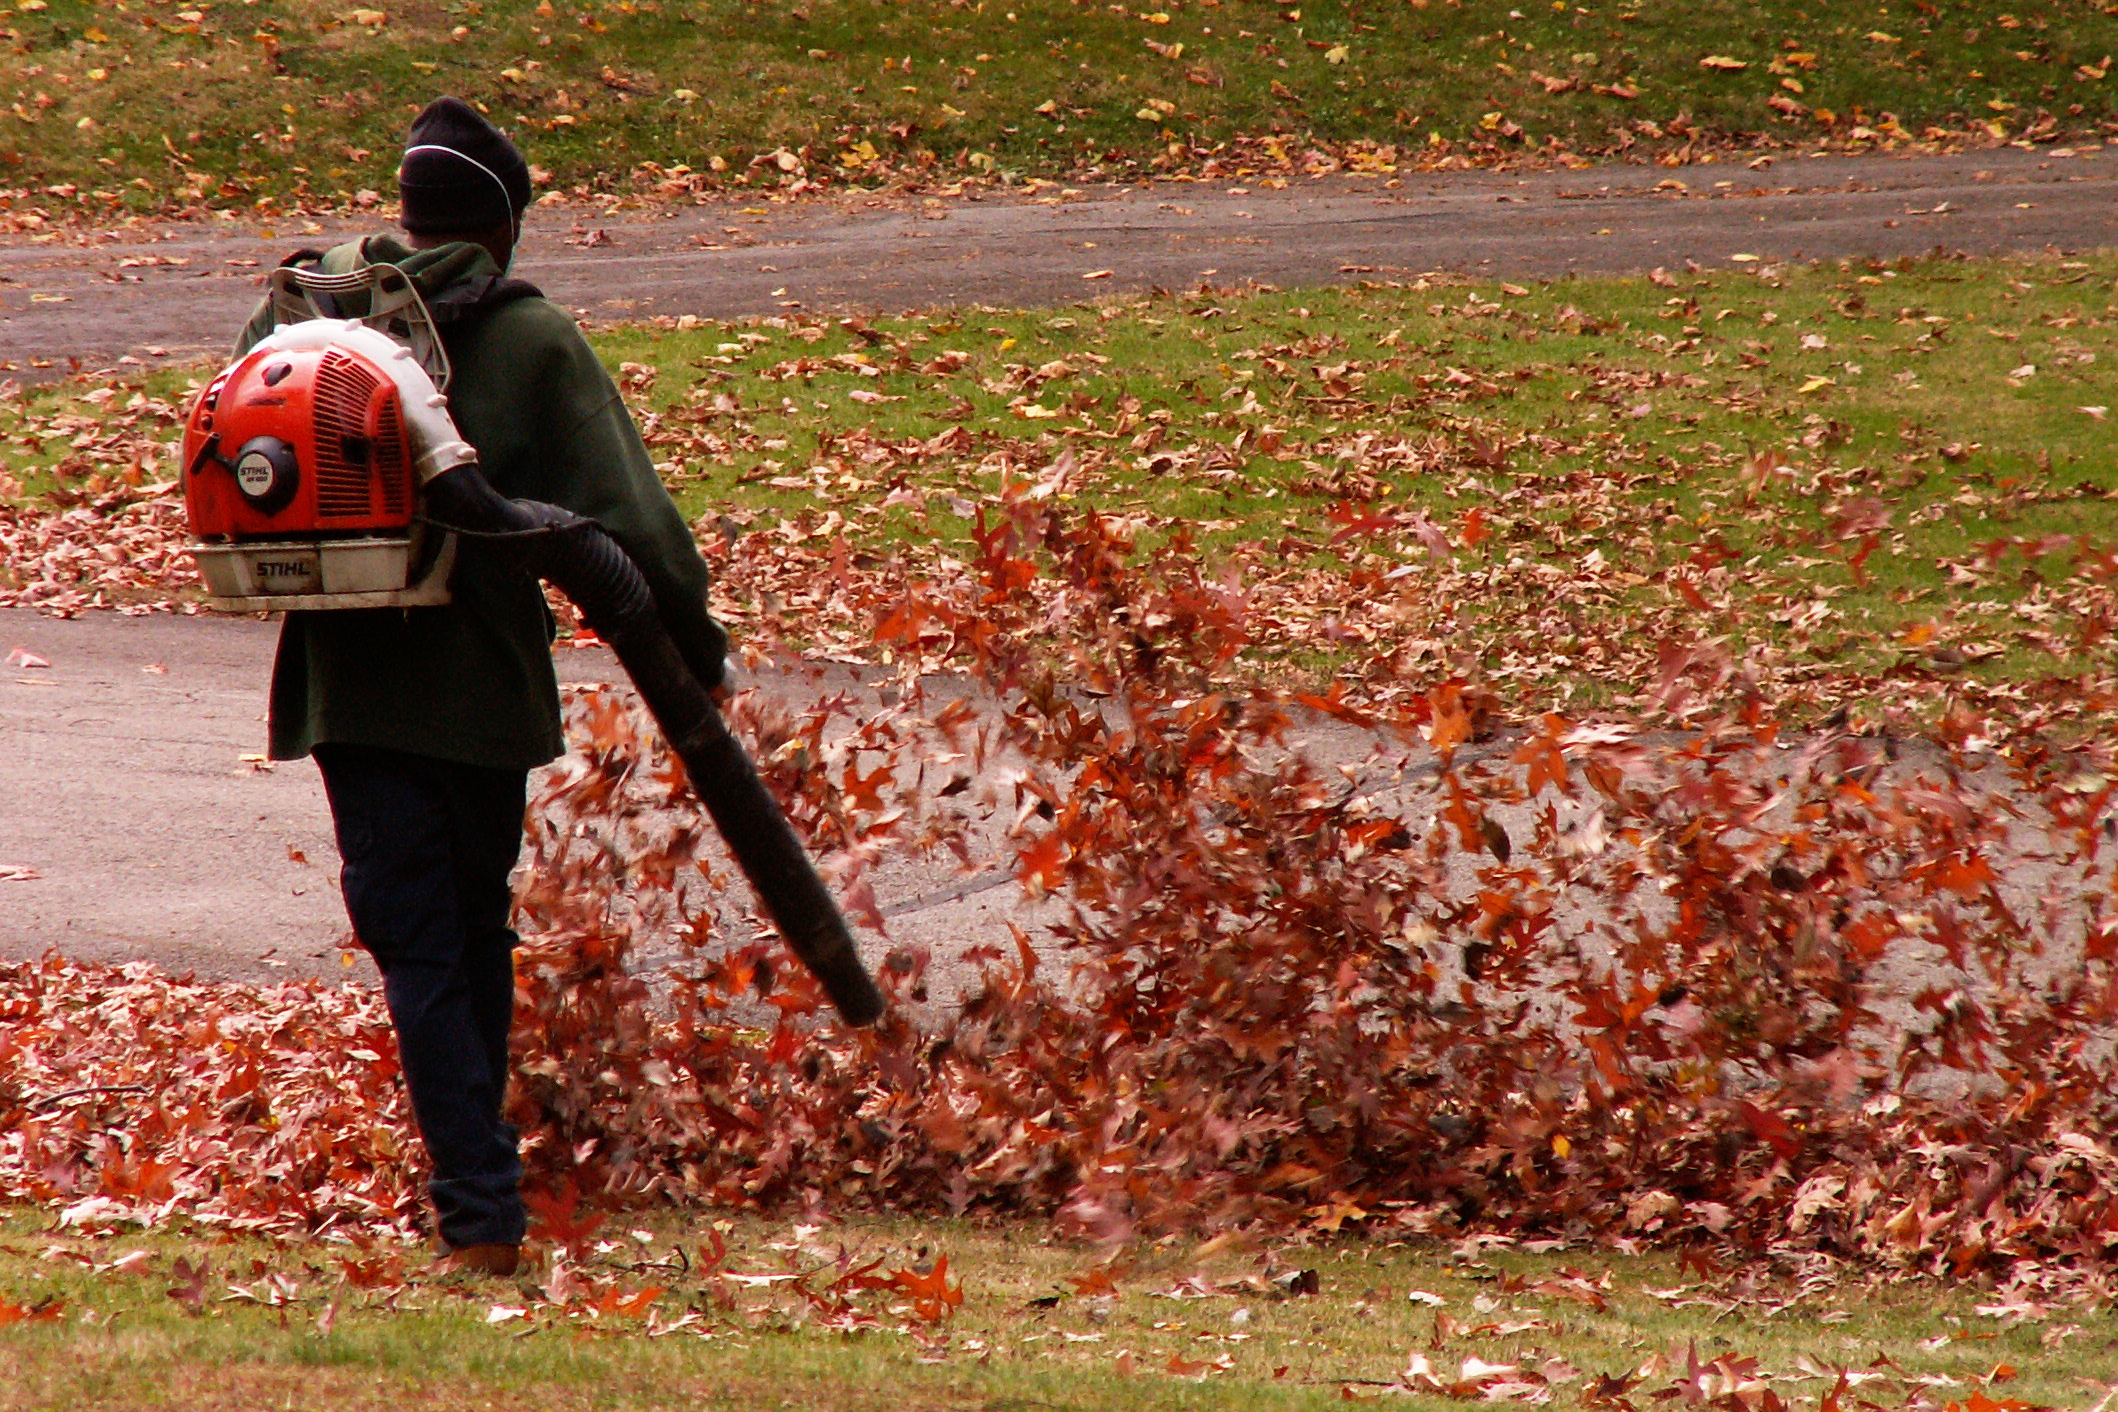
How Do I Mow Leaves?

For the best results, mow the leaves before coverage extends past the height of the grass. This may require moving two or three times per week when leaf fall is at its peak.

Lift the front of the mower one or two settings higher than the rear. This helps the deck draw in leaves instead of pushing them away. Set the Clip Director to “Mulch” or “9.” The mulch left by the mower should be broken down fast enough by your lawn that bagging won’t be needed. If you need to bag the leaves, install a leaf shredder in the discharge opening.

How Do I Store My Mower?

Drain any gas left in the tank, carburetor and fuel lines. Depending on your model, you may be able to drain everything by removing the sediment cup on the bottom of the carburetor, or by tilting the mower and letting the gas flow out of the filler neck. Once the fuel system has been drained, start the engine and let it run until it stalls. This removes any remaining fuel. Even if you’re using gasoline mixed with a stabilizer, it will go stale before next spring.

Remove the spark plug and add a few drops of oil to the cylinder. Pull the starter cable a couple times to distribute the oil, then reinstall the plug. It’s normal for the mower to smoke when first starting the engine next season.

It’s a good idea to thoroughly clean the mower and change the oil before putting it in storage. Never put a tarp over your mower. Moisture can collect inside, promoting rust.

Where Do I Find the Model and Serial Number for My Mower?

The model and serial number for the mower are printed on a tag on top of the deck next to the handle. If you’re ordering engine parts, you’ll need to know its model and serial number. The model name is printed on a large sticker on top of the engine cover, while the serial number is stamped into the engine block.

What’s the Best Place to Get Parts and Accessories for My Mower?

Hondalawnparts.com is an authorized Honda Engines and Honda Power Equipment dealer. That means we’re able to ship OEM parts and accessories for your mower straight to your door whether you live in the U.S. or Canada. Our site can find parts based on your model and serial number, and it will show you factory parts diagrams and descriptions, making it easy to find what you need.

Versamow: Solving Common Problems with Mulching Mowers

Versamow: Solving Common Problems with Mulching Mowers
What is Versamow? Honda touts this as a single feature, but it’s really a combination of design elements included on HRX mowers that give them the flexibility to fit any mowing situation. By using a clever chute control and advanced blades, the mower can mulch wet grass and leaves, get more clippings into a bag and even operate in two mowing modes at one time.

Microcut Twin Blade: More Cuts for Better Performance

Instead of making blades with different amounts of lift that have to be swapped out when going between mowing, bagging or discharge, Honda fits their mowers with a pair of blades that work in any situation. While in discharge mode, the leading edges of these blades cut grass twice with each pass, leaving finer clippings. In mulching mode, the vacuum created by the blades blows clippings upward into the mowing chamber to fall back town for another cut.

The added edges cut down clippings faster, letting HRX models mulch grass that would bog down other mowers while creating a very fine mulch that’s quickly digested by microorganisms, returning nutrients to the soil. The dual cutting action also makes for smaller, more compact clippings when bagging, stuffing up to 40% more grass in the bag than competitors’ walk-behind mowers.

Clip Director: Getting the Right Balance

Instead of being stuck in bagging, mulching or discharging modes, the Clip Director lets you vary the amount of grass that is kept inside the mowing chamber for mulching and the amount that is released to the bag or the discharge chute. With 9 positions, you can balance mulching with discharging for the best results.

The lever moves a door on the back side of the deck. In the highest bagging setting, the door is fully open, drawing all the clippings into the bag. Move it to the highest mulching setting, and the door is fully closed, trapping the clippings in the mowing chamber where they’re cut down to size before falling to the ground. Want to discharge clippings? With the bag removed, clippings that go through the door will fall through a chute and end up on the ground.

Having trouble deciding which mode you should use to mow your lawn? If the lawn is too thick or wet to mulch all of it, you can direct some of the clippings out of the deck, mulching the rest. If you want a clean finish without having to bag lots of grass, you can use the Clip Director to divert some grass toward the deck or chute. This lets you leave a small amount of clippings that will blend in with the lawn and cut down on the amount of yard waste you have to dispose of.

The deck is also designed to work with the Clip Director when mulching leaves. Just set it one or two positions away from the full mulch position, and the leaves will be kept in the mowing chamber long enough to be cut down to size before being discharged.

What Else Can I Expect from a Versamow-Equipped Mower?

When clippings come through the door, they fall out of the rear of the deck like a high-end landscaping mower, spreading them out instead of leaving piles as you mow. Since there’s no chute sticking out of the side, the mower is narrower, making it easier to maneuver.
The chute cover stays on the mower, lifting up when you want to install the bag, and the Microcut blades work for all types of mowing. That means you can switch between mulching, bagging and discharging clippings without needing to use tools or install extra parts like a mulch plug.

Get the Performance Your Honda Mower Was Designed For

When you want quality OEM parts for your mower, visit www.hondalawnparts.com. We’re an authorized dealer for Honda Engines and Honda Power Equipment, so we can provide you with everything you need to keep your HRX cutting as good as it did when it was new. Our site has built-in factory parts diagrams and descriptions so you can be sure you’re ordering exactly what you need. We ship across the USA and Canada.

FG110 Mini Tiller

FG110 Mini Tiller

Buying small power equipment doesn’t mean you have to settle for something that’s cheaply made. Honda’s FG110 Mini Tiller is small enough for cleaning up between rows and creating beds in small areas, and its compact 4-stroke engine makes it reliable and easier to use than two-stroke models. Add some accessories, and you can put it to work for a variety of lawn and garden care tasks, making it a useful addition for anyone whether they have a green thumb or a brown one.

Power

The FG110 is powered by a GX25 mini 4-stroke engine. Designed as a direct replacement for small two-stroke motors, it has oil baffles that allow it to be operated or stored in any position. A tube steel guard protects the engine on all sides and makes it easy to lean the tiller over for transport or maintenance.

This engine was primarily designed to reduce emissions, but it also comes with some major benefits for owners. Unlike a two-stroke, it doesn’t bog down as easily, it isn’t hard to start, it doesn’t need its fuel mixed with oil. It’s also far less prone to fuel sensitivity: current two-stroke engines need their fuel replaced after a month, while fuel treated with a stabilizer can be left in the GX25’s tank for up to three months. Best of all, these improvements add little in the way of weight: at just under 29 lbs, this model is about average for the segment.

Tilling

This tiller comes fitted with 8-inch diameter tines that have a maximum tilling width of 9 inches. The tines mount to the reel shaft with Clevis pins. With the outer tines removed, the cutting width is just 6 inches, letting the FG110 get into the smallest spaces. With or without all tines installed, they can spin up to 294 RPM.

This tiller also comes with a couple features rarely seen on models at this end of the market. An adjustable depth bar limits how deep the tines can dig so surface weeds can be removed without cutting into the roots of the plants you want to keep. This model also doesn’t need to be carried around thanks to standard transport wheels.

More than Just a Tiller

Every tine star can be removed from the reel, leaving space to fit attachments for common gardening and lawn care tasks:

Aerator — Breaks up compacted soil for better drainage and root penetration.
Edger — Trims plants in hard-to-reach areas next to buildings, fences, and other landscape features.
Dethatcher — Removes dead surface vegetation to increase plant access to water and oxygen
Digging tines — Cuts into soil that hasn’t previously been turned.

Warranty

This model is covered for one year of commercial or rental use. For residential users, the FG110 is covered for two years, and the tines are guaranteed by a limited lifetime warranty.

Getting Parts for the FG110

When you need something for a Honda small engine or Honda power equipment, visit www.hondalawnparts.com. As a certified dealer, we’re able to offer OEM replacement parts and accessories that can be shipped to any address in the U.S. or Canada. Finding the right part is easy: just select your model, and our site will show you exploded parts diagrams and descriptions straight from the factory.

HRR and HRS Mowers: Honda Quality and Innovation for the Home Owner

HRR and HRS Mowers: Honda Quality and Innovation for the Home OwnerMost consumer lawn equipment is driven by price, but that doesn’t mean you have to buy something big to get a quality lawn mower. Honda’s HRR and HRS mowers are small walk-behinds built with the company’s trademark reliability and clever design, making them a great choice if your lawn is less than an acre.

Engine

All HRR and HRS mowers are powered by a GCV160 engine. It uses what Honda calls “uniblock” construction, forming the head, block and upper half of the crankcase from a single piece of metal. The head uses a crossflow design with an overhead cam made out of resin. The valvetrain and crankshaft connect using a unique internal timing belt that is designed to last the lifetime of the motor. Together, these features make this engine extremely light with less vibration, less noise and fewer points of failure than competing residential powerplants.
Honda didn’t just innovate with this engine, they put a lot of thought into making it easy to use. An automatic decompression system makes it easy to turn over when starting, while an automatic choke controls air flow as the engine warms up. A manual fuel shutoff valve prevents spilling and carburetor flooding during transit. It also makes it easy to empty the fuel system when storing, preventing issues with corrosion and gumming. A long filler neck acts as both the drain and fill point for oil. To drain, just tilt the mower over a drain pan.

Cutting Performance

These mowers use Honda’s Twin Blade MicroCut System. Instead of a single blade with a high, medium or low leading edge, this design uses a pair of blades stacked on top of each other with different edge profiles. With each pass, blades of grass are cut twice, resulting in smaller clippings from the start. When mulching, this dual action cut breaks down grass faster, making it more effective than other designs, even when cutting wet grass. Smaller pieces also compact more, so emptying is less frequent when bagging.

All HRR and HRS mowers come with a 21-inch cutting deck with 6 cutting heights ranging from 1 1/8 to 4 inches.

HRR mowers use a 3-in-1 cutting system controlled by Honda’s Clip Director. This system operates a door at the back of the deck, letting the mower switch between mulching, bagging and rear discharge by turning a single lever. No tools are required to switch between modes, and there’s no chute or mulch plug that needs to be installed on the side of the deck. The included bag holds 1.9 bushels.

Smart Drive

Self-propelled models come with Smart Drive, a compact hydrostatic drive system. Like the hydrostatic systems found in riding mowers, it allows infinite speed adjustment on the fly. This makes it easy to slow down for hills and obstacles, then speed up when you’re mowing straight on level ground.
This drive system is operated by levers that can be set to one of 5 positions. Mower speed is adjusted by pushing down on the thumb pads. This allows multiple hand positions, reducing fatigue.

Other Features

The folding Quick Release handle has two operating positions and is locked into place with large knobs, requiring no tools to change position. The rear wheels on both push and Smart Drive models are mounted on ball bearings for lower effort when pushing and smoother movement.

Models

HRS
These basic mowers are designed for side discharge and mulching. The HRS216PKA is a no-frills mower weighing just 64 lbs, making it easy to push and turn, while the HRS216VKA comes with the Smart Drive self-propulsion system.

HRR
These models are designed for bagging as well as mulching and discharge, and every model has a system to stop the blade when stepping away from the mower, making it safer to work around.
The HRS216PKA is a push mower with a flywheel brake that stops the engine shaft and blade when the bail is released, while the HRS216VKA comes with the Smart Drive system. The HRS216VYA uses Honda’s Roto-Stop system. It has a PTO like a riding mower, letting the blade disengage from the drive shaft. When the bail is released, the blade stops without shutting off the engine. This saves time and effort when stopping to pick up branches and other obstacles.

Warranty

Honda guarantees these mowers and engines for 3 years of residential use or 90 days of commercial use.

Getting Parts and Accessories for Honda Walk Behind Mowers

Hondalawnparts.com has everything you need to keep your Honda mower working for years to come. Our site makes it a breeze to find parts for your model by showing parts diagrams and descriptions straight from Honda so you know exactly what you’re ordering. We ship across the U.S. and Canada.

Water Pump Maintenance

Water Pump Maintenance

Most people are familiar with working on small engines after owning lawn care equipment, but there are some unique challenges when maintaining water pumps. Here are some tips to keep your Honda water pump working reliably for years to come.

Oil

For the most part, checking and changing the oil in a water pump engine is no different from any other Honda-powered product. However, there’s always the chance that a leaking hose can spray the engine with water, letting it seep into the crankcase. This can create a sticky, light-colored emulsion that won’t lubricate the engine. If this happens, the oil should be changed immediately.

To check the oil, set the pump on level ground, remove the dipstick from the filler neck and wipe it clean. Insert it into the neck without screwing it in to get an accurate reading. When adding oil, it should come up to the top of the filler neck.

Most recent GX-Series engines used in Honda’s pumps come with the Oil Alert system. If the float inside the crankcase is too low, it will cut power to the ignition to prevent engine damage. If you have starting problems, start by checking the oil level.

Pump Case and Strainer

All models except electric and mini 4 stroke-powered pumps have a separate pump case. This case should be flushed after each use. Trash pumps have a clean out port, while all other pumps can be cleaned by spraying the outlet and inlet of the pump with a garden hose until the runoff is clean.

If you hear grinding noises, debris may be entering the pump housing or a clogged strainer is preventing steady water flow, resulting in cavitation. Either way, the pump should be shut off immediately and the strainer should be checked for damage and debris build-up.

Fuel

Honda recommends using Unleaded fuel that is at least 87 Octane and no more than 10% ethanol or 5% methanol. Fuel should be treated with a stabilizer if it won’t be used for at least a month after purchase and should be replaced entirely after three months, even if it has been treated. Since most pump use isn’t on a set schedule, it’s a good idea to treat all fuel used in your equipment. Stale fuel can be safely used in cars where it will be diluted by fresh fuel and be easier to burn thanks to the engine’s fuel injection system.

The fuel level should only come up to the bottom of the filler neck, and the holes in the cap need to be clean. This lets the fuel expand and contract as temperatures change and allows air to enter the tank as gas is drawn into the fuel system.

Gear Box

Some models have a gear case between the engine and pump housing that contains a reduction gear. The oil inside should be replaced at least once a year with a GL5-rated 80W90 gear oil. Removing the old oil will be faster if you can run the engine for a few minutes to warm it up. When you do this, make sure the pump is off to prevent overheating that can ruin the seals. The dipstick should not be screwed in when checking the oil level, and the level needs to be rechecked once the case has been filled.

Pump Connecting Rod

The WDP30 uses a spring-loaded connecting rod to absorb shocks from rocks entering the pump. Honda recommends applying NLGI Category 2 grease, which is the standard grease for most mechanical and automotive applications. The rod shouldn’t be making direct contact with water, so this grease doesn’t need to be waterproof or designed for marine use.

Electric Pumps

These pumps should mostly be maintenance free. However, dirt can cause problems with the float switch and overall pump performance.

If the float is dirty and isn’t responding to water level changes, it just needs a thorough cleaning. If debris build-up on the inlet is causing problems, the volute case should be cleaned. To access the case, remove the screws that attach the lower part of the housing and pry the base and housing apart with a flathead screwdriver. Remove any debris in the case and pump base holes and make sure the impeller can spin freely. Never open up the pump itself: if it isn’t precisely reassembled and resealed, water can leak into the case, causing a short. Once everything is clean, reassemble the case.

Getting Parts for Your Pump

Hondalawnparts.com is a certified Honda Engines and Honda Power Equipment dealer, which means we’re able to offer all the parts and accessories you need for your pump including everything from spark plugs to hoses. Our site makes it easy to find what you need thanks to built-in factory parts diagrams and descriptions, and we can ship your order to any location in the U.S. or Canada.

HS1336iAS Snowblower Maintenance

HS1336IAS_PE_IMG250

Working on a hybrid may sound complicated, but maintaining the Honda HS1336iAS snowblower is relatively straightforward. Here’s what you need to know to keep this advanced piece of equipment ready to clear winter snowfall.

Tool Kit

A toolkit is included with this model for most common repairs. This kit can be stored in the toolbox at the back of the snowblower. Here’s what you should find inside:

10 and 12 mm box end wrench
10 and 14 mm open end wrench
Two 12 and 17 mm open end wrenches
Spark plug wrench and handle
Spare fuse cover and 5 and 15 amp fuses
Pliers
5 blower shear bolts
10 auger shear bolts
15 8 mm self-locking nuts
Two cotter pins
Two battery terminal covers

If you’re missing any of these tools or spare parts, it’s a good idea to pick up some replacements before you need them.

Maintenance Schedule

First month or 20 hours of use: Change engine oil, check track tension
Before each use: Check engine oil, battery electrolyte level, skid shoes, scraper, and all nuts and fasteners.
Each year before first use: Check battery electrolyte gravity, spark plug, and tracks. Change the engine oil.
Each year before storing: Check sediment cup, drain fuel tank and carburetor and apply oil on unpainted surfaces to stop corrosion.
Every 100 hours: Change engine oil
Every four years or 300 hours: Change spark plug

Honda recommends having these services done by a dealer:

First month or 20 hours: Check chute cable, auger belt, and ACG belt
Each year before first use: Check chute cable, auger belt, ACG belt, gear oil, idle speed and valve clearance.
Every 300 hours: Check idle speed and valve clearance
Every 1,000 hours: Clean combustion chamber
Every two years: Check fuel tube
Every four years: Clean fuel tank and filter, replace fuel tube

Oil

Check the oil by removing the filler cap/dipstick and reinserting it into the engine without screwing it in. If the level is low, add more oil and check the level with the dipstick. Unlike other Honda engines, the oil should not come up to the top of the filler neck. Honda recommends 5W30 automotive oil.

To change the oil, remove the filler cap and place a drain pan under the drain plug, below and left of the filler neck. To open the drain, use a 15 mm wrench to hold the extension in place and unscrew the drain bolt with a 10 mm wrench. Put a new sealing washer on the drain bolt when reinstalling. Pour oil into the engine through the filler neck. This model holds 1.16 quarts.

Spark Plug

The spark plug gap should be between 0.7-0.8 mm (0.028-0.031 inches.) Replace the spark plug if the electrode or insulator is damaged.

When reinstalling the plug, turn it ¼ turn after it seats to get a good seal, or ½ turn if you’re using a new plug.

Track Adjustment

The tracks should be clean and dry to get an accurate measurement. Press down on the middle top of the track. A force of 22 lb-ft. should move the belt 0.63-0.79 inches. To change the tension, loosen the lock nuts on the tension bolt, located behind the front wheel. Turn the tension bolt until the deflection is correct, then retighten the lock nuts.

Shear Bolt Replacement

Get the snowblower onto a stable, level surface and make sure the auger clutch switch is set to OFF. Release the drive clutch lever and use the auger control to put the auger into its lowest position.

Turn the engine off and remove the ignition key. Make sure all the rotating parts on the snowblower have come to a complete stop.

After removing any jammed material and cleaning out the impeller housing, replace any broken sheer bolts. There are two on each side of the auger drive shaft next to the auger transmission and two more at the back of the shaft behind the transmission.

Battery

The batteries are behind the rear cover. To access them, loosen the two knobs on the sides of the snowblower next to the cover, then tilt the cover downward.

The batteries are connected in series with a joint cable running between the negative terminal on the right side battery and the positive terminal on the left side battery. When removing the batteries, first disconnect the terminal on the left side negative terminal followed by the right side positive terminals and finally the joint cable. Place the tubes included in the toolkit on the terminals to protect them while working on the batteries.

Getting Parts for Your Snowblower

When you need something for your HS1336iAS, visit www.hondalawnparts.com. We’re a certified Honda Power Equipment and Honda Engines dealer so we can ship you OEM replacements for anything on your machine to any address in the U.S. or Canada.

HS1336iAS Snowblower Operation

HS1336iAS Snowblower Operation

Even if you have plenty of experience using a snowblower, the Honda HS1336iAS is nothing like any machine you’ve used before. Its hybrid drivetrain is unique in the industry, while features like automatic speed control and a tiltable auger are rare in this market. Here’s what you need to know to get up to speed with Honda’s most advanced snowblower to date.

Starting

1. Turn the fuel valve to “ON”
2. Move the shift lever into neutral (N.)
3. Turn the engine switch to “START.” Release once the engine starts. If it hasn’t started after 5 seconds of cranking, release the starter and wait 10 seconds before starting again to keep the starter motor from overheating.

If the engine doesn’t start after 5 attempts, push and release the manual start lever, next to the fuel valve, then try the electric starter again. If it still doesn’t start, push in the start lever and try starting.

Once the engine is running, move the throttle to “SLOW” and gradually increase the engine speed as the motor warms up.

Setting the Skid and Scraper

1. Lower the auger to the ground using the auger control switch.
2. Shut off the engine and remove the key from the ignition switch.
3. Loosen the bolts on the skid and set the height according to the surface being cleared:

For operating over gravel, raise the auger by ½ inch and lower the skids until they are 0.3 inches from the ground. Keep in mind that this isn’t foolproof and it’s still possible that the auger will pick up and throw rocks.

For hardened snow, raise the auger as high as possible and lower the skids until they touch the ground.

For clearing pavement with regular snow, raise the auger 0.4 inches off the ground and lower the skids until they touch the ground.

Auger Housing Position

The height adjuster has three settings:
High — when clearing snow in multiple passes or when backing up the snowblower.
Middle — Normal clearing
Low — Hardened snow

Auger angle can be set using the tilt control. Holding the control once the auger has reached the end of its movement can overheat the adjustment motor, keeping it from moving until the motor cools down. The auger can be returned to its original position by pushing “RESET.”

Work Modes

Set the work mode with the transmission in neutral (N.) Choosing the right mode depends on how you need to use the snowblower:

Auto — The snowblower adjusts speed and power automatically. This is the quietest mode and requires less input from the operator.
Power — Allows the operator to adjust the speed while in motion to match the current workload, while the snowblower manages the throttle. Offers the maximum throwing distance and clearing speed.
Manual — Gives the operator full control of the throttle and drive speed.

Auger and Speed Control

Pushing the auger clutch switch allows the augers to engage once the drive clutch is engaged. Holding the auger clutch switch for four seconds turns on the protection function, stopping the auger and blower.

In Power and Manual modes, the shift lever controls the snowblower speed. Low range is recommended for most snow, while fast range can be used for light snowfall.

In Manual mode, the throttle lever should be set to the third mark from the bottom when first engaging the drive clutch. Once the transmission is in gear, the throttle can be adjusted to change speed.

Turning

The motors are controlled by the steering levers, one on each grip. To turn in one direction, squeeze the lever on that side. The more the lever is moved, the sharper the turn will be; a fully closed handle causing the wheel to stop, letting the snowblower turn in place.

Transporting with the Engine Off

The electric drive motors can be used with the engine shut off for transport. To enable this mode, release the drive clutch, shift into neutral, and turn the engine switch to “ON.” Hold down both steering levers for three seconds. The red and orange drive control warning indicators on the control panel will blink. Engage the drive clutch, and the snowblower can be controlled normally. Keep in mind that using this mode for more than three minutes can drain the battery to a point that it can’t start the engine. After the drive clutch lever has been open for 5 seconds, this mode will shut off.

Get What You Need to Keep Your Snowblower Workings

www.hondalawnparts.com is your one-stop shop for everything Honda from spark plugs to skid shoes. Our site can show you factory parts diagrams and descriptions for parts used on your model so you can find exactly what you need, and we can ship your order to any location in the U.S. or Canada.

Technology: Honda’s Advantage in the Small Engine Market

honda small engines

Why are Honda engines so popular in professional and high-end consumer outdoor equipment? Since its inception, Honda has been first and foremost an engine company. From aircraft to motorcycles, their engine technology has led the way with innovations like their legendary V-TEC valve control system and top-mounted jet engines. Small engines receive the same treatment with Honda consistently introducing new technologies to the market, making their offerings the most reliable, easiest to use engines on the market. Here are just a few of the features that make them so popular.

Mini 4 Stroke

Lawn professionals have a love/hate relationship with two stroke engines: on one hand, they deliver a lot of power for their size and don’t have any oil inside that can leak into the combustion chamber, making them ideal for handheld equipment. On the other hand, they’re difficult to start, use a lot of fuel, need their fuel mixed with oil, and are extremely sensitive to stale gas. It’s also looking like the two stroke’s days are numbered due to their high exhaust emissions: it’s hard to argue for this design’s future when workers who clean up roadsides get far more exposure to pollutants from their chainsaws and string trimmers than the thousands of vehicles that pass them by during each shift.

To address these problems, Honda designed an oiling system works at any angle, allowing them to build a small four stroke engine that can be turned and tosses around just like a two stroke. Along with other improvements including an efficient overhead cam head design, their line of Mini 4 Stroke motors are able to deliver near-two stroke power without all the two stroke’s disadvantages. They aren’t just better for the environment and easier to use, their low fuel and oil consumption means operating costs are half that of comparable two strokes.

Oil Alert – GX, iGX, V-Twin

Air cooled engines depend on oil for both lubrication and cooling, which means it doesn’t take long for a lack of oil to cause serious damage. Honda’s Oil Alert system links the ignition system to a sensor in the sump, shutting off the engine if the oil level is too low and preserving the engine.

Integrated ECU – iGX

The iGX has an ECU that controls the throttle, choke and ignition timing. These functions can be controlled using “drive-by-wire” systems, eliminating mechanical cabling that can rust. This allows engine settings to be programmed to fit the equipment’s needs, while the governor can adjust automatically to current conditions to maintain power. This reduces maintenance while making the engine easier to use, so it’s a perfect fit for rental equipment.

Variable Timing Ignition – GX, iGX, V-Twin

Timing on most small engines is controlled by the movement of the flywheel past the ignition coil, but with this technology, timing can be adjusted to fit current conditions and engine speed. That means easier start-up, increased fuel efficiency and more peak power.

Integrated Cylinder and Head – V-Twin

Since the cylinder and head are cast as a single unit, there’s no head gasket or bolts to fail, and there’s better heat transfer between these two sections of the engine, increasing reliability, particularly in harsh environments.

Lifetime Belt-Driven Overhead Cam – GC, GS, Mini 4 Stroke

Cam chains are noisy and heavy, while belts can stretch and break. By moving the belt inside the engine where it can be lubricated, Honda engineers have been able to make a belt drive system that will last the life of the engine, combining the advantages of chain and belt drives.

Automatic Mechanical Decompression – All Engines

On most engines, when you pull on the starter handle, you have to get the engine to spin past the compression stroke to start it. Honda uses a mechanical system on their motors that keeps the exhaust valve from closing completely, letting the air inside the motor pass through freely instead of being compressed. Once the engine is running, the system disengages and the cam acts normally, sealing the chamber for maximum power. Since this system is used on all of Honda’s modern engines, electric start versions need less battery power and can use smaller, lighter starter motors.

Easy Access to Parts

Honda has the technology to make small engines reliable and easy to use, while www.hondalawnparts.com makes it easy to get the parts you need to keep them running. Our search engine doesn’t just find parts, it shows you Honda’s own parts diagrams and lists factory descriptions so you can identify exactly what you need. No matter where you live in the U.S. or Canada, we can ship those parts to your door.

Troubleshooting Your Honda’s Ignition System

Honda Engine

Is your Honda engine not wanting to start? Is it running rough, despite everything being fine with the fuel system and air filter? It may be having an issue with the ignition system. Here’s what you need to know to troubleshoot common electrical problems on these motors.

Before You Begin

If the engine has been running, it needs to be left to cool for at least a half hour before working on it to prevent burns.

To access the flywheel on some models, the engine shroud/starter cover needs to be removed. On GCV models, this shroud is connected to the fuel tank. If the engine has a fuel valve, turn it off before unbolting the tank, and make sure the tank is tilted over a container to catch any fuel that leaks out.

Honda Oil Alert and Kill Switches

Most recent engines come equipped with Honda’s Oil Alert system, which shuts down the engine if the oil in the crankcase is too low, preventing internal damage. This system works by wiring a float into the ignition system: if the float is too low, the ignition circuit is cut, which prevents the spark plug from firing. Generators and engines with a built-in console will have a light that indicates whether or not the system has been activated. For other engines, the only way to see if the system may have tripped is to check the oil level.

Most engines also come equipped with kill switches that will cut power to the ignition system. This switch will be located on the engine, but it may be operated from a remote location, such as a bail on a lawn mower handle. Both the kill switch and the Oil Alert float connect to a single wire on the side of the coil. If this wire is damaged or becomes disconnected, the spark plug won’t fire. If the kill switch is damaged, it will need to be replaced. There should be two wires next to the switch that can be disconnected by pulling them apart, as well as a grounding tab located on the back of the switch that should be bent back. On most models, the starter cover will need to be removed to access the tab.

Power Generation and Ignition

In a car, the power generation system is contained in the alternator, but in a small engine, the generator components are separated and mounted on and around the flywheel. When the engine is running, magnets on the flywheel pass by a coil, creating electricity. This electricity is stored in the coil until it is needed.

Modern Honda engines use a solid state ignition system that uses a transistor to control when the electricity is sent through the spark plug wire. The coil, transistor, rectifier and spark plug wire are built as one unit. Once the piston is in the right position, the electricity in the coil is released, creating an arc of electricity across the electrodes of the spark plug, igniting the fuel.

If the flywheel is damaged or the key that keeps the flywheel in position on the crankshaft has fallen out or sheered off, the timing will be off. If the insulator inside the coil has worn out or the insulator over the spark plug wire is damaged, there won’t be enough electricity making it to the plug to ignite the fuel.

When replacing the coil, there needs to be a small gap between it and the flywheel. The easiest way to set this gap is to place a business card between the flywheel and the coil, then tighten down the bolts enough to keep the coil in position. A feeler gauge can be used to set the correct gap, specified in the repair manual, before fully tightening the bolts.

Spark Plug

For most engines, Honda recommends replacing the spark plug at least yearly, while each model has recommendations based on operating hours. A worn electrode will have too wide of a gap to get a good arc, while a damaged insulator could be shorting out the spark plug, transferring power to the engine instead of out through the electrodes.

Where to Get Parts to Fix Your Honda

If it’s Honda, you can get it from www.hondalawnparts.com. We’re a certified Honda Small Engine dealer, and our massive parts warehouse means we have most parts ready to ship across the U.S. and Canada so you can get your equipment back to work quickly.

Leaf Blowing Tips

KONICA MINOLTA DIGITAL CAMERAFall leaves are beautiful when they’re still on trees, but they become a major nuisance and a threat to your lawn when they start falling. A leaf blower can make leaf removal fast and easy, but only if you know the right techniques. These tips will help you get the most out of your equipment whether you have a Honda-powered backpack or walk-behind blower, an older Honda-built blower or a blower attachment for your VersAttach multitool.

Be Sensible About Safety and Considerate to Your Neighbors

A blower works by moving air so fast that it can push heavy, loose materials. That means lots of noise and dust that requires eye and ear protection. It’s also a good idea to stay well away from gravel driveways and to wait a while before blowing over areas that have recently been covered in fertilizer, pesticides or other chemicals.

Speaking of dust and loudness, you should probably limit blowing to times when everyone is awake and no one is out playing in the yard or having a barbecue.

Work with the Weather

Working on a wind-free day will keep the leaves you just moved from blowing away, but if you must work when it’s windy, plan accordingly by working toward the wind direction instead of against it.

Wet leaves are far heavier than dry leaves and tend to clump together, making them even harder to move. Unless absolutely necessary, only blow leaves when they’re dry.

Plan Where You Want the Leaves to Land

Place a tarp in an area that is easy to reach both for the blower and their final destination, whether they’ll be loaded into bags or onto a trailer. Once everything is in place, start working from the outer edges of the property toward this tarp.

Live at the edge of a forest? While it may seem like a good idea to simply blow the leaves into the woods, tall piles of leaves can collect moisture that will promote rot, hurting and even killing the trees. This is especially true in areas with acidic soil including the East, Southeast and Pacific Northwest where the decomposing leaves can push the pH to plant-damaging levels.

Use the Right Angle

Pointing the tip down will concentrate the jet of air into a small spot, which is ideal for pulling up matted leaves and mulch. However, this also pushes the leaves higher into the air where they can be caught by the wind, blowing them where you don’t want them, and it will lift more dust off of the soil.

Using the tip at a shallow angle will move the leaves forward instead of up, making them easier to maneuver and collect into a pile. Skimming the surface will also keep dust from being blown up.

Don’t Expect Perfection

A leaf blower can remove 99.5% of the leaves from your lawn with ease, but there will always be a handful of leaves that will stick tenaciously to the grass. Unless you have a section that has clumped together, it’s better to leave them alone. With the vast majority of leaves removed, you’ve accomplished the three main reasons for moving leaves: maintaining drainage, exposing the grass and preventing an increase in surface soil acidity.

Use the Blower for More than Leaves

A blower works great for moving light snowfall and water off of driveways and pushing away cobwebs that gather on the corners of buildings.

Keep Your Blower Working

When you need parts for Honda blowers or engines, visit www.hondalawnparts.com. We’re a certified Honda Small Engine Equipment dealer, which means we carry everything for their motors and equipment. Our site has factory diagrams built in to help you find the part you’re looking for, and we can ship it to you whether you live in the U.S. or Canada.