Servicing the HS1336iAS Snow Blower

HS1336iAS Snow Blower
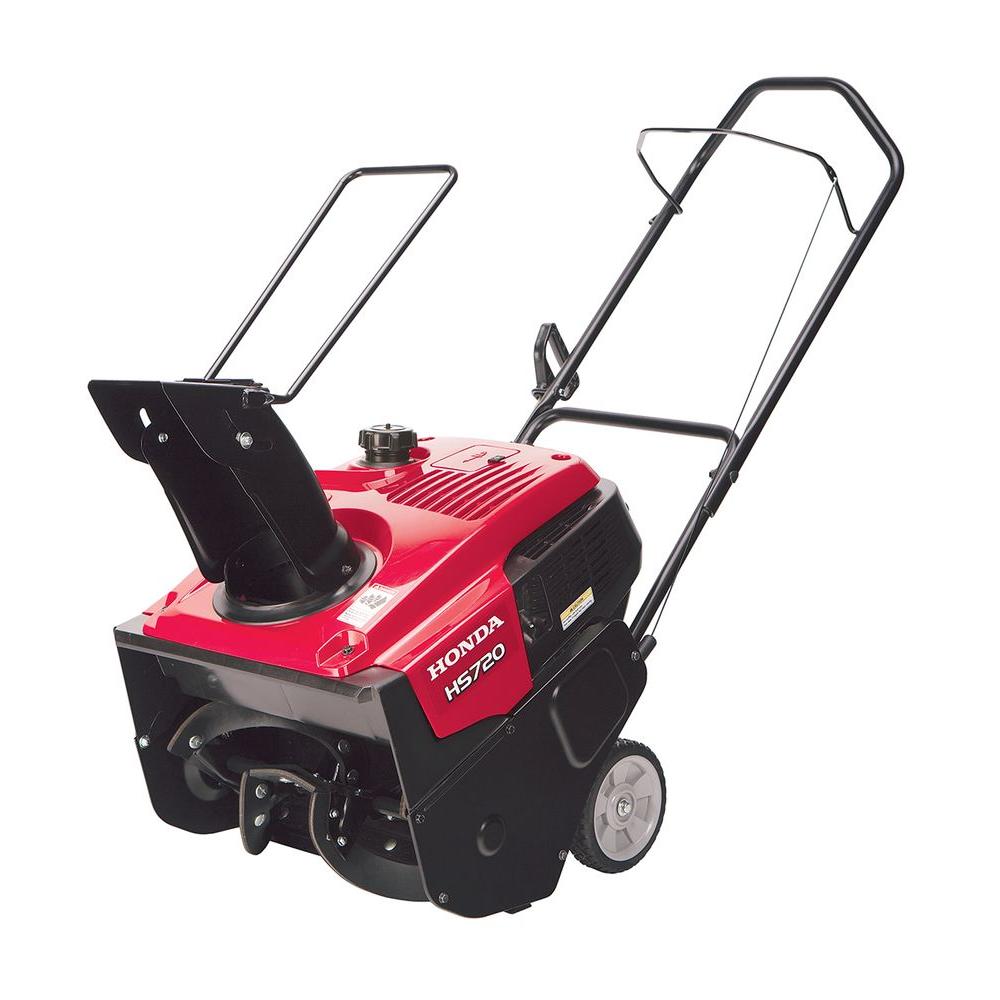
It may be a hybrid, but the HS1336iAS snow blower is as easy to service as any other piece of Honda outdoor equipment. Here’s everything you need to know about keeping this two-stage blower running from adjusting the tracks to changing the oil.

Tool Box

This snow blower has a toolbox built into the back panel with everything you need for maintenance. Here’s what you should find inside.

Tools:
10 and 12 mm box wrench
10 and 14 mm open end wrench
Two 12 and 17 mm open end wrenches
Spark plug wrench and handle
Pliers

Spare parts:
5 blower shear bolts
10 auger shear bolts
15 8 mm lock nuts
2 cotter pins
2 battery terminal covers
5 and 15 amp fuses
Fuse cover

Maintenance Schedule

Each Use: Check engine oil, skid shoes, scraper, shear bolts, and battery electrolyte level.
Each year before use: Change the engine oil. Check the gear reduction oil, spark plug, and tracks.
Every year before storing: Drain the fuel tank and carburetor. Clean the sediment cup. Apply oil to unpainted parts to prevent corrosion.
First month or 20 hours of operation: Change the engine oil and check the tracks.
Every 100 hours: Change the engine oil.
Every four years or 300 hours: Replace the spark plug.

Honda recommends having this snow blower serviced professionally before storage, after the first month or 20 hours of operation and every 300 hours. These services include repairs that are too complex for most owners.

Auger wear will vary depending on the surfaces you operate on. The blades at the end of the auger have wear marks. If the blades are worn down to these marks, the auger should be replaced by a mechanic.

Engine Oil

The dipstick is located on the right side of the snow blower next to the tracks. When checking the oil level, do not screw the dipstick into the hole.

To change the oil, place a drain pan on the right track. Remove the dipstick and unscrew the 10 mm drain bolt directly below the filler neck. Once the crankcase is empty, reinstall the drain bolt, using a new washer.

Honda recommends 5W30 motor oil that meets API service category SJ or later. The oil level should come up to the edge of the filler neck. The iGX390 holds 1.16 quarts.

Spark Plug

The plug is behind the muffler. The plug gap should be between 0.028 and 0.031 inches or 0.7-0.8 mm.

Track Adjustment

The tracks must be clean and dry to get accurate measurements. To check the tension, push down on the top middle section of the track with 22 lb-ft. of force. The track should deflect 0.62-0.79 inches (16-20 mm.)

To adjust the track tension, loosen the lock nut on the tension bolt, located just behind the front wheel. Turn the adjusting nut until the track tension is correct, then tighten the lock nut.

Shear Bolt Replacement

1. Turn the auger clutch switch to “Off.”
2. Release the drive clutch lever.
3. Set the auger to its lowest position.
4. Turn the engine off and remove the key. Let the snowblower come to a complete stop.
5. Look over the snow blower for signs of debris or damage that may have caused the bolt to break.
6. Remove the broken bolts and replace them with new shear bolts and lock nuts.

Batteries and Fuses

To access the batteries, loosen the two knobs on the sides of the rear cover. Rotate the rear cover down and slide it off of the snow blower. The fuses are inside a box directly above the batteries.

The electrolyte level should be between the “Lower Level” and “Upper Level” marks on the side of the battery case. If the level is low, remove the caps from the top of the battery and add distilled water. Clean any corrosion on the battery terminals with baking soda and water.

To remove the batteries, disconnect the negative cable from the left battery, followed by the positive terminal on the right battery. Loosen the nuts holding the battery clamp, then disconnect the joint cable from the left battery’s positive terminal, then the right battery’s negative terminal. Remove the batteries from the snow blower. When reinstalling the batteries, connect them in the reverse order you disconnected them.

Charge the batteries individually. The output of each battery should be within 10% of 35 Ah. Charge the battery at 3.5 amps for 5-10 hours.

Need Parts?

If you need some shear pins, an oil plug washer or even a new toolkit, you can get it from www.hondalawnparts.com. We’re a certified dealer for Honda Power Equipment and Honda Engines, which means we carry OEM replacements for everything on your snow blower. Our site has built-in factory information including diagrams and descriptions, making it easy to find compatible parts for your model.

Servicing Honda Single Stage Snow Blowers

Honda Single Stage SnowblowerDo you want to make sure your Honda single stage snow blower will be reliable and deliver maximum performance? Here’s everything you need to do to keep your HS720AM, HS720AS or HS720AA performing at its best.

Maintenance Schedule

Before use: Check the oil and scraper blade.
Every year before use: Change the oil. Inspect the spark plug, auger clutch, auger paddles and chute guide lever (if equipped.)
Every year before storage: Check the spark plug and drain the fuel tank and carburetor. Grease the chute tension bolts if you have an AM blower.
After the first 5 hours of use and every 50 hours of operation: Change the oil.
Every 100 hours: Check the spark plug.
Every 150 hours: Replace the spark plug.

Honda recommends having the snow blower professionally serviced every 100 hours to check engine speed and valve clearance, and every two years to inspect the fuel system.

Oil

Oil should be checked with the dipstick inserted in the filler neck but not screwed in. Honda recommends 5W30 oil when temperatures are above 10°F and 5W20 when operating in weather below 10°F.

1. Place the snow blower on a level surface.
2. Place a drain pan between the wheels.
3. Remove the dipstick.
4. Remove the drain bolt and washer from the back of the engine, next to the filler neck.
5. Install the drain plug, using a new washer.
6. Add oil through the filler neck. Stop when the oil is at the edge of the neck.
7. Install the dipstick.

Spark Plug

Let the engine cool off before removing the spark plug.

1. Open the plug access panel next to the fuel filler cap. Disconnect the spark plug cap, then unscrew the plug using a spark plug wrench.
2. Replace the plug if it’s heavily worn or has cracks or other damage. Set the gap to 0.028-0.031 inches.
3. Screw the plug in by hand, then tighten it down with the wrench. If the plug is new, rotate the plug a half turn after it seats to crush the sealing washer. Honda recommends torquing the plug to 14 ft-lbs. if you have a torque wrench on hand.
4. Snap the access panel back into place.

Clutch Lever and Belt Tension

To check the tension, squeeze the bail until you feel some resistance. Measure the distance between the bail and the handle: it should be between 7 ½ and 8 inches.

There are several adjustment holes for both the clutch spring and the cable near the base of the handle. Slide the cover up to expose the spring and access these holes. Moving the spring down one hole adjusts the lever distance by ¼ inch, and adjusting the cable position moves it by 3/8 inch.

To check the belt tension, slide the spring cover up on the drive cable. Engage the auger clutch bail. The spring should be 2.93-3.15 inches long. To adjust the tension, move the cable end from the lower hole to the upper hole on the bail.

Auger Paddle

To inspect the paddles, place the snow blower on a level surface. Disconnect the spark plug and turn the fuel valve off to prevent an accidental start. Measure the distance between the edge of the paddle and the metal part of the auger. If the distance is less than 5/8 inch, have the paddles replaced by a dealer.

Scraper Blade

To check the blade alignment, place the snow blower on a level surface. Disconnect the spark plug and turn the fuel valve off to prevent an accidental start.

The blade should be level and come in contact with the ground. The distance between the lower rubber paddle and the ground should be 1/16-1/8 of an inch. If the blade is uneven or the paddle is too high, adjust the blade. If the blade is less than 1/16” thick, replace it.

To adjust the blade, tilt the snow blower forward. Loosen the three flange nuts and move the blade. Tighten the nuts and recheck the clearance.

If the blade needs to be replaced, simply remove the nuts, washers and carriage bolts, then remove the old blade. Install the new blade, reusing the fasteners. Check the blade adjustment.

Chute Guide Cable (A and AS models)

Pull the chute control lever rearward. The chute should point up with the top of the deflector lining up with the back of the chute. Push the lever down. The deflector should be pointed up just slightly.

If the deflector isn’t moving through its full range of motion, loosen the lock nut on the end of the cable next to the deflector. Turn the adjusting nut below it to change the cable tension, then tighten the lock nut, torquing it to 48-83 in-lbs.

Get the Parts You Need for Your Honda

Need to make some repairs to your snow blower? Hondalawnparts.com isn’t just for mowers: we carry OEM parts for everything from Honda Engines and Honda Power Equipment. Our site can show you parts specific to your mode using factory diagrams and descriptions, so it’s easy to find what you need. We ship across the USA and Canada.

Picking the Right Snowblower

HS1336iAS Snowblower OperationBuying a snow blower can be confusing: Honda has 14 models, letting you pick from two auger types, three starting systems, and three drive systems, not to mention various widths and snow capacities. Which one is right for you? Here’s how you can narrow down the selection.

Size and Power

For the best performance, you should plan on some overlap with each pass so the effective clearing width will be 20% narrower than the actual auger width. If you’re nearing the maximum capacity of a snow blower, you should plan on a 50% overlap.

Snow density can vary a lot between snowfalls, so it’s hard to directly correlate power to snow clearing ability. Fresh snow can weigh as little as three pounds per cubic foot, while settled snow can top 19 lbs. and packed snow can reach 25 lbs.

When selecting a snow blower, your primary concern should be the width and depth of snow the auger housing can handle. Once you narrow down your choices, choosing a model with a higher pound per minute rating will let you clear snow with less overlap between passes.

Wheel or Track Drive?

Track drives handle packed snow and slopes better than wheels. Choose a track drive if you need to clear snowbanks, snow that has been driven on. A track drive snow blower is also a good choice if you need to clear snow off of a flat industrial roof.

Snow blowers with wheels are easier to turn, saving time and effort when clearing flat surfaces like driveways and parking lots.

Single or Two Stage?

A single stage snow blower has an auger that spins fast enough to pick up snow and push it out of the chute. This mechanical simplicity makes these machines light and easy to maneuver.

A two-stage snow blower lifts snow off of the ground with a low-speed auger, then pushes it out of the chute with a high-speed impeller. This helps the machine pick up heavy snow and throw it further so it can clear wide areas.

A single stage snow blower like the HS720 is ideal for clearing paved sidewalks and driveways for single or two-car garages and works best for snow under 9 inches thick. If you need to clear larger areas, uneven surfaces or major accumulation, get a two-stage snow blower.

Electric or Recoil Start?

Honda engines are easy to start in cold weather, and all models have a recoil starter, whether it’s the only way to start the engine or it serves as a backup for the electric starter.

The HS720AS uses an AC motor to start the engine, which needs to be plugged into an electric outlet to work. All other electric start models have a built-in 12-volt battery that powers a DC motor so the starter can be used anywhere.

Hydrostatic Drive, Hybrid Drive or No Drive?

Honda’s single stage blowers have no drive system, but as the auger’s rubber paddles scrape against the ground, they help pull the machine along when applying light pressure to the handles.

All but one two-stage Honda snow blower comes equipped with a hydrostatic drive. By varying fluid flow inside of the transmission, the speed can be infinitely adjusted while letting the engine run at full power to operate the augers.

The hybrid power system on the HS1336iAS uses electric motors to operate the tracks. These motors produce maximum torque as soon as they start moving, making it the best model for clearing snow on slopes. The motors can also be used with the engine off for easy transport.

Do I Need Drift Cutters?

These are a must-have if you live in a place that gets frequent heavy snowfall. Snow drifts are created by wind gathering snow in one spot, creating a large hump that resembles a sand dune. Drift cutters are blades that extend above and ahead of the auger housing, slicing through these drifts so the snowfall into the path of the snow blower. This keeps the tops of drifts from collapsing onto the snow blower and the pavement. Drift cutters can be fitted to any two-stage snow blower.

Do I Need a Cold Weather Cab?

Wind chill can make a cold day uncomfortable or even dangerous. At 20°F, a 20 mph wind results in a wind chill of 4°F. A snow cab might not look like much, but by shielding your body from the wind, you’ll be a lot warmer. Honda makes cabs for all two-stage models.

Where Can I Get Parts and Accessories?

No matter which model you choose, you can get all the OEM parts and accessories for your Honda snowblower at www.hondalawnparts.com. Finding parts is easy: check out our “Snow Blower Parts & Accessories” section, or search for your model to see everything that fits your machine. We ship across the United States and Canada.

Servicing the EU1000i

EU1000i GeneratorThe EU1000i may be fully enclosed to keep down noise, but it’s still simple enough that owners can do most of the maintenance themselves. Here’s how you can keep Honda’s tiny EU1000i generator ready to power your tailgate parties and camping trips.

Maintenance Schedule

Most maintenance is easy enough that you can do it yourself:

Before each use – Check the oil and air filter.
After the first month or 10 hours of use – Change the oil.
Every three months or 50 hours – Clean the air filter.
Every 6 months or 100 hours – Change the oil, check the spark plug and clean the spark arrester.
Every two years or 300 hours – Replace the spark plug.

Honda recommends having a professional perform the following maintenance:

Every year – Clean the fuel tank and fuel filter
Every two years – Check the fuel line for cracking.
Every 300 hours Clean the combustion chamber.

Fuel

Fuel should be used within one month of purchase. If the fuel is treated with a stabilizer, it can be used up to three months after purchase.

When adding fuel, do not fill past the red mark inside the filler neck. The top of the cap has a lever that opens and closes a vent. This vent should be open while the engine is running and while the engine is cooling down after use. Once the generator is cool, the vent should be shut to prevent fuel from leaking during transport and storage.

Accessing the Engine

The EU1000i has three maintenance covers:

To access the air filter, dipstick and drain plug, remove the maintenance cover on the left side of the generator. Turn the cover screw counter-clockwise and lift the cover up.

To access the spark plug, remove the access cover on top of the generator next to the handle.

To access the muffler, remove the cover on the rear of the generator. It’s held in by four 5 mm screws.

Oil

10W30 and 5W30 oil are recommended for all operating conditions. SAE 30 can be used at temperatures above 50°F.

This engine has Oil Alert, which will shut off the engine if the oil level is too low. If this feature is triggered, it will turn on a light on the control panel.

To check the oil level, remove the dipstick from the filler neck, located on the bottom left of the engine. Wipe off any oil and reinsert the dipstick, but don’t screw it back into the filler neck.

To change the oil, turn off the engine switch and close the fuel filler cap vent. Remove the dipstick and unscrew the drain plug at the base of the engine. Tilt the generator, letting the used oil flow down through the channel on the case into a container. Reinstall the drain plug. Add oil through the filler neck. With the generator sitting on a level surface, the oil should come up to the edge of the neck. This engine holds about 8 ounces of oil.

Air Filter

The air box is located to the right of the engine. To access the filter, push down on the tab at the top of the air box cover and lift the cover straight up.

Clean the filter in warm, soapy water. Squeeze out the filter and let it air dry. Dip the filter in clean engine oil and squeeze it out. To make this process cleaner, consider putting the filter and oil in a plastic bag. Do not twist the filter when washing or oiling.

Spark Plug

The spark plug is accessed through a maintenance cover on top of the generator. The plug gap should be between 0.024-0.028 inches (0.6-0.7 mm.) Replace the plug if the washer or insulator are damaged, or the electrode is worn down.

When installing the plug, thread it in by hand until it seats. Use a spark plug wrench to turn it another ¼ turn if you’re reinstalling a used plug, or ½ turn to crush the washer on a new plug.

Spark Plug Arrester

The arrester is inside the tailpipe, sandwiched between the muffler and the engine’s exhaust port. Once the back cover is off, remove the three 6 mm bolts holding the muffler onto the back of the engine. Remove the muffler. It should come off with the spark arrester and gasket. Pull the spark arrester out of the muffler and scrub off any carbon deposits with a wire brush. If the arrester or gasket are damaged, they should be replaced. Reinstall in reverse order.

Need Something For Your Honda Generator?

Hondalawnparts.com is an authorized Honda Engines and Honda Power Equipment dealer. That means we can ship OEM parts and accessories to your door whether you live in the U.S. or Canada. We have sections for common parts and generator accessories, or you can use our search engine to find the right part for your specific equipment model. Our site even has factory diagrams and descriptions, so you know exactly what you’re ordering.

EU1000i Generator

EU1000i GeneratorAre you looking for portable power without having to sacrifice quality? Honda’s EU1000i generator is perfect for camping and tailgating, offering enough power for common appliances, while its lightweight design makes it easy to move. A full enclosure keeps down noise, while advanced features like Eco Throttle and Oil Alert save money on fuel and repairs, making it the perfect choice for electric power on the go.

Output

This generator can output a steady 900 watts (7.5 amps) and peaks at 1,000 watts (8.3 amps) to handle momentary load spikes. Like Honda’s other generators, the EU1000i has a built-in inverter to create a clean power waveform. That means the alternating current coming out of the outlets is smooth and steady like it is from grid power, so it won’t burn out sensitive electronics.

The 0.6-gallon gas tank can power this generator for up to three hours and twelve minutes at 100% load, and about 7 hours and 6 minutes at ¼ load. Honda’s Eco Throttle automatically adjusts engine speed to match the current electrical load, so you’ll always get the best fuel consumption.

Power and Noise

The generator is driven by a four-stroke, 50cc GXH engine. The GHX is a popular choice for water pumps, compact farming equipment, and go-kart racing. The engine, generator, and circuitry are housed in an enclosed case to keep things quiet. When running, it makes 42-50 dB of noise, which is about as loud as the ambient noise in an office building. In most situations, unless you’re standing next to it, you won’t really notice the sound from the engine.

Portability and Serviceability

The engine on switch and starter handles are built into the side of the case, and there’s a built-in oil channel and spark plug access for easy maintenance. Oil Alert comes standard, shutting off the engine if the oil level is too low to keep the engine lubricated. The generator measures 20 x 13 ¼ inches and weighs just 29 lbs, making it easy to carry using the built-in handle.

Connecting To Your Appliances

Appliances connect to the generator through a 125-volt duplex outlet rated at 15 amps. That’s two standard outlets sharing the same circuit breaker. There’s also a 12 volt, 96-watt connector rated at 8 amps for recharging automotive batteries. Using this connector requires an optional 12-volt cable. The front panel has indicator lights for overload and Oil Alert, and there’s a large ground terminal connector for using an external ground. Granted, you’re unlikely to be using this low power generator in ways that would require an external ground, such as using appliances on metal floors or wet areas.

What Can This Generator Power?

If it’s something you’d use for camping or tailgating, there’s a good chance the EU1000i will be able to power it. Here are some common appliances that are compatible with this generator:

– Microwaves up to 650 watts
– TVs
– Media devices including Blu-Ray players, game consoles and media streamers
– Coffee makers
– Blenders
– Slow cookers
– Two-way radios
– Computers
– Phone chargers

Electric motors are reactive loads, requiring large amounts of power to start before settling down and drawing small amounts of current. For this reason, power draw from refrigerators, air conditioners, pumps and all but the smallest power tools are too much for this generator, even if the rated watts or amps are well within its operating range.

Need more power? The EU1000i has a parallel connector, letting you link two of these generators together with an optional parallel cable, doubling output without sacrificing portability.

Warranty

Honda guarantees the EU1000i and the GXH50 that powers it for two years of residential use or one year of commercial use.

Everything You Need for Your Honda in One Place

Hondalawnparts.com is more than just lawn care: we carry OEM parts and accessories for everything from Honda Power Equipment and Honda Engines including their generators. Check our Generator Accessories section for parallel cables and 12-volt cables, or use the search engine to find replacement parts for your specific model. Our site can break down parts listings down to specific serial number ranges, and it can show you factory parts diagrams and descriptions so you can be sure you’re ordering the right part. We ship across the U.S. and Canada.