Troubleshooting Your Honda’s Ignition System

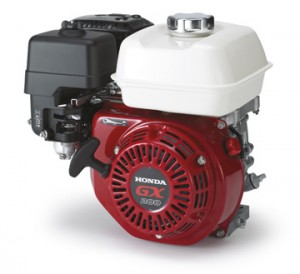
Honda Engine

Is your Honda engine not wanting to start? Is it running rough, despite everything being fine with the fuel system and air filter? It may be having an issue with the ignition system. Here’s what you need to know to troubleshoot common electrical problems on these motors.

Before You Begin

If the engine has been running, it needs to be left to cool for at least a half hour before working on it to prevent burns.

To access the flywheel on some models, the engine shroud/starter cover needs to be removed. On GCV models, this shroud is connected to the fuel tank. If the engine has a fuel valve, turn it off before unbolting the tank, and make sure the tank is tilted over a container to catch any fuel that leaks out.

Honda Oil Alert and Kill Switches

Most recent engines come equipped with Honda’s Oil Alert system, which shuts down the engine if the oil in the crankcase is too low, preventing internal damage. This system works by wiring a float into the ignition system: if the float is too low, the ignition circuit is cut, which prevents the spark plug from firing. Generators and engines with a built-in console will have a light that indicates whether or not the system has been activated. For other engines, the only way to see if the system may have tripped is to check the oil level.

Most engines also come equipped with kill switches that will cut power to the ignition system. This switch will be located on the engine, but it may be operated from a remote location, such as a bail on a lawn mower handle. Both the kill switch and the Oil Alert float connect to a single wire on the side of the coil. If this wire is damaged or becomes disconnected, the spark plug won’t fire. If the kill switch is damaged, it will need to be replaced. There should be two wires next to the switch that can be disconnected by pulling them apart, as well as a grounding tab located on the back of the switch that should be bent back. On most models, the starter cover will need to be removed to access the tab.

Power Generation and Ignition

In a car, the power generation system is contained in the alternator, but in a small engine, the generator components are separated and mounted on and around the flywheel. When the engine is running, magnets on the flywheel pass by a coil, creating electricity. This electricity is stored in the coil until it is needed.

Modern Honda engines use a solid state ignition system that uses a transistor to control when the electricity is sent through the spark plug wire. The coil, transistor, rectifier and spark plug wire are built as one unit. Once the piston is in the right position, the electricity in the coil is released, creating an arc of electricity across the electrodes of the spark plug, igniting the fuel.

If the flywheel is damaged or the key that keeps the flywheel in position on the crankshaft has fallen out or sheered off, the timing will be off. If the insulator inside the coil has worn out or the insulator over the spark plug wire is damaged, there won’t be enough electricity making it to the plug to ignite the fuel.

When replacing the coil, there needs to be a small gap between it and the flywheel. The easiest way to set this gap is to place a business card between the flywheel and the coil, then tighten down the bolts enough to keep the coil in position. A feeler gauge can be used to set the correct gap, specified in the repair manual, before fully tightening the bolts.

Spark Plug

For most engines, Honda recommends replacing the spark plug at least yearly, while each model has recommendations based on operating hours. A worn electrode will have too wide of a gap to get a good arc, while a damaged insulator could be shorting out the spark plug, transferring power to the engine instead of out through the electrodes.

Where to Get Parts to Fix Your Honda

If it’s Honda, you can get it from www.hondalawnparts.com. We’re a certified Honda Small Engine dealer, and our massive parts warehouse means we have most parts ready to ship across the U.S. and Canada so you can get your equipment back to work quickly.

Plugging into a Honda Generator

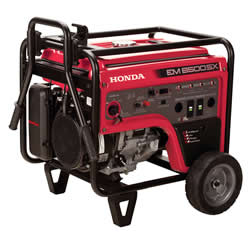
Honda generatorA Honda generator can keep your tools and appliances running whether you’re tailgating, waiting for a storm to pass or working in remote areas, but only if you have a way to get power from the outlets to your equipment. What should you look for when getting cables to use with your generator?

Why are Extension Cables Necessary?

The engine in your generator produces an odorless gas called “carbon monoxide.” If it’s run indoors or next to a building, this gas can collect in concentrations that can lead to asphyxiation. Over 85% of non-fire related deaths caused by carbon monoxide poisoning in the U.S. are the result of generators being used indoors. To keep the generator in an open area and still have access to the power it produces, you need extension cables.

While you may have some cables on hand, you likely don’t have ones that can withstand the high currents and conditions needed to safely get the most power from your generator to what you want to power. Buying the right cables now will let you put your generator to work as needed to provide power during blackouts and in remote locations.

Plug Types

Small portable generators have duplex plugs, while larger generators have both duplex and twist lock plugs.

A duplex plug has two 120 volt sockets connected to the circuit by a single set of wires. This means the rated amperage applies to the total draw from both sockets on a duplex plug. When selecting cables, one cable can be used to transfer the full rated power of the duplex plug to the location you need the electricity, leaving the other socket unused. Honda uses Ground Fault Circuit Interrupter (GFCI) three pronged sockets for these plugs, which have breakers that cut the flow of electricity if there’s a short.

A twist lock plug has curved blades that are designed to slide into the socket and twist, locking the plug in place so it remains secure when subject to movement and vibration. It can be used with a transfer switch or with an extension cable that splits the current into standard 120-volt sockets.

Transfer Switches

To legally connect your generator directly to your household’s wiring system, it needs to be plugged into a professionally-installed transfer switch. This device breaks the connection between your house and the electrical grid when the generator is active to keep power from being sent into neighboring power lines where it could electrocute line workers.

The switch will have its own twist lock plug, requiring a female to female twist lock cable to make the connection. Finding the right cable is easy since this socket combination is almost exclusively for transferring power between these two devices: just look for one that matches the maximum amp rating on your generator that has plugs that match both the generator’s outlet and the transfer switch’s plug.

Finding the Right Cord

The meaning of product terms like “outdoor” and “heavy duty” can vary, but you can find out exactly what an extension cord is capable of thanks to standard cable labeling that can be found printed on the cord jacket and in the cable’s specifications. This starts with a series of letters that describe the construction of the cord:

S – Flexible, general use cord
W – Outdoor use
J – “Junior service” insulation rated at 300 watts. Wire without this designation is rated at 600 watts.
P – Parallel wire construction for household use
T – Vinyl thermoplastic jacket
E – Thermoplastic elastomer rubber (TPE) jacket
O – Oil Resistant
OO – Oil resistant jacket and insulation
W, W-A – Weather approved for indoor/outdoor use
HPN – Oil resistant for portable and damp location use
SPT-2, SPT-3 – For light duty damp locations

For example, an SWPEO cable is a general use cord designed for outdoor use with parallel wire construction and a TPE outer jacket that is oil resistant. In general, cords should use TPE for durability, be weather and water resistant, and, if you’ll use it near oil-lubricated equipment like trucks and tractors, be oil resistant.

Next on the label are the letters “AWG” followed by a dash and two numbers separated by a “/.” The first number is the American Wire Gauge number. A lower number indicates a thicker, less resistive cable. Your needs will vary, but there are some general guidelines for wire thickness:

16 gauge – under 10 amps
14 gauge – 10-15 amps at up to 50 feet
12 gauge – 10-15 amps at up to 100 feet
10 gauge – 15 amps or more

The number after the “/” is the number of conductors, usually three to support a three prong plug and outlet. For example, “AWG 10/3” means the extension cable uses 10 gauge wiring with three conductors.

Where to Find Cords, Transfer Switches and More for Your Honda Generator

Hondalawnparts.com is a certified Honda Power Equipment dealer, so we’re able to offer OEM parts and accessories including power cords and transfer switches designed specifically for their generators. We ship across the U.S. and Canada.

Storing Your Honda Tiller

Storing Your Honda Tiller

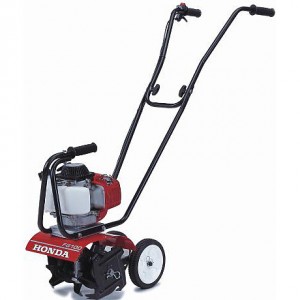
After tilling your garden this fall to turn over sod and mix in organic matter, it will be time to put your Honda tiller into storage. Taking steps to protect your equipment now will make it easier to get it up and running in the spring.

Inspection

Addressing issues now will mean your tiller will be ready to work when it’s time to break ground in the spring. Give your machine a look over and answer these questions:

Are the tines straight? Do they show severe wear or signs of cracking?
If the tiller has a belt drive, is the belt still tight? Is it starting to crack?
Is the spark plug, fuel hose, and air filter still in good condition?

Cleaning

Let the engine cool for at least a half hour before cleaning: rapid cooling caused by water making contact with hot engine parts can cause warping.

A garden hose or pressure washer can be used, but the water should not be aimed at the controls, cables, air filter, belts or muffler. A rag or stiff brush can be used to remove dirt trapped near these sensitive areas.

Once clean, wipe any remaining moisture off of the tiller. To get rid of the last bit of water, start the engine and let it run until it reaches normal operating temperature. If the mower has a clutch, operate the clutch lever several times to remove any water clinging to the pulleys and belts.

Fuel

Even stabilized fuel should not be kept in your tiller’s engine for longer than three months. Before putting it into long term storage, the fuel system should be drained completely.

Start by disconnecting the spark plug. If there is an engine switch, make sure it’s set to “off.”

On models with a Mini 4-Stroke engine, open the gas cap and tip the tiller so that the gas pours out into a container. Once the tank is empty, squeeze the priming bulb to remove any remaining gas in the carburetor.

On models with larger engines, place a fuel container underneath the carburetor and unscrew the gas cap. Open the fuel valve and unscrew the fuel drain bolt or knob at the bottom of the carburetor. Newer models like the FC 600 also have a sediment cup to the right of the drain knob: once the fuel has drained, unscrew this cup, clean out any fuel and debris, and reinstall the cup, fitting a new O-ring to ensure a tight seal. Screw the bolt or knob back into the carburetor once the tank and carburetor are empty.

Oil

If your tiller has a separate transmission, the fluid inside does not need attention before you put your equipment in storage aside from checking the level. On all models, the engine oil should be changed, and the cylinder should be lubricated to prevent rust.

To lubricate the cylinder, first, remove the spark plug.

For Mini 4 Stroke engines, pour a quarter teaspoon of clean engine oil into the spark plug hole. For other engines, add one teaspoon of oil.

Pull the starter handle several times to circulate the oil inside the cylinder, then reinstall the spark plug.

Pull the starter handle gently until resistance is felt. This positions the valve train so that both the intake and exhaust valves are closed, sealing the combustion chamber.

When the tiller is put back into service, it’s normal for the motor to smoke for a few seconds as the oil in the cylinder is burnt off.

Rust Prevention

To keep rust from forming during storage, chipped and damaged paint should be covered in a touch-up paint, while bare metal surfaces should get a light coat of oil or silicone lubricant.

Storing

Even with the fuel tank and carburetor drained, there may still be enough fuel inside of your tiller to release flammable vapors. Keep the tiller in an area that doesn’t have an open flame or sparks nearby. This includes avoiding power tools, heaters, clothes dryers and water heaters.

To prevent rust, the tiller should be stored in an area with low humidity. Placing a tarp over the tiller can trap moisture, accelerating rust formation.

If you fold the handle to make the tiller more compact, make sure the cables aren’t kinked or wedged between the upper and lower handle.

Getting Parts for Your Honda Tiller

From small maintenance parts like O-rings and spark plugs up to major components including tines and engine covers, if it’s Honda, you can find it at Hondalawnparts.com. We’re a certified Honda Small Engine and Power Equipment dealer, and our massive parts stock lets us ship parts quickly across the U.S. and Canada.

Servicing a Honda Mini Four Stroke

GXV50 engine

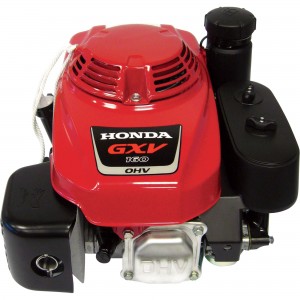
Honda’s mini four strokes are designed to replace two stroke engines in applications ranging from string trimmers to tillers, which means they need to function in any position. To do this, they use a unique internal design that makes caring for them a little different from standard two and four stroke motors. Here’s what you need to know to maintain the GX25, GX35, GXH50 and GXV50 engines in this lineup.

Fuel

These engines can run off of straight automotive gasoline that has at least an 86 octane rating and contains a maximum of 10% ethanol or 5% methanol. Fuel freshness is important: gasoline should be used within one month of purchase, or within three months if it has been treated with a fuel stabilizer. Briefly running the engine on fuel mixed with two stroke oil shouldn’t damage it, but this fuel should be drained out as soon as possible. The tank and carburetor should also be drained before putting the engine in storage.

To remove fuel from the engine, make sure the oil cap is screwed in fully, then unscrew the fuel cap. Tip the engine so that the gas flows into a fuel container. Once empty, squeeze the priming bulb until all the gas has been drawn out of the carburetor.

Oil

Despite a unique oiling system that mists the oil through the entire motor no matter the position, checking and changing the oil isn’t much different from any other Honda engine.

To check the oil, the engine needs to be positioned so that the gas tank is below the motor. On vertical shaft GX22 and GX31 engines, this may involve tilting the equipment over. Remove the oil filler cap/dipstick, wipe it clean, then insert it back into the filler neck without screwing it in. The oil should come up to at least the bottom mark on the stick. Honda recommends checking the level before each use or every 10 hours of continuous use.

To change the oil, remove the dipstick and tilt the engine, letting the oil flow into a container for recycling. Doing this while the motor is still warm will help the oil pour out faster. Set the engine in the oil check position and add oil until it comes up to the edge of the filler neck. 10W30 oil is recommended, while 5W30 can be used if the motor will be operated at temperatures below 32°F (0°C.) The oil should be changed after the first 10 hours of use to remove contaminants from breaking it in. After that, replace the oil every 6 months or 50 hours of use.

When storing the engine at the end of the season, remove the spark plug and pour a teaspoon of oil into the plug hole. Pull the starter handle a few times to distribute the oil inside the cylinder, then reinstall the spark plug. When the motor is started again, it’s normal for the engine to smoke a little as this oil is burnt off.

Air Filter

Honda recommends checking the air filter for contaminants before each use and cleaning it every three months or 25 hours. On tillers, the air filter can be accessed by squeezing the tabs on the top and bottom of the cover and sliding the cover outward. On all other engines, simply push in the tabs at the top of the cover, then tilt the cover downward.

To clean the filter, remove it from the air box and either rinse it in water and a mild detergent or spray it down with a non-flammable solvent. Once the element is dry, soak it in clean engine oil and squeeze out any excess oil. Wipe out the air box before reinstalling the filter.

Spark Arrester

The spark arrester can collect carbon deposits that should be scrubbed off with a wire brush every 100 hours of use. Let the engine cool for at least 15 minutes before attempting this repair to avoid burns.

Depending on the motor design, there will either be a small cover over the muffler, or a cover that goes over the entire top of the engine. Large covers serve as a mounting point for the spark plug wire; the wire bracket will need to be unbolted before unbolting the cover itself.

Once the cover is off, the arrester can be removed from the exhaust opening by removing a single screw. When scrubbing off the deposits, inspect the spark arrester and replace it if it has holes or cracks.

Getting Parts for Your Mini Four Stroke

Hondalawnparts.com is a certified dealer for Honda Engine and Honda Power Equipment, so we have all the OEM parts you need to keep your motor in top condition. Our search engine lets you see where parts fit on factory diagrams, making it easy to order what you need. We can ship your order to any address in the U.S. and Canada.

Using a Honda Generator for Construction

Honda-Commercial-Generator

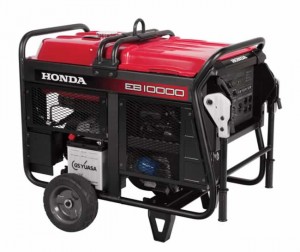
While the proliferation of Lithium-Ion technology has made portable tools a more viable choice in construction, there’s plenty of equipment that needs AC power. To serve these users, Honda makes the EB-Series of generators. They’re built for the demands of commercial and rental use, are offered a range of outputs, use low noise designs and are OSHA compliant. How do you know which one is right for you? Here’s what you need to know to work out your use case.

How Many Watts Do I Need?

As a general rule of thumb, Honda recommends a 2,000 watt generator to run a single tool, 3,000-4,000 watts to run two tools and over 4,000 watts to run several tools. However, your specific use case can vary a lot depending on the equipment that will be drawing power from the generator.

The easiest way to calculate the power needed for a tool or appliance is to check the data tag, usually located on the body of the device. If this tag has worn off, the same information can usually be found in the owner’s manual, or measured using an appliance load tester. To convert amps into watts, multiply the rated amps by the voltage, either 120 or 240.

Electric motors create a “reactive” load, requiring a lot more power when they start than when they run. To compensate for this, Honda’s generators have a maximum load capacity that can be sustained for a few seconds to help deal with these load spikes. Devices with these loads include air compressors, power tools, grinders and pumps. Manufacturers of commercial equipment will usually state both the starting and running power in amps or watts on the data label. Some labeling systems use a letter to indicate the starting amps per horsepower:

A – 26.0
L – 83.3
B – 29.5
M – 93.3
C – 33.3
N – 104.0
D – 37.4
P – 116.6
E – 41.6
R – 133.3
F – 46.6
S – 149.9
G – 52.4
T – 166.6
H – 59.0
U – 186.6
J – 66.6
V – Over 186.6

For example, if you have a ¼ hp drill press with a “P” code, it requires 29.15 amps to start or 3,498 watts. If there is no code or second number, assume the starting power will be three times as much as the running power.

When calculating power demands, remember that you probably won’t be turning all your devices on at the same time. The generator you buy should be able to support all the equipment you may be using at one time plus the highest single reactive load for your equipment.

Can I Power Electronics with an Industrial Generator?

Inverter generators including CycloConverter models like the EB3000c create a clean power waveform, making them safe to use with electronics as well as tools with computerized control systems. This means you can use them to power Li-Ion charging stations, computers, and radios.

Can I Power Three Phase Equipment with a Generator?

No. While most EB models can provide 240-volt power, this electricity is single phase, switching fully between negative and positive polarity. In a three phase system, three power waveforms are combined, keeping the polarity fairly steady. Welders and some large electric motors need three phase power to work properly.

NFPA and OSHA Compliance

OSHA establishes what needs to be done to ensure a safe work environment, while the National Fire Protection Agency (NFPA) regulations handle how those standards are met when involving fire safety. NFPA rules also apply outside of work use. For generators, these standards bodies come into play in two ways:

OSHA has specific requirements for generators used in the workplace covering fire safety, grounding and circuit protection. The NFPA issues rules for fire compliance to meet OSHA’s requirements. All Honda EB Series generators are OSHA compliant.

The NFPA issues guidelines for using generators for emergency backup power for all users, commercial and private. All Honda generators comply with NFPA regulations if they’re installed and used correctly.

Full compliance requires correct usage of the generator, which includes keeping it outside of buildings and away from walls to prevent carbon monoxide poisoning. When adding a generator to your equipment, you’ll need to have a way to get that power to the work area via cables and weather protection to prevent shorts from rain.

Getting Parts and Accessories for Industrial Grade Honda Generators

Hondalawnparts.com is a certified Honda Power Equipment dealer, so we can offer OEM parts and accessories to keep your generator working including cables, transfer switches and load testers. Our massive warehouse lets us keep most popular parts in stock for fast shipping to any address in the U.S. or Canada.