Servicing HSS724 Snow Blowers

HSS724 Snow Blowers
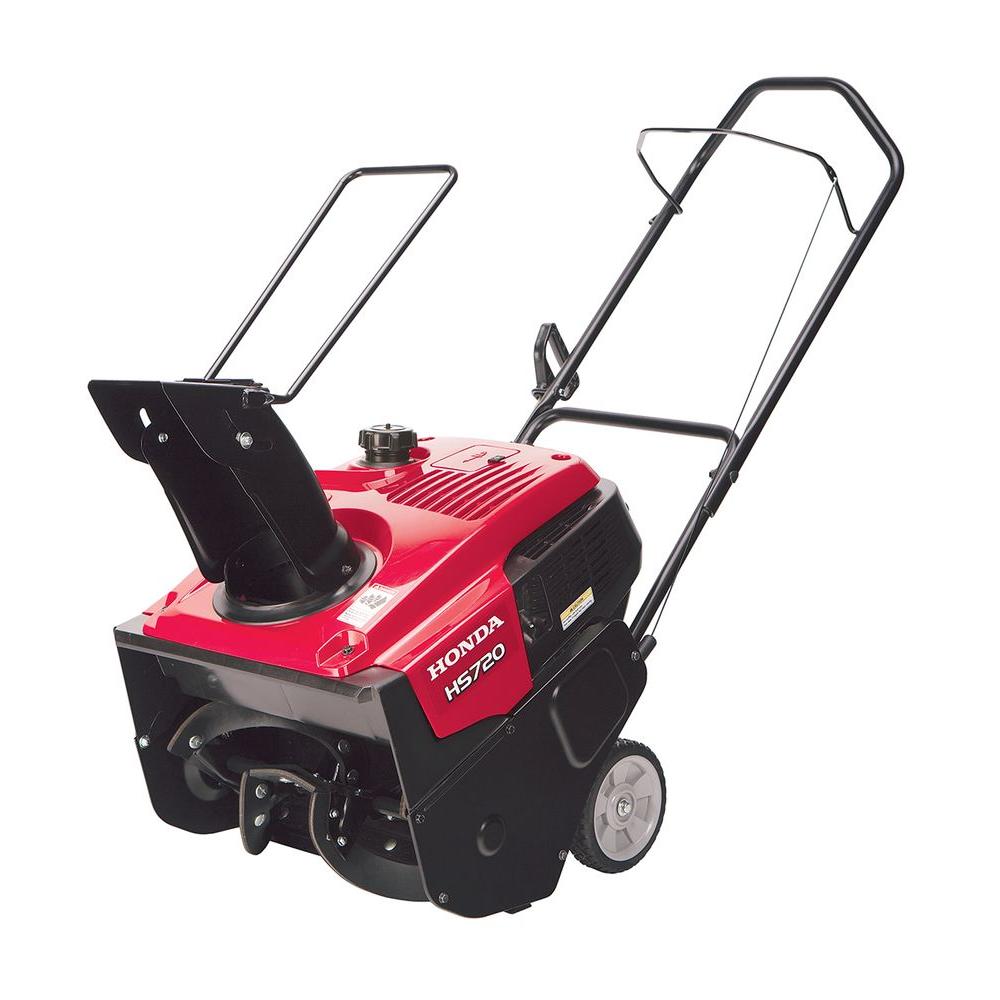
Want to make sure your light-duty Honda snow blower maintains its performance? Here’s what you need to know to keep your HSS724AT, ATD, AW or AWD two-stage snow blower working reliably.

Maintenance Schedule

Before use: Check engine oil level, skid shoes, scraper, tire pressure, shear bolts, and bolts and nuts.
Before the start of the season: Change the oil. Check the tracks (if equipped) and charge the battery (if equipped.)
Before storage: Lubricate joints and chains, drain fuel system and charge battery.
First month or 20 hours of use: Change engine oil. Check tracks (if equipped,) belts and cables.
Every 100 hours: Change oil and clean spark arrester.
Every four years or 300 hours: Replace spark plug.

Honda recommends having these snow blowers professionally serviced before the start of the season for cable and belt adjustment, every 300 hours for engine maintenance, every two years for fuel system cleaning, and every 1,000 hours for combustion chamber cleaning.

Fuel

To drain the fuel system, remove the sediment cup on the bottom of the carburetor and turn on the fuel valve. Once drained, replace the cup and run the engine until it stalls.

Oil

When checking the oil, do not screw the dipstick into the filler neck.

The engine has an extension on the drain plug to allow oil to drain outside of the snowblower frame. When draining the crankcase, use a 17 mm wrench to keep the extension from spinning and a 10 mm to unscrew the drain bolt. Always use a new washer when reinstalling the drain bolt. Torque the drain bolt to 8.1 ft-lbs. to get a tight seal.

This engine holds 0.6 quarts of 5w20 oil. When filled, the oil level should come up to the bottom edge of the filler neck opening.

Spark Plug

The spark plug is above the cylinder head, just to the right of the muffler. Wait 20-30 minutes after running the engine before checking the plug to prevent burns from the exhaust.

The spark plug gap should be between 0.028 to 0.031 inches. When installing the plug, torque it to 13 ft-lbs.

Tracks

With 11 lb-ft. of pressure on the top center of the tread, the tread should deflect 7/16 to 5/8 inches. Tension is controlled by tensioner bolts on the rear axle. To change the tension, loosen the outer lock nut, then turn the inner tension nut. Once the tension is correct, torque the lock nut to 16 ft-lbs.

Tires

On wheeled models, the tires should be aired up to 20 PSI. When checking the tire pressure, be sure to check the tire surface for signs of damage and dry rot, replacing as needed.
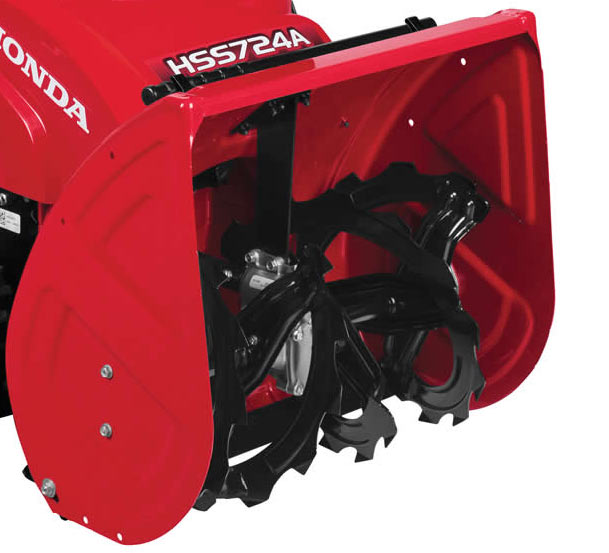
Shear Bolts

Shear bolts are designed to snap if the auger or impeller is jammed, cutting power transfer. Always use genuine Honda shear bolts to ensure they break away before your machine is damaged.

If a bolt breaks, shut off the engine and wait until everything on the snow blower has come to a complete stop before walking to the auger.

Inspect the auger housing for debris build-up or other issues that may have caused the break. Once the problem has been addressed, the broken bolts can be replaced. HSS724 snow blowers use two types of shear bolts:

The carriage shear bolt is for the impeller. It goes into a hole directly behind the transmission.
The auger connects to the transmission using a pair of standard shear bolts. These go in holes next to the transmission. All shear bolts thread into 6 mm self-locking nuts.

Skid Shoes and Scraper

Shoe wear: If the edge of the shoe is less than 0.02 inches thick, flip the shoe upside down to use the other edge. If both edges are worn, replace the shoe.

Shoe and scraper adjustment: If your model has track drive, push auger height adjustment lever and push on handlebars to raise to max position. Release pressure on the bars and let the auger slowly lower until the skid shoes contact ground.

Loosen bolts and adjust the height to meet snow conditions:
Normal clearing conditions – 5/32-5/16 inches
Ice-covered surfaces – 0-3/16 inches
Rough, uneven surfaces – 1-1 3/16 inch

Scraper ground clearance should be 3/32 to 5/32 inch under all operating conditions.

Torque scraper bolts to 18.5 lb-ft. and skid shoe nuts to 19.5 lb-ft.

Battery

Electric start models have a battery inside a housing next to the handles. Check the voltage every 6 months. If the output is under 12.9 volts, it needs to be recharged at 1.2 amps for 5-10 hours.

Get the Quality OEM Parts You Need for Your Snow Blower

Hondalawnparts.com is an authorized Honda Engines and Honda Power Equipment dealer. That means we’re able to ship OEM parts and accessories for your snow blower and its engine to any location in the U.S. or Canada. Our site has a section for commonly needed snowblower parts including belts and shear pins, or you can use our search engine to find parts specific to your model.

Servicing Honda Single Stage Snow Blowers

Honda Single Stage SnowblowerDo you want to make sure your Honda single stage snow blower will be reliable and deliver maximum performance? Here’s everything you need to do to keep your HS720AM, HS720AS or HS720AA performing at its best.

Maintenance Schedule

Before use: Check the oil and scraper blade.
Every year before use: Change the oil. Inspect the spark plug, auger clutch, auger paddles and chute guide lever (if equipped.)
Every year before storage: Check the spark plug and drain the fuel tank and carburetor. Grease the chute tension bolts if you have an AM blower.
After the first 5 hours of use and every 50 hours of operation: Change the oil.
Every 100 hours: Check the spark plug.
Every 150 hours: Replace the spark plug.

Honda recommends having the snow blower professionally serviced every 100 hours to check engine speed and valve clearance, and every two years to inspect the fuel system.

Oil

Oil should be checked with the dipstick inserted in the filler neck but not screwed in. Honda recommends 5W30 oil when temperatures are above 10°F and 5W20 when operating in weather below 10°F.

1. Place the snow blower on a level surface.
2. Place a drain pan between the wheels.
3. Remove the dipstick.
4. Remove the drain bolt and washer from the back of the engine, next to the filler neck.
5. Install the drain plug, using a new washer.
6. Add oil through the filler neck. Stop when the oil is at the edge of the neck.
7. Install the dipstick.

Spark Plug

Let the engine cool off before removing the spark plug.

1. Open the plug access panel next to the fuel filler cap. Disconnect the spark plug cap, then unscrew the plug using a spark plug wrench.
2. Replace the plug if it’s heavily worn or has cracks or other damage. Set the gap to 0.028-0.031 inches.
3. Screw the plug in by hand, then tighten it down with the wrench. If the plug is new, rotate the plug a half turn after it seats to crush the sealing washer. Honda recommends torquing the plug to 14 ft-lbs. if you have a torque wrench on hand.
4. Snap the access panel back into place.

Clutch Lever and Belt Tension

To check the tension, squeeze the bail until you feel some resistance. Measure the distance between the bail and the handle: it should be between 7 ½ and 8 inches.

There are several adjustment holes for both the clutch spring and the cable near the base of the handle. Slide the cover up to expose the spring and access these holes. Moving the spring down one hole adjusts the lever distance by ¼ inch, and adjusting the cable position moves it by 3/8 inch.

To check the belt tension, slide the spring cover up on the drive cable. Engage the auger clutch bail. The spring should be 2.93-3.15 inches long. To adjust the tension, move the cable end from the lower hole to the upper hole on the bail.

Auger Paddle

To inspect the paddles, place the snow blower on a level surface. Disconnect the spark plug and turn the fuel valve off to prevent an accidental start. Measure the distance between the edge of the paddle and the metal part of the auger. If the distance is less than 5/8 inch, have the paddles replaced by a dealer.

Scraper Blade

To check the blade alignment, place the snow blower on a level surface. Disconnect the spark plug and turn the fuel valve off to prevent an accidental start.

The blade should be level and come in contact with the ground. The distance between the lower rubber paddle and the ground should be 1/16-1/8 of an inch. If the blade is uneven or the paddle is too high, adjust the blade. If the blade is less than 1/16” thick, replace it.

To adjust the blade, tilt the snow blower forward. Loosen the three flange nuts and move the blade. Tighten the nuts and recheck the clearance.

If the blade needs to be replaced, simply remove the nuts, washers and carriage bolts, then remove the old blade. Install the new blade, reusing the fasteners. Check the blade adjustment.

Chute Guide Cable (A and AS models)

Pull the chute control lever rearward. The chute should point up with the top of the deflector lining up with the back of the chute. Push the lever down. The deflector should be pointed up just slightly.

If the deflector isn’t moving through its full range of motion, loosen the lock nut on the end of the cable next to the deflector. Turn the adjusting nut below it to change the cable tension, then tighten the lock nut, torquing it to 48-83 in-lbs.

Get the Parts You Need for Your Honda

Need to make some repairs to your snow blower? Hondalawnparts.com isn’t just for mowers: we carry OEM parts for everything from Honda Engines and Honda Power Equipment. Our site can show you parts specific to your mode using factory diagrams and descriptions, so it’s easy to find what you need. We ship across the USA and Canada.

Picking the Right Snowblower

HS1336iAS Snowblower OperationBuying a snow blower can be confusing: Honda has 14 models, letting you pick from two auger types, three starting systems, and three drive systems, not to mention various widths and snow capacities. Which one is right for you? Here’s how you can narrow down the selection.

Size and Power

For the best performance, you should plan on some overlap with each pass so the effective clearing width will be 20% narrower than the actual auger width. If you’re nearing the maximum capacity of a snow blower, you should plan on a 50% overlap.

Snow density can vary a lot between snowfalls, so it’s hard to directly correlate power to snow clearing ability. Fresh snow can weigh as little as three pounds per cubic foot, while settled snow can top 19 lbs. and packed snow can reach 25 lbs.

When selecting a snow blower, your primary concern should be the width and depth of snow the auger housing can handle. Once you narrow down your choices, choosing a model with a higher pound per minute rating will let you clear snow with less overlap between passes.

Wheel or Track Drive?

Track drives handle packed snow and slopes better than wheels. Choose a track drive if you need to clear snowbanks, snow that has been driven on. A track drive snow blower is also a good choice if you need to clear snow off of a flat industrial roof.

Snow blowers with wheels are easier to turn, saving time and effort when clearing flat surfaces like driveways and parking lots.

Single or Two Stage?

A single stage snow blower has an auger that spins fast enough to pick up snow and push it out of the chute. This mechanical simplicity makes these machines light and easy to maneuver.

A two-stage snow blower lifts snow off of the ground with a low-speed auger, then pushes it out of the chute with a high-speed impeller. This helps the machine pick up heavy snow and throw it further so it can clear wide areas.

A single stage snow blower like the HS720 is ideal for clearing paved sidewalks and driveways for single or two-car garages and works best for snow under 9 inches thick. If you need to clear larger areas, uneven surfaces or major accumulation, get a two-stage snow blower.

Electric or Recoil Start?

Honda engines are easy to start in cold weather, and all models have a recoil starter, whether it’s the only way to start the engine or it serves as a backup for the electric starter.

The HS720AS uses an AC motor to start the engine, which needs to be plugged into an electric outlet to work. All other electric start models have a built-in 12-volt battery that powers a DC motor so the starter can be used anywhere.

Hydrostatic Drive, Hybrid Drive or No Drive?

Honda’s single stage blowers have no drive system, but as the auger’s rubber paddles scrape against the ground, they help pull the machine along when applying light pressure to the handles.

All but one two-stage Honda snow blower comes equipped with a hydrostatic drive. By varying fluid flow inside of the transmission, the speed can be infinitely adjusted while letting the engine run at full power to operate the augers.

The hybrid power system on the HS1336iAS uses electric motors to operate the tracks. These motors produce maximum torque as soon as they start moving, making it the best model for clearing snow on slopes. The motors can also be used with the engine off for easy transport.

Do I Need Drift Cutters?

These are a must-have if you live in a place that gets frequent heavy snowfall. Snow drifts are created by wind gathering snow in one spot, creating a large hump that resembles a sand dune. Drift cutters are blades that extend above and ahead of the auger housing, slicing through these drifts so the snowfall into the path of the snow blower. This keeps the tops of drifts from collapsing onto the snow blower and the pavement. Drift cutters can be fitted to any two-stage snow blower.

Do I Need a Cold Weather Cab?

Wind chill can make a cold day uncomfortable or even dangerous. At 20°F, a 20 mph wind results in a wind chill of 4°F. A snow cab might not look like much, but by shielding your body from the wind, you’ll be a lot warmer. Honda makes cabs for all two-stage models.

Where Can I Get Parts and Accessories?

No matter which model you choose, you can get all the OEM parts and accessories for your Honda snowblower at www.hondalawnparts.com. Finding parts is easy: check out our “Snow Blower Parts & Accessories” section, or search for your model to see everything that fits your machine. We ship across the United States and Canada.

Setting Up the HS720AM, AA and AS Snowblowers

hs720am snowblower

Honda’s 720AA, 720AS, and 720AM snowblowers may be small, but they deliver enough power to clear driveways and sidewalks, making them a great choice for homeowners. If you just picked one up to use this winter, there are a few steps you need to take to get your new equipment up and running.

What You’ll Need

These snowblowers are heavy, and the shipping carton is designed so that the blower must be lifted straight up for removal, so it’s a good idea to have someone on hand to help you get everything out of the box.

You’ll also need a few tools to set up your new snowblower:

– A gas can filled with fresh gas. While not required, it’s a good idea to use a stabilizer with the fuel since it may be weeks or months between snowfalls.
– A small funnel
– 12 mm wrench
– 10 mm wrench (720AM only)
– #2 Phillips head screwdriver (720AM only)
– Clean rags

A bottle of oil is included with the snowblower and can be found in a plastic bag with the owner’s manual.

Model and Serial Number

The model information can be found on a tag on the base of the snowblower at the back. This information will be needed to register your snowblower with Honda and to order parts. There’s a place to write this down in your owner’s manual for easy reference.

Adding Oil

Remove the dipstick from the filler neck, located on the back side of the snowblower on the bottom left side. Using the funnel, pour the included oil into the engine. The crankcase is full once oil starts dripping out of the filler neck. Screw in the dipstick.

Handlebar

Gently unfold the handle, taking care not to pinch the control cables. Use the 12 mm wrench to tighten down the nuts where the two halves of the handlebar meet. Remove any cardboard packaging.

Spark Plug

Remove the spark plug door, located on the top of the snowblower housing. Clip the spark plug cap onto the plug and snap the door back into place.

Chute

The chute needs to be installed on the 720AM. Place the chute over the discharge opening near the front of the snowblower and line up the screw holes. Slide the screws into the holes through the inside of the chute and thread on the nuts from the outside. Tighten down the screws with the screwdriver and 10 mm wrench. Once installed, move the chute around to ensure it fits correctly and doesn’t bind.

On 720AS and AA models, the operation of the remove chute controls should be checked before use. Move both the pitch and angle levers through their full length of motion to make sure the cables are operating correctly and the chute doesn’t bind.

Fuel

Remove the fuel tank cap on the top of the snowblower and add gas. The tank is full once the fuel level reaches the bottom of the filler neck.

First Start

The controls for the engine are located on the rear of the snowblower body. Turn fuel valve to “ON,” turn the engine switch to “ON,” and pull the choke. Pull the recoil starter lightly until you feel resistance, then give it a hard pull. If everything was set up correctly, the engine should fire up. Push in the choke.

When you’re ready to stop the engine, turn the engine switch to “OFF” and the fuel valve to “OFF.”

Electric Starting (720AS)

Connect the starter box, located to the left of the chute angle control, to a grounded three-prong outlet using a three-prong outdoor-rated extension cord. Turn the fuel valve to “ON,” turn the engine switch to “ON,” and pull the choke. Press the start button on the starter box until the engine fires up. Once the engine is running, push in the choke and disconnect the extension cord.

Belts and Shear Pins

The drive belt and shear pins are designed to fail if something gets jammed in the auger to prevent damage to more expensive components. Have some spares on hand will let you quickly repair your snowblower after the obstruction has been removed.

Where can you buy them? www.hondalawnparts.com. We’re a certified dealer for Honda Power Equipment, letting us provide everything you need from shear pins to major components. Finding parts is easy: just select your model and serial number range, and our site can show you factory parts diagrams and descriptions to help you identify exactly what you need. We ship across the U.S. and Canada.

Which Snowblower is Right for You?

Which Snowblower is Right for You

It’s that time of year again: the leaves have fallen and the grass has stopped growing, replacing lawn care with snow removal. What Honda snowblower will fit your needs?

Single-Stage vs. Two-Stage

A single-stage snow blower uses one auger to pick up snow and push it through the chute, while a two-stage snowblower adds a second auger to push snow through the chute. This lets two-stage blowers throw snow farther so they can clear larger areas. Honda’s single-stage blowers can throw snow up to 33 feet away, while their two-stage blowers can throw snow between 49 and 56 feet away, depending on the model.

Drive System

Honda’s single-stage snowblowers are “semi-self propelled.” There’s no drive system, but the action of the auger digging through the snow helps pull the machine along the ground, reducing the force needed to push the blower through the snow.

All two-stage snowblowers except the HS1336iAS come with a hydrostatic drive like you’d find on a riding mower. The wheels are driven by a hydraulic system that can be infinitely varied to get the speed you want.

The HS1336iAS uses a hybrid drivetrain. The engine powers the augers, while electric motors power the tracks. While there are efficiency benefits to this system, its biggest advantage is the motors’ ability to deliver maximum torque as soon they start moving. This keeps the blower rolling in situations that would bog down other equipment. It also has a transport mode, allowing the snowblower to be moved around without starting the engine.

The HSS1332AT, HSS1332ATD, and HS1336iAS use a track drive system, which gives them the grip needed to clear snow on inclines.

Starting

The HSS928AWD, HSS1332ATD, and HS1336iAS all have electric starters. Unlike most snowblowers on the market, these starters are powered by the on-board batteries, so there’s no need to plug it into an outlet.

All other models use a standard recoil starter, but since the engine has an automatic decompression system, they’re easy to turn over, even in cold weather.

Height, Width, and Pounds per Minute

A snowblower has a maximum snow height it can handle and a maximum width it can remove with each pass. While it’s technically possible to reach the maximum width and height, the actual amount it can handle without bogging down will depend on snow density, which can vary a lot: a cubic foot of light snow may only weigh 7-8 pounds while the same amount of hard pack snow can weigh well over 20 lbs. To make apples-to-apples comparison easier, Honda includes a pounds-per-minute rating, which is how much snow the machine can move regardless of depth. All things being equal, a snowblower with a higher pounds-per-minute rating will be able to cut through a wider strip of snow with each pass.

Chute Control

Honda’s smallest model, the HS720AM, uses a simple chute control: the height is adjusted using a pair of bolts, while the direction can be changed by turning the chute using the handle.

Most models come with Honda’s Snow Director. This uses two levers mounted on the handle to change the direction of the chute and the angle of the opening to drop snow exactly where you need it with each pass. The largest models use a power tilt system with similar controls.

Parts

No matter which Honda snowblower you end up purchasing, you can get everything you need for it from skid shoes and shear pins to major components from www.hondalawnparts.com. We’re a certified Honda Power Equipment dealer, which lets us offer the full line of OEM parts. Finding what you need is easy thanks to our advanced search engine that has built-in factory diagrams and descriptions. We can ship your order to any address in the U.S. or Canada.

How to Avoid Fuel-Related Problems for a Honda HS720AM Snow Thrower

Honda HS720AM Snow ThrowerHonda designed and built the model HS720AM Snow Thrower for powerful, reliable performance in any snow conditions. The condition of the fuel is critical in the machine’s performance. Unfortunately, fuel can deteriorate in a short amount of time, which can corrode and damage engine parts. Also, the manufacturer’s limited warranty does not cover system damage and engine problems caused by substandard fuel. Thankfully, users can avoid problems and extend the life of their Honda Snow Thrower by following through with the manufacturer’s recommendations below. Continue reading

Honda Snow Blower Shear Bolt Replacement Tips

Snow blowers commonly encounter obstructions while in use, such as rocks or children’s toys. When an auger impacts a solid object, significant stresses are imparted to the auger, the motor, the gearbox, and the blower. To prevent damage to these expensive components, snow blower manufacturers commonly use shear pins or shear bolts that are designed to fail above a certain stress threshold. This will permit the auger to spin freely, thus relieving the stresses on it and the driveline. Honda uses shear bolts in their snow blowers.

Continue reading