Maintaining Your EB2800i or EG2800i Generator

Maintaining Your EB2800i or EG2800i Generator

The EB2800i and EG2800i are the latest generators from Honda, and as with any new design, maintenance requirements and procedures are a little different from older models. Here’s what you need to know to keep your generator running like new for years to come.

Safety

Carbon monoxide build-up from the generator’s exhaust can kill you. Even if you’re just starting the motor to check how it’s running, it should first be moved outdoors.

Unless you’re changing the oil, make sure the engine has had time to cool down before you start working it. Some parts, like the exhaust, can stay hot enough to cause burns up to a half hour after use.

Oil

The engine oil should be changed after the first 5 hours or month of use, then every 50 hours or 6 months thereafter. Always check the engine oil before using the generator.

To check the oil, remove the dipstick/filler cap from the oil filler neck, located on the engine at the back of the generator. Wipe the dipstick clean, then insert it into the filler neck without screwing it in. The level should be between the marks on the dipstick.

To change the oil, let the engine run long enough to get warm, but not hot to help the oil flow out of the engine, taking dirt and sludge along with it.

Support the generator on blocks, keeping it level to provide space to slide an oil drain pan underneath it. The drain bolt is located at the base of the engine to the left of the dipstick. Remove the dipstick/filler cap and the bolt to let oil flow out of the engine. Once the oil has drained, reinstall the plug using a new sealing washer.

Using a funnel, refill the engine with SAE 10W30 oil. The oil level is correct when it reaches the edge of the filler neck. Reinstall the dipstick/filler cap.

Air Filter

Check the air filter before using the generator, and clean it every 25 hours or three months of use. If you use the generator in a dusty area, clean the filter more frequently.

The air cleaner box is located on the left side of the generator near the control panel. To access the filter, push in the tabs on the top of the cover and swing the cover downward. The air filter should come out with the cover.

The air filter uses three components: a paper element, a foam element and a plastic screen that separates these elements. Dust can be cleaned from the paper element by knocking it against a hard surface. The foam element should be cleaned by rinsing it in warm water and dish detergent. Once dry, soak the foam element in clean engine oil. Squeeze out any excess oil before installing. The easiest, cleanest way to do this is by putting the filter and oil in a resealable plastic bag.

When reinstalling the filter elements, the foam element should be placed above the tabs inside the cover. Follow this with the plastic screen and the paper element. Reinstall the cover on the motor, making sure the rubber seal fits into the groove on the inner half of the air box.

Spark Plug

Check the plug every year or 100 hours of operation, and change it every two years or 250 hours.

The spark plug is located at the top of the engine. It can be reached from the back of the generator between the two humps in the gas tank.

To remove the spark plug, disconnect the plug wire, then unscrew the plug with a 13/16 inch or 21 mm plug socket or wrench. The plug should be replaced if it’s fouled, has a worn electrode or shows cracks in the insulator. The plug gap should be between 0.028-0.031 inches (0.7-0.8 mm.)

To reinstall, screw the plug in by hand to keep it from cross-threading. Tighten down the plug with the plug socket or wrench, tightening 1/8-1/4 of a turn once the plug is seated. If the plug is new, tighten it 1/2 turn to ensure the plug washer makes a tight seal. Reconnect the plug wire.

Spark Arrester

The arrester should be cleaned every year or 100 hours. Unlike other Honda equipment, these generators always come with an arrester from the factory.

Disconnect the spark plug wire to prevent an accidental start. Remove the screw on the side of the exhaust opening with a Phillips or 4 mm screwdriver and slide the plug arrester out of the muffler. Use a wire brush to clean carbon deposits off of the arrester screen. If there are cracks or holes in the arrester, it should be replaced. Reinstall the arrester and reconnect the plug wire.

Getting Parts for Your Honda Generator

From spark plugs to spark arresters, if it’s Honda, you can get it from www.hondalawnparts.com. As a certified Honda Power Equipment dealer, we’re able to ship the full line of Honda OEM parts and accessories across the U.S. and Canada.

Setting Up the EB2800i and EG2800i Generators

EB2800i

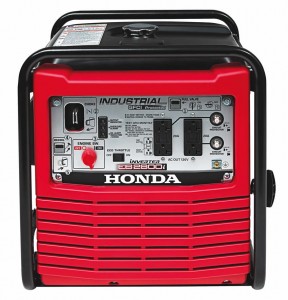
The EB2800i and EG2800i are recent additions to Honda’s generator lineup, combining low noise and low weight with tough frame construction. If you just bought one of these models, there are a few things you should know before you start using it.

Safety

Running an internal combustion engine indoors can kill you in just a few minutes, even if you have doors and windows open. Carbon monoxide in the exhaust keeps red blood cells from carrying oxygen, leading to asphyxiation and death. Plan ahead by getting extension cables to deliver power where you need it while leaving the generator outside. Always run the generator at least three feet (one meter) away from any building walls or roofs.

If you hook your generator up to your household wiring, you are legally required to have it connected to a transfer switch installed by a professional electrician. This switch cuts the connection between the house wiring and the grid, where it could electrocute line workers.

What You Need to Set Up Your Generator

Every generator Honda makes is tested at the factory. There may be some residual fluids left over, but gas and oil still need to be added during setup. Unlike some equipment, oil is not included in the box. Honda recommends using SAE-certified 10W30 motor oil for most operating conditions. Along with oil and fresh gas, you’ll also need a long funnel to add oil to the engine.

Unboxing the Generator

These generators weigh a little under 70 lbs so they can be moved by a single people. The box is designed so that the generator can be lifted straight up out of the top. Inside, you should find three items:

  • The Generator
  • The Owner’s Manual
  • A registration card

Your generator can be registered by sending in the registration card, filling out a form on the Honda Power Equipment website, or scanning the QR code in the “Registration” section of the owner’s manual. You need to register your generator to get recall information and make warranty claims.

Oil

Add oil before trying to start the generator. Even with the Oil Alert system, it’s possible to damage internal components by repeatedly turning over the engine.

To add oil, start by unscrewing the oil dipstick/cap, located at the base of the engine next to the frame rail. Pull it out and set it aside.

Place a rag under the filler neck and use a funnel to add 10W30 oil to the crankcase. It should take between 12-13.5 oz. (340-380 ml.) The oil is at the right level once it’s at the edge of the filler neck. Screw the dipstick back into the engine.

The Oil Alert system will shut down the engine if there isn’t enough oil in the crankcase. Indicator lights for the system are located on the front panel.

Fuel

The engine can run on automotive gasoline that has an octane rating of at least 86 and a maximum of 10% ethanol. This fuel should be fresh, purchased within 30 days, or within 90 days if it has been treated with a stabilizer: if you store the generator for long periods, it’s a good idea to drain the fuel tank and carburetor. The tank should be filled no higher than the red fuel level mark inside the tank screen.

Starting

Even if it’s the first time or fiftieth time you’re starting the engine, the procedure remains the same:

1. Find the fuel lever, located between the fuel tank and the engine on the starter grip side, to “ON.”

2. Turn the Eco-Throttle switch, located on the control panel to the right of the engine switch, to “OFF.”

3. Pull out the choke rod, located on the upper left of the control panel, to the closed position.

4. Turn the engine switch to “ON.”

5. Hold down the generator with one hand, then gently pull the starter grip until you feel resistance with the other hand. Give the grip a hard pull. It should start.

6. As the engine warms up, slowly move the choke lever back in. Let the generator warm up for three minutes. If the engine runs fine with the choke completely open, the generator is ready to use.

Stopping

Again, there’s no special procedure for your first use of the engine.

1. Disconnect any cables or appliances connected to the generator.

2. Turn the engine switch to “OFF.”

3. Turn the fuel lever to “OFF.”

Getting Parts for Your New Generator

If you want genuine Honda oil for your generator’s engine, or you need parts for maintenance and repairs over its life, you can get everything you need at www.hondalawnparts.com. Our site makes it easy to find parts by letting you search by your model and see factory diagrams and descriptions, so you know you’re ordering exactly what you need. We ship across the U.S. and Canada.

Using a Honda Generator During Storms

Honda GeneratorA Honda generator can keep power going when a storm cuts your home’s connection to the grid so you can keep televisions, radios, and phones on to monitor the forecast while keeping a few appliances running for comfort. However, getting the generator up and running can be daunting during bad weather. With a little planning, you can make the switch from grid to generator power a lot easier.

Storage

Like any piece of small engine equipment, a generator needs to be kept in a cool, dry place. However, it also needs to be in a place that will be accessible during a storm, letting you position it where it can be used. That means carrying it or rolling it to a place that keeps it at least three feet away from buildings so that carbon monoxide from the exhaust won’t reach lethal concentrations. Make sure you can easily move the generator from its storage spot to its operating spot, taking care of any obstacles that may be in the way.

Cords

Since you can’t bring your generator into your home, you need a way to get power from it to the appliances you want to use. When shopping for extension cords, make sure to check the amperage: it needs to be at least as high as the maximum amp output of the socket it will be plugged into.

Larger generators include a twist lock outlet. This keeps the cord attached at the generator end when running long distances, but it also requires a special extension cord with the right end. The type of twist lock cord you’ll need will depend on the power mode and attached appliances: all Honda generators can produce 120-volt power, while some have the ability to make 240-volt power for high-demand appliances and can even switch some outlets between 120 and 240-volt output. Cords are available with ends including multiple 120-volt sockets that use power directly, converter cables that turn 240 volts into 120, and 240-volt sockets for high power demand devices like water pumps. 120-volt power is fed through an inverter to get a clean waveform that’s safe for sensitive electric devices, but 240-volt power comes directly from the generator and shouldn’t be used for these devices.

Fuel

The fuel used in your generator should be no more than 30 days old, or 90 days old if it’s been treated with a stabilizer. Instead of storing fuel just for the generator, keep some fuel on hand for the generator and other power equipment including mowers and lawn care tools so it’s used up quickly. Honda’s generators can run for several hours on a tank of gas, so one full tank should be enough to keep appliances going until the power is restored or it’s safe for you to leave your home and buy more fuel.

Oil

Honda’s Oil Alert system will shut down the engine to prevent it from being damaged if there isn’t enough oil, but that also means your generator won’t be able to make power. Keep some extra oil on hand and check the oil level before moving the generator out of storage.

Linking the Generator to Your Home Wiring

Your generator can feed into your home’s electrical system directly using a transfer switch. This device is required by law when linking a generator to home wiring because it isolates your home from the grid. Without this switch, power can enter the grid, shocking workers who are trying to repair the lines. This switch needs to be installed by a professional electrician to make sure it’s working correctly. Once installed, the generator can be moved to the switch and plugged in so it can supply electricity when the power fails.

Keep Your Generator Running with Genuine Honda Parts

As a certified Honda small engine equipment dealer, www.hondalawnparts.com carries everything you need for your Honda equipment. Along with replacement parts for your generator, we carry genuine Honda accessories including transfer switches and cable adapters so you can rest easy knowing you’ll be ready when storms strike. We ship across the U.S. and Canada.

Taking Your Honda Generator Tailgating

honda-generatorNo matter what sport you’re into, half the fun of going to a game or a race is the tailgating. With a little preparation, a Honda generator can help you get the most out of your party by letting you watch the pre-game show on TV, outfit your mobile kitchen and keep some cold drinks on hand.

How Many Watts Do I Need?

Generators are rated in maximum watts for temporary loads and running watts for long term use. To get the right size generator, you need to figure out how much power you need for the devices you plan on using. Most appliances have a label clearly outlining power demands, but there are a couple things to watch out for.

A heating element on an electric hot plate or a hair dryer may have the watts stated clearly on the side of the device, but this is a measurement of heat energy, not electrical energy. If there isn’t an electric label, plan on using 60% more than the stated heat wattage.

Watts = Amps X Volts. If you have an appliance only rated in amps, simply multiply that number by 120 to get the watts.

Electric motors are “reactive” loads, using up to three times as much power to start as they do to run. Appliances that have electric motors include air conditioners, blenders, fans, and refrigerators. Since air conditioners and refrigerators cycle on and off constantly, it’s best to have enough capacity to handle the peak load at any time. With other appliances, you can plan around this load, switching off a few things before starting them up, then switching everything back on once the appliance is running.
Resistive loads like TVs and toasters always draw the same amount of current when they’re on.

Are Electronics Safe to Use with a Generator?

Honda generators come equipped with inverters that convert the generator’s power into a clean AC waveform that won’t damage sensitive electronics including TVs and computers.

How Do I Set Up My Generator?

Like any internal combustion engine, the motor in your generator makes carbon monoxide, which can be poisonous in high enough concentrations. Never place it under awnings or tents where the exhaust gasses can collect. Placing it downwind will keep the exhaust from blowing over the area you’ll be partying. Using a high amp extension cord will reduce resistance, taking a load off of your generator and the equipment connected to it. For most uses, the best route is to get a cord designed for the locking plug that ends in multiple 120v outlets.

While it’s easy to get an extension cord made for outdoor use, you’ll probably end up using a few devices intended to be used only in the home. GFCI protection is built into the outlets on your generator to reduce the chance of shorts, but some extra precautions should be taken to help keep your appliances away from water. Make sure they’re kept off of the ground and have some sort of weather protection to keep them from getting wet and inspect cords for damage before plugging them in.

How Loud is the Generator?

Most Honda recreational generators are housed in a case that helps quiet engine noises. At most, the generator will make 65 dBa under full load, which is about the same as a normal speaking voice. Since the generator will be at least a few feet away from where you’ll be hanging out, the sound will be drowned out by TVs, radios, and talking.

How Can I Get the Most Out of My Appliances?

If you tailgate regularly, it may be worth investing in an outdoor refrigerator. These are built to keep items cool in a wide range of environments, and if they’re UL listed, they’ve undergone a series of tests to ensure they won’t short if they get wet. Likewise, outdoor TVs are built to both withstand moisture and manage heat through a wide range of temperatures, while the life of a standard TV will be shortened considerably if it gets cold or overheats.

You can reduce the load that refrigerators, freezers, and refrigerated coolers put on your generator by filling them with pre-chilled food. If you have a freezer or cooler, fill any remaining space with ice to create a thermal buffer.

Where Can I Get Parts to Keep My Generator Working?

www.hondalawnparts.com is a certified dealer for Honda Power Equipment. We stock parts for Honda generators and the motors that power them, and we can ship those parts anywhere in the U.S. and Canada. Finding the right part is easy thanks to our advanced search system that integrates factory diagrams so you can see where the part fits on your machine.

Choosing the Right Honda Generator

generatorNeed a generator? Honda’s reliable engines, automatic power control and high-quality components make their generators a great choice. Which Honda generator should you buy, though?

That depends on how and where you’ll use it.

Which Kind of Generator Do I Need?

Honda divides their generator lines into industrial, recreational and home use. These are the main differences between the models:

  • EU-i Series recreational generators are designed to be portable.
  • EU Series RV generators are designed to be quiet.
  • EM and EG Series home generators are built to run several hours on each tank of fuel.
  • EB Series industrial generators have GFCI outlets for ground fault protection.

Continue reading

How to Tune Up a Honda EB11000 Generator

How to Tune Up a Honda EB11000 Generator

Tuning up a Honda EB11000 generator allows you to get the most out of the system, especially after extended periods of use. If you have an older system, it is important to regularly maintain it, as this allows you to prevent breakdowns and malfunctions in the way the system operates.  One of the most regular parts of the maintenance process is removing and cleaning the oil and air filters. To change or clean the oil filter, drain the engine oil before retightening the bolt. When it is removed, clean the mounting base and discard the old oil filter before replacing it with a new one. Screw back on and use as necessary. For the air filter, remove the wing bolt and remove the air foam from the filter’s body. Depending on the condition of the air filter, you can wash it with regular water for a quick clean or have it replaced entirely if it is older and more worn out.
Continue reading

Replacing Parts on an EV4010 Honda Generator

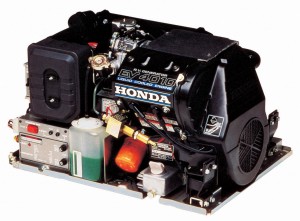
Honda EV 4010

Honda is known for its quality cars and engine designs, and that fact extends to their generators too. Hook up the EV4010 generator to your recreational vehicle or home. You’ll have immediate power for all of your critical electrical items. Although Honda generators are reliable machines, they aren’t maintenance-free products. In fact, you need to stay on top of their maintenance schedule so that they can work without a hitch. Take a look at the maintenance and parts replacement tasks you will need to perform, so that your Honda EV4010 generator can stay in tip-top shape.

Continue reading