Which Snowblower is Right for You?

Which Snowblower is Right for You

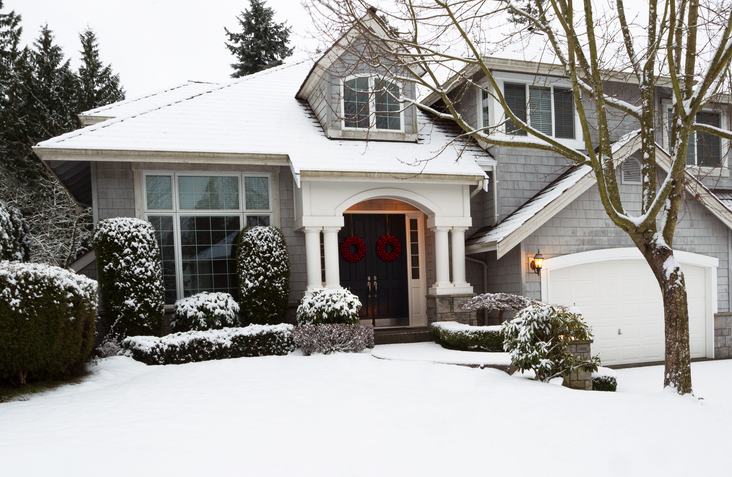
It’s that time of year again: the leaves have fallen and the grass has stopped growing, replacing lawn care with snow removal. What Honda snowblower will fit your needs?

Single-Stage vs. Two-Stage

A single-stage snow blower uses one auger to pick up snow and push it through the chute, while a two-stage snowblower adds a second auger to push snow through the chute. This lets two-stage blowers throw snow farther so they can clear larger areas. Honda’s single-stage blowers can throw snow up to 33 feet away, while their two-stage blowers can throw snow between 49 and 56 feet away, depending on the model.

Drive System

Honda’s single-stage snowblowers are “semi-self propelled.” There’s no drive system, but the action of the auger digging through the snow helps pull the machine along the ground, reducing the force needed to push the blower through the snow.

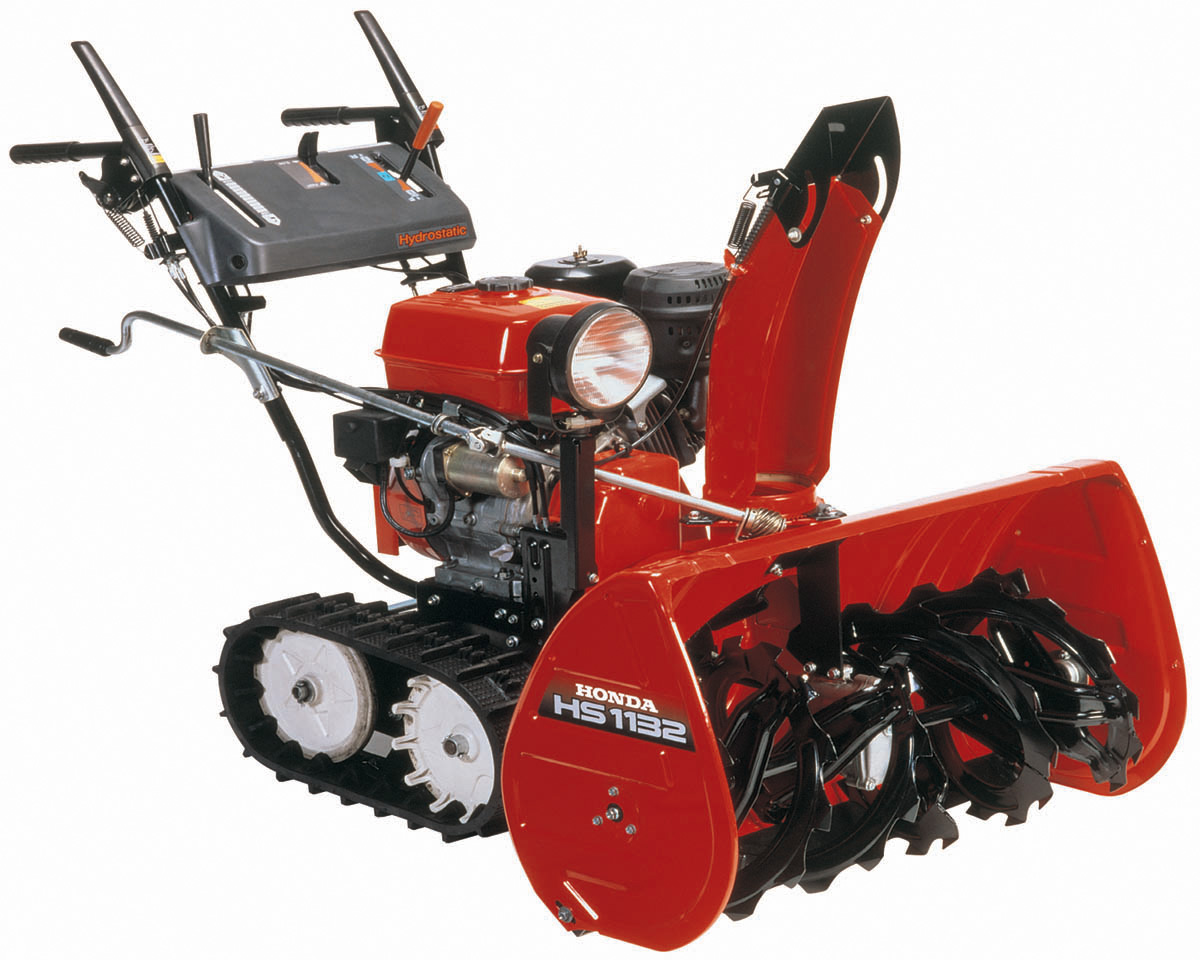
All two-stage snowblowers except the HS1336iAS come with a hydrostatic drive like you’d find on a riding mower. The wheels are driven by a hydraulic system that can be infinitely varied to get the speed you want.

The HS1336iAS uses a hybrid drivetrain. The engine powers the augers, while electric motors power the tracks. While there are efficiency benefits to this system, its biggest advantage is the motors’ ability to deliver maximum torque as soon they start moving. This keeps the blower rolling in situations that would bog down other equipment. It also has a transport mode, allowing the snowblower to be moved around without starting the engine.

The HSS1332AT, HSS1332ATD, and HS1336iAS use a track drive system, which gives them the grip needed to clear snow on inclines.

Starting

The HSS928AWD, HSS1332ATD, and HS1336iAS all have electric starters. Unlike most snowblowers on the market, these starters are powered by the on-board batteries, so there’s no need to plug it into an outlet.

All other models use a standard recoil starter, but since the engine has an automatic decompression system, they’re easy to turn over, even in cold weather.

Height, Width, and Pounds per Minute

A snowblower has a maximum snow height it can handle and a maximum width it can remove with each pass. While it’s technically possible to reach the maximum width and height, the actual amount it can handle without bogging down will depend on snow density, which can vary a lot: a cubic foot of light snow may only weigh 7-8 pounds while the same amount of hard pack snow can weigh well over 20 lbs. To make apples-to-apples comparison easier, Honda includes a pounds-per-minute rating, which is how much snow the machine can move regardless of depth. All things being equal, a snowblower with a higher pounds-per-minute rating will be able to cut through a wider strip of snow with each pass.

Chute Control

Honda’s smallest model, the HS720AM, uses a simple chute control: the height is adjusted using a pair of bolts, while the direction can be changed by turning the chute using the handle.

Most models come with Honda’s Snow Director. This uses two levers mounted on the handle to change the direction of the chute and the angle of the opening to drop snow exactly where you need it with each pass. The largest models use a power tilt system with similar controls.

Parts

No matter which Honda snowblower you end up purchasing, you can get everything you need for it from skid shoes and shear pins to major components from www.hondalawnparts.com. We’re a certified Honda Power Equipment dealer, which lets us offer the full line of OEM parts. Finding what you need is easy thanks to our advanced search engine that has built-in factory diagrams and descriptions. We can ship your order to any address in the U.S. or Canada.

Winterizing Water Pumps

Winterizing Water pumps

Winter is on its way, which means it’s time to think about putting up your Honda water pump for the season. Depending on the model, that may mean removing a submerged pump from a well at a vacation home, stopping work on moving water between ponds or knowing that you won’t need to worry about flooding until the snow melts off. No matter how you use your pump, there are a few things you should do to ensure your equipment will be ready to be put back to work next spring.

Before You Begin

Before working on the pump, disconnect the spark plug to prevent an accidental start. Give the engine some time to cool off before working on it: some parts of the engine including the head and exhaust can remain hot up to a half hour after the motor has shut off.

Running the pump without water, even on self-priming models, can cause the pump seals to overheat and melt. If you need to warm up the engine to change the motor or gear box oil, make sure the pump is shut off.

Cleaning the Pump

The pump chamber should be flushed with water using a garden hose. To ensure all water is drained from the pump, it should be tilted so that the discharge side of the pump is lower than the suction side. Never tilt the pump the other direction: while water may still flow out, this also tilts the engine in a way that will flood the carburetor. A few drops of water may still be inside the pump case, but this isn’t enough to cause freeze damage, and there’s no need to run anti-freeze through the pump for protection.

Electric Pumps

Ice can damage the pump, whether it forms on the pump body or on the power cable. If temperatures are going to dip below freezing, the pump should be pulled out of the well or sump where it’s being used. While it’s out, this is a good time to remove the impeller cover and clean out any debris.

Yearly Service

Servicing your pump now will save you from having to do so when you first need it next season.

If the pump has a separate gear box, the oil should be changed. The engine should be run for a few minutes to warm up the oil so it flows out easily. Refill the gear box with a GL5-rated 80W90 gear oil.

Some models have grease points for the pump connecting rod. In most cases, Honda recommends NLGI Category 2 grease. These components are shielded from water, so marine grease is not required.

The air filter should be inspected and cleaned. Remember that foam elements need to be re-oiled after cleaning and the air box should be wiped out before reassembly.

All nuts and bolts on the pump and engine should be checked for tightness.

Engine

Any fuel inside the engine should be removed before storage. Honda recommends draining fuel that is over a month old or three months old if it has been treated with a stabilizer. Some small engines like the Mini 4 Stroke may need to be tilted to let gas flow out of the tank, while other motors with a removable sediment cup will have a bolt on the base of the carburetor that can be removed to drain the entire fuel system. Either way, this fuel should be drained into a suitable gasoline container and disposed of properly. Using this fuel in your car is fine, as fuel injected motors are less sensitive to stale fuel and the fuel you add will be diluted by the fresh gas already in the tank.

If the engine has a fuel valve, set it to “Off” to prevent any residual fuel from leaking out during storage.

Have an electric pump? The motor shouldn’t need anything outside of normal maintenance before storage, and it should be left alone to make sure it stays sealed off from water, which can cause a short or electrocution during operation.

Storing

Storing the pump indoors will help prevent damage from UV light and extreme temperatures. Since there may be a little fuel left in the motor, it’s best to keep it stored away from ignition sources including power tools, furnaces and anything else that produces a spark or flame.

Keep the pump uncovered. If a tarp is laid over it, moisture can become trapped, promoting rust.

Getting Parts for Your Honda Pump

Hondalawnparts.com carries parts for everything from submersible electric pumps to trash pumps and everything in between. Our site makes finding what you need easy by letting you see factory parts diagrams and descriptions for your model, and we can ship those parts to any address in the U.S. and Canada.

Preparing Your Lawn for Snow

Preparing Your Lawn for Snow

While your lawn might not be foremost on your mind with winter coming, snow and cold can do serious damage. By making preparations now, you can reduce the effects of moisture, cold and snow mold to help your grass come back full and lush next spring.

Control Your Leaves

Left undisturbed, fall leaves can create a thick mat of rotting material that blocks air and sunlight from the grass, keeping it from absorbing the nutrients it needs to survive the winter. Once it starts snowing, this layer holds in moisture that encourages the growth of snow mold.

Honda’s mulching mowers are designed to handle large amounts of lawn debris, even if it’s wet. If you mow frequently as the leaves fall, you’ll be able to turn those leaves into mulch, feeding the soil and reducing the money you need to spend on yard waste disposal. Expect to mow at least twice a week at the peak of the season. If the number of leaves gets out of hand, you should collect and dispose of them either by creating a mulch pile or by having them collected as yard waste.

Fertilize, but Not Too Much

By now, the time for fall fertilizing has passed in most of the country, but if you’re still a few weeks away from winter, now is a good time to get a soil sample tested so you can use the right mix on your soil. Nitrogen is emphasized in fall fertilizer mixes to encourage chlorophyll production and the resulting sugar stores needed to survive the winter, but too much can promote the growth of snow mold. This makes it critical to get the right balance to supplement your grass without opening it up to infection.

Cut Your Grass Short

The less grass you have, the less moisture it can hold. Ideally, the blades should be around an inch in height, but you may need to go a little higher to keep from cutting into crowns. Remember never to mow more than 1/3 of the grass blades at one time. Warm season grasses should stop growing after the first freeze, while cool-season grasses may grow just enough to need one more mow after the initial freeze.

Be Careful with Hibernating Grass

Both warm and cool season grasses should stop growing once temperatures are regularly below 40°F (4-5°C) and enter hibernation. Photosynthesis shuts down, the blades of grass turn brown and the plant starts using the sugar stores collected through the later summer and fall. In this state, the grass is very sensitive to damage, especially if it’s covered in frost. At this point, the grass shouldn’t be mowed; walking and any other contact with the ground should be kept to a minimum.

Spread Out Snow

When most of us use our snowblowers, we simply aim the chute to get the snow away from the area we’re clearing. This centers the snow on one area, creating a pile that is thermally insulated, slowing down the melting process. In turn, it keeps the ground underneath wetter longer, encouraging the growth of snow mold and the washing away of mud surrounding the grass. To keep this from happening, try to adjust the chute angle to drop the snow in a different spot with each pass, spreading it out over a wider area.

Take Care of Your Equipment, and Your Equipment Will Take Care of Your Lawn

If you have Honda power equipment or a Honda small engine, you can get everything you need for it at www.hondalawnparts.com. We’re a certified dealer for both arms of Honda’s outdoor equipment division, letting us ship OEM parts across the U.S. and Canada.

Maintaining Your EB2800i or EG2800i Generator

Maintaining Your EB2800i or EG2800i Generator

The EB2800i and EG2800i are the latest generators from Honda, and as with any new design, maintenance requirements and procedures are a little different from older models. Here’s what you need to know to keep your generator running like new for years to come.

Safety

Carbon monoxide build-up from the generator’s exhaust can kill you. Even if you’re just starting the motor to check how it’s running, it should first be moved outdoors.

Unless you’re changing the oil, make sure the engine has had time to cool down before you start working it. Some parts, like the exhaust, can stay hot enough to cause burns up to a half hour after use.

Oil

The engine oil should be changed after the first 5 hours or month of use, then every 50 hours or 6 months thereafter. Always check the engine oil before using the generator.

To check the oil, remove the dipstick/filler cap from the oil filler neck, located on the engine at the back of the generator. Wipe the dipstick clean, then insert it into the filler neck without screwing it in. The level should be between the marks on the dipstick.

To change the oil, let the engine run long enough to get warm, but not hot to help the oil flow out of the engine, taking dirt and sludge along with it.

Support the generator on blocks, keeping it level to provide space to slide an oil drain pan underneath it. The drain bolt is located at the base of the engine to the left of the dipstick. Remove the dipstick/filler cap and the bolt to let oil flow out of the engine. Once the oil has drained, reinstall the plug using a new sealing washer.

Using a funnel, refill the engine with SAE 10W30 oil. The oil level is correct when it reaches the edge of the filler neck. Reinstall the dipstick/filler cap.

Air Filter

Check the air filter before using the generator, and clean it every 25 hours or three months of use. If you use the generator in a dusty area, clean the filter more frequently.

The air cleaner box is located on the left side of the generator near the control panel. To access the filter, push in the tabs on the top of the cover and swing the cover downward. The air filter should come out with the cover.

The air filter uses three components: a paper element, a foam element and a plastic screen that separates these elements. Dust can be cleaned from the paper element by knocking it against a hard surface. The foam element should be cleaned by rinsing it in warm water and dish detergent. Once dry, soak the foam element in clean engine oil. Squeeze out any excess oil before installing. The easiest, cleanest way to do this is by putting the filter and oil in a resealable plastic bag.

When reinstalling the filter elements, the foam element should be placed above the tabs inside the cover. Follow this with the plastic screen and the paper element. Reinstall the cover on the motor, making sure the rubber seal fits into the groove on the inner half of the air box.

Spark Plug

Check the plug every year or 100 hours of operation, and change it every two years or 250 hours.

The spark plug is located at the top of the engine. It can be reached from the back of the generator between the two humps in the gas tank.

To remove the spark plug, disconnect the plug wire, then unscrew the plug with a 13/16 inch or 21 mm plug socket or wrench. The plug should be replaced if it’s fouled, has a worn electrode or shows cracks in the insulator. The plug gap should be between 0.028-0.031 inches (0.7-0.8 mm.)

To reinstall, screw the plug in by hand to keep it from cross-threading. Tighten down the plug with the plug socket or wrench, tightening 1/8-1/4 of a turn once the plug is seated. If the plug is new, tighten it 1/2 turn to ensure the plug washer makes a tight seal. Reconnect the plug wire.

Spark Arrester

The arrester should be cleaned every year or 100 hours. Unlike other Honda equipment, these generators always come with an arrester from the factory.

Disconnect the spark plug wire to prevent an accidental start. Remove the screw on the side of the exhaust opening with a Phillips or 4 mm screwdriver and slide the plug arrester out of the muffler. Use a wire brush to clean carbon deposits off of the arrester screen. If there are cracks or holes in the arrester, it should be replaced. Reinstall the arrester and reconnect the plug wire.

Getting Parts for Your Honda Generator

From spark plugs to spark arresters, if it’s Honda, you can get it from www.hondalawnparts.com. As a certified Honda Power Equipment dealer, we’re able to ship the full line of Honda OEM parts and accessories across the U.S. and Canada.

Operating EB2800i and EG2800i Generators

Operating EB2800i and EG2800i Generators

The home backup-focused EG2800i and job site-ready EB2800i are recent additions to Honda’s generator line up, providing the self-grounding and tough construction of a frame generator in a lightweight package. If you own or are buying one of these generators, there are a few things you should know about these units to get the most out of them.

Before You Begin

Carbon monoxide from the exhaust can kill you in a matter of minutes, even if it’s running in a garage with the door and windows open. Always run the generator outdoors at least three feet away from buildings.

If you just got this generator, take a look at our earlier article on setting them up. Oil needs to be added to the engine before its first start-up.

Controls

Most of the controls can be found on the panel at the front of the generator.

Choke rod: upper left
Engine On/Off switch: a large red switch on the lower left
Indicator lights: To the right of the choke rod
Eco throttle: To the right of the engine switch
Power receptacles: On the right side of the control panel
Circuit protectors: Just to the right of the receptacles.
Ground terminal: Lower right

There are also three areas on the engine itself that you’ll need to find to run the generator:

Fuel valve lever: On the right side, directly below the fuel tank
Starter handle: On the right side, next to the control panel.
Dipstick/filler cap: On the left side near the base of the engine.

Tips for Starting

The Oil Alert system will cut power to the ignition if the oil level is too low to protect the engine. If the system is tripped, it will switch on the bottom indicator light. Even if it hasn’t been tripped, it’s a good idea to check the oil level before starting the engine.

Before starting, make sure the generator is at least 10 feet away from fuel containers to prevent the ignition of gas fumes.

The fuel lever and engine need to be switched on for the motor to start, while the Eco Throttle should be off. If the engine is cold, the choke rod should be pulled out to the “Closed” position.

Once the engine is running, if everything is working correctly, the “OUTPUT INDICATOR” light should be green.

Stopping

Unplug all cords from the outlets and turn the engine switch to “OFF.” If you won’t be using the generator for a while, turn the fuel lever to “OFF” to keep fuel from leaking into the carburetor.

Power Demands

Both the EB2800i and EG2800i have a maximum output of 2,800 watts. With 120 volt appliances, that’s equivalent to 23.3 amps. Power draw at this maximum load should be kept below 30 minutes at a time. For longer power use, the maximum draw should be limited to 2,500 watts or 20.8 amps. If there is a short or the power demand exceeds 2,800 watts, the Overload Alarm in the middle of the indicator lights will switch on, and the circuit protector will trip.

Electric motors are reactive loads: they take more power to start up than they need to run, causing spikes in electricity demand. Motors are used in air conditioners and refrigerators as well as more obvious appliances like drills and mixers.

Eco Throttle

When switched on, the Eco Throttle automatically reduces engine speed to match generator output to the current load. This conserves fuel, reduces noise and saves wear and tear on the generator. Eco Throttle should be switched on once the engine is running.

GFCI Testing

When using the EB2800i at a job site, OSHA regulations require testing of the Ground Fault Circuit Interrupter (GFCI) system before the generator can be used as a power source. Here’s how you test the outlets:

1. Start the engine.
2. Unplug all cords from the outlets
3. Make sure the circuit protection is on for both outlets by pushing in the buttons.
4. Push the “TEST” button in the middle of each outlet. The “RESET” button should pop up, and a small green GFCI LED next to this button will light up. Push the RESET button back in to use the outlet.

If the reset button won’t push down or the GFCI light stays on after reset, the generator should be inspected and repaired before use.

Grounding

These generators are grounded to the frame, which in almost all cases is enough to meet the grounding requirements for the National Electric Code (NEC) and OSHA so long as the generator is sitting on the ground. If external grounding is needed, a wire can be connected from the grounding terminal to a grounding electrode.

Maintaining Your New Generator

www.hondalawnparts.com is a certified dealer for Honda Power Equipment so we can provide you with factory original replacements for everything on your generator. With built-in factory parts descriptions and diagrams, it’s easy to find exactly what you need, and we can ship your order to any address in the U.S. or Canada.