Using the WT30x Trash Pump

Honda_WT30

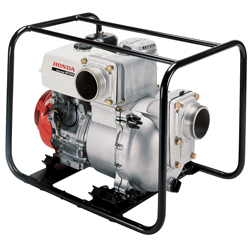
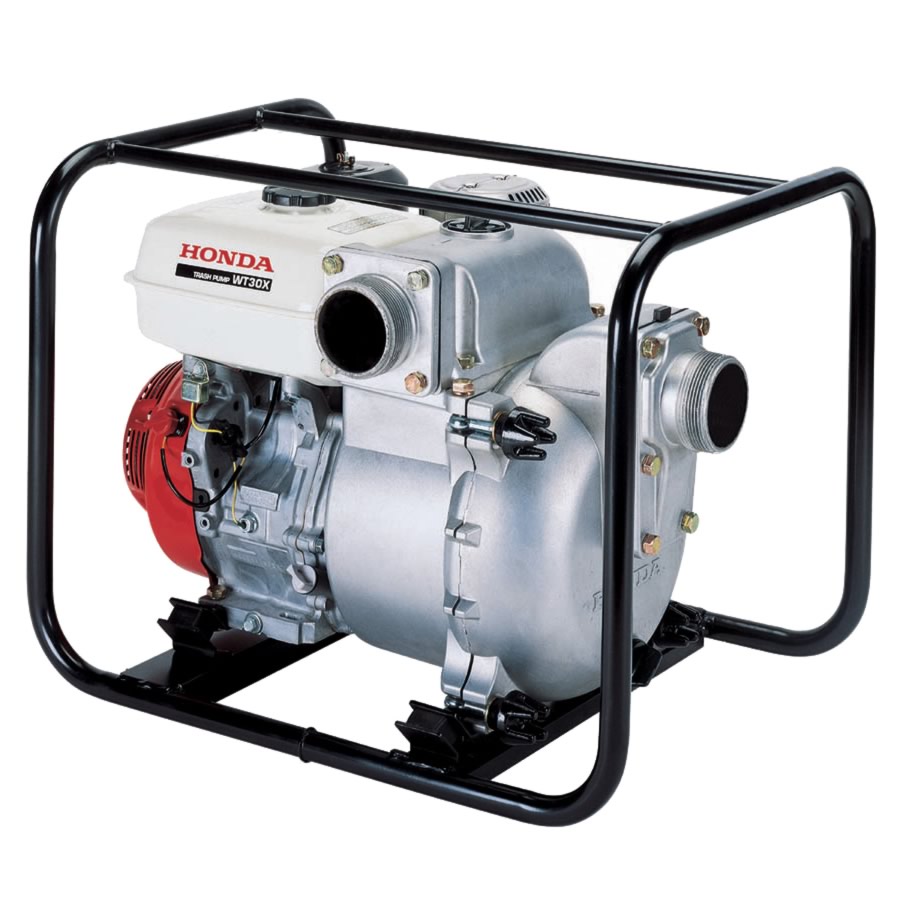
Honda’s WT30X is a staple of the construction and property management, providing portable power to drain waterlogged and flooded areas. Whether you’re a new owner or drainage is a regular part of your work day, these tips will help you get maximum performance from this trash pump.

Specifications vs. Real World Performance

Honda lists the following specs for this pump:

— Handles debris up to 1 1/16 inch
— Pumps up to 317 gallons per minute
— 82-foot head
— 26-foot suction head
— 90 second priming time at 16.4 feet

However, actual performance can vary widely depending on how and where you set up your pump.

Suction head decreases by two feet for every 1,000 feet of elevation. If you need to use your pump at altitudes above 13,000 feet, the pump will need to be lower than the surface of the water.

Even though it can handle large rocks and debris, a strainer must be attached to the suction hose to prevent anything over the maximum size limit from reaching the pump housing.

The maximum flow rate is under ideal conditions. For the best performance, you should use the shortest hoses, the shortest suction head and shortest total head possible. Priming time will take longer as head and hose length increases.

Always check the hoses and seals for signs of damage before using the pump. Even small leaks can hinder performance.

Using the Pump Safely

If there’s a problem with the pump, it can be shut off immediately by turning off the ignition.

This pump is built to handle construction materials and other trash. It is not safe to use with corrosive fluids including sea water and mine runoff.

Priming

The pump case needs to be filled with water to keep the seals cool while it pulls water through the suction hose during startup. Before starting the engine, remove the cap on the top of the pump next to the suction hose and add water. The pump case should hold just under four gallons of liquid.

Starting

There are a few minor differences that make starting this pump’s engine different from other small engines.

Depending on the version of pump you’re using, the ignition switch will either be on the starter housing or bolted to the frame. This switch should be turned on after setting the choke and throttle and before pulling the starter rope. The engine comes with Honda’s Oil Alert system, which will cut the ignition if there isn’t enough oil to lubricate the engine. If the engine won’t start or it stops abruptly, start by checking the oil level in the crankcase.

The throttle only needs to be about a third of the way open to get the engine started. Once the engine is warm, the throttle can be opened to get the right pumping speed. The throttle lever is above and to the right of the choke and fuel valve controls.

Cleaning the Pump Case

The inside of the pump should be cleaned after each use. Honda includes a special wrench for this purpose that attaches to the frame using a wing nut.

Remove the drain plug on the base of the pump, then loosen the four cover knobs on the pump cover. Slide the pump cover and volute case off of the pump. The o-ring that seals the two halves of the pump should stay in the groove on the volute case.

Clean out any debris inside the pump.

Make sure the o-ring is in place and in good condition, then reinstall the pump cover. Hand-tighten the cover knobs before tightening them down with the wrench. Reinstall the drain plug. Add water to the pump just like you would when priming it and check for leaks. If everything looks good, remove the drain plug again to let the water drain out, then reinstall the plug.

Get the Parts You Need for Your Trash Pump

Hondalawnparts.com carries the full line of Honda replacement parts. That includes OEM hoses, strainers, seals and everything else you need to use and repair your WT30. We have a section on our website dedicated to pump accessories, while our search engine can find parts based on your pump or engine’s model and serial number. We can ship your order to any location in the US or Canada.

Using the WT40x Trash Pump

WT40x Trash PumpWhat kind of garbage can you safely move through a trash pump? How do you get the hoses set up to get the highest flow rate? Whether you’re a new owner of Honda’s WT40x trash pump or you’ve used one for years, these tips will help you set it up to work effectively and reliably.

Pre-Use Checks

Before you put your pump to work, there are a few things you should look at to make sure it’s ready to use.

— Look around for puddles from leaking fuel and oil before moving the pump.
— Check the oil level and condition of the air filter.
— Check the tightness of all bolts on the frame, pump, and engine.
— Make sure there’s fresh gas in the fuel tank. The pump should be able to run continuously for around 90 minutes with a full tank of gas.

Connecting the Hoses

Both the suction and discharge ports are designed to work with hoses that are four inches in diameter. The suction hose needs to have a built-in non-collapsible support layer or a braided wire layer to keep it open under negative pressure.

Some hoses have a coupler built into the end, while others need a coupler secured to the hose using a clamp. Use a sealing washer between the suction port and the coupler. This seal should be checked before each use as even a small leak can have a serious impact on performance.

This trash pump can handle solids up to 1 1/6 inch in diameter, but it still needs a strainer secured to the end of the suction hose to prevent larger objects from getting jammed in the impeller. If you need to completely drain a body of water, use a skimmer strainer. Its flat, conical shape keeps the openings submerged for as long as possible to prevent starvation.

Head and Pump Placement

This model has a total head of 82 feet and a maximum suction head of 26 feet. This is the maximum vertical distance that the pump can move water. The suction head is limited by the air pressure pushing down on the water. Expect it to decrease by about one foot for every 500 feet of elevation.

The impeller is better at pushing water than pulling. To get the highest possible pumping rate, try to use the shortest suction head possible, making up the difference with the discharge hose. Friction between the water and the hose also decreases pump performance. Using shorter hoses will help the pump move water faster.

Priming

The pump needs to be primed with water before starting. Remove the cap on the top of the pump housing and pour in four gallons of clean water.

If you skip this step, the pump will overheat, damaging the seals. If you start the engine after forgetting this step, shut it down immediately. Try again once the pump has had some time to cool down.

Starting and Stopping

The choke and fuel valve levers are located directly below the engine’s air cleaner box. Above and to the right of these controls, there’s a third lever that controls the throttle. The engine also has an ignition switch on the starter cover. To start the engine, do the following:

  1. Open the fuel valve.
  2. Set the choke. It can be left open if you’re restarting the engine, but otherwise, it should be pushed closed.
  3. Set the throttle to about 1/3 of the way from the “Slow” position.
  4. Turn on the ignition switch.
  5. Pull the starter grip.

Let the engine warm up, gradually opening the choke. Once the engine runs smoothly with the choke open, you can use the throttle to set the pumping speed. Keep in mind that it can take two or three minutes for water to be pumped from the strainer all the way to the end of the discharge hose.

The pump can be shut off immediately using the ignition switch, but it’s easier on the pump if you first move the throttle to the “Slow” position and wait for the engine to return to idle.

When You Need Parts, Go to Honda Lawn Parts

We may have “lawn” in our name, but we offer parts for everything from Honda’s power equipment and small engine lines. That includes strainers, hoses and replacement parts for the WT40 and the GX390 that powers it. We can ship these parts and accessories to any address in the US. or Canada. To order, visit www.hondalawnparts.com.

Using the WDP30 Diaphragm Pump

Using the WDP30 Diaphragm PumpDiaphragm pumps work differently than impeller designs, which means they need to be used differently from more common water and trash pumps. Here’s what you need to know to correctly set up, start and use Honda’s WDP30 Diaphragm Pump.

Before Use

Do a quick check for any signs of leaking oil or gasoline, as well as any other signs of damage. It’s also a good idea to check the tightness of bolts on both the pump and engine.

Inspect the hoses for signs of damage, and make sure the sealing washers and strainer are in good condition.

Check the oil level, fuel level and condition of the air filter. Oil Alert will automatically shut the engine off if the oil level is too low. If the engine stops suddenly, this is the first thing you should check.

Setting Up the Hoses

Instead of spinning an impeller, a diaphragm pump moves a flexible diaphragm up and down, pulling and pushing water. Check valves on the inlet and outlet of this chamber keep this water flowing in one direction. Water is pumped in pulses, and the mechanism reciprocates like a piston in an engine. This shakes the pump and makes the hoses jump around. It’s a good idea to anchor the ends of the hoses and to keep an eye on the pump while it’s running. The pump can start walking if it’s moving fluids with a high solids content.

A strainer must be fitted to the end of the suction hose. The holes may look unusually large if you’re used to other pumps: the pump design lets the WDP30 handle solids up to 2.4 inches in diameter.

Honda rates the WDP30 using both dynamic head, a theoretical maximum pumping height, and static head, the maximum height difference you can have between the inlet and outlet in real-world conditions. Static head is just 25 feet. If the pump is primed, the suction head can be up to 24 feet. Priming time is shorter than other pumps at just 20 seconds with a 20-foot head. If water isn’t exiting the discharge hose after 30 seconds or so, check the placement of the suction hose inlet and the seals around the pump inlet and outlet.

This pump should not be used to move potable water. Using it to pump corrosive liquids including sea water and mine runoff will damage the pump while moving flammable liquids can cause a fire or explosion.

Priming

The pump only needs to be primed if the suction head is more than 16 feet. To prime the pump, remove the cap on top of the air cushion chamber, directly above the pump inlet. Pick up the suction hose near the inlet and lift it at least one foot off of the ground. This keeps the priming water from flowing out of the inlet. Pour one gallon of clean water into the chamber. Lower the hose, then screw the cap back onto the chamber.

Starting and Stopping

Controls for the throttle, choke and fuel valve can be found below the air cleaner box, while the ignition switch is located on the starter housing on the opposite side of the engine.

To start the engine, open the fuel valve. If the engine is cold, close the choke. The throttle should be just past the slow position. Turn the ignition switch on, then pull the starter grip. The engine should fire up in one or two pulls. Open the choke as the engine warms up. Once the engine runs smoothly with the choke fully open, the throttle can be set to get the right pumping speed.

The engine can be stopped by turning the ignition off, but it’s easier on the pump if you first close the throttle and let the engine return to idle speed first.

After Use

The pump casing needs to be flushed with water to remove any leftover sediment. Disconnect the suction and discharge hoses, then insert the end of a garden hose into the pump inlet. Turn on the hose. Once the water pouring out of the outlet is clear, remove the hose. Drain any remaining water from the pump housing by lifting the inlet side of the pump or by rolling the right side wheel onto a wood block.

Get the Parts You Need Straight from Your Browser

Hondalawnparts.com carries the complete line of parts and accessories for Honda Engines and Honda Power Equipment. Our site lets you browse through our selection of hoses and pump accessories, or you can use our search engine to see factory diagrams and descriptions for your pump so you can be sure you’re ordering the part you need. We can ship anything from small parts or major components to any address in the U.S. or Canada.

Using WB20 and WB30 Water Pumps

WB20 Water Pump Honda

Is your pump not working as fast as you think it should? How long does it take to prime? Are the hoses on right? If you just got a new water pump, using it can be confusing. Here’s what you need to know to get your Honda WB20 or WB30 to perform at its full potential.

Operating at High Altitudes

If you will regularly operate your pump at altitudes above 5,000 feet above sea level, the carburetor needs to be re-jetted to get the air/fuel ratio in line with the available air. Without this modification, the fuel mixture will be too rich, leading to hard starting, poor performance and fouled spark plugs. If an engine with a high altitude kit is run at altitudes below 5,000 feet, the fuel mixture will be too lean, leading to overheating and engine damage. Even with the kit installed, maximum power will go down by about 3.5% for every 1,000 feet above sea level.

Maximum intake head decreases by about a foot every 500 feet above sea level. Above 11,000 feet, the pump will need to be at the same height or slightly lower than the surface of the water being pumped.

Setting Up the Pump

A reinforced hose and strainer should be fitted to the pump’s inlet port, while a standard hose can be used with the pump outlet. Be sure to check the hose clamps for tightness: small air leaks can have a major impact on performance.

The total head for the WB20 is 105 ft, while the larger diameter inlet and outlet of the WB30 limits its total head to 85 ft. Both pumps have a maximum suction head of 25 ft. When setting up your pump, try to get it as close to the level of the water as possible: you’ll get better performance with a shorter suction head than a shorter outlet head.

If you need to run the discharge hose across a roadway, place it so it goes perpendicular to the flow of traffic. Place boards on both sides of the hose to keep vehicles from driving over the hose.

Priming

Remove the cap next to the pump discharge outlet and add clean water until the pump chamber is completely filled. Screw the cap back onto the pump.

If you accidentally started the engine without priming the pump, shut it off immediately. Once the pump has had time to cool down, prime the pump and restart the engine. Running the pump without priming it will cause overheating and seal failure.

Starting the Pump

To start the engine, you’ll need to adjust the choke, fuel valve, throttle, and ignition. The choke lever is located directly below the air cleaner box on the carburetor, and the fuel lever is below that. The throttle is to the right of the air box, and the ignition switch is on the opposite side of the engine below the recoil starter.

To start the engine, the fuel valve and ignition switch need to be on. If the engine is cold, close the choke. Move the throttle out 1/3 of the way from the “Slow” position. The engine should start after one or two pulls of the starter grip.

Operating the Pump

Slowly open the choke as the engine warms up. Once the choke is open and the engine is running smoothly, adjust the throttle to set the pumping speed. It can take a couple of minutes before the pump has moved enough water to have it flowing out of the end of the discharge hose.

Stopping the Engine

Set the throttle to the “Slow” position and wait for the engine to return to idle. Turn the ignition switch off. The engine will shut down. Close the fuel valve. In emergencies, the engine can be shut off immediately using the ignition switch.

Get Everything You Need for Your Pump from One Place

www.hondalawnparts.com is a certified dealer for Honda Power Equipment and Honda Engines, so we’re able to supply you with everything you need for your pump. That includes the hoses and strainers you need to move water as well as seals, spark plugs and other components to keep the pump and engine working. Browse our selection of pump accessories or use our search engine to find parts for your specific model. We ship across the U.S. and Canada.

Using WT20 and WT30 Trash Pumps

Using WT20 and WT30 Trash Pumps

Honda’s WT20 and WT30 pumps make it easy to move dirty water, but improper use can lead to poor performance and even damage to the pump. Here’s what you need to know to set up and use your pump so you can get the most from it.

Placing the Pump

Always keep the pump at least three feet away from buildings and awnings to prevent fires from engine heat and buildup of deadly carbon monoxide from the exhaust.

The WT20 has a maximum total head of 85 feet, while the WT30 can lift water up to 82 feet. Both have a maximum suction head of 26 feet. The pump will work faster with a shorter head. When making a choice between suction and outlet head, go for a shorter suction head. This will decrease power demands on the pump, increasing the pumping rate.

Before Use

Check the pump for signs of gas and oil leaks, and make sure the bolts on the pump are tight.

Clean off any dirt around the starter and muffler.

Inspect the hoses for cuts and other damage. Make sure the sealing washer that goes in the suction hose connector is good condition and that both connectors are secure. Check the strainer at the end of the suction hose, clearing it of debris and checking the connection.

Check the oil level, air filter, and fuel tank. Oil Alert will turn the engine off automatically if the oil level is too low, but checking ahead of time will keep you from having unexpected shutdowns.

Attaching the Suction Hose

The parts attaching the suction hose to the pump inlet should be installed in this order: sealing washer, hose coupler, hose clamp ring, suction hose and hose clamp. These pumps can handle solids up to 13/16 inch in diameter: anything larger can damage the impeller and housing. To keep this from happening, the suction hose should always be used with a strainer.

The parts that connect the discharge hose should be installed in this order: hose connector, discharge hose, and hose clamp.

Priming the Pump

Remove the filler cap on the top of the pump chamber and fill the chamber with clean water. Screw the cap back onto to the pump chamber.

If you started the engine without priming the pump, stop the engine immediately. Let the pump cool completely before priming the chamber and restarting the engine. If the pump is used when dry, the resulting heat can destroy the pump seals.

Starting the Engine

The controls for the engine are located directly below the air cleaner box.

– Move the fuel valve lever to “On.”
– If the engine is cold, move the choke lever to “Closed.” If the engine is warm, leave the choke open.
– Move the throttle lever about 1/3 of the way from the “Slow” position.
– Turn the ignition switch to “On.”
– Pull the starter grip. The engine should fire up after the first or second pull.

If the choke is closed, open it gradually as the engine warms up.

Setting Pump Speed

Once the engine is warm and it’s running with the choke open, move the throttle to the “Fast” position. The pump will pull water through the hoses. After water comes out of the outlet hose, the throttle can be set to get the desired pumping speed.

Stopping the Engine

The pump can be stopped immediately by turning the ignition switch off. Unless you have an emergency, it’s better to move the throttle lever to “Slow” and let the engine reach idle speed before turning the ignition switch. Once the engine is off, move the fuel valve lever to the “Off” position.

After Use

Remove the case drain plug and cover drain plugs from the base of the pump case. Once water stops dripping out of these openings, remove the filler cap on the top of the pump case and pour in some clean water. This will flush out any dirt or debris left inside the pump. After this water has drained out, the drain plugs and filler cap can be screwed back into the pump.

The Parts You Need for Your Honda Pump are Just a Few Clicks Away

Hondalawnparts.com carries replacement parts and accessories for all Honda power equipment. Our pump accessory section has the hoses, clamps, and seals you need to use your pump, and our parts section has everything you need to maintain your equipment. Not sure what part to order? Select your model and serial number, and our site can show you parts using factory descriptions and exploded parts diagrams. We ship across the United States and Canada.