Troubleshooting Electric Starters

Troubleshooting Electric Starters

Is the electric starter on your Honda engine not working? Before you start ordering parts, there are a few things you should check to make sure the repairs you make will fix the problem.

Protecting Your Starter

Honda’s starters are designed to run for up to 5 seconds at a time. Running the motor longer can lead to overheating. If you’re having difficulty starting your engine, wait at least 10 seconds between starting attempts to let the starter cool.
If your engine has an electric starter, it probably has Honda’s Oil Alert system. It uses a float inside the crankcase that is wired to the ignition system. If the float is too low, the power to the spark plugs is cut, keeping the engine from starting. Always check the oil level first when trying to find out why the engine won’t start.

Testing and Maintaining the Battery

Check your owner’s manual on how to maintain the battery charge in your equipment. On some models, Honda recommends using a trickle charger, while others should be periodically recharged with a standard charger. If you have a hybrid snowblower, the batteries need to be disconnected from each other and charged separately.

The battery health can be checked by measuring the voltage at the terminals with a multimeter. A fully-charged 12 volt battery should be between 12.7 to 12.9 volts without a load when fully charged. If it’s below 12.4 volts, it’s time for a new battery.

Most batteries sold for these engines including Honda’s OEM units require maintenance. The chemical reaction inside the cells breaks down the water inside, and that evaporation will eventually leave the lead sheets inside uncovered. The cells should be refilled with distilled water up to the level marked on the battery, either on the side of the case or inside the cell. Overfilling could cause the water and acid to spill out, corroding the terminals, battery tray and anything underneath it.

The Battery is Fine, but the Motor Doesn’t Turn

Even if your battery is new, it still needs a clear path to power the starter. Loose and corroded connections can keep power from flowing through the system, making it seem like the starter motor has failed. There is also a fuse that prevents the starter from overloading. This fuse will either be connected to the positive wire between the battery and the starter, or located in the fuse box.

Corrosion and blown fuses are easy to identify with a visual inspection, but bad connections aren’t always as obvious. To test the connection, connect the positive probe to the positive terminal of the battery and the negative probe to the ground connector on the frame. This connection should be at least 12 volts.

There are several options for corrosion removal, but few work better than vinegar. Soaking bolts in vinegar overnight can strip off rust, while applying it directly with a brush can remove corrosion from contacts. If you operate in conditions where the connections are regularly exposed to moisture, consider coating them in a dielectric grease.

The ground connection needs to be made with bare metal. Clean the bolt and bolt hole to ensure direct contact between the wire and the frame.

Starter and Solenoid Issues

Once the battery and electrical connections have proven to be in good shape, it’s time to address the starter.

The solenoid, a small cylinder attached to the side of the starter, is a switch designed to handle heavy electric loads. If the starter does nothing when the start switch is on, it’s likely due to a bad solenoid.

The starter has three ways it can fail:

— A worn out starter gear will make a grinding noise when the starter is being used.

— A bad throwout bearing lets the starter gear spin, but won’t let it slide out to engage the flywheel and turn over the engine.

— Smoke from the starter indicates an overload due to high power demand or overheating.

If the starter is grinding, whirring or smoking, it needs to be replaced.

Getting New Electrical Parts for Your Honda Engine

From small hardware to solenoids, if it fits a Honda small engine, you can get it from www.hondalawnparts.com. Our site can show you factory information including parts descriptions and diagrams for your model so you can be sure you’re ordering exactly what you need. We can ship your order to any location in the U.S. or Canada.

HRR and HRS Mowers: Honda Quality and Innovation for the Home Owner

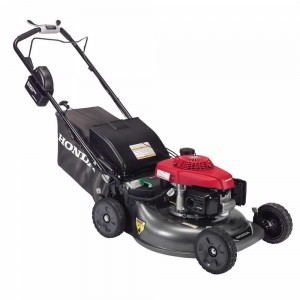
HRR and HRS Mowers: Honda Quality and Innovation for the Home OwnerMost consumer lawn equipment is driven by price, but that doesn’t mean you have to buy something big to get a quality lawn mower. Honda’s HRR and HRS mowers are small walk-behinds built with the company’s trademark reliability and clever design, making them a great choice if your lawn is less than an acre.

Engine

All HRR and HRS mowers are powered by a GCV160 engine. It uses what Honda calls “uniblock” construction, forming the head, block and upper half of the crankcase from a single piece of metal. The head uses a crossflow design with an overhead cam made out of resin. The valvetrain and crankshaft connect using a unique internal timing belt that is designed to last the lifetime of the motor. Together, these features make this engine extremely light with less vibration, less noise and fewer points of failure than competing residential powerplants.
Honda didn’t just innovate with this engine, they put a lot of thought into making it easy to use. An automatic decompression system makes it easy to turn over when starting, while an automatic choke controls air flow as the engine warms up. A manual fuel shutoff valve prevents spilling and carburetor flooding during transit. It also makes it easy to empty the fuel system when storing, preventing issues with corrosion and gumming. A long filler neck acts as both the drain and fill point for oil. To drain, just tilt the mower over a drain pan.

Cutting Performance

These mowers use Honda’s Twin Blade MicroCut System. Instead of a single blade with a high, medium or low leading edge, this design uses a pair of blades stacked on top of each other with different edge profiles. With each pass, blades of grass are cut twice, resulting in smaller clippings from the start. When mulching, this dual action cut breaks down grass faster, making it more effective than other designs, even when cutting wet grass. Smaller pieces also compact more, so emptying is less frequent when bagging.

All HRR and HRS mowers come with a 21-inch cutting deck with 6 cutting heights ranging from 1 1/8 to 4 inches.

HRR mowers use a 3-in-1 cutting system controlled by Honda’s Clip Director. This system operates a door at the back of the deck, letting the mower switch between mulching, bagging and rear discharge by turning a single lever. No tools are required to switch between modes, and there’s no chute or mulch plug that needs to be installed on the side of the deck. The included bag holds 1.9 bushels.

Smart Drive

Self-propelled models come with Smart Drive, a compact hydrostatic drive system. Like the hydrostatic systems found in riding mowers, it allows infinite speed adjustment on the fly. This makes it easy to slow down for hills and obstacles, then speed up when you’re mowing straight on level ground.
This drive system is operated by levers that can be set to one of 5 positions. Mower speed is adjusted by pushing down on the thumb pads. This allows multiple hand positions, reducing fatigue.

Other Features

The folding Quick Release handle has two operating positions and is locked into place with large knobs, requiring no tools to change position. The rear wheels on both push and Smart Drive models are mounted on ball bearings for lower effort when pushing and smoother movement.

Models

HRS
These basic mowers are designed for side discharge and mulching. The HRS216PKA is a no-frills mower weighing just 64 lbs, making it easy to push and turn, while the HRS216VKA comes with the Smart Drive self-propulsion system.

HRR
These models are designed for bagging as well as mulching and discharge, and every model has a system to stop the blade when stepping away from the mower, making it safer to work around.
The HRS216PKA is a push mower with a flywheel brake that stops the engine shaft and blade when the bail is released, while the HRS216VKA comes with the Smart Drive system. The HRS216VYA uses Honda’s Roto-Stop system. It has a PTO like a riding mower, letting the blade disengage from the drive shaft. When the bail is released, the blade stops without shutting off the engine. This saves time and effort when stopping to pick up branches and other obstacles.

Warranty

Honda guarantees these mowers and engines for 3 years of residential use or 90 days of commercial use.

Getting Parts and Accessories for Honda Walk Behind Mowers

Hondalawnparts.com has everything you need to keep your Honda mower working for years to come. Our site makes it a breeze to find parts for your model by showing parts diagrams and descriptions straight from Honda so you know exactly what you’re ordering. We ship across the U.S. and Canada.

Honda’s New EU2200i Generator

Honda's New EU2200i Generator

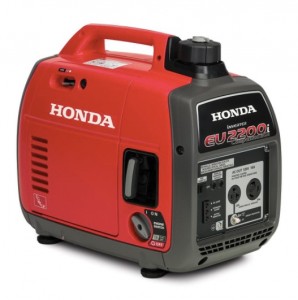
This spring, Honda is replacing their popular EU2000i generator with the new EU2200i. While it may look identical to its predecessor, it has a new engine, more power, and an easier to use design.

Power

The EU2200i makes 10% more power than the model it replaces, yet the size and weight are almost identical. In real-world use, that extra 200 watts is enough to power a 42-inch LCD TV. The extra power can also handle reactive loads better, taking the worry out of using appliances with electric motors.

This upgrade is thanks to a new engine/generator combo. It’s based on the GXR120, an engine built for earth rammers used in construction. The flywheel and alternator are built into a single unit to save space and weight. Higher grade magnets in the stator are thinner and maintain overall diameter. This reduces weight and increases power output. This configuration makes one dB less noise than the EU2000i’s GX100.

Increased torque lets the Eco Throttle keep the engine speeds down, further reducing noise and fuel consumption. The 0.95-gallon fuel tank can keep the generator running for 3.2 hours at constant 100% load and 8.1 hours at a 25% average load.

Output

This generator is rated at 120 volts with a steady output of 1,800 watts and a peak output of 2,000 watts. It uses an inverter with an in-house designed microprocessor to control output. This “clean” electricity is safe for powering electronics.

Convenience

Color-coded components make it easy to follow the steps needed to start the engine. Automatic decompression makes the engine easier to turn over with the pull starter.

Maintenance is also easier. A larger oil filter opening, a longer spout, and wider oil drain gutter make it easier to change the oil.

The generator includes a fuel shut off valve to burn off remaining fuel in the carburetor after use, avoiding most stale fuel issues. If there isn’t enough oil in the crankcase, Oil Alert can shut off th engine before it’s damaged. Redesigned case ducting maintains temperatures in high heat environments.

Models

The EU2200i comes with a 120-volt duplex outlet and a 12 volt DC outlet. Along with this standard model, there will be three other versions of this generator:

The Camo comes with a case wrapped in Realtree’s APG camouflage. It has a combination of sharp and soft detail woodlands patterns to simulate depth. Otherwise, it’s identical to the regular EU2200i.

The Companion can connect with all versions of the EU2200i and EU2000i, doubling available power. This model has a 30 amp, 125-volt locking plug outlet and a 20 amp, 125-volt single outlet. This generator is a great choice for backup power.

The EB2200i is designed with commercial users in mind. It meets LA-ETL and OSHA requirements and comes with 20A 125V GFCI Duplex outlet and a GFCI neutral bond.

All models weigh 46.5 lbs.

Warranty

Honda guarantees all versions of this generator for three years of residential or commercial use.

Getting Parts and Accessories for Honda Generators

Whether you plan on getting an EU2200i soon or you already have a Honda generator, you can get everything you need for it from www.hondalawnparts.com. As a certified dealer, we’re able to offer OEM parts and accessories including parallel cables, covers and even transfer switches. Check out our generator accessory section, or pick your model from our search engine. It has factory parts diagrams and descriptions that let you find exactly what you need. We can ship your order to any location in the U.S. or Canada.
Water Pump Maintenance

Water Pump Maintenance

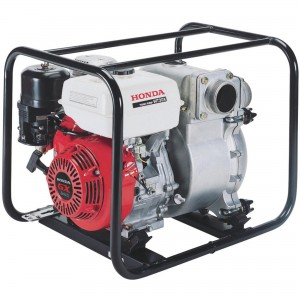
Most people are familiar with working on small engines after owning lawn care equipment, but there are some unique challenges when maintaining water pumps. Here are some tips to keep your Honda water pump working reliably for years to come.

Oil

For the most part, checking and changing the oil in a water pump engine is no different from any other Honda-powered product. However, there’s always the chance that a leaking hose can spray the engine with water, letting it seep into the crankcase. This can create a sticky, light-colored emulsion that won’t lubricate the engine. If this happens, the oil should be changed immediately.

To check the oil, set the pump on level ground, remove the dipstick from the filler neck and wipe it clean. Insert it into the neck without screwing it in to get an accurate reading. When adding oil, it should come up to the top of the filler neck.

Most recent GX-Series engines used in Honda’s pumps come with the Oil Alert system. If the float inside the crankcase is too low, it will cut power to the ignition to prevent engine damage. If you have starting problems, start by checking the oil level.

Pump Case and Strainer

All models except electric and mini 4 stroke-powered pumps have a separate pump case. This case should be flushed after each use. Trash pumps have a clean out port, while all other pumps can be cleaned by spraying the outlet and inlet of the pump with a garden hose until the runoff is clean.

If you hear grinding noises, debris may be entering the pump housing or a clogged strainer is preventing steady water flow, resulting in cavitation. Either way, the pump should be shut off immediately and the strainer should be checked for damage and debris build-up.

Fuel

Honda recommends using Unleaded fuel that is at least 87 Octane and no more than 10% ethanol or 5% methanol. Fuel should be treated with a stabilizer if it won’t be used for at least a month after purchase and should be replaced entirely after three months, even if it has been treated. Since most pump use isn’t on a set schedule, it’s a good idea to treat all fuel used in your equipment. Stale fuel can be safely used in cars where it will be diluted by fresh fuel and be easier to burn thanks to the engine’s fuel injection system.

The fuel level should only come up to the bottom of the filler neck, and the holes in the cap need to be clean. This lets the fuel expand and contract as temperatures change and allows air to enter the tank as gas is drawn into the fuel system.

Gear Box

Some models have a gear case between the engine and pump housing that contains a reduction gear. The oil inside should be replaced at least once a year with a GL5-rated 80W90 gear oil. Removing the old oil will be faster if you can run the engine for a few minutes to warm it up. When you do this, make sure the pump is off to prevent overheating that can ruin the seals. The dipstick should not be screwed in when checking the oil level, and the level needs to be rechecked once the case has been filled.

Pump Connecting Rod

The WDP30 uses a spring-loaded connecting rod to absorb shocks from rocks entering the pump. Honda recommends applying NLGI Category 2 grease, which is the standard grease for most mechanical and automotive applications. The rod shouldn’t be making direct contact with water, so this grease doesn’t need to be waterproof or designed for marine use.

Electric Pumps

These pumps should mostly be maintenance free. However, dirt can cause problems with the float switch and overall pump performance.

If the float is dirty and isn’t responding to water level changes, it just needs a thorough cleaning. If debris build-up on the inlet is causing problems, the volute case should be cleaned. To access the case, remove the screws that attach the lower part of the housing and pry the base and housing apart with a flathead screwdriver. Remove any debris in the case and pump base holes and make sure the impeller can spin freely. Never open up the pump itself: if it isn’t precisely reassembled and resealed, water can leak into the case, causing a short. Once everything is clean, reassemble the case.

Getting Parts for Your Pump

Hondalawnparts.com is a certified Honda Engines and Honda Power Equipment dealer, which means we’re able to offer all the parts and accessories you need for your pump including everything from spark plugs to hoses. Our site makes it easy to find what you need thanks to built-in factory parts diagrams and descriptions, and we can ship your order to any location in the U.S. or Canada.