How to Get Better Performance from Your Snow Blower

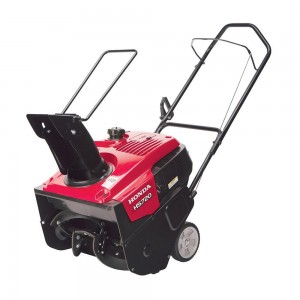
HSS928Do you feel like you’re not getting the best performance from your Honda single or dual stage snow blower? Are you looking for ways to make snow clearing easier on yourself? These tips will help you clear snow faster and avoid common problems with starting and clogging.

Prepare the Area You’re Clearing Ahead of Time

Removing hazards, including rocks, chains, garden hoses and extension cords from the area before it snows will keep you from running over them. Placing markers around the edges of driveways and sidewalks will let you see the area you need to clear once the landscape is covered in snow. This doesn’t just save time by limiting what you clear, it protects your lawn, which can be damaged by your blower’s auger.

Do you get the newspaper? Make sure it’s out of the driveway before you start clearing. The paper and the plastic bag it comes in will have no problem jamming up your auger and breaking the shear pins.

Keep Your Fuel Fresh

There are few places where snow storms are constant, so it pays to be prepared for the next storm whether it’s tomorrow or in a couple months. Straight gasoline starts going stale after a month, but by adding a stabilizer shortly after purchase, the fuel will stay fresh for up to three months, making your machine easier to start. Between storms, keeping the tank topped up will reduce the amount of contact it has with oxygen, keeping it fresher longer.

Move Snow While It’s Still Snowing

This seems counter-intuitive: by clearing snow while it’s falling, you’ll have to go back and remove any remaining snow once the storm stops. However, the less snow your machine has to move at one time, the faster it can work. Clearing snow as it falls also keeps the weight of fresh snow from packing down lower layers, making it easier to remove. That means breaking up the job into two clearings can decrease the total time you have to spend out in the cold.

Throw Snow Where You Want It the First Time

When your snow blower picks up snow, it should be forced through the chute far enough to land outside the area you’re clearing. If it isn’t, changing your methods can keep you from having to make a second pass to move snow you already tried to clear:

– Overlap more with each pass, letting the auger pick up less snow at a time.
– Go slower and increase engine speed.
– Increase the chute angle.
– Aim the chute to work with the wind.

Keep the Chute from Clogging

Wet snow may not be dense, but it likes to stick to the auger housing and chute. If you’re having trouble with chute clogs, go slower, even if the snow isn’t that deep or dense.

Applying polymer car wax to the inside of plastic chutes can keep snow from sticking, while silicone spray lubricant can be used on the surface of the impeller and inside metal chutes to help snow slide through the machine.

Wait Before Refueling

You may be tempted to refill your blower’s fuel tank as soon as possible so you can get back to work, but it only takes a few spilled drops of fuel on a hot engine to start a fire. When your Honda runs low on fuel, take a break to let the engine cool down and your body warm up. Once you’ve refueled, move your snow blower at least 10 feet away before restarting to prevent the ignition of fuel vapors.

Consider a Snow Cab

Wind chill can make cold temperatures dangerous while blowing snow is unpleasant regardless of temperature. A snow cab may not look like much, but it can shield you from these two hazards, making it easier and safer to clear large areas. Honda makes cabs that fit all of their two-stage models.

Plan Ahead for Parts Replacement

Shear pins and belts can break at any time, so it pays to have some extras on hand to keep your snow blower running. Hondalawnparts.com has these parts as well as everything else you need to keep your Honda snow blower working. When you select your model and serial number in our search engine, you’ll see factory parts diagrams and descriptions, making it easy to find the right item for your equipment. Want to add a snow cab or a set of drift cutters? We sell those, too. We ship across the U.S. and Canada.

Servicing the HS1336iAS Snow Blower

HS1336iAS Snow BlowerIt may be a hybrid, but the HS1336iAS snow blower is as easy to service as any other piece of Honda outdoor equipment. Here’s everything you need to know about keeping this two-stage blower running from adjusting the tracks to changing the oil.

Tool Box

This snow blower has a toolbox built into the back panel with everything you need for maintenance. Here’s what you should find inside.

Tools:
10 and 12 mm box wrench
10 and 14 mm open end wrench
Two 12 and 17 mm open end wrenches
Spark plug wrench and handle
Pliers

Spare parts:
5 blower shear bolts
10 auger shear bolts
15 8 mm lock nuts
2 cotter pins
2 battery terminal covers
5 and 15 amp fuses
Fuse cover

Maintenance Schedule

Each Use: Check engine oil, skid shoes, scraper, shear bolts, and battery electrolyte level.
Each year before use: Change the engine oil. Check the gear reduction oil, spark plug, and tracks.
Every year before storing: Drain the fuel tank and carburetor. Clean the sediment cup. Apply oil to unpainted parts to prevent corrosion.
First month or 20 hours of operation: Change the engine oil and check the tracks.
Every 100 hours: Change the engine oil.
Every four years or 300 hours: Replace the spark plug.

Honda recommends having this snow blower serviced professionally before storage, after the first month or 20 hours of operation and every 300 hours. These services include repairs that are too complex for most owners.

Auger wear will vary depending on the surfaces you operate on. The blades at the end of the auger have wear marks. If the blades are worn down to these marks, the auger should be replaced by a mechanic.

Engine Oil

The dipstick is located on the right side of the snow blower next to the tracks. When checking the oil level, do not screw the dipstick into the hole.

To change the oil, place a drain pan on the right track. Remove the dipstick and unscrew the 10 mm drain bolt directly below the filler neck. Once the crankcase is empty, reinstall the drain bolt, using a new washer.

Honda recommends 5W30 motor oil that meets API service category SJ or later. The oil level should come up to the edge of the filler neck. The iGX390 holds 1.16 quarts.

Spark Plug

The plug is behind the muffler. The plug gap should be between 0.028 and 0.031 inches or 0.7-0.8 mm.

Track Adjustment

The tracks must be clean and dry to get accurate measurements. To check the tension, push down on the top middle section of the track with 22 lb-ft. of force. The track should deflect 0.62-0.79 inches (16-20 mm.)

To adjust the track tension, loosen the lock nut on the tension bolt, located just behind the front wheel. Turn the adjusting nut until the track tension is correct, then tighten the lock nut.

Shear Bolt Replacement

1. Turn the auger clutch switch to “Off.”
2. Release the drive clutch lever.
3. Set the auger to its lowest position.
4. Turn the engine off and remove the key. Let the snowblower come to a complete stop.
5. Look over the snow blower for signs of debris or damage that may have caused the bolt to break.
6. Remove the broken bolts and replace them with new shear bolts and lock nuts.

Batteries and Fuses

To access the batteries, loosen the two knobs on the sides of the rear cover. Rotate the rear cover down and slide it off of the snow blower. The fuses are inside a box directly above the batteries.

The electrolyte level should be between the “Lower Level” and “Upper Level” marks on the side of the battery case. If the level is low, remove the caps from the top of the battery and add distilled water. Clean any corrosion on the battery terminals with baking soda and water.

To remove the batteries, disconnect the negative cable from the left battery, followed by the positive terminal on the right battery. Loosen the nuts holding the battery clamp, then disconnect the joint cable from the left battery’s positive terminal, then the right battery’s negative terminal. Remove the batteries from the snow blower. When reinstalling the batteries, connect them in the reverse order you disconnected them.

Charge the batteries individually. The output of each battery should be within 10% of 35 Ah. Charge the battery at 3.5 amps for 5-10 hours.

Need Parts?

If you need some shear pins, an oil plug washer or even a new toolkit, you can get it from www.hondalawnparts.com. We’re a certified dealer for Honda Power Equipment and Honda Engines, which means we carry OEM replacements for everything on your snow blower. Our site has built-in factory information including diagrams and descriptions, making it easy to find compatible parts for your model.

Servicing Honda Single Stage Snow Blowers

Honda Single Stage SnowblowerDo you want to make sure your Honda single stage snow blower will be reliable and deliver maximum performance? Here’s everything you need to do to keep your HS720AM, HS720AS or HS720AA performing at its best.

Maintenance Schedule

Before use: Check the oil and scraper blade.
Every year before use: Change the oil. Inspect the spark plug, auger clutch, auger paddles and chute guide lever (if equipped.)
Every year before storage: Check the spark plug and drain the fuel tank and carburetor. Grease the chute tension bolts if you have an AM blower.
After the first 5 hours of use and every 50 hours of operation: Change the oil.
Every 100 hours: Check the spark plug.
Every 150 hours: Replace the spark plug.

Honda recommends having the snow blower professionally serviced every 100 hours to check engine speed and valve clearance, and every two years to inspect the fuel system.

Oil

Oil should be checked with the dipstick inserted in the filler neck but not screwed in. Honda recommends 5W30 oil when temperatures are above 10°F and 5W20 when operating in weather below 10°F.

1. Place the snow blower on a level surface.
2. Place a drain pan between the wheels.
3. Remove the dipstick.
4. Remove the drain bolt and washer from the back of the engine, next to the filler neck.
5. Install the drain plug, using a new washer.
6. Add oil through the filler neck. Stop when the oil is at the edge of the neck.
7. Install the dipstick.

Spark Plug

Let the engine cool off before removing the spark plug.

1. Open the plug access panel next to the fuel filler cap. Disconnect the spark plug cap, then unscrew the plug using a spark plug wrench.
2. Replace the plug if it’s heavily worn or has cracks or other damage. Set the gap to 0.028-0.031 inches.
3. Screw the plug in by hand, then tighten it down with the wrench. If the plug is new, rotate the plug a half turn after it seats to crush the sealing washer. Honda recommends torquing the plug to 14 ft-lbs. if you have a torque wrench on hand.
4. Snap the access panel back into place.

Clutch Lever and Belt Tension

To check the tension, squeeze the bail until you feel some resistance. Measure the distance between the bail and the handle: it should be between 7 ½ and 8 inches.

There are several adjustment holes for both the clutch spring and the cable near the base of the handle. Slide the cover up to expose the spring and access these holes. Moving the spring down one hole adjusts the lever distance by ¼ inch, and adjusting the cable position moves it by 3/8 inch.

To check the belt tension, slide the spring cover up on the drive cable. Engage the auger clutch bail. The spring should be 2.93-3.15 inches long. To adjust the tension, move the cable end from the lower hole to the upper hole on the bail.

Auger Paddle

To inspect the paddles, place the snow blower on a level surface. Disconnect the spark plug and turn the fuel valve off to prevent an accidental start. Measure the distance between the edge of the paddle and the metal part of the auger. If the distance is less than 5/8 inch, have the paddles replaced by a dealer.

Scraper Blade

To check the blade alignment, place the snow blower on a level surface. Disconnect the spark plug and turn the fuel valve off to prevent an accidental start.

The blade should be level and come in contact with the ground. The distance between the lower rubber paddle and the ground should be 1/16-1/8 of an inch. If the blade is uneven or the paddle is too high, adjust the blade. If the blade is less than 1/16” thick, replace it.

To adjust the blade, tilt the snow blower forward. Loosen the three flange nuts and move the blade. Tighten the nuts and recheck the clearance.

If the blade needs to be replaced, simply remove the nuts, washers and carriage bolts, then remove the old blade. Install the new blade, reusing the fasteners. Check the blade adjustment.

Chute Guide Cable (A and AS models)

Pull the chute control lever rearward. The chute should point up with the top of the deflector lining up with the back of the chute. Push the lever down. The deflector should be pointed up just slightly.

If the deflector isn’t moving through its full range of motion, loosen the lock nut on the end of the cable next to the deflector. Turn the adjusting nut below it to change the cable tension, then tighten the lock nut, torquing it to 48-83 in-lbs.

Get the Parts You Need for Your Honda

Need to make some repairs to your snow blower? Hondalawnparts.com isn’t just for mowers: we carry OEM parts for everything from Honda Engines and Honda Power Equipment. Our site can show you parts specific to your mode using factory diagrams and descriptions, so it’s easy to find what you need. We ship across the USA and Canada.