GX and GXV 690 Maintenance

GX and GXV 690 Maintenance

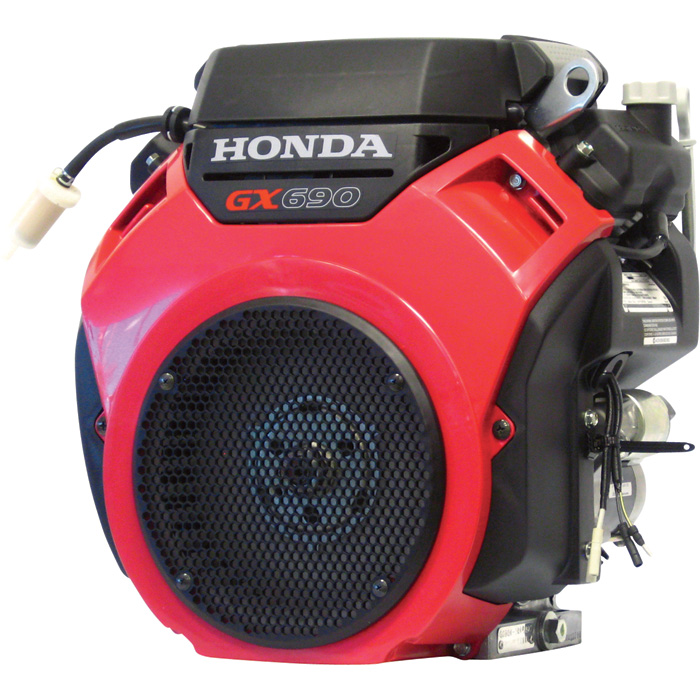
Honda makes quality engines, but it takes steady maintenance for them to live up to their reputation for reliability. Here’s what you need to know to keep your GX 690 or GXV 690 V-Twin in top running condition.

Maintenance Schedule

These maintenance tasks are easy enough that you can do them yourself:

Before each use – Check air filter and oil level.
After the first month or 20 hours of operation – Change the oil.
Every 6 months or 100 hours – Change the oil, clean the air filter and check the spark plug. Clean the spark arrester if your engine has one (GX 690 only.)
Every 200 hours – Replace the oil filter.
Every year or 300 hours – Replace the spark plug.
Every two years or 500 hours – Replace the paper air filter element.

Honda recommends having a small engine mechanic handle these maintenance tasks:

Every year or 300 hours – Check the idle speed and valve clearance, and replace the fuel filter
Every two years – Check the fuel tube and replace as needed
Every 1,000 hours: Clean the combustion chamber (GXV 690 only.)

Oil

This engine is designed to use oil that meets the requirements for API category SJ or later. Honda recommends oil viscosity based on the temperatures the engine will be operating in:

SAE 30 – 50-113ºF (10-45ºC)
Conventional 5W30 or 10W30 – 23-113ºF (-5-45ºC)
Synthetic 5W30 – 5-113ºF(-15-45ºC)

To get an accurate measurement when checking the oil, place the engine on a level surface and let it run for a couple minutes. This will splash some oil on the dipstick, so it needs to be cleaned and inserted all the way into the filler neck before checking the oil level. Some versions of this engine come equipped with Oil Alert, which will shut off the ignition automatically if the oil level is too low.

To change the oil, remove the drain plug, located directly below the starter on the GX 690 and next to the filler neck on the GXV 690. Once the oil has drained, reinstall the drain plug and a new sealing washer. If your engine is due for a new filter, remove the old one with an oil filter wrench. Using a strap wrench can damage the oil pressure switch. Coat the seal on the new filter with clean engine oil before installing. Screw in the filter by hand, then use the wrench to turn the filter another ¾ turn once the filter seats. Pour new oil into the oil filler neck, located on the top of the cylinder directly to the left of the dipstick. Add oil until the level comes up to the upper limit mark on the dipstick. Start the engine and check for leaks.

Air Filter

To access the filter, pull up on the latches at the sides of the air cleaner cover and pull the cover away from the engine. The paper filter and surrounding foam element can be removed by unscrewing the wing nut on the GX 690, while they can be lifted straight out of the air box on the GXV 690.

To clean the paper element, tap it on a hard surface or blow it out with compressed air. When using air, limit the pressure to 30 psi.

To clean the foam element, wash it in a non-flammable solvent or soapy water. Once the filter is dry, soak it in clean engine oil and squeeze it out to remove any excess.

Before reinstalling the filters, wipe out the inside of the air cleaner box.

Spark Plug

To remove the spark plugs, first, clean the area around the spark plug caps and disconnect them from the plugs. Use a 5/8 inch plug wrench to unscrew the plugs.

The spark plug gap should be between 0.028 and 0.031 inches (0.7-0.8 mm.) Replace the plug if it’s damaged, corroded, has a worn electrode or the sealing washer is in poor condition.

Always start the spark plug by hand to prevent cross-threading. Once seated, use the wrench to turn the plug another ½ turn if it’s new or 1/8-1/4 turn if it’s used to get a tight seal. Reconnect the spark plug caps.

Spark Arrester

If your engine has a round high-mount muffler, simply remove the screw from the tailpipe and slide out the arrester. If your engine has a flat side-mount muffler, you’ll need to remove the four bolts holding the muffler protector. With the muffler uncovered, remove the three screws holding in the arrester.

Use a wire brush to scrub off any carbon deposits. Replace the arrester if it has signs of damage.

Keep Your Engine Running with Quality OEM Parts

Hondalawnparts.com is a certified dealer for Honda Engines, letting us sell the parts you need to maintain your Honda engine no matter what it’s powering. Not sure what you need? Just pick your model and serial number, and our site can show you diagrams and descriptions to locate parts on your engine. We ship to any address in the United States or Canada.

Honda GX Series V-Twin Engines

gx v-twinHonda’s GX Series V-twins are built for high demand applications including everything from generators to UTVs, delivering power with the company’s signature reliability and ease of operation. No matter what your GX powers, there are a few things you should do to get the most out of your engine.

Controls

All the controls on these motors are placed on a control panel, located to the right of the fan cover. From top to bottom, there’s a throttle, choke knob, engine switch, oil alert indicator and an hour meter. There are a couple things you should know about how these controls work on the GX:

  • Don’t see a throttle or a choke lever? Some equipment mounts the throttle remotely, typically placing it on a handle. This is almost guaranteed with vertical shaft models.
  • The choke is engaged by pulling the choke knob out.
  • The hour meter will display the current operation hours when the ignition switch is on, but it only counts time when the engine is running.
  • These engines have a fuel cut solenoid that lets fuel enter the carburetor when the ignition switch is in the “On” and “Start” positions, and then closes the fuel line when the switch is off. If the battery becomes disconnected, the solenoid will close the fuel line, causing the engine to stall. Some models also have a separate fuel valve on the fuel tank that needs to be opened when the engine will be used, then closed when it is put away.
  • Honda’s Oil Alert system will shut down the engine if the oil level inside the crankcase gets too low, preventing potential engine damage. If the system is tripped, the indicator light will turn on. If the engine stops suddenly, check both the light and the oil level.

Starting

The throttle should be about 1/3 of the way from the lowest “Min.” position, and the choke should be closed unless the motor is being restarted. If there is a fuel valve on the tank, make sure it’s open. To turn over the motor, turn the ignition switch to “On,” then twist it to “Start” until the engine fires up. If the engine isn’t running after 5 seconds, release the ignition switch and wait 10 seconds to let the starter motor cool off before trying again. Once the engine is running, it should idle for a couple minutes to let it warm up.

Stopping

Move the throttle to the “Min.” position, then turn the ignition to “Off.” If equipped, close the fuel valve.

Oil

On horizontal shaft engines, the oil is poured into a filler neck located at the top of the right side cylinder head. The oil can be checked using the automotive-style dipstick behind this cylinder. On vertical shaft models, there will be a combination filler neck cap and dipstick behind the right-hand cylinder. The oil level should be checked after the engine has idled for a couple minutes and is then shut off. The level should be between the two marks on the dipstick. On vertical shaft models, the cap should not be threaded into the filler neck when using the dipstick to check the oil level.

GX Series engines are designed to use 5W30 or 10W30 oil in most operating conditions. If you need to operate the motor at temperatures below 10 degrees F (-15 degrees C) a synthetic 5W30 is recommended. SAE 30 can be used at temperatures above 50 degrees F (10 degrees C).

Oil can be drained by removing a plug bolt at the base of the engine. The GX series also uses a spin-on oil filter, which should be replaced each time the oil is changed.

Air Filter

The air cleaner is behind a latched cover between the cylinders. Vertical shaft motors use a series of panels, while horizontal shaft motors use round filter elements.

The air cleaner uses both a paper element and a foam element. The foam element should be cleaned by washing it with a mild detergent or a non-flammable solvent. Once dry, soak it in clean engine oil and squeeze out any excess. The paper element should be tapped against a hard surface to loosen any dirt between the pleats.

Spark Plugs

The spark plug gap should be between 0.028-0.031 inches (0.7-0.8 mm.) The plugs can be removed and installed using a 5/8 inch plug wrench or socket. When installing, screw the plug into the engine by hand to ensure it doesn’t cross thread, then tighten it down 1/8-1/4 turn after it seats if it’s used, or ½ turn if it is new.

Getting Parts

Need something for your Honda GX V-twin? You can get it from www.hondalawnparts.com. We’re a certified Honda Small Engine Equipment dealer, so we carry everything for their motors. When you search for parts on our site, you’ll see factory parts diagrams and descriptions so you can quickly find what you need. We ship parts across the U.S. and Canada.