Storing Your Honda Mower

HRR and HRS Mowers: Honda Quality and Innovation for the Home Owner
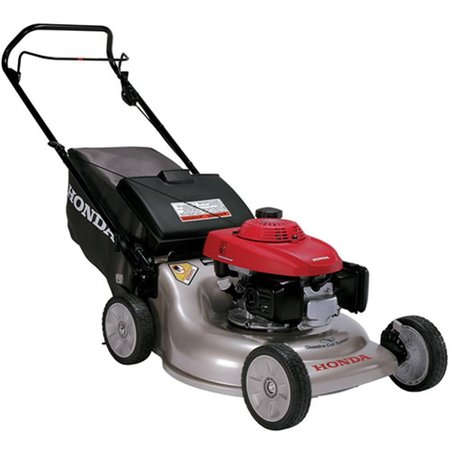
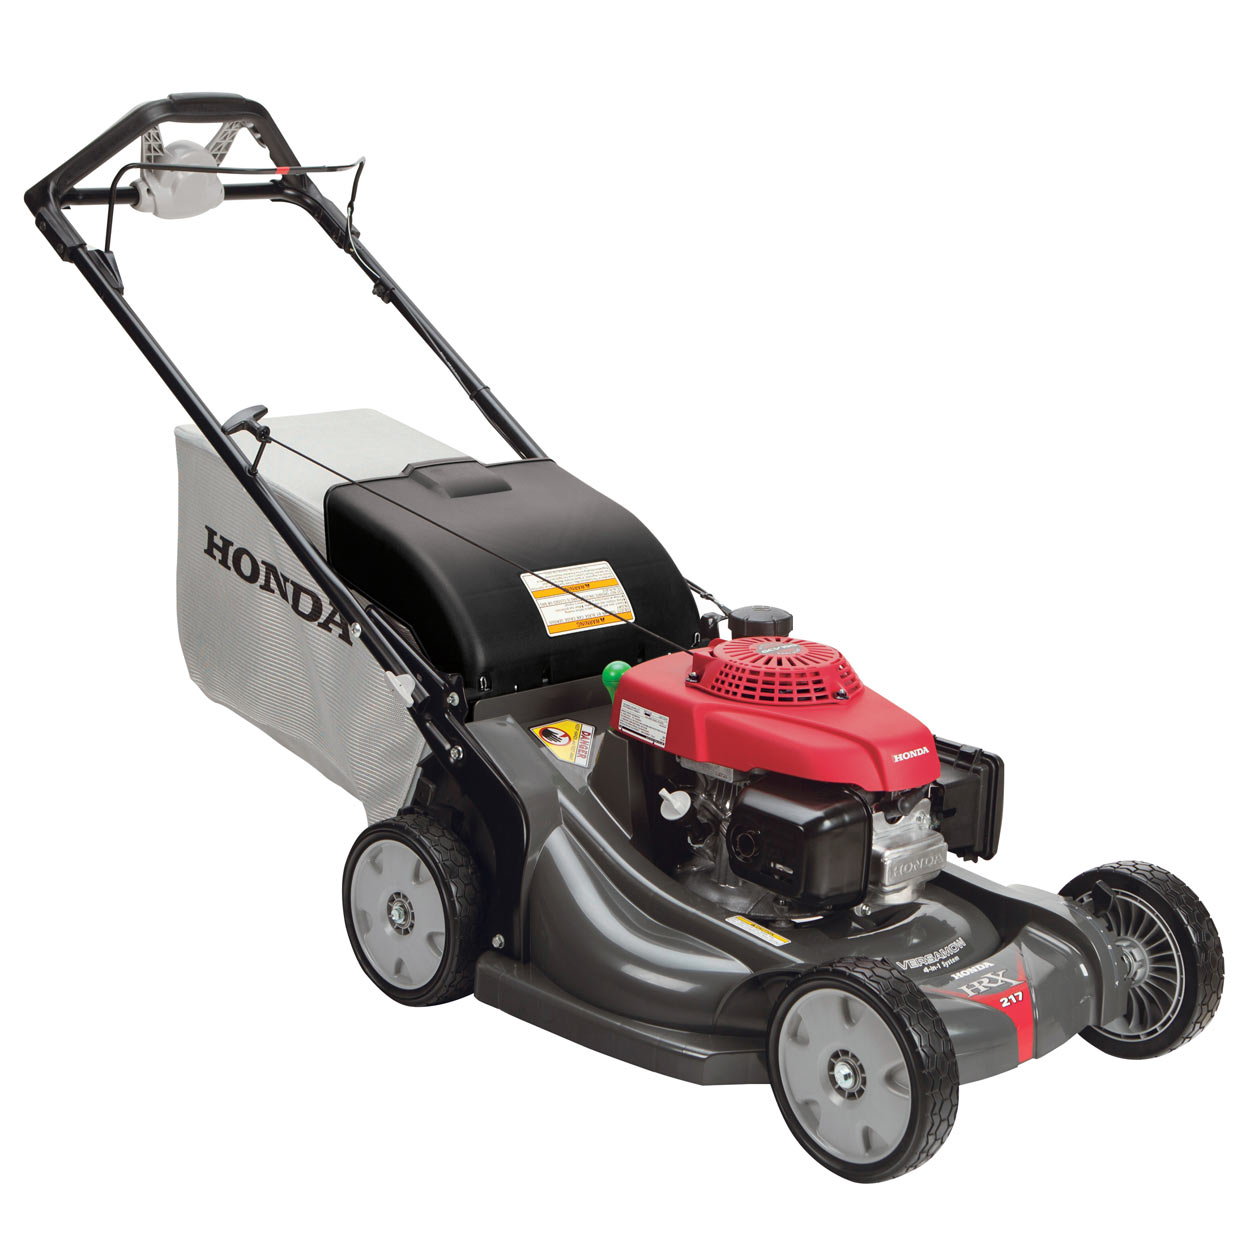
Fall is over, and that means it’s finally time to stop mowing. Before you put your Honda mower into storage, there are a few things you should do to protect your machine and make it easier to put back to work next spring.

Fuel

All gasoline, even if it’s treated with a stabilizer, will turn stale during long-term storage, leading to problems with lacquering and corrosion. Honda recommends draining the fuel system if the mower will be stored for longer than three months.

If your engine has a sediment cup, removing this cup and turning the fuel valve on will let the tank and fuel system drain out. GCV engines don’t have this cup, but the fuel tank can be drained by removing the gas cap and tipping the mower on its side. Collected fuel can be used in your car’s fuel tank.

Once the tank is empty, start the engine and let it run until it stalls. This removes any remaining fuel in the lines and carburetor.

Oil and Lubrication

Even slightly used oil contains acidic compounds left over from combustion that can damage your mower during storage. Changing the oil now will protect your engine. As long as you don’t start the engine when it’s cold, it’s fine to use oil recommended for summer temperatures. For most engines, that’s 10W30 motor oil.

HRC mowers come with sealed cables that don’t require maintenance. Cables on all other models should be covered in a light oil or silicone spray to prevent rust. Water displacers and penetrating oils like WD-40 and Liquid Wrench will eventually drip off of the cables, leaving them unprotected.

Honda recommends lubricating the cylinder with oil. To do this, remove the spark plug, pour one teaspoon of oil through the plug hole, Pull the recoil starter several times: this will spread the oil across the cylinder wall and push out any excess. Reinstall the plug. When you start your mower next year, don’t be surprised if it smokes for a few seconds: that’s just the oil burning off.

Cleaning

Now is a good time to clean the grass bag. Rinse off the fabric with a garden hose to remove trapped dirt and debris. Let the bag drip dry before storage.

Do not use a pressure washer or garden hose to clean the rest of your mower. This can force water into the engine where it can mix with the oil and seep through bearings, damaging components. Use a brush to remove dirt and debris collected around the engine, particularly around the cooling fins. A putty knife can be used to remove grass cakes onto the mowing chamber.

Use touch-up paint to cover up areas where the original paint has chipped off. Exposed metal parts can be protected from rust by applying a light coating of oil.

Battery

Electric start models have a small battery inside the box that houses the start button. This battery should be removed and charged both before and after long-term storage.

An automotive battery charger is too powerful for this battery. Honda makes a low amperage charger specifically for these batteries. The battery can be attached to this charger for up to 24 hours. Charging longer can cause overheating, damaging the battery.

Storing

Your mower should be stored in a clean, dry place. Keep the mower away from sources of ignition, including power tools, heaters and electric motors: even with the tank and carburetor drained, there may be enough fuel residue to release flammable vapors.

Don’t cover the mower with a tarp. This can trap moisture, promoting rust.

The handle can be folded down to save space:
1. Remove the grass bag and frame. These can be stored separately or placed on top of the mower.
2. Loosen the knobs on the handle joints.
3. Tilt the top of the handle forward, making sure that the cables aren’t being kinked.

Get the Quality Parts You Need for Your Honda

Want to get a few things fixed before the next mowing season? Hondalawnparts.com is a certified Honda Power Equipment and Honda Engines dealer, so we carry everything you need for your mower from bags to blades. Finding parts is easy: just select your model and serial number, and our site will show you parts listings and factory information specific to your mower or engine. We can ship your order to any address in the United States or Canada.

Using the WX10 Water Pump

WX10 water pumpThe WT10’s small size and efficient Mini 4 Stroke engine make it perfect for pumping out sumps, removing puddles and powering fountains and garden-sized irrigation systems. These tips will help you get the most out of this model.

Choosing a Pumping Location

The most important consideration when setting up a water pump is head, the vertical distance between the surface of the water being pumped and the end of the discharge hose. This pump has a capacity of 121 feet of total head and 26 feet of suction. That means the surface of the water can be as much as 26 feet below the pump. However, reducing head, and suction head, in particular, will increase performance. When setting up your pump, try to place it as close as possible to the body water being moved, making up the distance with the outlet hose.

Speaking of hoses, the shorter they are, the less fluid resistance there will be, which increases pumping speed. The suction hose must be reinforced to keep it from collapsing under pressure. While there are several options for outlet hoses, choosing the widest hose available will reduce friction losses.

Connecting the Intake Hose

The order the parts need to go onto the pump intake will depend on whether you have the included standard connection system or you’re using Honda’s separate hose connector.

Standard connector: washer, hose coupler, clamp ring, hose clamp and hose
Separate hose connector: packing without tabs, male coupler, packing with tabs, female coupler, hose

When using the separate hose connector, flip the levers toward the pump intake to clamp the female coupler onto the male coupler.

The hose must always be used with a strainer clamped onto the inlet, and this strainer must be fully submerged during use. A standard strainer is included with the pump, but there are other designs available for pumping from shallow bodies of water.

Connecting the Discharge Hose

Unlike the intake hose, this hose isn’t under pressure, so it only requires a hose connector and hose clamp to attach to the pump outlet.

To use the included garden hose adapter, screw the adapter on just tight enough that it doesn’t leak, then screw in the garden hose. Keep in mind that the reduced diameter of the hose will reduce pumping performance.

Priming

Operating the pump when dry will cause the seals to overheat and fail. If you start the pump without priming it, shut it off immediately and give it a few minutes to cool off.

The filler cap is located to the right of the pump outlet. Remove the cap, pour in water until the chamber is full, and reinstall the cap.

Starting, Running and Shutting Off the Pump

1. Set the choke to “Closed” if the engine is cold, or “Open” if the pump was just running.
2. Set the throttle mid-way between “Slow” and “Fast.”
3. Press the priming bulb until fuel can be seen inside the fuel return tube next to the bulb.
4. Turn the ignition switch to “On.”
5. Hold the handle on top of the engine with one hand while using the other to pull the starter grip.

Once the engine is running, gradually open the choke as the engine warms up. At this point, the pumping speed can be adjusted by moving the throttle.

Once you’re done pumping, move the throttle to “Slow” and turn the ignition switch off.

Chamber Flushing

After using the pump, let the engine cool down and flush the pump chamber to remove any remaining water or debris. The pump drain plug is located on the bottom front of the pump housing. Once the water has drained out, pour water through the pump chamber the same way you would when priming the pump.

Everything You Need for Your Honda Pump

We may have “lawn” in our name, but www.hondalawnparts.com carries everything you need for your Honda small engine or outdoor equipment including water pumps like the WX10. We have a section on our website dedicated to pump accessories including hoses, seals and strainers, or you can use our search engine to find replacement parts specific to your pump. We ship across the U.S. and Canada.

Servicing the iGX390 Engine

Honda iGX EngineIt may be Honda’s most advanced small engine, but that doesn’t mean the iGX390 is hard to work on. Here what you need to know about maintaining this engine so it continues to deliver top-level performance and reliability no matter what it may be powering.

Maintenance Schedule

Oil: Check before each use. Change after the first month or 20 hours of operation, then every 6 months or 100 hours.
Air filter: Check before each use, clean every three months or 50 hours, and replace the paper filter element every year or 300 hours.
Spark plug: Check every 6 months or 100 hours, and replace every year or 300 hours.
Spark arrester: If equipped, clean every 6 months or 100 hours.
Sediment cup: Clean every 6 months or 100 hours.
Fuel tube: Check every two years and replace as needed.

Honda also recommends taking this engine into a dealer once each year to take care of more difficult tasks like checking valve clearance and cleaning the fuel system.

Which Engine Do I Have?

The location of some components is different between standard and low profile designs. Standard iGX390s have a fuel tank on top of the engine, while low profile engines use a side-mounted or remote fuel tank.

Oil

Oil Alert will shut down the engine if the oil level gets too low. If your engine has an hour meter, an indicator light on the controls will turn on when the system is triggered and the ignition is in the “ON” position. If your engine doesn’t have an hour meter, the indicator light will blink when the engine stops or you try to start it.

The dipstick is built into the oil filler cap, while the drain plug is below and to the left of this cap. When checking the oil level, do not screw the cap into the filler neck. Always use a new washer with the drain plug when changing the oil. Both versions of this engine hold 1.2 quarts of oil. 10W30 motor oil is recommended for all temperatures.

Air Filter

Standard engines have an airbox located next to the muffler. To access the air filter, remove the nut on top of the air box, followed by the box itself. Remove a second wing nut and slide off the foam and paper filter elements.

On low profile engines, the airbox is next to the recoil starter. To access the foam filter element, squeeze on the tabs on the cover and swing it to the left.

To clean a paper filter, knock it against a hard surface or use compressed air under 30 psi to push away surface dirt.

To clean a foam filter, wash it in warm, soapy water or a nonflammable solvent. Once dry, soak the filter in clean engine oil and squeeze out any excess.

Sediment Cup

This cup uses gravity to collect dirt in the fuel before it can reach the carburetor jets.

1. Turn the fuel valve to “OFF.”
2. Unscrew the sediment cup from the bottom of the carburetor. It should come off with an o-ring and a filter. If you have a low profile engine, you’ll need to take off some parts to access the cup: Remove the air filter cover and foam filter element, then unscrew the 5 bolts and 6 nuts holding the airbox to the carburetor.
4. Wash the cup with non-flammable solvent and allow it to dry.
5. Reinstall the cup in reverse order, using a new O-ring and lining up the tab on the filter with the tab on the cup.

Spark Plug

The plug is located between the muffler and the fuel tank. Disconnect the spark plug cap, then use a 13/16 inch plug wrench to remove the plug. The plug gap should be between 0.7-0.8 mm.

Spark Arrester

The arrester is optional and can be fitted to any iGX390. If you have a standard engine, you’ll need to remove the air box to get access to all of the muffler protector screws.

1. Remove the screws from the muffler protector. There are two 5 mm screws on the right side, two 5 mm screws on the top, and one 6 mm screw on the left side.
2. Remove the two 5 mm screws holding the spark arrester inside the muffler opening.
3. Clean the arrester with a wire brush.
4. Reassemble in reverse order.

Need Something for Your Honda Engine?

From drain plug washers to major components, if it’s for a Honda, you can get it from www.hondalawnparts.com. As an authorized Honda Engines dealer, we’re able to offer a wide selection of OEM parts, and we can ship those parts to any address in the U.S. or Canada. Not sure what you’re looking for? Our site can filter results by your model and serial number, and it has built-in parts diagrams and factory descriptions so you can find what you need quickly and easily.

Servicing GC Series Engines

Honda GCThey may not be commercial engines, but Honda’s GC engines have proven to deliver reliable, efficient power in a wide range of mowers and home power equipment. Here’s everything you need to know to keep the horizontal shaft GC and vertical shaft GCV running reliably.

Maintenance Schedule

First 30 days or 5 hours of operation: Change the oil.
Every 90 days or 25 hours: Clean the engine air filter
Every 120 days or 50 hours: Change the oil. Check the flywheel brake (if equipped.)
Yearly or every 100 hours: Check the spark plug and spark arrester (if equipped.)
Every two years or 200 hours: Replace the spark plug and air filter element.

Oil

These engines are designed to use oil that meets SAE classification SJ or later. 5W30 and 10W30 are recommended. SAE 30 can be used at temperatures above 50ºF.

To check the oil, remove the dipstick from the filler neck. Wipe off any oil, then reinsert the dipstick without screwing it back into the engine.

To drain the oil on a GC engine, remove the dipstick followed by the drain bolt and washer on the base of the engine. Once the oil has drained, screw the drain bolt back in, using a new washer to get a tight seal.

To drain the oil on a GCV engine, remove the dipstick and tilt the engine, letting the old oil flow pour out of the oil filler neck.

Add oil via the filler neck. GC engines hold about 20 ounces of oil, while GCV engines hold about 12 ounces of oil. The oil level should come to the top mark on the dipstick.

Air Filter

To access the filter, push in the two tabs on the airbox cover and swing it out of the way. When reinstalling, the paper fins on the filter element should face out toward the cover.

To clean the filter, tap it against a hard surface or use compressed air to blow out any dirt between the pleats. Limit air pressure to 30 psi; higher pressures can force dirt into the filter medium.

Spark Plug

To remove the spark plug, disconnect the spark plug cap and clean out any surrounding dirt to keep it from getting into the engine. Use a spark plug wrench or socket to remove the plug from the cylinder head.

The spark plug gap should be 0.028-0.030 in. Replace the plug if it has signs of damage to the electrode or insulator.

When reinstalling the plug, tighten it by hand, then turn another 1/8-1/4 turn. If you’re putting in a new plug, turn the plug ½ of a turn to crush the washer and get a tight seal around the combustion chamber.

Flywheel Brake

This brake is included in some versions of the GCV. To check the brake, start the engine, set the throttle lever to “Fast” and release the brake lever. The engine should stop quickly. If it doesn’t, check the brake for wear:

1. Remove the three flange nuts from the top of the recoil starter. Remove the starter from the engine.
2. Remove the fuel tank and set aside. The fuel line does not need to be disconnected.
3. Check the thickness of the brake shoe, located next to the flywheel. If it’s under 3 mm, have the brake replaced by a service technician.
4. Reassemble the engine in reverse order.

Spark Arrester

This metal screen can be added to the exhaust pipe of any GC or GCV to comply with local fire codes.

To clean the arrester, wait at least 30 minutes after the engine has been on to ensure the exhaust is completely cool. Remove the three bolts holding the protector onto the muffler, then remove the bolt or screw holding the arrester inside the tailpipe.

To clean the arrester, scrub off any carbon with a wire brush. Replace the arrester if it is damaged or splitting. Reassemble the arrester and muffler in reverse order.

Storage

Wait until the engine has been off for at least half an hour to ensure it’s completely cool. Clean off any dirt using a moist rag. Do not use a pressure washer or garden hose: this can force water inside the engine.

Once clean, fix paint chips by adding a layer of touch-up paint and coat unpainted metal with a light oil. Remove the spark plug and pour one to two teaspoons of clean engine oil into the cylinder. Pull the starter several times to distribute the oil around the cylinder and piston, then reinstall the plug. It’s normal to have a smoky exhaust when the engine is first started. This is just the oil burning off.

Need Something for Your Honda Engine?

Hondalawnparts.com is more than an online retailer: we’re an authorized Honda Engines dealer, so we’re able to ship OEM parts across the U.S. and Canada. Our search engine can filter results by model and serial number so you’ll only see factory parts listings and diagrams specific to your model.

Servicing the WDP30 Pump

Using the WDP30 Diaphragm Pump

With a rock channel and the ability to handle solids up to 2.4 inches in diameter, Honda’s WDP30 is built to handle the roughest pumping jobs. Here’s how you can keep your diaphragm pump performing at its best.

Maintenance Schedule

Before each use: Check the oil level and air filter on the engine. Inspect the hoses and strainer for signs of damage.
After each use: Flush the pump chamber.
First month or 20 hours of use: Change the oil and grease the pump connecting rod bearing.
Every 3 months or 50 hours: Clean the air filter and sediment cup. Grease the pump connecting rod bearing and check the gearbox oil.
Every 6 months or 100 hours: Check the spark plug and (if equipped) the spark arrester.
Every year or 300 hours: Replace the air filter and spark plug. Change the gearbox oil. Inspect the pump diaphragm and clappet valve.
Every two years: Inspect the fuel line.

Honda also recommends bringing the pump in for service every year or 300 hours to clean the fuel system and check both valve clearance and idle speed.

Spark Plug

Replace the plug if the electrodes are worn down or the insulator is cracked. The electrode gap should be between 0.028 and 0.031 inches or 0.07 to 0.08 mm.

Gearbox Oil

To check the oil, the pump needs to be cold and sitting on a level surface. Remove the connecting rod cover, which is held on by a pair of bolts and washers. Remove the dipstick/filler cap, wipe it clean, and screw it back into the gearbox. Remove it again to check the level.

Here’s how to change the oil:

1. Run the engine for 10 minutes to warm up the oil. This helps it drain faster.
2. With the engine off, remove the two bolts and washers from the connecting rod cover. Remove the cover.
3. Oil will damage the diaphragm, so have a pan ready to catch the oil before it flows down the side of the pump. Remove the oil filler cap from the top of the gearbox followed by the drain bolt and washer from the base of the box.
4. Once the gearbox is empty, reinstall the drain bolt and washer.
5. Add SAE 80W90 GL5 gear oil until the dipstick reads full. It holds about 0.8 quarts.
6. Reinstall the washer, cap, and connecting rod cover.

Flushing the Pump Chamber

1. Disconnect the inlet and outlet hoses.
2. Roll the right wheel of the pump onto a block so that the suction side of the pump is pointed up.
3. Put the end of a garden hose inside the pump inlet and turn on the water. The water can be shut off and the hose removed once the discharge from the pump outlet is clear.
4. Lift the suction side of the pump up to allow any remaining water to pour out of the pump outlet.

Accessing the Clappet Valves

These valves create one-way flow through the pump during operation. Damage can result in leaks that reduce pump performance.

1. Disconnect the spark plug, turn off the fuel valve and flush the pump chamber.
2. Remove the nuts and washers from the intake and discharge ports.
3. Remove both ports. As you do this, note the valve position. These are directional and will need to be 4. reinstalled on the same side and in the same orientation.
5. Inspect the clappet valves. If they’re worn or damaged, replace them. If the case sealing surface is damaged, a wear plate can be installed.
6. Place the clappet valves on the studs. The valve’s flat side should face the pump housing on the discharge side and the port on the intake side.
7. Reinstall the ports and apply a medium-strength thread locker. Torque the nuts to 20 ft-lbs.

Sediment Cup

This cup collects dirt in the fuel before it reaches the engine.

1. Turn the fuel valve to “Off.”
2. Unscrew the sediment cup, located under the fuel valve. Make sure the O-ring is still inside the base of the carburetor and is in good condition.
3. Empty the cup and clean it with a non-flammable solvent.
4. Reinstall the sediment cup.

Spark Arrester

A spark arrester isn’t included from the factory, but it can be fitted to any WDP30 pump to meet local fire safety requirements.

1. Unbolt the muffler from the engine.
2. Remove the screws holding the protector onto the muffler. Lift the protector off of the muffler.
3. Remove the screw holding the spark arrester inside the tailpipe.
4. Clean off carbon deposits with a wire brush. If the arrester is cracked, replace it.
5. Reassemble in reverse order.

Keep Your Pump Running with Quality OEM Parts

Hondalawnparts.com is an authorized Honda Power Equipment dealer, so we’re able to ship factory parts and accessories to your door whether you live in the U.S. or Canada. Check out our pump accessory page, or use our search engine to find parts for your specific model revision.

The Honda Versattach System

The Honda Versattach System

There’s a lot of lawn equipment that’s great to have on hand, but the jobs they do are limited to a few days or even a few hours per year. Buying a piece of equipment for each task means having more to take care of, and often forces you to sacrifice quality to keep costs down. However, you can get around these problems with Honda’s Versattach System. While lawn multitools are nothing new, Honda’s collection of powerheads and attachments get around the pitfalls of other systems, giving you an affordable way to get Honda reliability for your less frequent landscaping jobs.

SureLock: An Easier Way to Connect Attachments

Other multitools rely solely on knobs to hold the attachment in place, have driveshafts that need to be lined up, or use pins that are hard to push out when switching tools. Honda’s SureLock system avoids these problems, simplifying attachment so you can switch tools easily. Here’s how it works:

1. Loosen the joint knob
2. Turn set pin knob 180 degrees.
3. Line up the arrows on the powerhead and the attachment, and slide the attachment into the powerhead shaft until the arrows meet.
4. Turn the set pin knob. If it clicks, the attachment is seated.
5. Tighten the joint knob.

Once that’s done, you can be 100% sure the powerhead can drive the attachment and the attachment won’t work loose.

Powerheads

Attachments are driven by a powerhead. This unit has an engine, throttle control and a short shaft with a SureLock connector. The difference between the two powerheads comes down to engines: the UMC425 uses a GX25, while the UMC435 has a more powerful GX35. Both engines are Honda Mini 4 Strokes. They can be used in any position like a two-stroke, but they don’t need mixed gas, are easier to start and have a wider powerband.

Attachments

Honda offers 6 attachments to cover lawn care jobs that would normally require rarely-used specialty equipment.

Trimmer: This string trimmer uses a two-line bump feed head and cuts a 16.5-inch wide swath. It can also be used with an optional three tooth grass blade for heavy brush, or use a variety of aftermarket heads by installing an adapter.

Hedge Trimmer: This attachment comes with a double-sided reciprocating blade that is 21.6 inches long. A joint at the end of the shaft allows the blade to be tilted a total of 108 degrees in 18-degree increments so you can get the perfect cut while maintaining a comfortable hand position. The trimmer is available with either a 5.3 inch or 25-inch shaft.

Edger: This attachment uses a standard 9 x 2-inch blade to cut clean edges around pavement and landscape transitions. A metal anti-wear strip protects the gearbox, while a wrap-around blade guard shields the operator from debris.

Cultivator: This mini tiller attachment has tines that are 9.4 inches in diameter and cut a path that’s 6.5 inches wide. With the engine at full throttle, the tines spin at 233 rpm.

Pruner: A 12-inch bar makes quick work of branches, while the 25-inch shaft gives you enough reach for most bushes and small trees. The oil reservoir is translucent, making it easy to check the level and keep the chain lubricated.

Blower: A long shaft, compact fan, and narrow exit make this attachment perfect for skimming across the ground, blowing up loose debris or lifting up layers of wet, matted leaves. Maximum output will vary depending on your powerhead: the UMC425 can drive this attachment to a maximum of 184 mph and 235 CFM, while UMC435 can drive it to a maximum of 235 mph and 250 CFM.

Extensions: Available in 19 and 39 inches, these extensions give you more reach when hedge trimming or pruning.

Warranty

Honda guarantees the powerheads, engines, and attachments for 36 months of residential use or 24 months of commercial use.

Need Something for Your Honda Equipment?

Hondalawnparts.com is more than a website: we’re a certified Honda Engines and Honda Power Equipment dealer, so we’re able to offer the same OEM parts and accessories you get at brick and mortar dealers. Better still, we have most items in stock and we ship across the U.S. and Canada. Our website can show you factory parts diagrams and descriptions specific to your model, making it easy to find just what you’re looking for.

Frequently Asked Questions about Honda Mowers

HRR and HRS Mowers: Honda Quality and Innovation for the Home OwnerIs there something bugging you about your new mower? Do you think you could get better performance from it? These are the most frequently asked questions about Honda mowers from setting them up to getting parts that fit.

Why Can’t I Tilt the Handle Into Place?

The flywheel brake is engaged, which is putting tension on a cable running on the side of the handle. Closing the bail will let you swing the handle into its operating position.

How Do I Discharge Clippings?

Set the Clip Director to “Bag” or “1.” If you don’t have a bag attached to the mower, clippings will fall out of the rear chute onto the ground.

Do I Need a Spark Arrester?

A spark arrester is a metal screen that traps sparks from the exhaust, preventing them from igniting vegetation. These devices may be required in areas experiencing a drought or that have highly flammable plants.

Arresters are not included from the factory, but they can be added to any Honda mower. The arrester attaches to the exhaust opening with a single screw and can be removed for cleaning. Over time, carbon buildup can fill the screen, restricting exhaust flow. This buildup can be removed with a wire brush.

How Do I Charge the Battery in My Mower?

Electric start models use a small battery mounted in a housing below the start button. The mower’s charging system recharges the battery as you mow. During the mowing season, this should be enough to keep the battery ready to start the engine.

Power may drop off during storage, requiring a recharge. This battery is too small to be safely charged with an automotive battery charger. Honda makes a low amp charger specifically for these small batteries. To use it, remove the battery from the starter box and connect it to this charger for 8-24 hours.

How Short Should I Cut My Lawn?

When cutting, the blade should trim the leaves, but not go through stems or crowns. Most turf grasses should be trimmed to around two inches tall.

Limit cutting to 1/3 of the grass’ total length. Cutting more at one time will make it harder for the grass to recover.

How Do I Mow Leaves?

For the best results, mow the leaves before coverage extends past the height of the grass. This may require moving two or three times per week when leaf fall is at its peak.

Lift the front of the mower one or two settings higher than the rear. This helps the deck draw in leaves instead of pushing them away. Set the Clip Director to “Mulch” or “9.” The mulch left by the mower should be broken down fast enough by your lawn that bagging won’t be needed. If you need to bag the leaves, install a leaf shredder in the discharge opening.

How Do I Store My Mower?

Drain any gas left in the tank, carburetor and fuel lines. Depending on your model, you may be able to drain everything by removing the sediment cup on the bottom of the carburetor, or by tilting the mower and letting the gas flow out of the filler neck. Once the fuel system has been drained, start the engine and let it run until it stalls. This removes any remaining fuel. Even if you’re using gasoline mixed with a stabilizer, it will go stale before next spring.

Remove the spark plug and add a few drops of oil to the cylinder. Pull the starter cable a couple times to distribute the oil, then reinstall the plug. It’s normal for the mower to smoke when first starting the engine next season.

It’s a good idea to thoroughly clean the mower and change the oil before putting it in storage. Never put a tarp over your mower. Moisture can collect inside, promoting rust.

Where Do I Find the Model and Serial Number for My Mower?

The model and serial number for the mower are printed on a tag on top of the deck next to the handle. If you’re ordering engine parts, you’ll need to know its model and serial number. The model name is printed on a large sticker on top of the engine cover, while the serial number is stamped into the engine block.

What’s the Best Place to Get Parts and Accessories for My Mower?

Hondalawnparts.com is an authorized Honda Engines and Honda Power Equipment dealer. That means we’re able to ship OEM parts and accessories for your mower straight to your door whether you live in the U.S. or Canada. Our site can find parts based on your model and serial number, and it will show you factory parts diagrams and descriptions, making it easy to find what you need.

Honda’s Cruise Control Hydrostatic Transmission: Making Mower Control Easy

hondahydrostatic

Hydrostatic motors are used in most riding mowers, but walk-behind models have been stuck with clunky geared transmissions. Honda is changing that with their Cruise Control Hydrostatic Transmission. This exclusive feature makes mower speed fully adjustable for better control on hills and around obstacles, and it works with other mower features to make stops and starts easier.

Why Use a Hydrostatic Transmission?

When you want to change your speed when driving a car, you can shift gears or use more or less throttle. You can also do the same thing on a mower, but there’s a problem: if you close the throttle, the engine won’t spin the blade as fast, reducing cutting performance. Instead of setting the speed exactly where you want it, you have to shift the transmission into gear and work around whatever speed it’s going. This makes mowing awkward when going over slopes, as the mower ends up going too slow or too fast. The gears are also too high for slow speed maneuvers, forcing the operator to shut off the drive system and push the mower when operating in narrow spaces and around landscape features.

Hydrostatic transmissions commonly found on riding mowers and wide-area walk-behind mowers get around this by using a hydraulic pump to control drive speed. By changing the amount of fluid pumped by the hydraulic system, the speed can be varied independently of the throttle. The Cruise Control transmission works the same way, but it’s small enough to be used in a regular walk-behind mower.

How Does it Work?

Instead of driving gears, the engine drives a hydraulic pump. This pump has a set of pistons connected to a swash plate. By changing the angle of this plate, the distance the pistons travel changes, increasing or decreasing the amount of fluid they pump. That fluid is used to drive a hydraulic motor connected to the wheels. In effect, it’s like having a second throttle independent of the engine.

With the pump running at its full flow rate, the pump in the Cruise Control transmission can drive the hydraulic motor fast enough to reach a speed of 4 mph. That’s a brisk walking pace.

Less Complicated Than It Sounds

Hydrostatic drive systems in riding mowers often use a combination of pumps, hoses, filters, and motors to drive the vehicle. However, Honda was able to design a complete hydrostatic drive system including the pump and motor into a single unit that’s no larger than a geared walk-behind mower transmission.

This drive unit is sealed, so it requires no maintenance. There’s also no clutch to wear out, nor is there a belt connected to the engine that can slip and break. That means these mowers require less maintenance and have fewer points of failure than a walk-behind with a geared transmission.

Using Hydrostatic Cruise Control

The bail on the top of the handle changes the swash plate angle, increasing speed as it’s closed. The cruise control lever below it limits plate movement, offering 9 settings for maximum speed. Usually, the bail will be fully engaged, so the mower speed will be the maximum set by the cruise control. The lower the cruise control setting is, the finer the speed adjustment is using the bail. This gives the mower precision control when operating in areas filled with obstacles without being erratic at high speeds.

All models that have a hydrostatic transmission also come with the Roto-Stop blade stop system. This uses a clutch between the blade to the engine shaft, stopping the blade when the operator leaves the controls. With both the blade and bail disengaged, the engine can keep running without cutting or rolling away. When you return to the mower, you don’t need to restart the engine, and you can squeeze the bail to return to your original mowing speed as set, using the cruise control lever.

Which Models have a Cruise Control Hydrostatic Transmission?

Currently, Honda fits this transmission to the HRX217HYA, HRX17HZA, and HRC216HXA.

When You Think “Honda,” Think “Honda Lawn Parts”

Honda Lawn Parts is an authorized Honda Engines and Honda Power Equipment dealer so we can supply you with what you need for your mower, generator, snowblower, pump, trimmer or engine. Our site has factory information built-in including parts diagrams and descriptions, making it easy to find exactly what you need. Whether you’re in the US or Canada, you have parts shipped to your door by visiting www.hondalawnparts.com.

Getting the Most from the HRR216PKA Walk-Behind Mower

HRR216PKA Walk-Behind Mower

The HRR216PKA is Honda’s least expensive mower, making it the most common choice for homeowners new to the brand. Despite its price, it still offers all the innovation you expect from Honda, which makes using it different from anything else from the market. Here’s how you can get the most out of this unique mulching mower.

Using the Clip Director

Unlike most walk-behind mowers, the PKA has a rear-mounted discharge chute. The Clip Director, located next to the base of the handle, operates a door that can cover this chute. This eliminates the need for a mulch plug.

To change mowing modes, push in the button and move the lever to either “Bag” or “Mulch.” If you want to discharge clipping without mulching them, set the Clip Director to “Bag.” Clippings will be sent out of the rear discharge chute without being re-cut.

Cutting Height

Height is set by moving the levers next to each of the wheels. With the levers moved all the way toward the rear of the mower, the cutting height is 1 1/8 inches. Adjustment isn’t linear: as the levers are moved forward, the cutting height increases to 1 ¾, 2 ½, 3, 3 ½ and finally 4 inches.

Fuel

The engine used in this mower is designed to use gasoline that contains up to 10% ethanol. This fuel should be used within 30 days of purchase, or within 90 days if it’s treated with a fuel stabilizer. When adding fuel, only fill the tank up to the bright red fuel lever gauge inside the filler neck. After filling the tank, move the mower away from the fueling location. This prevents the ignition of any remaining fuel vapor.

Smart Drive Control

The mower’s self propulsion is controlled by pushing on the palm pads of the smart drive control: the harder you push, the faster the mower will go. Letting up on these pads shuts off the drive system, letting you push the mower when maneuvering around trees and other obstacles.

To adjust the position of the Smart Drive Control, move the adjustment lever on the back of the controls to the left to unlock. Rotate the controls until they’re in a comfortable position, then move the adjustment lever to the right to lock them in place.

If the drive system isn’t engaging like it should check the cable tension. With the engine off, then put the drive control levers in their lowest position. Push down on the levers while rolling the mower backward. The mower should stop before the levers are pointed straight down. If it doesn’t stop, find the adjuster, located between the bottom of the handle and the mower. Loosen the jam nut. It may be helpful to mark one side of the long adjuster nut. Pull the mower backward without using the Smart Drive Control. If you don’t feel resistance, turn the adjuster nut clockwise one turn. Keep rolling the mower and turning the adjuster until the mower wheels lock up when pulling the mower backward. Turn the adjustment nut counterclockwise 8 times and tighten the lock nut.

Microcut Blades

The Microcut system uses two blades stacked on top of each other. The upper blade is narrow with an angled cutting edge, while the lower blade has large winged ends to increase vacuum.

To access the blades, tilt the mower on its right side so the fuel tank is facing up. This keeps fuel from flooding the carburetor.

When fitting blades to your mower, the upper and lower blades should be stacked on top of each other, followed by a set of directional washers and bolts. The outer edge of the washers should face toward the blades. Torque the blade bolts to 36-43 ft-lbs.

Grass Bag

To attach the bag, lift the guard on the back of the mower and set the bottom edge of the bag opening against the bottom of the discharge chute. Push the bag forward to lock it into place.

Over time, the pores in the bag can become clogged, keeping air from passing through and reducing the amount of grass entering the bag. If this happens, remove the bag from the mower and wash it with a garden hose or pressure washer. The grass bag can be used again once it’s completely dry.

Mowing on Hills

This mower is designed to handle slopes up to 20 degrees. When mowing on a hill, go across it instead of up and down.

Getting Parts for Your Honda Mower

Hondalawnparts.com is an authorized Honda Engines and Honda Power Equipment dealer, which means we carry everything you need to maintain your HRR216PKA mower. Our site can show you parts based on your model and serial number, and it even has built-in parts diagrams direct from the manufacturer, making it easy to find what you need. We ship across the US and Canada.

Versamow: Solving Common Problems with Mulching Mowers

Versamow: Solving Common Problems with Mulching Mowers
What is Versamow? Honda touts this as a single feature, but it’s really a combination of design elements included on HRX mowers that give them the flexibility to fit any mowing situation. By using a clever chute control and advanced blades, the mower can mulch wet grass and leaves, get more clippings into a bag and even operate in two mowing modes at one time.

Microcut Twin Blade: More Cuts for Better Performance

Instead of making blades with different amounts of lift that have to be swapped out when going between mowing, bagging or discharge, Honda fits their mowers with a pair of blades that work in any situation. While in discharge mode, the leading edges of these blades cut grass twice with each pass, leaving finer clippings. In mulching mode, the vacuum created by the blades blows clippings upward into the mowing chamber to fall back town for another cut.

The added edges cut down clippings faster, letting HRX models mulch grass that would bog down other mowers while creating a very fine mulch that’s quickly digested by microorganisms, returning nutrients to the soil. The dual cutting action also makes for smaller, more compact clippings when bagging, stuffing up to 40% more grass in the bag than competitors’ walk-behind mowers.

Clip Director: Getting the Right Balance

Instead of being stuck in bagging, mulching or discharging modes, the Clip Director lets you vary the amount of grass that is kept inside the mowing chamber for mulching and the amount that is released to the bag or the discharge chute. With 9 positions, you can balance mulching with discharging for the best results.

The lever moves a door on the back side of the deck. In the highest bagging setting, the door is fully open, drawing all the clippings into the bag. Move it to the highest mulching setting, and the door is fully closed, trapping the clippings in the mowing chamber where they’re cut down to size before falling to the ground. Want to discharge clippings? With the bag removed, clippings that go through the door will fall through a chute and end up on the ground.

Having trouble deciding which mode you should use to mow your lawn? If the lawn is too thick or wet to mulch all of it, you can direct some of the clippings out of the deck, mulching the rest. If you want a clean finish without having to bag lots of grass, you can use the Clip Director to divert some grass toward the deck or chute. This lets you leave a small amount of clippings that will blend in with the lawn and cut down on the amount of yard waste you have to dispose of.

The deck is also designed to work with the Clip Director when mulching leaves. Just set it one or two positions away from the full mulch position, and the leaves will be kept in the mowing chamber long enough to be cut down to size before being discharged.

What Else Can I Expect from a Versamow-Equipped Mower?

When clippings come through the door, they fall out of the rear of the deck like a high-end landscaping mower, spreading them out instead of leaving piles as you mow. Since there’s no chute sticking out of the side, the mower is narrower, making it easier to maneuver.
The chute cover stays on the mower, lifting up when you want to install the bag, and the Microcut blades work for all types of mowing. That means you can switch between mulching, bagging and discharging clippings without needing to use tools or install extra parts like a mulch plug.

Get the Performance Your Honda Mower Was Designed For

When you want quality OEM parts for your mower, visit www.hondalawnparts.com. We’re an authorized dealer for Honda Engines and Honda Power Equipment, so we can provide you with everything you need to keep your HRX cutting as good as it did when it was new. Our site has built-in factory parts diagrams and descriptions so you can be sure you’re ordering exactly what you need. We ship across the USA and Canada.