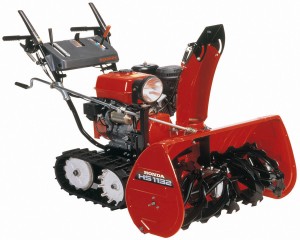
Storing Your Honda Snowblower

Storing Your Honda Snowblower

It’s been a rough winter, but it won’t be long before winter is replaced by spring and it will be time to put away your Honda snowblower. Proper preparation will protect your equipment when it’s in storage and make it easier to get running again once winter weather returns.

Washing

The auger housing, chute, and wheels or tracks can be rinsed off with a garden hose. Everything else should be wiped down with a moist rag to prevent water from seeping into the engine and gearbox where it can dilute the oil.

Once dry, apply some touch-up paint to damaged areas and a light oil or silicone spray to exposed metal components.

Lubrication

Refer to your manual to see the grease points on your model. Usually, this will include the chute guide, chute rolling gear, control lever links, chute tension bolts, auger height pivot point and, if you have a track model, the frame pivot point on the frame just inside of the tracks. There are no grease fittings on these points: simply smear some grease on the joints and move them back and forth to ensure even coverage. Some wheeled models have greaseable wheel axles, and the HS1336iAS also needs to have grease applied to the rolling cylinder pivot that tilts the auger.

A light, non-detergent oil should be applied to the auger and blower impellers at any point where they meet with the transmission or axles.

Fuel

Treated or not, fuel should not be left in your snowblower’s engine for over three months. To drain the fuel, use a siphon or hand pump to drain the tank, then switch the fuel valve on and unscrew the drain knob or screw from the base of the carburetor, letting the remaining gas pour into a suitable container.

If you have a Honda GX-series engine, the drain knob or screw threads into a sediment cup. Once the fuel has been drained, remove this cup and clean it thoroughly. Always use a new O-ring when reinstalling the cup.

Oil

The oil should be changed before storage regardless of the hours put on the machine since the last service. A small amount of oil should also be added to the inside of the cylinder. To do this, remove the spark plug and pour one to two teaspoons (5-10 ml) of oil through the hole. Rotate the engine a couple times to distribute the oil, then reinstall the plug.

Battery

If your snowblower has an electric starter, disconnect the negative battery terminal. Honda recommends recharging the batteries at least every 6 months while they’re in storage. The batteries on the HS1336iAS should be disconnected from each other and charged separately.

Storing

Parking your snowblower on a sheet of cardboard will protect the tires and tracks from direct contact with the cement, which can damage the rubber in extreme cold. It also makes it easy to find fuel and oil leaks when you pull it out of storage next winter.

Keep the snowblower away from any source of flame or spark. This includes furnaces, power tools and metalworking. While the fuel system may be empty, there can be enough residual gas to create the fumes needed to cause a fire. Make sure the fuel valve is set to “OFF” to minimize leakage of any residual fuel.

Keep your snowblower covered with a purpose-built cover, not a tarp. Tarps can’t breathe, allowing moisture to collect on metal components and promote rust. Always let the engine and exhaust cool completely before putting the cover on to keep it from melting.

Getting Parts for Your Honda Snowblower

From covers to major components, you can get everything you need for your Honda snowblower at www.hondalawnparts.com. Our site has built-in factory diagrams and descriptions to help you find the parts you need, and since we’re a certified Honda Power Equipment and Honda Engines dealer, you know you’ll always get quality OEM replacements. We can ship your order to any address in the U.S. or Canada.

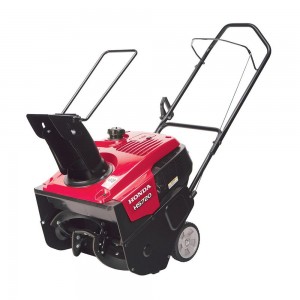
HS1336iAS Snowblower Maintenance

HS1336IAS_PE_IMG250

Working on a hybrid may sound complicated, but maintaining the Honda HS1336iAS snowblower is relatively straightforward. Here’s what you need to know to keep this advanced piece of equipment ready to clear winter snowfall.

Tool Kit

A toolkit is included with this model for most common repairs. This kit can be stored in the toolbox at the back of the snowblower. Here’s what you should find inside:

10 and 12 mm box end wrench
10 and 14 mm open end wrench
Two 12 and 17 mm open end wrenches
Spark plug wrench and handle
Spare fuse cover and 5 and 15 amp fuses
Pliers
5 blower shear bolts
10 auger shear bolts
15 8 mm self-locking nuts
Two cotter pins
Two battery terminal covers

If you’re missing any of these tools or spare parts, it’s a good idea to pick up some replacements before you need them.

Maintenance Schedule

First month or 20 hours of use: Change engine oil, check track tension
Before each use: Check engine oil, battery electrolyte level, skid shoes, scraper, and all nuts and fasteners.
Each year before first use: Check battery electrolyte gravity, spark plug, and tracks. Change the engine oil.
Each year before storing: Check sediment cup, drain fuel tank and carburetor and apply oil on unpainted surfaces to stop corrosion.
Every 100 hours: Change engine oil
Every four years or 300 hours: Change spark plug

Honda recommends having these services done by a dealer:

First month or 20 hours: Check chute cable, auger belt, and ACG belt
Each year before first use: Check chute cable, auger belt, ACG belt, gear oil, idle speed and valve clearance.
Every 300 hours: Check idle speed and valve clearance
Every 1,000 hours: Clean combustion chamber
Every two years: Check fuel tube
Every four years: Clean fuel tank and filter, replace fuel tube

Oil

Check the oil by removing the filler cap/dipstick and reinserting it into the engine without screwing it in. If the level is low, add more oil and check the level with the dipstick. Unlike other Honda engines, the oil should not come up to the top of the filler neck. Honda recommends 5W30 automotive oil.

To change the oil, remove the filler cap and place a drain pan under the drain plug, below and left of the filler neck. To open the drain, use a 15 mm wrench to hold the extension in place and unscrew the drain bolt with a 10 mm wrench. Put a new sealing washer on the drain bolt when reinstalling. Pour oil into the engine through the filler neck. This model holds 1.16 quarts.

Spark Plug

The spark plug gap should be between 0.7-0.8 mm (0.028-0.031 inches.) Replace the spark plug if the electrode or insulator is damaged.

When reinstalling the plug, turn it ¼ turn after it seats to get a good seal, or ½ turn if you’re using a new plug.

Track Adjustment

The tracks should be clean and dry to get an accurate measurement. Press down on the middle top of the track. A force of 22 lb-ft. should move the belt 0.63-0.79 inches. To change the tension, loosen the lock nuts on the tension bolt, located behind the front wheel. Turn the tension bolt until the deflection is correct, then retighten the lock nuts.

Shear Bolt Replacement

Get the snowblower onto a stable, level surface and make sure the auger clutch switch is set to OFF. Release the drive clutch lever and use the auger control to put the auger into its lowest position.

Turn the engine off and remove the ignition key. Make sure all the rotating parts on the snowblower have come to a complete stop.

After removing any jammed material and cleaning out the impeller housing, replace any broken sheer bolts. There are two on each side of the auger drive shaft next to the auger transmission and two more at the back of the shaft behind the transmission.

Battery

The batteries are behind the rear cover. To access them, loosen the two knobs on the sides of the snowblower next to the cover, then tilt the cover downward.

The batteries are connected in series with a joint cable running between the negative terminal on the right side battery and the positive terminal on the left side battery. When removing the batteries, first disconnect the terminal on the left side negative terminal followed by the right side positive terminals and finally the joint cable. Place the tubes included in the toolkit on the terminals to protect them while working on the batteries.

Getting Parts for Your Snowblower

When you need something for your HS1336iAS, visit www.hondalawnparts.com. We’re a certified Honda Power Equipment and Honda Engines dealer so we can ship you OEM replacements for anything on your machine to any address in the U.S. or Canada.
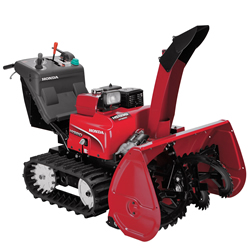
HS1336iAS Snowblower Operation

HS1336iAS Snowblower Operation

Even if you have plenty of experience using a snowblower, the Honda HS1336iAS is nothing like any machine you’ve used before. Its hybrid drivetrain is unique in the industry, while features like automatic speed control and a tiltable auger are rare in this market. Here’s what you need to know to get up to speed with Honda’s most advanced snowblower to date.

Starting

1. Turn the fuel valve to “ON”
2. Move the shift lever into neutral (N.)
3. Turn the engine switch to “START.” Release once the engine starts. If it hasn’t started after 5 seconds of cranking, release the starter and wait 10 seconds before starting again to keep the starter motor from overheating.

If the engine doesn’t start after 5 attempts, push and release the manual start lever, next to the fuel valve, then try the electric starter again. If it still doesn’t start, push in the start lever and try starting.

Once the engine is running, move the throttle to “SLOW” and gradually increase the engine speed as the motor warms up.

Setting the Skid and Scraper

1. Lower the auger to the ground using the auger control switch.
2. Shut off the engine and remove the key from the ignition switch.
3. Loosen the bolts on the skid and set the height according to the surface being cleared:

For operating over gravel, raise the auger by ½ inch and lower the skids until they are 0.3 inches from the ground. Keep in mind that this isn’t foolproof and it’s still possible that the auger will pick up and throw rocks.

For hardened snow, raise the auger as high as possible and lower the skids until they touch the ground.

For clearing pavement with regular snow, raise the auger 0.4 inches off the ground and lower the skids until they touch the ground.

Auger Housing Position

The height adjuster has three settings:
High — when clearing snow in multiple passes or when backing up the snowblower.
Middle — Normal clearing
Low — Hardened snow

Auger angle can be set using the tilt control. Holding the control once the auger has reached the end of its movement can overheat the adjustment motor, keeping it from moving until the motor cools down. The auger can be returned to its original position by pushing “RESET.”

Work Modes

Set the work mode with the transmission in neutral (N.) Choosing the right mode depends on how you need to use the snowblower:

Auto — The snowblower adjusts speed and power automatically. This is the quietest mode and requires less input from the operator.
Power — Allows the operator to adjust the speed while in motion to match the current workload, while the snowblower manages the throttle. Offers the maximum throwing distance and clearing speed.
Manual — Gives the operator full control of the throttle and drive speed.

Auger and Speed Control

Pushing the auger clutch switch allows the augers to engage once the drive clutch is engaged. Holding the auger clutch switch for four seconds turns on the protection function, stopping the auger and blower.

In Power and Manual modes, the shift lever controls the snowblower speed. Low range is recommended for most snow, while fast range can be used for light snowfall.

In Manual mode, the throttle lever should be set to the third mark from the bottom when first engaging the drive clutch. Once the transmission is in gear, the throttle can be adjusted to change speed.

Turning

The motors are controlled by the steering levers, one on each grip. To turn in one direction, squeeze the lever on that side. The more the lever is moved, the sharper the turn will be; a fully closed handle causing the wheel to stop, letting the snowblower turn in place.

Transporting with the Engine Off

The electric drive motors can be used with the engine shut off for transport. To enable this mode, release the drive clutch, shift into neutral, and turn the engine switch to “ON.” Hold down both steering levers for three seconds. The red and orange drive control warning indicators on the control panel will blink. Engage the drive clutch, and the snowblower can be controlled normally. Keep in mind that using this mode for more than three minutes can drain the battery to a point that it can’t start the engine. After the drive clutch lever has been open for 5 seconds, this mode will shut off.

Get What You Need to Keep Your Snowblower Workings

www.hondalawnparts.com is your one-stop shop for everything Honda from spark plugs to skid shoes. Our site can show you factory parts diagrams and descriptions for parts used on your model so you can find exactly what you need, and we can ship your order to any location in the U.S. or Canada.

Fixing and Replacing the Tires on Your Snowblower

Fixing and Replacing the Tires on Your SnowblowerHave a flat on your Honda snowblower? Just got it out of storage to find a tire has come off a rim? Here’s what you need to do to fix it and keep it from happening again.

Tube or Tubeless?

All Honda snowblowers built in the past two decades that use pneumatic tires are tubeless. That means if you have a leak, it’s in the tire itself. It also means that if the tire separates from the rim, the bead needs to be reseated to reinflate the tire.

Tire Pressure

Tire pressure should be checked before each use, even if you got your snowblower out the day before. If the temperature drops 10°F, tire pressure can drop up to one PSI. Tires can also lose one PSI each month they’re in storage. Honda’s snowblower tires are designed to operate at 8.5 PSI, so it doesn’t take much for the pressure to drop significantly between uses.

Removing and Replacing a Wheel

Removing the wheel will make it much easier to work on the tire. Honda offers some tires and wheels as a complete set, letting you replace a bent rim and tire in one step.

1. Disconnect the spark plug wire to prevent an accidental start.
2. Lift up the rear of the snowblower so that the tires are off the ground.
3. Depending on the model, there will be either a bolt or a Clevis pin on the axle. Remove this part, and slide the wheel off of the axle.
4. Slide the new wheel onto the axle and tighten down the bolt or reinstall the pin.
5. Air up the tire before lowing the snowblower to keep the bead from separating it from the rim.

Reseating a Tire

If the tire pressure is too low, rolling the snowblower can cause the tire bead to roll off of the rim. If that happens, it can be reseated by using air pressure to push out the sidewalls of the tire:

1. Remove the wheel.
2. Hold the tire and wheel in a way that lines the bead up with the rim.
3. Connect the air valve to a compressor or a pressurized air tank. You may need to go over the recommended operating pressure to push the bead onto the rim, but try not to go above the maximum pressure on the sidewall. The goal isn’t to put a lot of air in the tire, it’s to put the air in quickly to get the bead to meet with the rim.

Most of the time, the tire will expand and seat on the rim with just air pressure. If the bead still doesn’t want to seat, there are a few things you can try:

— Apply grease on the inside lip of the wheel. This helps the tire slide up to the rim, and can reduce the amount of air escaping as you air up the tire.
— Remove the valve stem. This reduces resistance when airing up the wheel. Be gentle handling the wheel and tire when reinstalling the stem as the lack of air pressure can let the bead slide off of the rim again.

— Tie a ratchet strap or a rope around the tire tread. This pressure will help push out the sidewall so the bead doesn’t have as far to go to meet with the rim. To tighten a rope, slide a piece of pipe between it and the tire and twist, wrapping the rope around the bar.

It is possible to spray the rim with starter fluid and light it to pull the tire onto the rim, but it should be obvious that this is extremely dangerous. If the tire is that difficult to fit, it’s worth getting a complete wheel and tire instead of setting your snowblower and yourself on fire.

Replacing a Tire

If there are cracks in the rubber or damage to the tire, it should be replaced.

1. Remove the wheel from the snowblower.
2. Push in the tire valve to release any remaining air inside the tire.
3. Use a set of tire levers or spoons to pull the bead over the rim. Once one bead is off the wheel, lift up the tire and pull the other bead over.
4. Fit the new tire onto the wheel using the spoons or levers.
5. Use the process above for reseating the bead. Air up the tire to the correct pressure, then install the wheel on the snowblower.

Getting New Tires and Wheels for Your Snowblowers

www.hondalawnparts.com is a certified Honda Power Equipment dealer, so we’re able to ship any OEM part currently available to any address in the U.S. or Canada. Check out our wheels section to find a replacement for your snowblower, or use our search system to find the right part for your model.

HS1336iAS Hybrid Snowblower

HS1336iAS Hybrid Snowblower

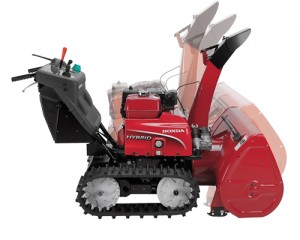
Honda is known for being the first to market with new technology, and their power equipment division is no exception: their top-of-the-line HS1336iAS is the only hybrid snowblower on the market. While the word “hybrid” may bring to mind fuel-sipping cars, adding electric power does more than conserve fuel. Adding electric propulsion gives this walk-behind the power to replace a tractor-operated PTO snowblower and makes it easier to use than just about anything on the market today.

State-of-the-Art Gasoline Power

This snowblower is powered by an iGX390, an electronically-controlled version of Honda’s popular GX series of commercial engines. It has an Electronic Control Unit like a modern car engine with a self-tuning regulator that adjusts throttle and RPM automatically to match load and speed demands.
It also allows drive-by-wire remote control and automatic choke, eliminating the need for two control cables. Coil-on-plug ignition provides more power and lowers fuel consumption, while the GX’s standard features including low friction components and low noise muffler carry over.

Starting is as simple as turning on the ignition and pushing the start button. There’s no choke or throttle to adjust, and the on-board 24-volt electrical system has no problem turning the engine over.

Hybrid Motivation

This isn’t a hybrid system like you’d find in a car. Instead, the engine directly powers the augers and generates power for a pair of electric drive motors. These motors provide maximum torque as soon as they start turning to push into thick accumulation, and they have sensors that can automatically adjust speed to get maximum snow clearing performance without bogging down. By connecting these sensors to the electronic control system on the engine, Honda has been able to create an easier way to control the snowblower’s speed.

Using a lever next to the handles, the operator can choose from manual, semi-auto or automatic speed control to best fit operating conditions. In automatic, the snowblower controls the forward speed and throttle automatically for the best performance, picking up the maximum amount of snow without bogging down. In manual mode, throttle and speed are controlled by the operator like a regular snowblower. Semi-auto hands throttle speed control off to the snowblower with the operator dictating the speed to make it easier to operate in tricky areas like slopes and iced-over pavement.

The advantages continue with the engine off. The motors can operate solely off of the batteries, making this snowblower easy to transport.

Auger

The main auger is 36 inches wide and can handle snow up to 22.8 inches deep at a rate of up to 3,000 lbs. per minute. Teeth on this auger help it bite into hardpacked snow.

The second auger pushes snow through a double-hinged chute provides a smooth curve for more precise control of where the snow lands. The position of the auger is electronically controlled using a joystick on the control panel. Maximum throwing distance for the chute is 62 feet.

The HS1336iAS has a unique power lift and tilt system for the auger housing for increased stability on hills, letting it go places that would normally require a tractor-based snowblower.

Parts and Accessories

As expected in this market, Honda makes a storage cover and a drift cutter for this model. There’s also a cold weather cab to protect the operator from snow and wind.

Getting parts and accessories for the HS1336iAS is easy: just visit www.hondalawnparts.com. We’re a certified Honda Engines and Honda Power Equipment dealer, which means we can ship the full range of Honda OEM parts to your doorstep, no matter where you live in the U.S. or Canada. Not quite sure what you need? Our search engine makes finding parts simple by including factory diagrams and descriptions.

HS928 and 1132 Two Stage Snowblowers

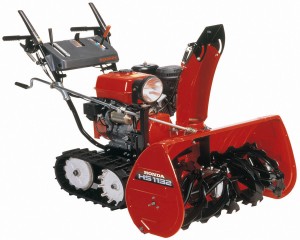
HS928 and 1132 Two Stage SnowblowersHow powerful can a walk-behind snowblower be? Honda’s biggest two-stage models don’t just have augers that can cut through large snow drifts, they have the power to move even the heaviest accumulation. The HSS928 and it’s high-powered stablemate, the HSS1332, deliver the performance, reliability and pragmatic design demanded by professionals. In some cases, they may be able to replace small tractor-powered snowblowers, providing the same clearing power without the added expense, complexity or maintenance of a PTO-driven unit.

HSS928

The 928 is powered by a GX270. These commercial engines come with an automatic decompression system, making it easy to start, even in extreme cold. The HSS928ATD and HSS928AWD come with an electric starter powered by an onboard battery, so there’s no need to find an outlet to get the engine running.

A heavy-duty serrated auger busts through ice and hard pack snow, picking up snow as high as 21.7 inches in strips up to 28 inches wide at a rate of up to 1,900 lbs. per minute. The auger housing rides on reversible skid shoes, while a small LED headlight mounted next to the chute helps with visibility. Maximum throwing distance is 52 feet. The chute has 198 degrees of rotation and its angle and pitch can be controlled with an electric joystick located next to the handles.

This line of snowblowers uses a hydrostatic drive system with independent control of the drive wheels, helping to both move and turn the snowblower. Once the snowblower is lined up for a pass, the levers can be locked to provide equal power to both wheels using one hand, leaving the other hand free to make adjustments to the controls.

Both the HSS928AW and AWD ride on 14-inch pneumatic tires with a new tread pattern designed for grip on slick surfaces. This is a great choice for use on flat surfaces like parking lots. For owners who need to deal with slopes, The HSS928AT and ATD come with a track drive system paired with an auger height control system supported by pneumatic strut for smooth adjustment. By lowering the auger, it can dig into hard packed snow that other snowblowers would drive over.

HSS1332

The 1332 is powered by a GX390, which is simply a larger version of the GX270. The size of the main auger remains the same, but the added power from the bigger engine lets these snowblowers move up to 2,750 lbs. per minute, making it a good choice if you regularly deal with slushy or hard pack snow. The HS1332ATD includes an electric starter along with an hour meter and auger lock indicator. Honda only sells the HSS1332 with the track drive system.

Warranty

Honda covers these snowblowers and their engines for 3 years of residential or commercial use.

Maintaining and Repairing Honda Snowblowers

Whether you have a small single stage model or a large commercial two stage blower, you can get everything you need for your Honda at www.hondalawnparts.com. As a certified dealer for Honda Engines and Honda Power Equipment, we’re able to provide OEM replacement parts for everything on your equipment, and we can ship your order to any location in the U.S. or Canada.

HSS724 Two Stage Snow Blowers

hss724-housing

Sometimes, a single stage blower isn’t big enough to get the job done, while most two-stage blowers are overkill. Honda’s HSS724 two-stage snowblowers are designed to fill the niche between these extremes, offering enough power for residential and minor commercial work while including features normally found only in the largest snow moving equipment.

Engine

These snow blowers are powered by a 198cc Honda GX200. This engine is a staple of the commercial outdoor equipment market, known for unparalleled reliability and easy starting, even in extreme cold. In this application, only the front of the engine is covered, shielding it from ice and snow while retaining easy access to service points. The gas tank is fitted with a top-mounted fuel gauge and an extra large gas cap designed to be easy to remove when wearing gloves.

Both the HSS724AWD and ATD have an electric starter that is powered by an onboard battery, eliminating the need for an extension cord. All models include an LED headlight.

Performance

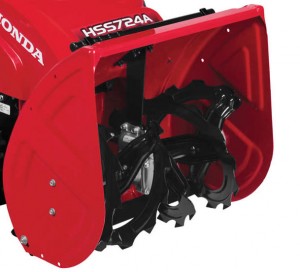
These snowblowers can sweep up a strip of snow that’s up to 23.8 inches wide and 21.7 inches tall at a rate of 1,500 lbs. per minute. This power is paired with a serrated main auger busts through ice and heavy snow, helping the HSS724 tackle ground cover that will stop most other blowers. This auger rides on greaseable bearings for long-term durability and has offset shear pins to prevent damage if there’s a jam. Reversible skid shoes protect the bottom edge of the auger housing, while a chute clearing tool clips into the side of the snowblower cover for quick, safe unclogging.

The second auger pushes snow through the chute hard enough to throw it up to 49 feet away. The chute uses an electric joystick control for angle and pitch and has 198 degrees of rotation.

Drive System

The HSS724AW and AWD ride on 14-inch pneumatic tires that have a new tread pattern designed for better grip on snow and slick pavement, making them a great choice for most users.

The HSS724AT and ATD use a track drive system that is ideal for use on difficult surface terrain and commercial flat roofs. The rubber tracks provide added grip on hills and inclines, uneven surfaces, icy conditions and heavily packed snow. These models also allow the height of the auger to be adjusted, digging into hard pack snow instead of driving over it.

All versions of the HSS724 come with a hydrostatic drive system that has infinitely variable speed control, letting you get the right rate of snow removal to get the job done quickly without bogging down. Drive to each wheel can be engaged independently using a set of grips on the handles, helping to steer the snowblower by shutting off power to the inner wheel. Once the snowblower is in position, the grips can be locked together, allowing one hand to control drive engagement while the other is free to operate other controls. When you need to transport the snowblower, closing both grips puts the drive system in neutral so it’s easy to roll.

Both the hydrostatic drive and throttle are adjustable from the handle-mounted controls, letting you ease off the engine for lower fuel consumption when moving light snow.

Warranty

Aside from wear items like shear pins and belts, Honda covers the snowblower and engine for three years of both residential and commercial use.

Getting Parts for HSS724 Snow Blowers

Whether you need some spare shear pins or it’s time to do major repairs to your Honda snowblower, you can get everything you need from www.hondalawnparts.com. We’re a certified Honda Power Equipment dealer, which lets us offer the full line of OEM parts for Honda equipment and the engines that power them. Our site can show you factory descriptions and diagrams for the parts of your model, making it easy to find exactly what you need. We ship to both the U.S. and Canada.

HS720AA and AS Single Stage Snowblowers

Honda HS720AS

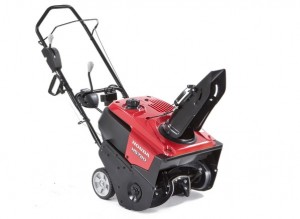
Honda may make large commercial quality snowblowers, but that doesn’t mean they’ve left the residential market behind. The HS720AA and HS720AS single stage snowblowers deliver the innovation and reliability you expect from a Honda product.

Serious Snow Clearing Power

These models have a maximum 20-inch clearing width and can handle snow up to 12 inches deep. More importantly, these models can move up to 1,800 lbs. of snow per minute, which is up to four times the rate of similarly sized equipment in this segment. This lets the snowblower use more of its capacity with each pass, even when picking up dense snow, saving significant time on jobs.

Drive systems are heavy and expensive, so to keep costs and weight down, Honda came up with a novel solution to provide self-propulsion. The auger blades have rubber paddles mounted on them that sweep up the snow, then grip the ground as the roll pass, pulling the snowblower forward. While it doesn’t completely eliminate pushing, it decreases the force to move the snowblower significantly. Turning is easy, too, thanks to a weight of just 89 lbs. for the AA and 93 lbs. for the AS. That’s about the same as a basic push mower.

The auger is surrounded by a metal housing, while a plastic housing protects the engine and other components from snow and ice.

Easy Starting

Both models are powered by Honda’s own GC190, a popular engine for everything from pressure washers to agricultural equipment. It comes with an automatic decompression system to make the engine easier to turn over for quick starts. Go for the AS and you’ll get a 120-volt electric starter. Just plug the box on the handle into a three-prong extension cable and push the button, and an electric motor will start the engine for you. If there’s no power access handy, the engine can still be pull started.

Easy Operation and Servicing

The single auger can push snow through the chute to drop it at a distance of up to 33 feet. This chute uses Honda’s Snow Director, allowing pitch and angle to be operated using two handle-mounted levers while in operation so you can keep the snow going exactly where you need it without having to stop to make adjustments.

Controls and service points are easy to access. The ignition switch, choke, starter grip, dipstick and oil drain plug are all located on the rear of the unit, while the spark plug and fuel tank can be accessed from the top. All controls are oversized to be easy to operate while wearing gloves.

Warranty

Honda covers the entire snowblower including the engine for two years of residential use or three months of commercial use.

Getting Parts for Honda Snow Blowers

Whether you need to keep some shear pins and belts on hand or make a few repairs to your Honda snowblower, you can find everything you need at www.hondalawnparts.com. We offer the full line of OEM Honda Power Equipment parts, and we can ship these parts to any address in the U.S. and Canada. Not quite sure what you need? Our site can find parts based on your model and serial number and will show you factory descriptions and parts diagrams so you know exactly what you’re ordering.

Setting Up the HS720AM, AA and AS Snowblowers

hs720am snowblower

Honda’s 720AA, 720AS, and 720AM snowblowers may be small, but they deliver enough power to clear driveways and sidewalks, making them a great choice for homeowners. If you just picked one up to use this winter, there are a few steps you need to take to get your new equipment up and running.

What You’ll Need

These snowblowers are heavy, and the shipping carton is designed so that the blower must be lifted straight up for removal, so it’s a good idea to have someone on hand to help you get everything out of the box.

You’ll also need a few tools to set up your new snowblower:

– A gas can filled with fresh gas. While not required, it’s a good idea to use a stabilizer with the fuel since it may be weeks or months between snowfalls.
– A small funnel
– 12 mm wrench
– 10 mm wrench (720AM only)
– #2 Phillips head screwdriver (720AM only)
– Clean rags

A bottle of oil is included with the snowblower and can be found in a plastic bag with the owner’s manual.

Model and Serial Number

The model information can be found on a tag on the base of the snowblower at the back. This information will be needed to register your snowblower with Honda and to order parts. There’s a place to write this down in your owner’s manual for easy reference.

Adding Oil

Remove the dipstick from the filler neck, located on the back side of the snowblower on the bottom left side. Using the funnel, pour the included oil into the engine. The crankcase is full once oil starts dripping out of the filler neck. Screw in the dipstick.

Handlebar

Gently unfold the handle, taking care not to pinch the control cables. Use the 12 mm wrench to tighten down the nuts where the two halves of the handlebar meet. Remove any cardboard packaging.

Spark Plug

Remove the spark plug door, located on the top of the snowblower housing. Clip the spark plug cap onto the plug and snap the door back into place.

Chute

The chute needs to be installed on the 720AM. Place the chute over the discharge opening near the front of the snowblower and line up the screw holes. Slide the screws into the holes through the inside of the chute and thread on the nuts from the outside. Tighten down the screws with the screwdriver and 10 mm wrench. Once installed, move the chute around to ensure it fits correctly and doesn’t bind.

On 720AS and AA models, the operation of the remove chute controls should be checked before use. Move both the pitch and angle levers through their full length of motion to make sure the cables are operating correctly and the chute doesn’t bind.

Fuel

Remove the fuel tank cap on the top of the snowblower and add gas. The tank is full once the fuel level reaches the bottom of the filler neck.

First Start

The controls for the engine are located on the rear of the snowblower body. Turn fuel valve to “ON,” turn the engine switch to “ON,” and pull the choke. Pull the recoil starter lightly until you feel resistance, then give it a hard pull. If everything was set up correctly, the engine should fire up. Push in the choke.

When you’re ready to stop the engine, turn the engine switch to “OFF” and the fuel valve to “OFF.”

Electric Starting (720AS)

Connect the starter box, located to the left of the chute angle control, to a grounded three-prong outlet using a three-prong outdoor-rated extension cord. Turn the fuel valve to “ON,” turn the engine switch to “ON,” and pull the choke. Press the start button on the starter box until the engine fires up. Once the engine is running, push in the choke and disconnect the extension cord.

Belts and Shear Pins

The drive belt and shear pins are designed to fail if something gets jammed in the auger to prevent damage to more expensive components. Have some spares on hand will let you quickly repair your snowblower after the obstruction has been removed.

Where can you buy them? www.hondalawnparts.com. We’re a certified dealer for Honda Power Equipment, letting us provide everything you need from shear pins to major components. Finding parts is easy: just select your model and serial number range, and our site can show you factory parts diagrams and descriptions to help you identify exactly what you need. We ship across the U.S. and Canada.

Which Snowblower is Right for You?

Which Snowblower is Right for You

It’s that time of year again: the leaves have fallen and the grass has stopped growing, replacing lawn care with snow removal. What Honda snowblower will fit your needs?

Single-Stage vs. Two-Stage

A single-stage snow blower uses one auger to pick up snow and push it through the chute, while a two-stage snowblower adds a second auger to push snow through the chute. This lets two-stage blowers throw snow farther so they can clear larger areas. Honda’s single-stage blowers can throw snow up to 33 feet away, while their two-stage blowers can throw snow between 49 and 56 feet away, depending on the model.

Drive System

Honda’s single-stage snowblowers are “semi-self propelled.” There’s no drive system, but the action of the auger digging through the snow helps pull the machine along the ground, reducing the force needed to push the blower through the snow.

All two-stage snowblowers except the HS1336iAS come with a hydrostatic drive like you’d find on a riding mower. The wheels are driven by a hydraulic system that can be infinitely varied to get the speed you want.

The HS1336iAS uses a hybrid drivetrain. The engine powers the augers, while electric motors power the tracks. While there are efficiency benefits to this system, its biggest advantage is the motors’ ability to deliver maximum torque as soon they start moving. This keeps the blower rolling in situations that would bog down other equipment. It also has a transport mode, allowing the snowblower to be moved around without starting the engine.

The HSS1332AT, HSS1332ATD, and HS1336iAS use a track drive system, which gives them the grip needed to clear snow on inclines.

Starting

The HSS928AWD, HSS1332ATD, and HS1336iAS all have electric starters. Unlike most snowblowers on the market, these starters are powered by the on-board batteries, so there’s no need to plug it into an outlet.

All other models use a standard recoil starter, but since the engine has an automatic decompression system, they’re easy to turn over, even in cold weather.

Height, Width, and Pounds per Minute

A snowblower has a maximum snow height it can handle and a maximum width it can remove with each pass. While it’s technically possible to reach the maximum width and height, the actual amount it can handle without bogging down will depend on snow density, which can vary a lot: a cubic foot of light snow may only weigh 7-8 pounds while the same amount of hard pack snow can weigh well over 20 lbs. To make apples-to-apples comparison easier, Honda includes a pounds-per-minute rating, which is how much snow the machine can move regardless of depth. All things being equal, a snowblower with a higher pounds-per-minute rating will be able to cut through a wider strip of snow with each pass.

Chute Control

Honda’s smallest model, the HS720AM, uses a simple chute control: the height is adjusted using a pair of bolts, while the direction can be changed by turning the chute using the handle.

Most models come with Honda’s Snow Director. This uses two levers mounted on the handle to change the direction of the chute and the angle of the opening to drop snow exactly where you need it with each pass. The largest models use a power tilt system with similar controls.

Parts

No matter which Honda snowblower you end up purchasing, you can get everything you need for it from skid shoes and shear pins to major components from www.hondalawnparts.com. We’re a certified Honda Power Equipment dealer, which lets us offer the full line of OEM parts. Finding what you need is easy thanks to our advanced search engine that has built-in factory diagrams and descriptions. We can ship your order to any address in the U.S. or Canada.