
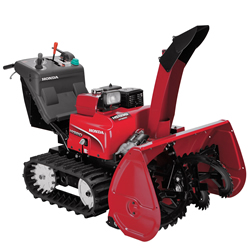
Working on a hybrid may sound complicated, but maintaining the Honda HS1336iAS snowblower is relatively straightforward. Here’s what you need to know to keep this advanced piece of equipment ready to clear winter snowfall.
Tool Kit
A toolkit is included with this model for most common repairs. This kit can be stored in the toolbox at the back of the snowblower. Here’s what you should find inside:
10 and 12 mm box end wrench
10 and 14 mm open end wrench
Two 12 and 17 mm open end wrenches
Spark plug wrench and handle
Spare fuse cover and 5 and 15 amp fuses
Pliers
5 blower shear bolts
10 auger shear bolts
15 8 mm self-locking nuts
Two cotter pins
Two battery terminal covers
If you’re missing any of these tools or spare parts, it’s a good idea to pick up some replacements before you need them.
Maintenance Schedule
First month or 20 hours of use: Change engine oil, check track tension
Before each use: Check engine oil, battery electrolyte level, skid shoes, scraper, and all nuts and fasteners.
Each year before first use: Check battery electrolyte gravity, spark plug, and tracks. Change the engine oil.
Each year before storing: Check sediment cup, drain fuel tank and carburetor and apply oil on unpainted surfaces to stop corrosion.
Every 100 hours: Change engine oil
Every four years or 300 hours: Change spark plug
Honda recommends having these services done by a dealer:
First month or 20 hours: Check chute cable, auger belt, and ACG belt
Each year before first use: Check chute cable, auger belt, ACG belt, gear oil, idle speed and valve clearance.
Every 300 hours: Check idle speed and valve clearance
Every 1,000 hours: Clean combustion chamber
Every two years: Check fuel tube
Every four years: Clean fuel tank and filter, replace fuel tube
Oil
Check the oil by removing the filler cap/dipstick and reinserting it into the engine without screwing it in. If the level is low, add more oil and check the level with the dipstick. Unlike other Honda engines, the oil should not come up to the top of the filler neck. Honda recommends 5W30 automotive oil.
To change the oil, remove the filler cap and place a drain pan under the drain plug, below and left of the filler neck. To open the drain, use a 15 mm wrench to hold the extension in place and unscrew the drain bolt with a 10 mm wrench. Put a new sealing washer on the drain bolt when reinstalling. Pour oil into the engine through the filler neck. This model holds 1.16 quarts.
Spark Plug
The spark plug gap should be between 0.7-0.8 mm (0.028-0.031 inches.) Replace the spark plug if the electrode or insulator is damaged.
When reinstalling the plug, turn it ¼ turn after it seats to get a good seal, or ½ turn if you’re using a new plug.
Track Adjustment
The tracks should be clean and dry to get an accurate measurement. Press down on the middle top of the track. A force of 22 lb-ft. should move the belt 0.63-0.79 inches. To change the tension, loosen the lock nuts on the tension bolt, located behind the front wheel. Turn the tension bolt until the deflection is correct, then retighten the lock nuts.
Shear Bolt Replacement
Get the snowblower onto a stable, level surface and make sure the auger clutch switch is set to OFF. Release the drive clutch lever and use the auger control to put the auger into its lowest position.
Turn the engine off and remove the ignition key. Make sure all the rotating parts on the snowblower have come to a complete stop.
After removing any jammed material and cleaning out the impeller housing, replace any broken sheer bolts. There are two on each side of the auger drive shaft next to the auger transmission and two more at the back of the shaft behind the transmission.
Battery
The batteries are behind the rear cover. To access them, loosen the two knobs on the sides of the snowblower next to the cover, then tilt the cover downward.
The batteries are connected in series with a joint cable running between the negative terminal on the right side battery and the positive terminal on the left side battery. When removing the batteries, first disconnect the terminal on the left side negative terminal followed by the right side positive terminals and finally the joint cable. Place the tubes included in the toolkit on the terminals to protect them while working on the batteries.
Getting Parts for Your Snowblower
When you need something for your HS1336iAS, visit www.hondalawnparts.com. We’re a certified Honda Power Equipment and Honda Engines dealer so we can ship you OEM replacements for anything on your machine to any address in the U.S. or Canada.
