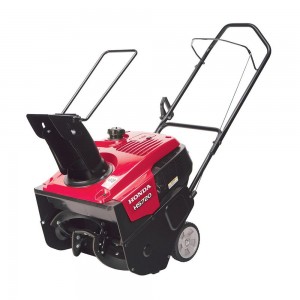
It’s been a rough winter, but it won’t be long before winter is replaced by spring and it will be time to put away your Honda snowblower. Proper preparation will protect your equipment when it’s in storage and make it easier to get running again once winter weather returns.
Washing
The auger housing, chute, and wheels or tracks can be rinsed off with a garden hose. Everything else should be wiped down with a moist rag to prevent water from seeping into the engine and gearbox where it can dilute the oil.
Once dry, apply some touch-up paint to damaged areas and a light oil or silicone spray to exposed metal components.
Lubrication
Refer to your manual to see the grease points on your model. Usually, this will include the chute guide, chute rolling gear, control lever links, chute tension bolts, auger height pivot point and, if you have a track model, the frame pivot point on the frame just inside of the tracks. There are no grease fittings on these points: simply smear some grease on the joints and move them back and forth to ensure even coverage. Some wheeled models have greaseable wheel axles, and the HS1336iAS also needs to have grease applied to the rolling cylinder pivot that tilts the auger.
A light, non-detergent oil should be applied to the auger and blower impellers at any point where they meet with the transmission or axles.
Fuel
Treated or not, fuel should not be left in your snowblower’s engine for over three months. To drain the fuel, use a siphon or hand pump to drain the tank, then switch the fuel valve on and unscrew the drain knob or screw from the base of the carburetor, letting the remaining gas pour into a suitable container.
If you have a Honda GX-series engine, the drain knob or screw threads into a sediment cup. Once the fuel has been drained, remove this cup and clean it thoroughly. Always use a new O-ring when reinstalling the cup.
Oil
The oil should be changed before storage regardless of the hours put on the machine since the last service. A small amount of oil should also be added to the inside of the cylinder. To do this, remove the spark plug and pour one to two teaspoons (5-10 ml) of oil through the hole. Rotate the engine a couple times to distribute the oil, then reinstall the plug.
Battery
If your snowblower has an electric starter, disconnect the negative battery terminal. Honda recommends recharging the batteries at least every 6 months while they’re in storage. The batteries on the HS1336iAS should be disconnected from each other and charged separately.
Storing
Parking your snowblower on a sheet of cardboard will protect the tires and tracks from direct contact with the cement, which can damage the rubber in extreme cold. It also makes it easy to find fuel and oil leaks when you pull it out of storage next winter.
Keep the snowblower away from any source of flame or spark. This includes furnaces, power tools and metalworking. While the fuel system may be empty, there can be enough residual gas to create the fumes needed to cause a fire. Make sure the fuel valve is set to “OFF” to minimize leakage of any residual fuel.
Keep your snowblower covered with a purpose-built cover, not a tarp. Tarps can’t breathe, allowing moisture to collect on metal components and promote rust. Always let the engine and exhaust cool completely before putting the cover on to keep it from melting.
Getting Parts for Your Honda Snowblower
From covers to major components, you can get everything you need for your Honda snowblower at www.hondalawnparts.com. Our site has built-in factory diagrams and descriptions to help you find the parts you need, and since we’re a certified Honda Power Equipment and Honda Engines dealer, you know you’ll always get quality OEM replacements. We can ship your order to any address in the U.S. or Canada.

