How to Test Your Lawn’s Soil

honda fertilizerTesting soil is standard practice for professional landscapers, but if you’re new to this process, it can be daunting. How do you know you’re getting a good sample, and how do you act on the results?

Preparing a Soil Sample

If you have areas that need different soil characteristics, say, a lawn and a flower garden, you should perform a test for each area. The soil should be dry and all tools should be cleaned beforehand to ensure a reliable reading. Make sure to get the sample sent in at least a couple weeks ahead of when you plan on fertilizing to ensure you’ll have the results in on time.

Start by digging several holes 6-8 inches deep. These holes should be spaced out around the soil and include areas where plants are thriving and failing.

Slice into the side of each hole all the way down and place into a bucket. Once you have soil from each hole, mix it together and spread it out on a newspaper. Once it’s dry, it can be packaged and sent to the lab.

Understanding Test Results

The results you get from your soil test will vary: most DIY kits only test acidity, while a test from your local extension office will include nutrient information so that you can apply the correct chemicals and fertilizers to help your lawn flourish. What do these results mean?

Soil Acidity
Acidity is rated in pH, which is a number between 1 and 14. 7 is neutral, while lower numbers are acidic or “sour,” and higher numbers are alkaline or “sweet.” Most plants thrive in soil with a pH of 6.2-7.2, while some plants including blueberries and rhododendrons prefer more acidic soil. Soil is usually alkaline in the central and southwest U.S, and acidic in the rest of the country.

Nutrients
This includes phosphorus (P,) potassium (K,) calcium (Ca,) magnesium (Mg,) and sulfur (S.) Micronutrients including iron, manganese, copper, zinc, and boron may also be listed in areas with sandy soils.

Toxic chemicals
Aluminum (Al) can harm root construction and reduce phosphorus solubility, although acidic soil-loving plants are usually less affected. Aluminum is hard to extract, but decreasing soil acidity can reduce its solubility.
Lead (Pb) can be absorbed by plants, making it unsafe to eat vegetables grown in soil with a lead content higher than 300 ppm (parts per million.)

Adjusting pH

Acidic soils can be brought closer to neutral by using lime, which is simply powdered limestone.

Alkaline soils can be acidified with sulfur, gypsum, Sphagnum peat moss or organic compost. Peat moss can be expensive and compost may not be readily available, making sulfur and gypsum the most common treatments.

Picking the Right Fertilizer

While fertilizer blends are marketed for specific purposes, their function comes down to the formulation. Somewhere on the fertilizer bag will be a set of three numbers, such as “18-9-9.” These indicate the proportion of nitrogen, phosphorus, and potassium, sometimes labeled “N-P-K.” The “P” stands for phosphate (P2O2) and the “K” refers to potash (K2O,) materials used to provide plant-available nutrients. Each number is a percentage, but these elements will never add up to 100 since part of the fertilizer needs to be fillers to make it easier to handle.

Each nutrient helps plants in different ways:

Nitrogen is a critical component for the manufacturing of chlorophyll, which is used by plants to capture and process sunlight. High nitrogen fertilizers are promoted for use with new seeds.

Phosphorus is used to build roots and helps plants flower, so it’s often sold as “bloom booster.”

Potassium helps with a wide range of functions including drought resistance, cold resistance and the building of roots and chlorophyll.

Your soil report will show you exactly what your top soil is deficient in, letting you apply fertilizer accordingly. Always err on the side of caution as too much of any nutrient can cause plant burning and even death.

Micronutrient fertilizers are also available, but since adverse effects are unlikely, these mixes include every micronutrient so they can correct any deficiencies.

Soil Additives

Other nutrients can be added using chemicals:

– Lime and gypsum add calcium.
– Lime and Epsom salts (magnesium sulfate) add magnesium
– Gypsum, potassium sulfate, sul-po-mag, manure, and compost add sulfur

Since lime makes soil more alkaline and both sulfur and gypsum make it more acidic, these chemicals should be avoided if your soil already has the right pH.

Take the Work Out of Fertilizing

Whether you’re using your mower to mulch grass, turning garden soil with a tiller or using a spreader to deposit fertilizer, chances are that equipment is built by Honda or uses one of their engines. Where can you turn when you need to maintain or repair this equipment? www.hondalawnparts.com. We’re a certified dealer so we can provide you with the OEM parts you need, whether you live in the U.S. or Canada.

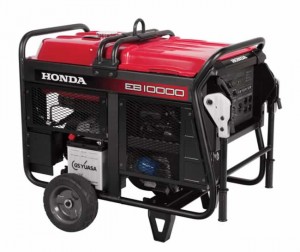
Using a Honda Generator for Construction

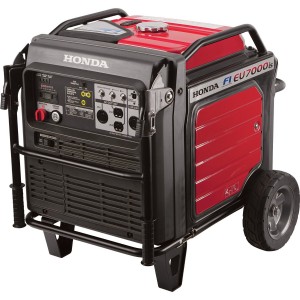
Honda-Commercial-Generator

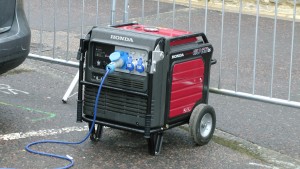
While the proliferation of Lithium-Ion technology has made portable tools a more viable choice in construction, there’s plenty of equipment that needs AC power. To serve these users, Honda makes the EB-Series of generators. They’re built for the demands of commercial and rental use, are offered a range of outputs, use low noise designs and are OSHA compliant. How do you know which one is right for you? Here’s what you need to know to work out your use case.

How Many Watts Do I Need?

As a general rule of thumb, Honda recommends a 2,000 watt generator to run a single tool, 3,000-4,000 watts to run two tools and over 4,000 watts to run several tools. However, your specific use case can vary a lot depending on the equipment that will be drawing power from the generator.

The easiest way to calculate the power needed for a tool or appliance is to check the data tag, usually located on the body of the device. If this tag has worn off, the same information can usually be found in the owner’s manual, or measured using an appliance load tester. To convert amps into watts, multiply the rated amps by the voltage, either 120 or 240.

Electric motors create a “reactive” load, requiring a lot more power when they start than when they run. To compensate for this, Honda’s generators have a maximum load capacity that can be sustained for a few seconds to help deal with these load spikes. Devices with these loads include air compressors, power tools, grinders and pumps. Manufacturers of commercial equipment will usually state both the starting and running power in amps or watts on the data label. Some labeling systems use a letter to indicate the starting amps per horsepower:

A – 26.0
L – 83.3
B – 29.5
M – 93.3
C – 33.3
N – 104.0
D – 37.4
P – 116.6
E – 41.6
R – 133.3
F – 46.6
S – 149.9
G – 52.4
T – 166.6
H – 59.0
U – 186.6
J – 66.6
V – Over 186.6

For example, if you have a ¼ hp drill press with a “P” code, it requires 29.15 amps to start or 3,498 watts. If there is no code or second number, assume the starting power will be three times as much as the running power.

When calculating power demands, remember that you probably won’t be turning all your devices on at the same time. The generator you buy should be able to support all the equipment you may be using at one time plus the highest single reactive load for your equipment.

Can I Power Electronics with an Industrial Generator?

Inverter generators including CycloConverter models like the EB3000c create a clean power waveform, making them safe to use with electronics as well as tools with computerized control systems. This means you can use them to power Li-Ion charging stations, computers, and radios.

Can I Power Three Phase Equipment with a Generator?

No. While most EB models can provide 240-volt power, this electricity is single phase, switching fully between negative and positive polarity. In a three phase system, three power waveforms are combined, keeping the polarity fairly steady. Welders and some large electric motors need three phase power to work properly.

NFPA and OSHA Compliance

OSHA establishes what needs to be done to ensure a safe work environment, while the National Fire Protection Agency (NFPA) regulations handle how those standards are met when involving fire safety. NFPA rules also apply outside of work use. For generators, these standards bodies come into play in two ways:

OSHA has specific requirements for generators used in the workplace covering fire safety, grounding and circuit protection. The NFPA issues rules for fire compliance to meet OSHA’s requirements. All Honda EB Series generators are OSHA compliant.

The NFPA issues guidelines for using generators for emergency backup power for all users, commercial and private. All Honda generators comply with NFPA regulations if they’re installed and used correctly.

Full compliance requires correct usage of the generator, which includes keeping it outside of buildings and away from walls to prevent carbon monoxide poisoning. When adding a generator to your equipment, you’ll need to have a way to get that power to the work area via cables and weather protection to prevent shorts from rain.

Getting Parts and Accessories for Industrial Grade Honda Generators

Hondalawnparts.com is a certified Honda Power Equipment dealer, so we can offer OEM parts and accessories to keep your generator working including cables, transfer switches and load testers. Our massive warehouse lets us keep most popular parts in stock for fast shipping to any address in the U.S. or Canada.

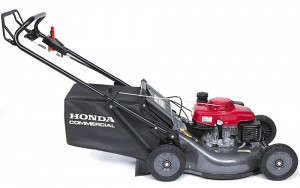
The HRC216HDA: Honda’s Latest Commercial Walk-Behind Mower

Honda-HRC216-Lawn-Mower-side-right

While the commercial market is dominated by riding mowers with massive decks and engines, walk-behind mowers are still a necessity for trimming hard to reach areas. Honda’s HRC mowers are designed for these users, integrating professional level quality and riding mower features into a walk-behind. The latest model in this lineup is the HRC216HDA, which bridges the gap between the push PDA and hydrostatic drive HXA.

Engine

The HDA is powered by a GXV160 engine. It has a dual element air cleaner which has a reusable foam element that stops larger debris, providing a longer life for the inner paper filter, while the Oil Alert system prevents the engine from running if it doesn’t have enough oil, preventing damage to internal components. A fuel shutoff valve is included to keep the carburetor from flooding during transport, maintenance, and storage. On this model, it comes with a manual throttle, letting you bring the motor down to idle so you can keep it running while emptying the clipping bag.

Deck

The motor sits on a 21-inch deck made out of 16 gauge steel with rolled edges like you’d find on a stamped riding mower deck. A large front bumper protects the deck from scrapes and impacts and provides a tie-down point so the paint doesn’t get scraped up when loading the mower on a truck or trailer.

The deck uses Honda’s MicroCut twin blade system, slicing grass twice with each pass. This design creates an excellent finish and can handle mulching and bagging in conditions that would bog down other mowers; Honda is so confident of its performance that they make side discharge an option since most users won’t need it. The deck can be set to one of 8 mowing heights ranging from ¾ to 4 inches, while the onboard bag can carry up to 2.5 bushels of clippings before being emptied.

Drive System

The HDA has more in common with a riding mower than just the deck: it also uses a hydrostatic transmission. Using the handle-mounted lever, the forward speed can be set to anywhere between 2.1 to 4 mph. The cruise control function lets you keep the speed set when shutting off or idling the mower: once you close the bail, the mower will return to its original pace. If you need to make a short stop to pick up branches or empty the bag, the flywheel brake engages as you leave the handle, stopping the blades immediately for safe stops without shutting off the engine.

Maintenance

The transmission is connected to the engine by a shaft drive, so there are no belts to replace on this mower. Sealed, adjustable cables are used for the controls for years of smooth action. The wheels are made out of Honda’s super durable NeXite polymer and ride on sealed ball bearings. These features make servicing the HDA more like a push mower, eliminating everything aside from engine maintenance and blade sharpening.

Warranty

Honda warranties the mower for one year of commercial use, while the engine is guaranteed for two years. For residential owners, the mower and engine are both covered for two years.

Servicing and Parts

Getting parts for maintaining and repairing the HRC216HDA is easy: just visit www.hondalawnparts.com. We’re a certified Honda Small Engine Equipment dealer, which means we offer OEM replacements for everything Honda from portable generators to professional mowers. Our site makes finding the right part easy by showing factory parts diagrams and descriptions so you can quickly identify what you need, and we can ship those parts to any location in the U.S. and Canada.

Using a Honda Generator During Storms

Honda GeneratorA Honda generator can keep power going when a storm cuts your home’s connection to the grid so you can keep televisions, radios, and phones on to monitor the forecast while keeping a few appliances running for comfort. However, getting the generator up and running can be daunting during bad weather. With a little planning, you can make the switch from grid to generator power a lot easier.

Storage

Like any piece of small engine equipment, a generator needs to be kept in a cool, dry place. However, it also needs to be in a place that will be accessible during a storm, letting you position it where it can be used. That means carrying it or rolling it to a place that keeps it at least three feet away from buildings so that carbon monoxide from the exhaust won’t reach lethal concentrations. Make sure you can easily move the generator from its storage spot to its operating spot, taking care of any obstacles that may be in the way.

Cords

Since you can’t bring your generator into your home, you need a way to get power from it to the appliances you want to use. When shopping for extension cords, make sure to check the amperage: it needs to be at least as high as the maximum amp output of the socket it will be plugged into.

Larger generators include a twist lock outlet. This keeps the cord attached at the generator end when running long distances, but it also requires a special extension cord with the right end. The type of twist lock cord you’ll need will depend on the power mode and attached appliances: all Honda generators can produce 120-volt power, while some have the ability to make 240-volt power for high-demand appliances and can even switch some outlets between 120 and 240-volt output. Cords are available with ends including multiple 120-volt sockets that use power directly, converter cables that turn 240 volts into 120, and 240-volt sockets for high power demand devices like water pumps. 120-volt power is fed through an inverter to get a clean waveform that’s safe for sensitive electric devices, but 240-volt power comes directly from the generator and shouldn’t be used for these devices.

Fuel

The fuel used in your generator should be no more than 30 days old, or 90 days old if it’s been treated with a stabilizer. Instead of storing fuel just for the generator, keep some fuel on hand for the generator and other power equipment including mowers and lawn care tools so it’s used up quickly. Honda’s generators can run for several hours on a tank of gas, so one full tank should be enough to keep appliances going until the power is restored or it’s safe for you to leave your home and buy more fuel.

Oil

Honda’s Oil Alert system will shut down the engine to prevent it from being damaged if there isn’t enough oil, but that also means your generator won’t be able to make power. Keep some extra oil on hand and check the oil level before moving the generator out of storage.

Linking the Generator to Your Home Wiring

Your generator can feed into your home’s electrical system directly using a transfer switch. This device is required by law when linking a generator to home wiring because it isolates your home from the grid. Without this switch, power can enter the grid, shocking workers who are trying to repair the lines. This switch needs to be installed by a professional electrician to make sure it’s working correctly. Once installed, the generator can be moved to the switch and plugged in so it can supply electricity when the power fails.

Keep Your Generator Running with Genuine Honda Parts

As a certified Honda small engine equipment dealer, www.hondalawnparts.com carries everything you need for your Honda equipment. Along with replacement parts for your generator, we carry genuine Honda accessories including transfer switches and cable adapters so you can rest easy knowing you’ll be ready when storms strike. We ship across the U.S. and Canada.

Trimming Tips

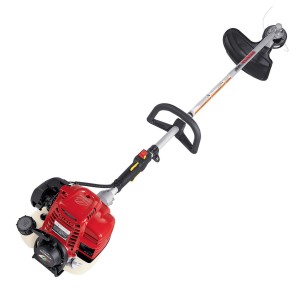
honda trimmersWith models ranging from the compact VersAttach to professional models powered by their own unique four stroke engine, Honda’s brushcutters and string trimmers are able to deliver impressive performance for homeowners and landscape professionals. However, there’s more to using this equipment than just firing up the engine and pointing the head at some tall grass. These tips will help you use your trimmer safely and effectively.

Safety

Unlike a mower, the head of a trimmer isn’t surrounded by a shroud, which means whatever is hit by the string or blade can be flung away at high speed, turning pebbles, plants and other objects into dangerous projectiles. When you use a trimmer, you should have full protection for your eyes, legs and feet, and you should always wear non-slip shoes or boots. People and animals should be kept away from where you’re working to keep them from being hit.

Ear protection is also a necessity due to the high level of noise generated by the cutting head and the engine. Even though Honda’s mini four strokes are far quieter than two-stroke engines, they can still cause hearing damage after prolonged use.

Always inspect the area for obstacles that could damage the trimmer or pose a safety hazard. Fence wire, chain, and electrical cables are particularly dangerous because they can wrap around the head. Once they tighten and jam the trimmer, it will kick back violently, causing serious injury.

Cutting Technique

The trimmer is designed to be used with the head parallel to the ground, floating just a couple inches from the surface. In some circumstances, the head may need to be used at an angle to get into crevices.

If you’re looking at the trimmer head from the top of the device, the head spins counter-clockwise. When trimming, the head should sweep right across the area being cut. This lets the string or blade slice into the plants and toss them against the debris shield, reducing the chance of turning these bits of growth or any objects hiding beneath them into projectiles. Once you’ve turned all the way to the right, swing back to the left before cutting again.

When cutting next to obstacles like walls and fences, tip the head slightly to the right. This will force ricocheting debris toward the ground.

Adjusting Harnesses and Handles

If you have a model that attaches to a shoulder harness, the proper adjustment will keep the trimmer in a comfortable position while maintaining the head position where you need it. The harness should be adjusted so that the quick release latch is resting on your hip. When the trimmer is attached, it should balance at an angle that places the head a few inched above the ground.

Whether or not your trimmer comes with a harness, the handle should be adjusted so that you can hold the trimmer in the correct position while your arms and shoulders are relaxed.

Getting More Line Out of the Head

To get more line out of a manual feed head, shut off the engine, then pull up on the head and twist it counter-clockwise.

Semi-matic and Pro-tap heads use a bump feed system. To get more line out, bump the head against the ground while the head is spinning. Always bump the head against soft ground: contact with pavement will grind off the surface of the head.

Using a Brushcutter Blade

String is great for cutting through young, green plants, but it will just slap the sides of woody plants. A brushcutter blade has the opposite problem: it goes through woody stems with ease, but it will just chew through young grass and weeds.

The basic technique for using a blade is the same as using the string head on your trimmer. However, it’s a good idea to check the area before cutting for unseen obstacles including rocks, branches, and other debris. While these will only wear down line, they can do serious damage to a blade.

On some models, Honda includes two debris shields. The shield with the cutoff knife should be used with trimmer line: this blade cuts off excess line as it passes by. The other shield is designed for use with the brushcutter blade. It’s shaped and supported to protect the operator from hardier grass.

When switching between the blade head and the line head, remember that everything on the shaft is reverse threaded so it won’t loosen during operation. Bolts and heads need to be turned left to tighten and right to loosen.

Keep Your Honda String Trimmer in Top Condition

Whether you need a brushcutter blade, a replacement harness or some engine parts, you can find everything you need for your Honda at www.hondalawnparts.com. We’re a certified dealer for Honda Small Engine equipment, and we can ship OEM parts to any address in the U.S. and Canada.

Engine Overheating

engine overheating
Summer heat and long hours of operation can put serious thermal stresses on your Honda engine, but under normal circumstances, it should have no problem keeping temperatures under control. However, a few problems can crop up that can push temperature to a level that components can expand, increasing friction and eventually seizing. Addressing these problems early can keep the motor going and avoid a costly rebuild.

Dirt

Small engines are air cooled: heat from combustion is transferred to the surrounding metal of the head and engine block where it heats the air. The fins increase the surface area, allowing more heat to be transferred. Dirt is a poor heat conductor, which means a dirty engine can’t get that heat into the air. Attention should also be paid to the plastic shroud over the engine: it helps channel air to the fins. If it gets clogged, airflow is reduced.

These parts can be cleaned with compressed air or a soft brush. Never use a pressure washer, as this can push water into the engine where it can contaminate the fuel and oil.

Oil

Oil has two roles in heat management: it reduces internal friction that generates heat, and it carries heat from the combustion chamber and piston to the rest of the engine, increasing the area that can be used to transfer that heat into the atmosphere. Although most modern Honda engines have their Oil Alert system to force shutdown if the oil level is dangerously low, the oil can still get low enough without triggering the system to compound problems that can lead to overheating. Always check the oil level before starting the engine.

Cooling System Damage

To keep enough cool air around the cooling fins, the flywheel has fins on its surface that act as a radial fan. While the engine is running, these fans draw air in from the shroud and push it around the engine to remove heat. Something as simple as some leaves or grass gathered on top of the inner shroud can reduce airflow, while damage to the fins or shroud can cause significant airflow problems. Replacing these parts once the issue has been found can save your engine from needing a rebuild.

Air/Fuel Mixture

Fuel also plays a role in cooling, directly absorbing heat from the combustion chamber and maintaining combustion heat at an acceptable level. If the engine runs lean, temperatures can skyrocket, leading to overheating.

The most common cause of a lean mix is a dirty fuel cap. This cap has small vents that allow air to enter the tank as fuel leaves. If those vents are sealed, the reduced pressure inside the tank can keep the carburetor from drawing in fuel, causing the mixture to lean out.

A dirty filter can also reduce fuel flow, especially in sub-50cc engines like those found in string trimmers. These engines have a small screen on the end of the fuel line that needs to be pulled out of the tank and cleaned occasionally. Other models have an in-line filter or a bowl on the bottom of the carburetor to collect debris before it reaches the jet. Clogged fuel filters should be replaced, while bowls can be drained or removed and cleaned.

Damage or age can also break the seal between the carburetor and the engine. If the seal between these two parts allows air to enter, the engine will be getting outside air along with air mixed with fuel in the carburetor, leaning out the mix reaching the cylinder.

Work in an area with high altitudes? Honda makes kits to change the carburetor jetting to deal with the reduced air density. If you try to use the engine at lower altitudes, the mix will be too lean. If the shop or previous owner who made the swap did it by the book, there should be a label on the engine stating the jets have been replaced.

Get the Parts You Need to Fix Your Honda Small Engine

Hondalawnparts.com is a certified Honda Small Engine Equipment dealer, letting us offer all the OEM parts you need to get your engine’s temperatures under control. Our site has advanced search tools with factory diagrams and descriptions to make it easy to find what you need, and we can ship your order anywhere in the U.S. and Canada.

Taking Your Honda Generator Tailgating

honda-generatorNo matter what sport you’re into, half the fun of going to a game or a race is the tailgating. With a little preparation, a Honda generator can help you get the most out of your party by letting you watch the pre-game show on TV, outfit your mobile kitchen and keep some cold drinks on hand.

How Many Watts Do I Need?

Generators are rated in maximum watts for temporary loads and running watts for long term use. To get the right size generator, you need to figure out how much power you need for the devices you plan on using. Most appliances have a label clearly outlining power demands, but there are a couple things to watch out for.

A heating element on an electric hot plate or a hair dryer may have the watts stated clearly on the side of the device, but this is a measurement of heat energy, not electrical energy. If there isn’t an electric label, plan on using 60% more than the stated heat wattage.

Watts = Amps X Volts. If you have an appliance only rated in amps, simply multiply that number by 120 to get the watts.

Electric motors are “reactive” loads, using up to three times as much power to start as they do to run. Appliances that have electric motors include air conditioners, blenders, fans, and refrigerators. Since air conditioners and refrigerators cycle on and off constantly, it’s best to have enough capacity to handle the peak load at any time. With other appliances, you can plan around this load, switching off a few things before starting them up, then switching everything back on once the appliance is running.
Resistive loads like TVs and toasters always draw the same amount of current when they’re on.

Are Electronics Safe to Use with a Generator?

Honda generators come equipped with inverters that convert the generator’s power into a clean AC waveform that won’t damage sensitive electronics including TVs and computers.

How Do I Set Up My Generator?

Like any internal combustion engine, the motor in your generator makes carbon monoxide, which can be poisonous in high enough concentrations. Never place it under awnings or tents where the exhaust gasses can collect. Placing it downwind will keep the exhaust from blowing over the area you’ll be partying. Using a high amp extension cord will reduce resistance, taking a load off of your generator and the equipment connected to it. For most uses, the best route is to get a cord designed for the locking plug that ends in multiple 120v outlets.

While it’s easy to get an extension cord made for outdoor use, you’ll probably end up using a few devices intended to be used only in the home. GFCI protection is built into the outlets on your generator to reduce the chance of shorts, but some extra precautions should be taken to help keep your appliances away from water. Make sure they’re kept off of the ground and have some sort of weather protection to keep them from getting wet and inspect cords for damage before plugging them in.

How Loud is the Generator?

Most Honda recreational generators are housed in a case that helps quiet engine noises. At most, the generator will make 65 dBa under full load, which is about the same as a normal speaking voice. Since the generator will be at least a few feet away from where you’ll be hanging out, the sound will be drowned out by TVs, radios, and talking.

How Can I Get the Most Out of My Appliances?

If you tailgate regularly, it may be worth investing in an outdoor refrigerator. These are built to keep items cool in a wide range of environments, and if they’re UL listed, they’ve undergone a series of tests to ensure they won’t short if they get wet. Likewise, outdoor TVs are built to both withstand moisture and manage heat through a wide range of temperatures, while the life of a standard TV will be shortened considerably if it gets cold or overheats.

You can reduce the load that refrigerators, freezers, and refrigerated coolers put on your generator by filling them with pre-chilled food. If you have a freezer or cooler, fill any remaining space with ice to create a thermal buffer.

Where Can I Get Parts to Keep My Generator Working?

www.hondalawnparts.com is a certified dealer for Honda Power Equipment. We stock parts for Honda generators and the motors that power them, and we can ship those parts anywhere in the U.S. and Canada. Finding the right part is easy thanks to our advanced search system that integrates factory diagrams so you can see where the part fits on your machine.

Honda Mini Four Stroke Engine

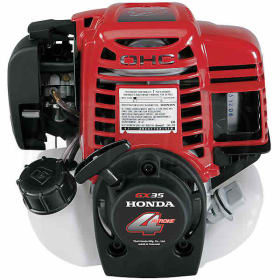
Honda Mini 4-stroke engineHonda’s GX25 and GX35 mini four-stroke engines are built to operate in any position, making them an enticing alternative to hard starting, fuel swilling two strokes. Here’s what you need to know to operate and maintain one of these unique engines, whether it’s powering a string trimmer, a tiller or a water pump.

Starting a Cold Engine

  1. Set the throttle 1/3 of the way above “Slow.” This lever will either be on the engine or the handle of the equipment you’re using.
  2. Move the choke lever, located next to the air cleaner, to the “CLOSED” position.
  3. Press the priming bulb, located next to the choke, until fuel can be seen inside the bulb.
  4. Turn the engine switch, located on the opposite side of the choke and priming bulb, to “ON.”
  5. Hold the starter grip and pull the recoil starter straight out from the opening in the flywheel cover. On tillers, the starter should be pulled straight back, toward the handle. On other engines, your left hand should be holding the starter grip, while your right hand pulls the starter toward you.

Starting a Warm Engine

On tillers and pumps, perform the following procedure before trying to restart the motor:

  1. Make sure the engine switch is in the “OFF” position.
  2. Set the choke lever to “OPEN.”
  3. Set the throttle to the “MAX” position.
  4. Pull the starter 3-5 times.

All engines can be started using the “Starting a Cold Engine” method above, but with the choke open.

Oil

These engines are able to work at any angle because they use a rotary slinger that turns the oil into a fine mist during operation, letting it lubricate in much the same way the oil/fuel mixture does in a two stroke. Because of this, changing and maintaining the oil is a little different from other small engines.

The oil should be checked when the engine is off and sitting level. Check the oil before each use. If you’re using the engine continually, check the level every 10 hours. Wipe the dipstick/filler cap clean, then insert it into the engine without screwing it in. The oil should come up to the bottom mark on the dipstick.

The oil should be changed after a month or 10 hours of use, then every 6 months or 50 hours after that. To drain the oil, simply remove the oil filler cap and tip the engine over a recycling container. Some oil will still be inside the motor, so there’s no standard amount of oil that needs to be added; start by adding 2.7 oz. (80 ml) of oil, then slowly pour in more until the oil is at the edge of the filler neck.

Honda recommends using pump engines at temperatures between 41 and 104°F (-5 to 40°C) and other engines between 23 and 104°F (-5 to 40°C.) 10W30 oil is recommended for most operating conditions, but SAE 30 can be used at temperatures above 50°F (10°C.) 5W30 can be used at temperatures below freezing.

Air Cleaner

These engines use a foam filter element. To reach the filter on tiller engines, squeeze the upper and lower tabs on the cover to lift it off. On other engines, squeeze the tabs on the top of the cover and swing it down. To clean the filter, wash it in soapy water or a non-flammable solvent. Once the filter is dry, soak it in clean engine oil and squeeze out any excess. Wipe out the inside of the air filter box before reinstalling the filter. Honda recommends cleaning the filter every three months or 25 hours.

Accessing the Engine

To get to the spark plug, spark arrester and cooling fins, remove the 5 mm bolt at the top of the engine and slide off the plastic cover. The fins should be cleaned every three months.

Spark Plug

The plug gap should be between 0.60 and 0.70 mm (0.024-0.028 inches.) When installing, always start by screwing the plug in by hand before tightening it with a plug wrench or socket to avoid cross-threading. The spark plug should be checked once a year or 100 hours of operation and should be replaced every two years or 300 hours of operation.

Spark Arrester

Depending on the model, the spark arrester can be accessed by removing a single screw on the muffler where the exhaust exits, or by removing three screws from the exhaust outlet. If the arrester is tube-shaped, it can be cleaned by squeezing and tapping it to remove the carbon deposits. All other types should be cleaned with a wire brush. The arrester needs cleaning every year or 100 hours.

Fuel Filter and Tank

The fuel filter and tank should be inspected and cleaned every year or 100 hours. To reach the fuel filter, use a hook to pull it out of the tank. If the filter or tank are dirty, clean them with a non-flammable solvent.

Getting Parts for Your GX Mini Four Stroke

Hondalawnparts.com is a certified Honda Small Engine Equipment dealer, which means we have everything for these engines from plugs to piston rings. We can ship anything you need to any address in the U.S. and Canada.

Honda iGX Engine Overview

Honda iGX EngineThe electronically-controlled Honda iGX has been making its way into a wide range of equipment including Honda’s own EM and EB series generators. At first glance, it’s easy to confuse a Honda iGX motor with their GX Series, found in pretty much every piece of commercial-grade small engine equipment. That’s understandable since the iGX is a GX at its core, but the iGX has some unique features that change how you need to operate and care for these motors.

What Makes an iGX engine different?

The iGX is based on the GX Series engine, the same design that has been a cornerstone of small engine equipment across the industry, used in everything from generators to pressure washers.

The biggest change is the Electronic Control Unit (ECU.) It can read engine conditions and adjust the governor and throttle, keeping the engine at just the right speed to meet current load demands. The result is fast power response and up to a 15% increase in fuel economy. It’s no wonder that these engines first saw use in generators.

These engines also use CDI ignition with variable timing and a rev limiter. By varying ignition with engine speed, these motors can produce more power over a wide RPM range.

Low Profile Models

For equipment where space is at a premium, Honda offers low profile versions of these engines. These are easy to identify by the large plastic panel next to the recoil starter. This is the cover for the air cleaner. The muffler is located at the rear of the engine, while fuel is stored on the equipment itself instead of a tank bolted to the motor.

The Honda Oil Alert System

The Oil Alert system is designed to protect the engine if it doesn’t have enough oil to stay lubricated. It works a little differently on the iGX than it does on other Honda engines: on some motors, the ECM, located directly above the carburetor, has a small LED light. If it flashes twice, the Oil Alert system has been triggered. On other models, the Oil Alert light is clearly visible next to the ignition switch and will either blink continuously or stay on once the system has been triggered. Most models will shut down to protect the motor, but if a shutdown may be dangerous due to the type of attached equipment, the motor may keep running. If you see the light come on, try to shut down the motor as quickly and safely as possible. Add more oil as needed before starting the engine again.

Starting the Engine

To start an engine with electric start, turn the ignition switch to “Start.” On these engines, the choke is engaged automatically. If it doesn’t start after 5 seconds, release the switch and wait 10 seconds before starting again. If it refuses to start, switch the manual start lever, located next to the ECM, to “On.” Turn the ignition to “On,” then use the recoil starter to start the engine. Don’t move the manual start lever until shutting down the motor.

To start an engine without electric start, locate the fuel lever (lower lever) and choke lever (upper lever) on the carburetor. If you have a low profile engine, which places the muffler and air cleaner behind the engine instead of above it, there will only be a choke lever. If you have an iGX270 or 390, the choke is automatic, so the sole lever is for fuel. Set the fuel lever to open and the choke to closed, as applicable. Turn the ignition switch to “On” and use the recoil starter to start the motor.

Fuses

One or more automotive fuses are used to protect the motor’s electrical system. These fuses are in a clearly marked fuse box on the side of the iGX440, while other motors will have an in-line fuse behind the ignition switch panel on electric start models. A burnt fuse will keep the engine from starting.

Low Power at High Altitude

It should be no surprise when engines make less power at higher altitudes due to the thinner air, but in the case of these engines, this loss in power is due to an incorrect fuel mixture. Honda recommends having the carburetor set up for high altitude use if your motor spends most of its time running at altitudes above 5,000 feet (1,500 m.)

Engine Identification

The serial number and engine model on any iGX can be found on the crankcase directly above the oil drain plug.

Getting Parts for the iGX

www.hondalawnparts.com is a certified Honda Small Engine Equipment dealer, carrying everything you need for Honda small engines and equipment from older lawn tractors to advanced powerplants like the iGX. Our site makes finding parts easy thanks to factory parts diagrams and information built into our search engine. We can ship your order to any address in the U.S. and Canada.

Honda Water Pumps Comparison Guide

Honda Water Pumps

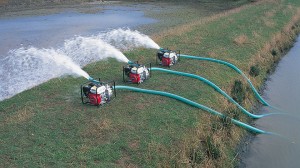
Honda offers consumers and businesses a wide selection of water pumps for many different applications. Their pumps come with several different designations as to the type of work that each pump is designed to do. Here is a breakdown of what you need to know about the Honda water pump line.
Continue reading