Breathe Easy – The Benefits of Honda Dual-Element Air Filters

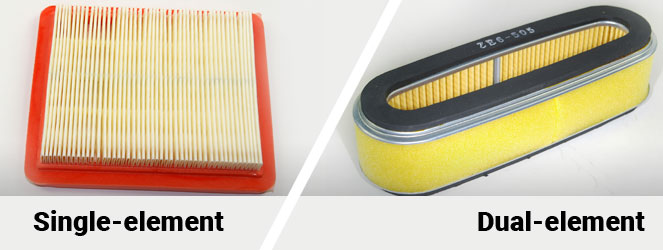
two Honda air filters: a red single-element filter, and a yellow dual-element filter
Some engines use one, and some the other!

Breathing clean air is essential to our overall health and well-being, and the same holds true for engines. The air filter in your Honda engine plays a critical role in keeping it running smoothly and efficiently, but not all air filters are created equal. Dual-element air filters, such as are found in Honda engine models such as the Honda GX series, offer benefits that traditional single-element filters simply can’t match.

In this article, we’ll explore the advantages of dual-element air filters and why keeping both elements in good condition is such an important part of Honda engine maintenance. From improved engine power and fuel efficiency to reduced emissions and longer engine life, the benefits of dual-element air filters are clear. So sit back, take a deep breath, and let’s dive into the world of Honda engine air filters!

How Air Filters Work

First, let’s take a quick look at how air filters work in general. As an engine runs, it pulls a constant stream of air to be mixed with the fuel before it enters the combustion chamber to be burned.

The air filter in your engine is designed to remove contaminants from the air before it enters the combustion chamber. If particles of dirt would enter the chamber, they would damage the mirror-smooth finish on the inside of the cylinder, reducing performance and the engine’s ability to burn the fuel efficiently.

Single-element air filters, as the name suggests, have a single layer of filtration material. While they are effective at removing larger particles, they can struggle to capture the smallest particles, which can lead to a decrease in engine performance over time.

Dual-element air filters, on the other hand, have two layers of filtration material, which allows them to capture a wider range of particles. The two layers are separate components and can often be removed or replaced separately. The first filter is like a foam sleeve that slides onto the outside of the cartridge-like second filter. They work together to clean the air in two stages, keeping your engine running at peak performance for longer.

Benefits of Dual-Element Air Filters over Traditional Air Filters

Now that we know how air filters work, let’s take a closer look at the benefits of dual-element air filters over traditional air filters.

Improved Engine Performance and Efficiency

One of the main benefits of dual-element air filters is engine performance. By capturing the maximum amount of dirt particles, dual-element air filters can help keep the air inside your engine cleaner, which results in cleaner burning, less fuel consumption, less air pollution, less internal damage, easier starting, and more power. When your engine is running on clean air, it can perform at its best.

Extended Engine Life and Reduced Maintenance Costs

Another advantage of dual-element air filters is that they can reduce wear and tear on the engine. This in turn reduces the need for costly repairs and extends the life of the engine.

Why You Should Never Operate a Honda Engine with One or Both of the Filter Elements Missing

It’s important to note that dual-element air filters are designed to work with both filter elements in place. If one or both filter elements are missing, your engine may not receive the necessary filtration, causing damage. That’s why it’s important to always make sure both filter elements are in place and in good condition.

Air Filter Cleaning Tips for Honda Dual-Element Air Filters

To keep your dual-element air filter performing at its best, it’s important to clean it regularly. The filter should be checked often to see if it needs to be cleaned, especially when running the engine in dusty conditions. Here are some tips for cleaning your Honda dual-element air filter:

  1. Remove the air filter from your engine and gently tap it on a hard surface to remove any loose dirt and debris.
  2. Use compressed air to blow out any remaining dirt and debris.
  3. If the filter is still dirty, wash it with a mild soap and warm water, then rinse thoroughly and allow it to dry completely.
  4. Once the filter is dry, apply a light coat of air filter oil to the filter element to help trap dirt and debris.

It’s important to follow these cleaning tips regularly to ensure your dual-element air filter is working at its best.

How to Order Air Filters on Hondalawnparts.com

If you’re in need of a new dual-element air filter for your Honda engine, you can easily order one online at hondalawnparts.com. Simply select your engine model to pull up all the parts related to that model. If you know the Honda part number for the filter you need, you can simply search for that number.

Genuine Honda parts are designed to fit your engine perfectly. With fast shipping and competitive pricing, hondalawnparts.com is the perfect place to order all your Honda engine parts and accessories.

Honda Mini Four Stroke Engine

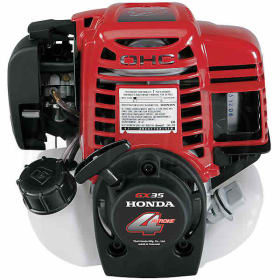
Honda Mini 4-stroke engineHonda’s GX25 and GX35 mini four-stroke engines are built to operate in any position, making them an enticing alternative to hard starting, fuel swilling two strokes. Here’s what you need to know to operate and maintain one of these unique engines, whether it’s powering a string trimmer, a tiller or a water pump.

Starting a Cold Engine

  1. Set the throttle 1/3 of the way above “Slow.” This lever will either be on the engine or the handle of the equipment you’re using.
  2. Move the choke lever, located next to the air cleaner, to the “CLOSED” position.
  3. Press the priming bulb, located next to the choke, until fuel can be seen inside the bulb.
  4. Turn the engine switch, located on the opposite side of the choke and priming bulb, to “ON.”
  5. Hold the starter grip and pull the recoil starter straight out from the opening in the flywheel cover. On tillers, the starter should be pulled straight back, toward the handle. On other engines, your left hand should be holding the starter grip, while your right hand pulls the starter toward you.

Starting a Warm Engine

On tillers and pumps, perform the following procedure before trying to restart the motor:

  1. Make sure the engine switch is in the “OFF” position.
  2. Set the choke lever to “OPEN.”
  3. Set the throttle to the “MAX” position.
  4. Pull the starter 3-5 times.

All engines can be started using the “Starting a Cold Engine” method above, but with the choke open.

Oil

These engines are able to work at any angle because they use a rotary slinger that turns the oil into a fine mist during operation, letting it lubricate in much the same way the oil/fuel mixture does in a two stroke. Because of this, changing and maintaining the oil is a little different from other small engines.

The oil should be checked when the engine is off and sitting level. Check the oil before each use. If you’re using the engine continually, check the level every 10 hours. Wipe the dipstick/filler cap clean, then insert it into the engine without screwing it in. The oil should come up to the bottom mark on the dipstick.

The oil should be changed after a month or 10 hours of use, then every 6 months or 50 hours after that. To drain the oil, simply remove the oil filler cap and tip the engine over a recycling container. Some oil will still be inside the motor, so there’s no standard amount of oil that needs to be added; start by adding 2.7 oz. (80 ml) of oil, then slowly pour in more until the oil is at the edge of the filler neck.

Honda recommends using pump engines at temperatures between 41 and 104°F (-5 to 40°C) and other engines between 23 and 104°F (-5 to 40°C.) 10W30 oil is recommended for most operating conditions, but SAE 30 can be used at temperatures above 50°F (10°C.) 5W30 can be used at temperatures below freezing.

Air Cleaner

These engines use a foam filter element. To reach the filter on tiller engines, squeeze the upper and lower tabs on the cover to lift it off. On other engines, squeeze the tabs on the top of the cover and swing it down. To clean the filter, wash it in soapy water or a non-flammable solvent. Once the filter is dry, soak it in clean engine oil and squeeze out any excess. Wipe out the inside of the air filter box before reinstalling the filter. Honda recommends cleaning the filter every three months or 25 hours.

Accessing the Engine

To get to the spark plug, spark arrester and cooling fins, remove the 5 mm bolt at the top of the engine and slide off the plastic cover. The fins should be cleaned every three months.

Spark Plug

The plug gap should be between 0.60 and 0.70 mm (0.024-0.028 inches.) When installing, always start by screwing the plug in by hand before tightening it with a plug wrench or socket to avoid cross-threading. The spark plug should be checked once a year or 100 hours of operation and should be replaced every two years or 300 hours of operation.

Spark Arrester

Depending on the model, the spark arrester can be accessed by removing a single screw on the muffler where the exhaust exits, or by removing three screws from the exhaust outlet. If the arrester is tube-shaped, it can be cleaned by squeezing and tapping it to remove the carbon deposits. All other types should be cleaned with a wire brush. The arrester needs cleaning every year or 100 hours.

Fuel Filter and Tank

The fuel filter and tank should be inspected and cleaned every year or 100 hours. To reach the fuel filter, use a hook to pull it out of the tank. If the filter or tank are dirty, clean them with a non-flammable solvent.

Getting Parts for Your GX Mini Four Stroke

Hondalawnparts.com is a certified Honda Small Engine Equipment dealer, which means we have everything for these engines from plugs to piston rings. We can ship anything you need to any address in the U.S. and Canada.

Honda GX Engine

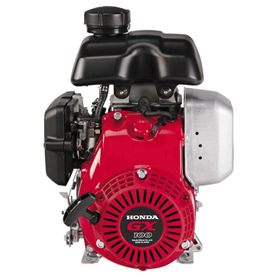
GX100_imgmedChances are if you own any commercial-grade small engine equipment, you have at least one Honda GX Series engine. Available in horizontal and vertical shaft versions and displacements ranging from 98 to 389 cc, this series of motors can be found in just about any type of small engine equipment you can think of. Here’s what you need to know about this motor’s quirks, from starting to troubleshooting.

Controls

There are many variations on these models and individual pieces of equipment may leave controls on the engine or move them to a remote control center, typically on the device’s handle.

The main controls are located on the carburetor, which will be directly below the air cleaner housing. Some models will have a throttle lever at the very top, almost against the air cleaner housing. Next, on the carburetor body itself, there will be a choke lever. Below that, some models have a fuel valve.

For starting, the throttle should be set to 1/3 of the way from “Slow.” On models with the lever on the engine, move the lever left to open the throttle. The choke should be closed unless the engine is already warm, and the fuel valve should be open.

On electric start models, the engine is started by turning the key or switch to “Start.” After 5 seconds, if the engine hasn’t started, release the switch and wait 10 seconds to let the starter motor cool before trying again. If the engine won’t start, set the switch to “On” and use the recoil starter.

Checking the Oil and the Oil Alert System

The dipstick is built into the oil filler cap. To check the oil level correctly, the dipstick needs to be wiped off and then inserted into the engine without threading it back into the filler neck. When adding oil, the oil level should come to the edge of the filler neck.

Some models are equipped with Honda’s Oil Alert system. This will automatically shut off the engine if the oil level gets too low. If your motor stops abruptly, check the oil level to make sure this wasn’t the cause. On electric start models, there should be a light on the starter panel indicating the oil alert system has been triggered.

On motors with a reduction gear, the gear is in a separate case with its own oil supply. It has its own filler cap/dipstick and uses the same oil as the engine. The case should only be about half full of oil, which will be well below the top of the filler neck.

Spark Arrester

No matter the model, the muffler on your engine is designed to be used with a spark arrester where required by law. The arrester can be accessed by removing the muffler shield. The arrester itself will be held in the muffler by one screw. To clean the arrester, scrub off any deposits with a wire brush. If it has any splits or holes, it should be replaced.

Air Cleaner

There can be up to three types of air filters inside the air cleaner that need occasional cleaning:

Paper elements can be cleaned by knocking them against a hard surface to loosen dirt.
Foam elements should be washed with a mild detergent or non-flammable solvent. Once dry, dip the filter in clean motor oil and squeeze out any excess liquid.
Cyclones should be disassembled and wiped clean. Any dust inside the cleaner housing should also be wiped out before reassembly.

Propane (LPG) Powered Engines

If you have an LPG-powered version of the GX270 or GX390, there are a couple differences in operation.

Since LPG is a gas, there won’t be any visual signs of leaks. Instead, smell the area around the engine. If you detect any trace of LPG, have the fuel system repaired before starting the motor.

The choke lever increases vacuum to help pull gas into the combustion chamber. Once the engine is running, the engine will provide the necessary vacuum, and the choke can be opened. There’s no need to wait for the engine to warm up.

Use only SAE 30 weight oil designed for use with LPG engines, or a synthetic 5W-30 oil if using the engine below 32 degrees F (0 degrees C.) A mineral-based multi-weight oil may be fine in other GX motors, but it will damage your LPG model.

Getting Parts for Your GX Series Engineering

No matter what your Honda engine is connected to, you can get parts for it at www.hondalawnparts.com. We’re a certified dealer, covering both small engines and Honda power equipment including generators, water pumps, and mowers. Our advanced search engine can show you factory parts diagrams so you can see exactly what you’re ordering. We ship to both the U.S. and Canada.