HRC Commercial Walk-Behind Mowers

HRC Commercial Walk-Behind Mowers

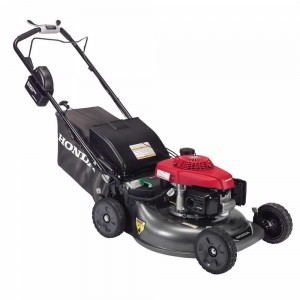
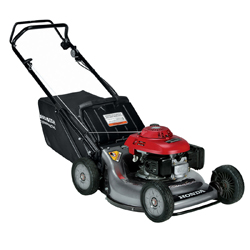
Even the largest operations need a walk-behind mower on hand to do work in confined spaces and around obstacles that block larger machines, but most small models are residential mowers that can’t handle commercial demands. Honda’s HRC professional mowers are built for this niche, offering professional-quality components in a small walk-behind package.

Deck

All versions of the HRC use a 21-inch deck stamped from 16 gauge steel with an integrated front bumper and edge guards. This deck is supported by 9-inch wheels made out of NeXite, the same super strong plastic Honda uses to make decks for some of their residential mowers. These wheels ride on sealed ball bearings, so they roll easy and require no maintenance.

The deck can be used for rear discharge, bagging or mulching. Honda’s MicroCut design uses a high lift blade and a flat blade stacked on top of each other. With each pass, these blades cut twice, leaving behind smaller clippings, reducing grass volume by up to 30% and preventing clumping on wet grass. The onboard bag holds up to 2.5 bushels of clippings, and the deck has 8 cutting heights ranging from ¾ inch to 4 inches.

Engines

There are two engines available in these mowers: the GSV160 and the GXV160.

The GSV160 is an overhead cam design based on Honda’s residential GCV engines, but it uses upgraded components to handle commercial duty. This includes a cast iron cylinder liner, stronger crankshaft bearings, and a two-stage air cleaner. It still retains the low noise, low vibrations and easy starting of the GCV. This engine is only available with the HRX216PDA.

The HDA and HXA are both powered by the GXV160. The GX line of overhead valve commercial engines are renowned for their reliability and have become the de facto standard for professional small engine equipment. Like the GSV, it has a dual element air filter. Both engines are fitted with a manual fuel shutoff to prevent carburetor flooding during transit.

Control

The fold-down handle is made from one-inch tubing, giving it strength and providing a wide grip area that reduces hand fatigue. The grip area is angled to limit wrist tension, and the hand controls use sealed, adjustable cables that require no maintenance and won’t turn rusty while in storage.

Drive

The PDA is a push mower, while the HDA and HXA use a hydrostatic transmission. This unit is as small as a conventional geared transmission, but it delivers the same infinite speed adjustment of its larger counterparts. The cruise control function lets you set a speed, then return to it by squeezing the bail, even if you’ve had to shut off the engine. The transmission connects to the crankshaft using a shaft drive, so there are no belts to change.

The HRC216HXA also comes with Roto-Stop. Instead of mounting the blades directly onto the crankshaft, they’re engaged using a clutch. The blades can be stopped for safety when moving away from the mower without stopping the engine. That means you won’t need to restart the engine after moving debris or branches.

Warranty

Both engines offered in the HRC line have a two-year warranty, while the rest of the mower is covered for one year of commercial use or two years of residential use.

Getting Parts for Your Commercial Mower

As a certified dealer for Honda Engines and Honda Power Equipment, www.hondalawnparts.com can ship anything you need for your HRC mower to any address in the U.S. or Canada. Finding what you need it easy: just pick your model and serial number, and our search engine will show you factory parts diagrams and descriptions.

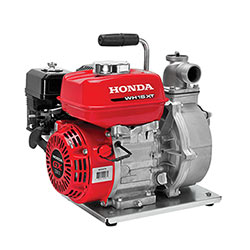
Using the WH15X Pump

Using the WH15X Pump

At 20 lbs, the WX15X is perfect for small jobs from garden irrigation to draining the bilge on small boats. Here’s what you need to know to get the most from this water pump.

What Will the WX15X Pump?

This pump is designed to pump fresh water. Pumping corrosive liquids like seawater and mine runoff will damage the pump, while pumping flammable liquids including gasoline and diesel can cause a fire or explosion.

This is a dewatering pump, so it can handle water with solids up to 3/8 of an inch (10 mm) in diameter. It’s strong enough to pick up muck water, so it’s safe to use when draining ponds.

Pump Location

The WX15’s maximum total head is 121 feet under ideal conditions. Suction head can be no more than 26 feet, and may be less in high altitude operation. When setting up the pump, position it so that it is close to the surface of the water, making up the difference in height to the drainage point by using the discharge hose. Reducing suction head will reduce the time the pump takes to self-prime.

Keep the pump at least three feet away from building walls and other equipment. Heat coming off of the engine could start a fire, and confined spaces can concentrate poisonous carbon monoxide from the exhaust.

Hoses

Both the suction and outlet ports are 1.5 inches in diameter. The suction port should be used with a 1.5-inch diameter non-collapsible hose. The outlet can be connected to a standard hose that is at least 1.5 inches in diameter. Using a wider hose will reduce fluid resistance, improving performance. The shorter the hoses are, the better the pump performance will be.

Hose clamps are included with the pump, but separate hose connectors will be needed to mate the hoses to the pump housing. Inspect the packing inside the hose coupling before installation. If this part fails, there won’t be a good seal between the hose and the pump port.

The suction hose should always be fitted with a strainer to keep large debris from reaching the pump and damaging the impeller. A basket strainer is included with the WX15X, but a skimmer strainer is a better choice if you need to completely drain a body of water.

If the discharge hose needs to cross a road, run it directly from one side of the road to the other. Place boards along the hose to support vehicles crossing the road: this will keep the tires from pushing down on the hose and cutting off water flow, which can damage the pump.

Priming

Before starting the engine, water needs to be added to the pump chamber to prevent overheating and seal damage. If the engine is accidentally started with a dry pump, shut it off immediately and let the pump cool off before priming and restarting.

To prime the pump, remove the cap on top of the pump housing. Add water until it’s even with the bottom of the pump outlet, then reinstall the filler cap. Once the engine is running, it can take a couple of minutes for the pump to draw water through the hoses.

Starting the Engine

1. Move the fuel valve lever, located to the right of the air box, to the “ON” position.
2. If the engine is cold, move the choke lever, located above the air box, to the “CLOSED” position. If the engine was recently started, leave the choke in the “OPEN” position.
3. Move the throttle lever, located below the fuel lever, halfway between “SLOW” and “FAST.”
4. Turn the ignition switch to the “ON” position.
5. Hold the carrying handle and pull the starter grip.
6. As the engine warms up, gradually move the choke to the “OPEN” position.

Stopping the Engine

1. Move the throttle lever to the “SLOW” position.
2. Turn the ignition switch to the “OFF” position.
3. Turn the fuel valve to the “OFF” position.

After Use

Once the engine is off, remove the drain plug on the base of the pump and the priming cap on the top of the pump. Pour fresh water into the pump to flush out any dirt or debris. Once all the water has drained, reinstall the plug and cap.

Get the Parts and Accessories You Need for Your Honda Water Pump

Hondalawnparts.com can ship OEM parts and accessories for you WX15X to your door whether you live in the U.S. or Canada. We carry the full line of Honda water pump accessories including hoses, strainers, and clamps as well as parts like spark plugs and pump seals. Browse our pump accessory section to find the right combination of hoses and adapters to fit your needs, or search by pump model and serial number to find compatible parts for your pump.

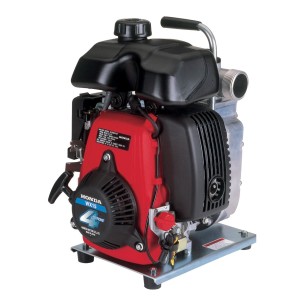
Maintaining the WX15 Water Pump

Maintaining the WX15 Water Pump

Honda’s WX15 water pump may be small, but that doesn’t mean it’s disposable. By keeping up on maintenance, you can get the same reliable service you expect from the company’s full-size pumps.

Maintenance Schedule

Before each use – Check the air filter and engine oil level.
First month or 10 hours of operation – Change the engine oil.
Every three months or 25 hours – Clean the air filter.
Every 6 months or 50 hours – Change the engine oil.
Every year or 100 hours – Check the spark plug and clean the spark arrester (if equipped.)
Every two years or 300 hours – Replace the spark plug.

The air filter may need to be cleaned more often when operating in dusty areas. The engine oil should be changed every 25 hours if the pump is used under heavy loads or in high temperatures.

Honda recommends having the following maintenance be performed by a dealer:
Every year or 100 hours – Clean the fuel tank and filter, and check the idle speed, impeller and pump inlet valve.
Every two years or 300 hours – Check the engine valve clearance
Every 300 hours – Clean the combustion chamber

Fuel

When adding fuel, it should only come up to the fuel level mark, located at the base of the filler neck.

The engine can run on gasoline with up to 10% ethanol or 5% methanol. It’s important that this fuel is fresh: either use it within one month of purchase, or up to three months after purchase if it has been treated with a fuel stabilizer. If you will store your pump for longer or you use it sporadically, drain the fuel tank and carburetor before storing. To drain the carburetor, remove the drain bolt directly below the fuel valve, then turn the fuel valve to “ON.”

Oil

The engine powering this pump comes with Honda’s Oil Alert system. If the engine oil level is too low, it will shut off the engine to prevent internal damage.

To check the oil, remove the cap from the oil filler neck. Wipe off the attached dipstick, then put it back into the neck without screwing it in. To drain the oil, remove the drain plug directly below the filler neck. Be sure to install a new sealing washer before screwing the plug back into the crankcase.

This engine holds 8 oz. of oil. Honda recommends 10W30 motor oil for most operating conditions, while SAE 30 oil can be used between 50 and 104ºF. Always use oil that is SAE certified SJ or later.

Air Filter

To open the air cleaner box, push down on the two latch tabs on the top of the cover, then swing the cover out and down.

To clean the air filter, wash it in warm, soapy water or a nonflammable solvent. Gently squeeze the filter to remove the water or solvent, then let the filter dry. Dip the filter in clean engine oil, then squeeze it out. Never twist the filter: this can alter its shape, which can keep it from making a good seal inside the air cleaner box. Always wipe out the inside of the air cleaner before reinstalling the filter.

Spark Plug

To find the spark plug, look at the top of the fuel tank. The plug is directly below the round indent in the side of the tank.

To remove the plug, unhook the spark plug cap, then unscrew the plug with a 5/8 inch spark plug wrench. The gap between the electrodes should be between 0.024-0.028 inches (0.60-0.70 mm.) Replace the plug if the electrodes or insulator are damaged, or the plug has fouled.

When installing the spark plug, first thread it in by hand to prevent cross-threading. Use the plug wrench to tighten down the plug, turning an extra 1/8 turn once the plug is seated against the engine to get a good seal. If you’re installing a new plug, turn it an extra ¼-½ turn to form the washer to the plug and engine opening.

Spark Arrester

A spark arrester isn’t included from the factory, but it can be added to the muffler on any WX15 pump to meet local fire regulations.

To access the spark arrester, first, remove the muffler protector. It’s held on by three 5 mm bolts: two are located on the bottom of the cover, while the third is on the top right side. Remove the screw on the side of the exhaust outlet and slide out the arrester.

Clean any carbon buildup on the arrester screen with a wire brush. Replace the spark arrester if it has signs of holes, cracking or other damage.

Get the Parts You Need to Maintain Your Honda Pump

Hondalawnparts.com is a certified dealer for both Honda Engines and Honda Power Equipment. Our site has built-in factory information including parts diagrams and descriptions, making it easy to find what you’re looking for from hoses to spark plugs. We ship across the U.S. and Canada.

Honda Trimmers

honda trimmers

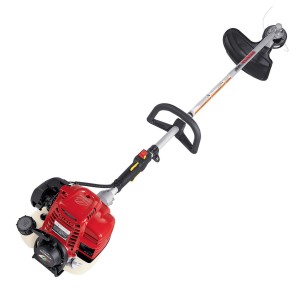
String trimmers have to be small and light, forcing manufacturers to make compromises on usability and reliability. However, Honda has managed to address those issues with their own trimmers. Built around their compact four stroke engines, these trimmers have operator-friendly features and a long list of accessories to take the frustration out of yard work.

Mini 4 Stroke Engine

Tightening emissions laws mean the two-stroke’s days are numbered, but there are plenty of reasons to choose Honda’s Mini 4 Stroke over a two-stroke aside from its low pollution design. A clever oil baffle system keeps the engine lubricated in any position, so they can be used and stored like a two-stroke. Since it still has an oil sump, straight fuel can be used to power the engine instead of oil and fuel mixtures.

The valves seal the combustion chamber when the air and fuel ignite, making the engine much quieter.
Intake and exhaust cycles are also separated, so fresh fuel doesn’t flow straight out of the engine. This improves fuel efficiency up to 50%. This also helps the engine is getting the exact mix of air and fuel it needs, making it easier to start. Torque is produced over a wider RPM range, so these trimmers don’t bog down as easily as two-stroke models.

Trimmers

Honda’s trimmer models use a loop handle that lets the operator switch hand positions for less fatigue. A single strap harness and safety glasses are included. The HHT25STLA comes with a 25 cc engine, weights 13.1 lbs. and uses a Semi-Matic bump head to cut a 17-inch swath. The HHT35STLA is similarly equipped, but it uses a 35 cc engine and weighs 14.8 lbs.

Brushcutter

The HHT35SUKA comes from the factory with everything you need for brushcutting, including a double harness, a debris barrier, and a 10-inch saw blade. A Kwik Loader head is also included for string trimming, cutting the same 17-inch swath as the standard trimmers. This model also uses a wide bicycle-style handle makes the brushcutter easy to control while minimizing kickback. The UKA is powered by a 35 cc engine and weighs just over 16 lbs. with the cutting head installed.

VersAttach

There are plenty of landscaping jobs that can benefit from motorized power, but it doesn’t make much sense to have a piece of equipment that will only be used a couple times a year. With Honda’s VersAttach system, several tools can be attached to a single power unit, reducing cost and maintenance. Compatible tools include an edger, trimmer, pruner, hedge trimmer, cultivator, and blower. Extensions are also available to increase the unit’s reach.

Most buyers will find they get the most use out of the trimmer attachment. It comes with a bump head and cuts a 16.5-inch swath. Safety glasses and single harness are included. Honda offers a three tooth grass blade for light brush, but there’s no provision for larger blades, nor can these units be fitted with a double harness.

Power units include the 25 cc UMC425 and the 35 cc UMC435. All VersAttach tools are compatible with both models.

Accessories

Honda offers three, four and 8 tooth grass/weed blades in 9 and 10-inch sizes as well as a 24 tooth brush blade for the HHT25 and an 80 tooth brush blade for the HHT35. These blades are also compatible with the HHT35UKA brushcutter. When using a metal blade on a trimmer, a barrier kit should be installed to deflect debris, while a double sling is recommended to give the operator better control of the trimmer’s position.

The heads on these units are compatible with several trimmer heads including the Kwik-Loader and Prolux’s manual and semi-manual heads.

Warranty

Honda guarantees their trimmers and Mini 4 Stroke engines for two years residential or one year of commercial use. The flex shaft, which transfers power from the engine to the head, has a limited lifetime warranty.

Get the Parts and Accessories You Need Straight from Your Browser

As a certified Honda Power Equipment and Honda Engines dealer, www.hondalawnparts.com is able to offer the full range of OEM parts and accessories for these trimmers. Our site has built-in factory parts diagrams and descriptions, and you can search for parts based on your equipment’s engine and serial number. We ship across the U.S. and Canada.

F220 Mid-Tine Tiller

F220 Mid-Tine Tiller

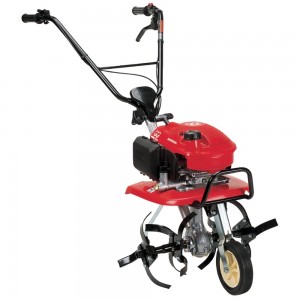
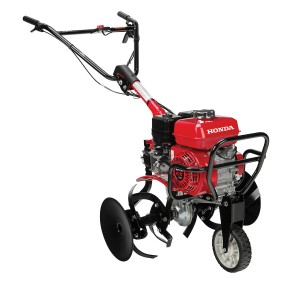
Looking for a tiller that can do it all? Honda’s F220 is a mid-tine model that can be set up for two tilling widths, has an engine that can handle tough soil better than compact two strokes, and uses a drive system to take the strain off the tines and the operator.

Power

This model uses Honda’s GXV57 engine. While it may be small, it shares the same basic design as Honda’s larger commercial engines. This includes features like an automotive-style paper air filter that provides better protection and needs less frequent maintenance than foam filters. Small displacement motors don’t need much force to turn over to begin with, and with this engine’s automatic decompression system, the starter pull is as light as a feather.

Honda has led the way toward the switch from two to four-stroke engines to meet tightening emissions regulations. This switch doesn’t just help the environment, it also brings major improvements to usability. There’s no need to mix oil with fuel, and the engine is far less sensitive to fuel degradation. The GXV57’s wide torque curve keeps it from stalling when the tines run into compacted dirt, and if it does stall, it’s much easier to start. Honda fits the tiller with a steel bar that wraps around the engine, protecting it from impacts during operation and transport.

Tilling

This model has a maximum tilling width of 21 inches. If you need to work around borders or small plots, the outer tines can be removed, reducing the width to 12 inches. At full throttle, the tines spin at 138 RPM.

The mid-tine design places the engine weight directly over the tines, helping push them into the soil. That’s 58 lbs. of force that doesn’t have to be exerted by the operator.
The engine has an integrated transmission with one forward speed. Since it doesn’t have to rely on the tines for momentum, they can do more cutting, giving this small tiller the power to slice through clay and compacted soil.
Honda offers optional side discs that deflect dirt away from plants and pavement for easy cleanup, while the furrow attachment makes a V-shaped trench for planting.

Operation

The handle on the F220 can be set to three positions, giving the operator a comfortable hand position with the right amount of leverage. A front-mounted retractable transport wheel flips up and down with minimal effort. When the wheel is down, the handles can be lifted to roll the tiller around the yard.

Once the tiller is in the work area, the depth bar can be adjusted to limit how deep the tines dig. This creates consistent planting beds, even when the tiller is moved between gardening plots. After the work is done, the handle can be folded forward, making the overall package compact for easy storage and transport.

Warranty

This tiller and its engine are covered for two years of residential use or one year of commercial or rental use.

Getting Parts and Accessories for the F220 Tiller

Hondalawnparts.com is more than an online parts warehouse: we’re a certified dealer for Honda Power Equipment and Honda Engines so you can be sure you’ll always get quality OEM replacements for your tiller. Our site can search by your model and serial number and will show you factory parts diagrams and parts descriptions so you can be sure you’re ordering exactly what you need. We can ship your order to any address in the U.S. or Canada.

FC600 Mid-Tine Tiller

FC600 Mid-Tine Tiller

Most tiller models are built for very light work with minimal power and features, or for turning large areas into seed beds for gardening. If you need something that can do both, the Honda FC600 may be what you’re looking for. It’s small enough for tilling between planted rows, but its feature-packed tine system and commercial engine make it suitable for creating new beds.

Commercial Power

This tiller is powered by a GX160. A staple of commercial outdoor equipment, this compact overhead valve engine delivers reliable performance coupled with features that make it simple to use. An automatic decompression system makes pull starts easy, while Oil Alert keeps the engine from running when there isn’t enough oil to lubricate it. Everything from the aluminum pushrods to the air intake system is designed to quell noise and vibration.

In this application, the GX160 produces 4.8 HP and 7.6 lb-ft. of torque. The throttle is controlled by a lever on the handle, letting the operator slow the tines when cutting through soft ground and chunky soil, then speed them up to cut through areas with compacted soil and roots. At top engine speed, the tines spin at 84 RPM.

High-Performance Tines

The mid-tine design puts the weight of the engine directly over the tines, helping push them into the ground, reducing the effort needed on the handles. To get a consistent digging depth, the back is fitted with a tool-free adjustment depth bar. Once digging starts, this bar skims along the top of the un-tilled surface, keeping the machine from digging deeper while letting you know by feel when the tines start lifting up out of the ground.

The FC 600 has 13-inch diameter tines and a total tine width of 26 inches. The staggered design agitates as it cuts through soil, dislodging stones and breaking up compacted soil. Side discs come standard. These keep the tines from catching on fences and sidewalks and deflect dirt away from plants and pavement for easy cleanup.

Need to get a seedbed ready to plant? Honda offers a furrow attachment to create uniform V-shaped trenches.

Built for Bumps

Even the most careful user is bound to run into something, whether it’s a fence or a hidden rock. Up top, a large, tubular steel guard protects the front of the engine, and the handle and engine bed are reinforced to withstand bumps when getting close to trees, buildings and landscape features. Shielding around the tine seal shaft as well as axle protection prevents damage from stones tossed up by the tines.

Easy to Operate

The FC 600’s handle can be set to one of three positions, helping the operator maintain a comfortable hand position regardless of height. They’re long enough to provide ample leverage, so it just takes a little pressure to force the tines into the soil.

When the work is done, there’s no need to stoop down to keep the tines lifted off the ground. A front-mounted retractable transport wheel can be lowered into place when the tiller isn’t in use, making it easy to roll.

Warranty

Honda guarantees this tiller and its engine for 3 years or residential or commercial use.

Parts

When you need anything for your Honda power equipment or small engines, visit Hondalawnparts.com. As a certified dealer, we’re able to offer the complete line of Honda parts and accessories from air filters to furrowers. Not sure what you need? Once you select your model in our search engine, it can show you factory parts diagrams and descriptions so you can be sure you’re ordering the right part. We ship across the USA and Canada.

Troubleshooting Electric Starters

Troubleshooting Electric Starters

Is the electric starter on your Honda engine not working? Before you start ordering parts, there are a few things you should check to make sure the repairs you make will fix the problem.

Protecting Your Starter

Honda’s starters are designed to run for up to 5 seconds at a time. Running the motor longer can lead to overheating. If you’re having difficulty starting your engine, wait at least 10 seconds between starting attempts to let the starter cool.
If your engine has an electric starter, it probably has Honda’s Oil Alert system. It uses a float inside the crankcase that is wired to the ignition system. If the float is too low, the power to the spark plugs is cut, keeping the engine from starting. Always check the oil level first when trying to find out why the engine won’t start.

Testing and Maintaining the Battery

Check your owner’s manual on how to maintain the battery charge in your equipment. On some models, Honda recommends using a trickle charger, while others should be periodically recharged with a standard charger. If you have a hybrid snowblower, the batteries need to be disconnected from each other and charged separately.

The battery health can be checked by measuring the voltage at the terminals with a multimeter. A fully-charged 12 volt battery should be between 12.7 to 12.9 volts without a load when fully charged. If it’s below 12.4 volts, it’s time for a new battery.

Most batteries sold for these engines including Honda’s OEM units require maintenance. The chemical reaction inside the cells breaks down the water inside, and that evaporation will eventually leave the lead sheets inside uncovered. The cells should be refilled with distilled water up to the level marked on the battery, either on the side of the case or inside the cell. Overfilling could cause the water and acid to spill out, corroding the terminals, battery tray and anything underneath it.

The Battery is Fine, but the Motor Doesn’t Turn

Even if your battery is new, it still needs a clear path to power the starter. Loose and corroded connections can keep power from flowing through the system, making it seem like the starter motor has failed. There is also a fuse that prevents the starter from overloading. This fuse will either be connected to the positive wire between the battery and the starter, or located in the fuse box.

Corrosion and blown fuses are easy to identify with a visual inspection, but bad connections aren’t always as obvious. To test the connection, connect the positive probe to the positive terminal of the battery and the negative probe to the ground connector on the frame. This connection should be at least 12 volts.

There are several options for corrosion removal, but few work better than vinegar. Soaking bolts in vinegar overnight can strip off rust, while applying it directly with a brush can remove corrosion from contacts. If you operate in conditions where the connections are regularly exposed to moisture, consider coating them in a dielectric grease.

The ground connection needs to be made with bare metal. Clean the bolt and bolt hole to ensure direct contact between the wire and the frame.

Starter and Solenoid Issues

Once the battery and electrical connections have proven to be in good shape, it’s time to address the starter.

The solenoid, a small cylinder attached to the side of the starter, is a switch designed to handle heavy electric loads. If the starter does nothing when the start switch is on, it’s likely due to a bad solenoid.

The starter has three ways it can fail:

— A worn out starter gear will make a grinding noise when the starter is being used.

— A bad throwout bearing lets the starter gear spin, but won’t let it slide out to engage the flywheel and turn over the engine.

— Smoke from the starter indicates an overload due to high power demand or overheating.

If the starter is grinding, whirring or smoking, it needs to be replaced.

Getting New Electrical Parts for Your Honda Engine

From small hardware to solenoids, if it fits a Honda small engine, you can get it from www.hondalawnparts.com. Our site can show you factory information including parts descriptions and diagrams for your model so you can be sure you’re ordering exactly what you need. We can ship your order to any location in the U.S. or Canada.

Honda’s New EU2200i Generator

Honda's New EU2200i Generator

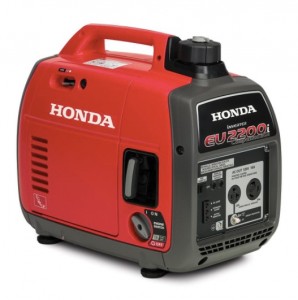
This spring, Honda is replacing their popular EU2000i generator with the new EU2200i. While it may look identical to its predecessor, it has a new engine, more power, and an easier to use design.

Power

The EU2200i makes 10% more power than the model it replaces, yet the size and weight are almost identical. In real-world use, that extra 200 watts is enough to power a 42-inch LCD TV. The extra power can also handle reactive loads better, taking the worry out of using appliances with electric motors.

This upgrade is thanks to a new engine/generator combo. It’s based on the GXR120, an engine built for earth rammers used in construction. The flywheel and alternator are built into a single unit to save space and weight. Higher grade magnets in the stator are thinner and maintain overall diameter. This reduces weight and increases power output. This configuration makes one dB less noise than the EU2000i’s GX100.

Increased torque lets the Eco Throttle keep the engine speeds down, further reducing noise and fuel consumption. The 0.95-gallon fuel tank can keep the generator running for 3.2 hours at constant 100% load and 8.1 hours at a 25% average load.

Output

This generator is rated at 120 volts with a steady output of 1,800 watts and a peak output of 2,000 watts. It uses an inverter with an in-house designed microprocessor to control output. This “clean” electricity is safe for powering electronics.

Convenience

Color-coded components make it easy to follow the steps needed to start the engine. Automatic decompression makes the engine easier to turn over with the pull starter.

Maintenance is also easier. A larger oil filter opening, a longer spout, and wider oil drain gutter make it easier to change the oil.

The generator includes a fuel shut off valve to burn off remaining fuel in the carburetor after use, avoiding most stale fuel issues. If there isn’t enough oil in the crankcase, Oil Alert can shut off th engine before it’s damaged. Redesigned case ducting maintains temperatures in high heat environments.

Models

The EU2200i comes with a 120-volt duplex outlet and a 12 volt DC outlet. Along with this standard model, there will be three other versions of this generator:

The Camo comes with a case wrapped in Realtree’s APG camouflage. It has a combination of sharp and soft detail woodlands patterns to simulate depth. Otherwise, it’s identical to the regular EU2200i.

The Companion can connect with all versions of the EU2200i and EU2000i, doubling available power. This model has a 30 amp, 125-volt locking plug outlet and a 20 amp, 125-volt single outlet. This generator is a great choice for backup power.

The EB2200i is designed with commercial users in mind. It meets LA-ETL and OSHA requirements and comes with 20A 125V GFCI Duplex outlet and a GFCI neutral bond.

All models weigh 46.5 lbs.

Warranty

Honda guarantees all versions of this generator for three years of residential or commercial use.

Getting Parts and Accessories for Honda Generators

Whether you plan on getting an EU2200i soon or you already have a Honda generator, you can get everything you need for it from www.hondalawnparts.com. As a certified dealer, we’re able to offer OEM parts and accessories including parallel cables, covers and even transfer switches. Check out our generator accessory section, or pick your model from our search engine. It has factory parts diagrams and descriptions that let you find exactly what you need. We can ship your order to any location in the U.S. or Canada.

Storing Your Honda Snowblower

Storing Your Honda Snowblower

It’s been a rough winter, but it won’t be long before winter is replaced by spring and it will be time to put away your Honda snowblower. Proper preparation will protect your equipment when it’s in storage and make it easier to get running again once winter weather returns.

Washing

The auger housing, chute, and wheels or tracks can be rinsed off with a garden hose. Everything else should be wiped down with a moist rag to prevent water from seeping into the engine and gearbox where it can dilute the oil.

Once dry, apply some touch-up paint to damaged areas and a light oil or silicone spray to exposed metal components.

Lubrication

Refer to your manual to see the grease points on your model. Usually, this will include the chute guide, chute rolling gear, control lever links, chute tension bolts, auger height pivot point and, if you have a track model, the frame pivot point on the frame just inside of the tracks. There are no grease fittings on these points: simply smear some grease on the joints and move them back and forth to ensure even coverage. Some wheeled models have greaseable wheel axles, and the HS1336iAS also needs to have grease applied to the rolling cylinder pivot that tilts the auger.

A light, non-detergent oil should be applied to the auger and blower impellers at any point where they meet with the transmission or axles.

Fuel

Treated or not, fuel should not be left in your snowblower’s engine for over three months. To drain the fuel, use a siphon or hand pump to drain the tank, then switch the fuel valve on and unscrew the drain knob or screw from the base of the carburetor, letting the remaining gas pour into a suitable container.

If you have a Honda GX-series engine, the drain knob or screw threads into a sediment cup. Once the fuel has been drained, remove this cup and clean it thoroughly. Always use a new O-ring when reinstalling the cup.

Oil

The oil should be changed before storage regardless of the hours put on the machine since the last service. A small amount of oil should also be added to the inside of the cylinder. To do this, remove the spark plug and pour one to two teaspoons (5-10 ml) of oil through the hole. Rotate the engine a couple times to distribute the oil, then reinstall the plug.

Battery

If your snowblower has an electric starter, disconnect the negative battery terminal. Honda recommends recharging the batteries at least every 6 months while they’re in storage. The batteries on the HS1336iAS should be disconnected from each other and charged separately.

Storing

Parking your snowblower on a sheet of cardboard will protect the tires and tracks from direct contact with the cement, which can damage the rubber in extreme cold. It also makes it easy to find fuel and oil leaks when you pull it out of storage next winter.

Keep the snowblower away from any source of flame or spark. This includes furnaces, power tools and metalworking. While the fuel system may be empty, there can be enough residual gas to create the fumes needed to cause a fire. Make sure the fuel valve is set to “OFF” to minimize leakage of any residual fuel.

Keep your snowblower covered with a purpose-built cover, not a tarp. Tarps can’t breathe, allowing moisture to collect on metal components and promote rust. Always let the engine and exhaust cool completely before putting the cover on to keep it from melting.

Getting Parts for Your Honda Snowblower

From covers to major components, you can get everything you need for your Honda snowblower at www.hondalawnparts.com. Our site has built-in factory diagrams and descriptions to help you find the parts you need, and since we’re a certified Honda Power Equipment and Honda Engines dealer, you know you’ll always get quality OEM replacements. We can ship your order to any address in the U.S. or Canada.

Operating EB2800i and EG2800i Generators

Operating EB2800i and EG2800i Generators

The home backup-focused EG2800i and job site-ready EB2800i are recent additions to Honda’s generator line up, providing the self-grounding and tough construction of a frame generator in a lightweight package. If you own or are buying one of these generators, there are a few things you should know about these units to get the most out of them.

Before You Begin

Carbon monoxide from the exhaust can kill you in a matter of minutes, even if it’s running in a garage with the door and windows open. Always run the generator outdoors at least three feet away from buildings.

If you just got this generator, take a look at our earlier article on setting them up. Oil needs to be added to the engine before its first start-up.

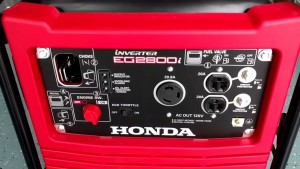
Controls

Most of the controls can be found on the panel at the front of the generator.

Choke rod: upper left
Engine On/Off switch: a large red switch on the lower left
Indicator lights: To the right of the choke rod
Eco throttle: To the right of the engine switch
Power receptacles: On the right side of the control panel
Circuit protectors: Just to the right of the receptacles.
Ground terminal: Lower right

There are also three areas on the engine itself that you’ll need to find to run the generator:

Fuel valve lever: On the right side, directly below the fuel tank
Starter handle: On the right side, next to the control panel.
Dipstick/filler cap: On the left side near the base of the engine.

Tips for Starting

The Oil Alert system will cut power to the ignition if the oil level is too low to protect the engine. If the system is tripped, it will switch on the bottom indicator light. Even if it hasn’t been tripped, it’s a good idea to check the oil level before starting the engine.

Before starting, make sure the generator is at least 10 feet away from fuel containers to prevent the ignition of gas fumes.

The fuel lever and engine need to be switched on for the motor to start, while the Eco Throttle should be off. If the engine is cold, the choke rod should be pulled out to the “Closed” position.

Once the engine is running, if everything is working correctly, the “OUTPUT INDICATOR” light should be green.

Stopping

Unplug all cords from the outlets and turn the engine switch to “OFF.” If you won’t be using the generator for a while, turn the fuel lever to “OFF” to keep fuel from leaking into the carburetor.

Power Demands

Both the EB2800i and EG2800i have a maximum output of 2,800 watts. With 120 volt appliances, that’s equivalent to 23.3 amps. Power draw at this maximum load should be kept below 30 minutes at a time. For longer power use, the maximum draw should be limited to 2,500 watts or 20.8 amps. If there is a short or the power demand exceeds 2,800 watts, the Overload Alarm in the middle of the indicator lights will switch on, and the circuit protector will trip.

Electric motors are reactive loads: they take more power to start up than they need to run, causing spikes in electricity demand. Motors are used in air conditioners and refrigerators as well as more obvious appliances like drills and mixers.

Eco Throttle

When switched on, the Eco Throttle automatically reduces engine speed to match generator output to the current load. This conserves fuel, reduces noise and saves wear and tear on the generator. Eco Throttle should be switched on once the engine is running.

GFCI Testing

When using the EB2800i at a job site, OSHA regulations require testing of the Ground Fault Circuit Interrupter (GFCI) system before the generator can be used as a power source. Here’s how you test the outlets:

1. Start the engine.
2. Unplug all cords from the outlets
3. Make sure the circuit protection is on for both outlets by pushing in the buttons.
4. Push the “TEST” button in the middle of each outlet. The “RESET” button should pop up, and a small green GFCI LED next to this button will light up. Push the RESET button back in to use the outlet.

If the reset button won’t push down or the GFCI light stays on after reset, the generator should be inspected and repaired before use.

Grounding

These generators are grounded to the frame, which in almost all cases is enough to meet the grounding requirements for the National Electric Code (NEC) and OSHA so long as the generator is sitting on the ground. If external grounding is needed, a wire can be connected from the grounding terminal to a grounding electrode.

Maintaining Your New Generator

www.hondalawnparts.com is a certified dealer for Honda Power Equipment so we can provide you with factory original replacements for everything on your generator. With built-in factory parts descriptions and diagrams, it’s easy to find exactly what you need, and we can ship your order to any address in the U.S. or Canada.