F220 Mid-Tine Tiller

F220 Mid-Tine Tiller

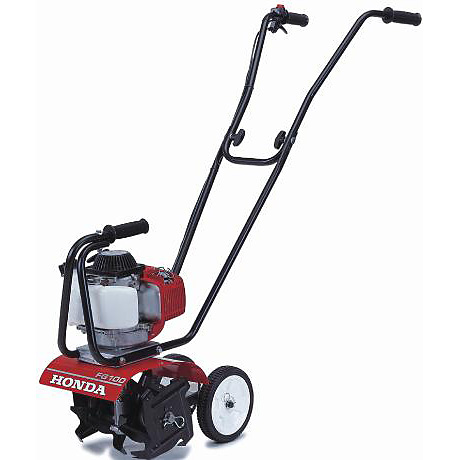
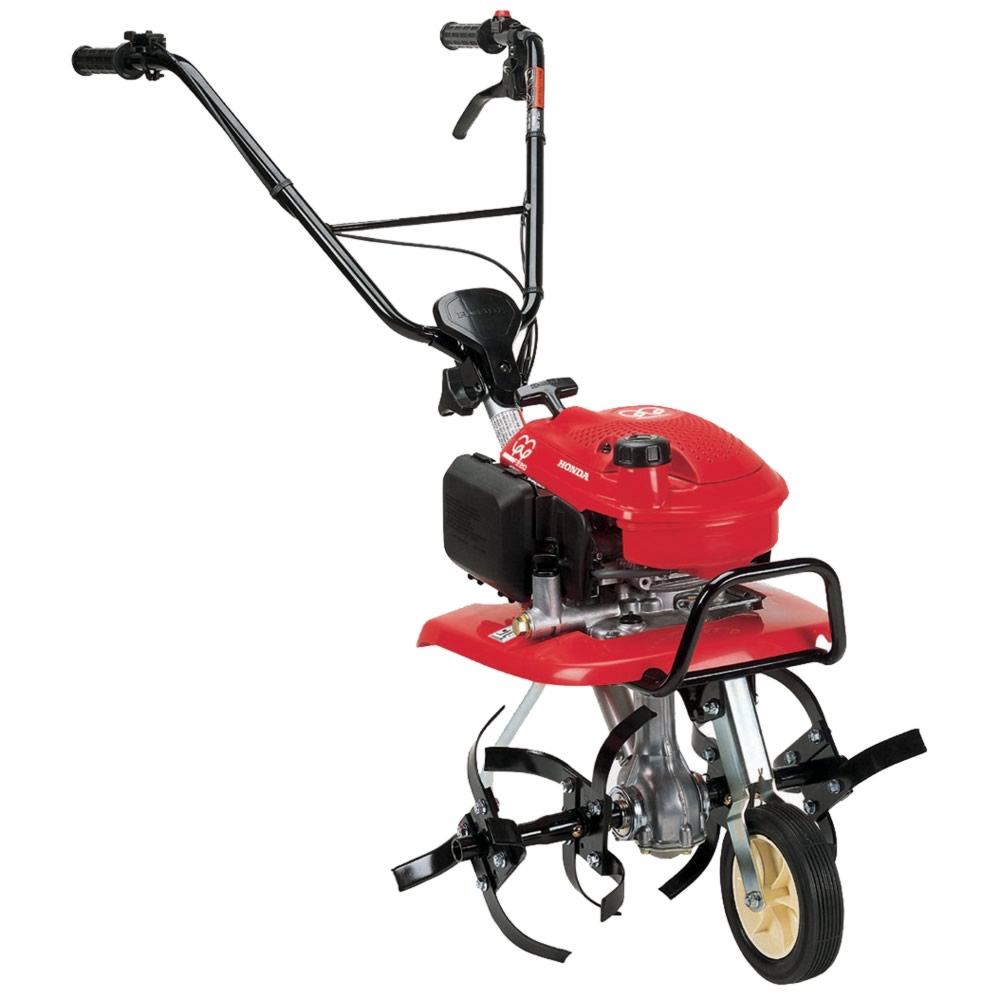
Looking for a tiller that can do it all? Honda’s F220 is a mid-tine model that can be set up for two tilling widths, has an engine that can handle tough soil better than compact two strokes, and uses a drive system to take the strain off the tines and the operator.

Power

This model uses Honda’s GXV57 engine. While it may be small, it shares the same basic design as Honda’s larger commercial engines. This includes features like an automotive-style paper air filter that provides better protection and needs less frequent maintenance than foam filters. Small displacement motors don’t need much force to turn over to begin with, and with this engine’s automatic decompression system, the starter pull is as light as a feather.

Honda has led the way toward the switch from two to four-stroke engines to meet tightening emissions regulations. This switch doesn’t just help the environment, it also brings major improvements to usability. There’s no need to mix oil with fuel, and the engine is far less sensitive to fuel degradation. The GXV57’s wide torque curve keeps it from stalling when the tines run into compacted dirt, and if it does stall, it’s much easier to start. Honda fits the tiller with a steel bar that wraps around the engine, protecting it from impacts during operation and transport.

Tilling

This model has a maximum tilling width of 21 inches. If you need to work around borders or small plots, the outer tines can be removed, reducing the width to 12 inches. At full throttle, the tines spin at 138 RPM.

The mid-tine design places the engine weight directly over the tines, helping push them into the soil. That’s 58 lbs. of force that doesn’t have to be exerted by the operator.
The engine has an integrated transmission with one forward speed. Since it doesn’t have to rely on the tines for momentum, they can do more cutting, giving this small tiller the power to slice through clay and compacted soil.
Honda offers optional side discs that deflect dirt away from plants and pavement for easy cleanup, while the furrow attachment makes a V-shaped trench for planting.

Operation

The handle on the F220 can be set to three positions, giving the operator a comfortable hand position with the right amount of leverage. A front-mounted retractable transport wheel flips up and down with minimal effort. When the wheel is down, the handles can be lifted to roll the tiller around the yard.

Once the tiller is in the work area, the depth bar can be adjusted to limit how deep the tines dig. This creates consistent planting beds, even when the tiller is moved between gardening plots. After the work is done, the handle can be folded forward, making the overall package compact for easy storage and transport.

Warranty

This tiller and its engine are covered for two years of residential use or one year of commercial or rental use.

Getting Parts and Accessories for the F220 Tiller

Hondalawnparts.com is more than an online parts warehouse: we’re a certified dealer for Honda Power Equipment and Honda Engines so you can be sure you’ll always get quality OEM replacements for your tiller. Our site can search by your model and serial number and will show you factory parts diagrams and parts descriptions so you can be sure you’re ordering exactly what you need. We can ship your order to any address in the U.S. or Canada.

Storing Your Honda Tiller

Storing Your Honda Tiller

After tilling your garden this fall to turn over sod and mix in organic matter, it will be time to put your Honda tiller into storage. Taking steps to protect your equipment now will make it easier to get it up and running in the spring.

Inspection

Addressing issues now will mean your tiller will be ready to work when it’s time to break ground in the spring. Give your machine a look over and answer these questions:

Are the tines straight? Do they show severe wear or signs of cracking?
If the tiller has a belt drive, is the belt still tight? Is it starting to crack?
Is the spark plug, fuel hose, and air filter still in good condition?

Cleaning

Let the engine cool for at least a half hour before cleaning: rapid cooling caused by water making contact with hot engine parts can cause warping.

A garden hose or pressure washer can be used, but the water should not be aimed at the controls, cables, air filter, belts or muffler. A rag or stiff brush can be used to remove dirt trapped near these sensitive areas.

Once clean, wipe any remaining moisture off of the tiller. To get rid of the last bit of water, start the engine and let it run until it reaches normal operating temperature. If the mower has a clutch, operate the clutch lever several times to remove any water clinging to the pulleys and belts.

Fuel

Even stabilized fuel should not be kept in your tiller’s engine for longer than three months. Before putting it into long term storage, the fuel system should be drained completely.

Start by disconnecting the spark plug. If there is an engine switch, make sure it’s set to “off.”

On models with a Mini 4-Stroke engine, open the gas cap and tip the tiller so that the gas pours out into a container. Once the tank is empty, squeeze the priming bulb to remove any remaining gas in the carburetor.

On models with larger engines, place a fuel container underneath the carburetor and unscrew the gas cap. Open the fuel valve and unscrew the fuel drain bolt or knob at the bottom of the carburetor. Newer models like the FC 600 also have a sediment cup to the right of the drain knob: once the fuel has drained, unscrew this cup, clean out any fuel and debris, and reinstall the cup, fitting a new O-ring to ensure a tight seal. Screw the bolt or knob back into the carburetor once the tank and carburetor are empty.

Oil

If your tiller has a separate transmission, the fluid inside does not need attention before you put your equipment in storage aside from checking the level. On all models, the engine oil should be changed, and the cylinder should be lubricated to prevent rust.

To lubricate the cylinder, first, remove the spark plug.

For Mini 4 Stroke engines, pour a quarter teaspoon of clean engine oil into the spark plug hole. For other engines, add one teaspoon of oil.

Pull the starter handle several times to circulate the oil inside the cylinder, then reinstall the spark plug.

Pull the starter handle gently until resistance is felt. This positions the valve train so that both the intake and exhaust valves are closed, sealing the combustion chamber.

When the tiller is put back into service, it’s normal for the motor to smoke for a few seconds as the oil in the cylinder is burnt off.

Rust Prevention

To keep rust from forming during storage, chipped and damaged paint should be covered in a touch-up paint, while bare metal surfaces should get a light coat of oil or silicone lubricant.

Storing

Even with the fuel tank and carburetor drained, there may still be enough fuel inside of your tiller to release flammable vapors. Keep the tiller in an area that doesn’t have an open flame or sparks nearby. This includes avoiding power tools, heaters, clothes dryers and water heaters.

To prevent rust, the tiller should be stored in an area with low humidity. Placing a tarp over the tiller can trap moisture, accelerating rust formation.

If you fold the handle to make the tiller more compact, make sure the cables aren’t kinked or wedged between the upper and lower handle.

Getting Parts for Your Honda Tiller

From small maintenance parts like O-rings and spark plugs up to major components including tines and engine covers, if it’s Honda, you can find it at Hondalawnparts.com. We’re a certified Honda Small Engine and Power Equipment dealer, and our massive parts stock lets us ship parts quickly across the U.S. and Canada.