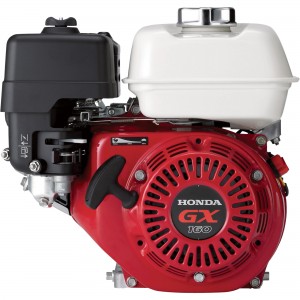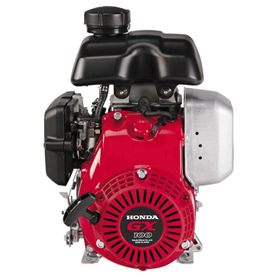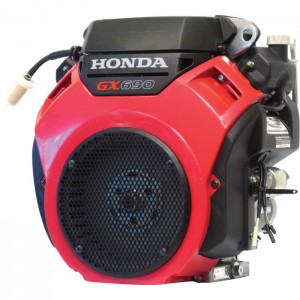
Honda GX Series V-Twin Engines

gx v-twinHonda’s GX Series V-twins are built for high demand applications including everything from generators to UTVs, delivering power with the company’s signature reliability and ease of operation. No matter what your GX powers, there are a few things you should do to get the most out of your engine.

Controls

All the controls on these motors are placed on a control panel, located to the right of the fan cover. From top to bottom, there’s a throttle, choke knob, engine switch, oil alert indicator and an hour meter. There are a couple things you should know about how these controls work on the GX:

  • Don’t see a throttle or a choke lever? Some equipment mounts the throttle remotely, typically placing it on a handle. This is almost guaranteed with vertical shaft models.
  • The choke is engaged by pulling the choke knob out.
  • The hour meter will display the current operation hours when the ignition switch is on, but it only counts time when the engine is running.
  • These engines have a fuel cut solenoid that lets fuel enter the carburetor when the ignition switch is in the “On” and “Start” positions, and then closes the fuel line when the switch is off. If the battery becomes disconnected, the solenoid will close the fuel line, causing the engine to stall. Some models also have a separate fuel valve on the fuel tank that needs to be opened when the engine will be used, then closed when it is put away.
  • Honda’s Oil Alert system will shut down the engine if the oil level inside the crankcase gets too low, preventing potential engine damage. If the system is tripped, the indicator light will turn on. If the engine stops suddenly, check both the light and the oil level.

Starting

The throttle should be about 1/3 of the way from the lowest “Min.” position, and the choke should be closed unless the motor is being restarted. If there is a fuel valve on the tank, make sure it’s open. To turn over the motor, turn the ignition switch to “On,” then twist it to “Start” until the engine fires up. If the engine isn’t running after 5 seconds, release the ignition switch and wait 10 seconds to let the starter motor cool off before trying again. Once the engine is running, it should idle for a couple minutes to let it warm up.

Stopping

Move the throttle to the “Min.” position, then turn the ignition to “Off.” If equipped, close the fuel valve.

Oil

On horizontal shaft engines, the oil is poured into a filler neck located at the top of the right side cylinder head. The oil can be checked using the automotive-style dipstick behind this cylinder. On vertical shaft models, there will be a combination filler neck cap and dipstick behind the right-hand cylinder. The oil level should be checked after the engine has idled for a couple minutes and is then shut off. The level should be between the two marks on the dipstick. On vertical shaft models, the cap should not be threaded into the filler neck when using the dipstick to check the oil level.

GX Series engines are designed to use 5W30 or 10W30 oil in most operating conditions. If you need to operate the motor at temperatures below 10 degrees F (-15 degrees C) a synthetic 5W30 is recommended. SAE 30 can be used at temperatures above 50 degrees F (10 degrees C).

Oil can be drained by removing a plug bolt at the base of the engine. The GX series also uses a spin-on oil filter, which should be replaced each time the oil is changed.

Air Filter

The air cleaner is behind a latched cover between the cylinders. Vertical shaft motors use a series of panels, while horizontal shaft motors use round filter elements.

The air cleaner uses both a paper element and a foam element. The foam element should be cleaned by washing it with a mild detergent or a non-flammable solvent. Once dry, soak it in clean engine oil and squeeze out any excess. The paper element should be tapped against a hard surface to loosen any dirt between the pleats.

Spark Plugs

The spark plug gap should be between 0.028-0.031 inches (0.7-0.8 mm.) The plugs can be removed and installed using a 5/8 inch plug wrench or socket. When installing, screw the plug into the engine by hand to ensure it doesn’t cross thread, then tighten it down 1/8-1/4 turn after it seats if it’s used, or ½ turn if it is new.

Getting Parts

Need something for your Honda GX V-twin? You can get it from www.hondalawnparts.com. We’re a certified Honda Small Engine Equipment dealer, so we carry everything for their motors. When you search for parts on our site, you’ll see factory parts diagrams and descriptions so you can quickly find what you need. We ship parts across the U.S. and Canada.

Honda GC Engine

Honda GCThe GC Series may be aimed at residential use, but it’s just as reliable as anything from Honda. Found mostly in pressure washers, tillers and water pumps, this motor is easy to use if you know how to operate and take care of it.

What’s the Difference between the GC160 and GC190?

Both engines are identical aside from the GC190’s longer stroke and higher weight. The information below applies to both versions of the GC series.

Controls

There are three versions of these motors, each with their own control set located to the right of the fuel filler neck. All models have a choke rod which has a hook on the end. Pulling this rod out closes the choke.

Next to the choke rod, there may be a lever. If the lever is gray, it’s the throttle lever. Pushing it up will open the throttle, increasing engine speed. If it’s red, it’s the ignition switch. Pushing it up switches the ignition on, allowing the motor to run.

Some fixed throttle engines have an engine stop/start switch next to the choke rod. Turning the knob clockwise switches the ignition on, while turning it counter-clockwise cuts the ignition, shutting off the engine.

Starting

Before starting, the choke should be closed if the engine is cold and open if the engine is warm. If your motor has a throttle, it should be set to 1/3 of the way toward the “Fast” position. If it has an ignition switch or stop/start switch, it should be on. Use the recoil starter to turn over the engine. Once the engine is warm, the choke can be opened and the throttle set to the desired speed.

Stopping

To stop the engine, shut off the ignition or push the throttle lever all the way down to the “stop” position.

Fuel

These engines are designed to run regular unleaded fuel with up to 10% ethanol. The fuel tank should be filled no higher than the bottom of the filler neck. When storing the engine, keeping the fuel tank full will limit the air inside. This reduces oxidation and aging. If the fuel will be stored for more than a month, a fuel stabilizer should be used, but this will only extend the fuel’s life to a maximum of three months.

If your engine isn’t running well due to stale fuel, use a siphon hose to remove fuel from the tank, then get the last of the gas out by loosening the drain screw on the base of the carburetor.

If you operate your engine at elevations above 5,000 feet (1,500 meters,) Honda recommends having the carburetor re-tuned to deliver the right amount of fuel to match the lower density air.

Oil

Honda recommends checking the oil level before each use. The dipstick is attached to the oil filler cap, which is located directly below the muffler. To get an accurate reading, the dipstick must be inserted without screwing the cap back into the filler neck.

This motor is designed to use 5W30 or 10W30 oil with an API certification of SJ or greater. SAE 30 can also be used at temperatures above 50 degrees F (10 degrees C.) When filling, the oil should come up to the bottom edge of the filler neck. Oil can be drained from the motor by removing the drain bolt and washer, located to the left of the filler neck. This motor holds about 20 oz. of oil, and it should be changed every 6 months or 50 hours of use. If you use the engine in high temperatures or places with a lot of dust, Honda recommends changing the oil every 25 hours.

Oil and Sudden Stops

All GC engines come equipped with the Oil Alert system. If the sensor inside the crankcase detects that the oil level is below a safe level, it will shut the engine off automatically. If the engine stops working, check the oil level to make sure this system hasn’t been tripped.

Air Filter

The air cleaner housing is located directly above the fuel tank. The paper filter inside can be accessed by opening two clasps on the side of the cleaner cover. The filter should be inspected for damage before each use. It should be cleaned every three months or 25 hours by gently tapping it against a hard surface to remove loose dirt. The filter needs to be changed every two years or 250 hours.

Sourcing Parts for the GC160 and GC190

When you need parts for your Honda motor or equipment, visit www.hondalawnparts.com. We’re a certified dealer, so we’re able to offer OEM replacements for everything from Honda’s small engine equipment line. Our site has factory diagrams and descriptions built-in, making it easy to find exactly what you need, and we can ship your order to any address in the U.S. and Canada.

Honda GS Engine Overview

honda gs engineThe horizontal shaft Honda GS can be found in a wide range of residential lawn and garden equipment as well as commercial equipment that puts a premium on low weight. No matter what your GS engine is powering, there are a few things you should know about it to get the most out of your motor.

Controls

Honda makes three versions of these engines, each with their own unique control setup. The controls can be found just to the right of the fuel tank, although some equipment may use remote levers for these functions. All model have a metal loop handle to control the choke: pulling it out closes the choke. Next to the choke, you’ll see one of three controls:

A gray manual throttle lever – Moving the lever up opens the throttle, increasing engine speed.
A red ignition switch lever – Moving the lever up will enable the ignition. Pushing it down will stop the engine.
An engine stop switch – Turning it to the right enables the ignition. Turning it to the left will stop the engine.

Engine Oil

Some versions of the GS come with Honda’s Oil Alert system. It uses a float inside the crankcase to detect low oil levels. If the level is too low, it will shut off the engine to prevent damage. If the engine stops suddenly without any clear external cause, check to make sure the oil level is correct.

The oil drain bolt is located on the bottom edge of the engine, directly below the muffler. The dipstick is part of the cap on the filler neck, located to the right of the drain plug. To check the oil level, the dipstick must be inserted into the filler neck without screwing it down. Honda recommends using 5W30 or 10W30 oil for most operating temperatures, or SAE 30 for temperatures above 50 degrees F (10 degrees C.) When changing the oil, the fresh oil should come up to the top of the filler neck. It should take about 20 ounces (0.58 liters) of oil to fill the crankcase.

Engine oil should be changed after the first month or 5 hours of use, then every 6 months or 50 hours thereafter. If the engine is used under heavy load or high temperatures, change the oil every 25 hours.

Air Cleaner

The air cleaner box, located above the fuel tank, can be opened by pressing in two tabs on the side of the cover. Below this, there’s a foam filter, a plastic grid, and a paper filter. Wash the foam element in a mild detergent or clean it with a nonflammable solvent, then soak it in clean motor oil once it has dried. Squeeze out any excess oil before installing. Remove dirt from the paper element by tapping it against a hard surface. The air filter should be replaced every two years or 200 hours of operation.

Spark Plug

The spark plug should be gapped between 0.028-0.030 inches (0.70-0.80 mm.) It should be checked every 6 months or 50 hours of operation and replaced every two years or 200 hours of operation.

Spark Arrester

The arrester is a metal sleeve that fits inside the exit of the muffler and can be added to any GS series motor to meet local safety requirements. To access it for cleaning, take off the muffler protector by removing three bolts around the outside edges. The arrester itself can be removed by removing a single screw. Use a wire brush to remove any deposits, and replace the arrester if it shows signs of damage.

Fuel

The fuel tank is designed to hold fuel up to the bottom of the filler neck. This engine is designed to run on gasoline with no more than 10% ethanol (E10.) A stabilizer should be used if the fuel will be stored more than 30 days, and even stabilized fuel should be replaced after 90 days.

If you need to drain the fuel system for storage or to remove stale fuel, use the drain on the carburetor, located directly below the air filter. It has a place to attach a hose which can be inserted into a fuel tank to capture the exiting fuel. Use a flathead screwdriver to open the valve directly above the drain to let the fuel flow out. If you’re storing the engine, start the motor and let it run until it dies to ensure the fuel system is completely empty.

High Altitude Use

Honda recommends having the carburetor jets changed if you use your GS motor at altitudes above 5,000 feet (1,500 meters) to better match fuel delivery with the available air. If you have an engine with an automatic throttle, the throttle mechanism may need to be adjusted if the motor doesn’t want to slow down once the load has been removed, or it takes a while to return to speed once the load has been reapplied.

Getting Parts for Your Honda GS Engine

www.hondalawnparts.com is a certified Honda Engines dealer offering everything you need to maintain and repair your GS Series motor. Our site has factory exploded parts diagrams built in to help you find the parts you want to order, and we can ship those parts across the U.S. and Canada.
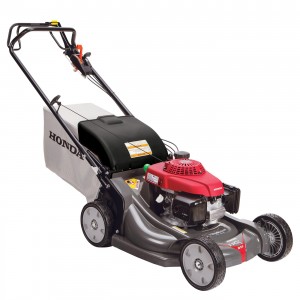
Honda GX Engine

GX100_imgmedChances are if you own any commercial-grade small engine equipment, you have at least one Honda GX Series engine. Available in horizontal and vertical shaft versions and displacements ranging from 98 to 389 cc, this series of motors can be found in just about any type of small engine equipment you can think of. Here’s what you need to know about this motor’s quirks, from starting to troubleshooting.

Controls

There are many variations on these models and individual pieces of equipment may leave controls on the engine or move them to a remote control center, typically on the device’s handle.

The main controls are located on the carburetor, which will be directly below the air cleaner housing. Some models will have a throttle lever at the very top, almost against the air cleaner housing. Next, on the carburetor body itself, there will be a choke lever. Below that, some models have a fuel valve.

For starting, the throttle should be set to 1/3 of the way from “Slow.” On models with the lever on the engine, move the lever left to open the throttle. The choke should be closed unless the engine is already warm, and the fuel valve should be open.

On electric start models, the engine is started by turning the key or switch to “Start.” After 5 seconds, if the engine hasn’t started, release the switch and wait 10 seconds to let the starter motor cool before trying again. If the engine won’t start, set the switch to “On” and use the recoil starter.

Checking the Oil and the Oil Alert System

The dipstick is built into the oil filler cap. To check the oil level correctly, the dipstick needs to be wiped off and then inserted into the engine without threading it back into the filler neck. When adding oil, the oil level should come to the edge of the filler neck.

Some models are equipped with Honda’s Oil Alert system. This will automatically shut off the engine if the oil level gets too low. If your motor stops abruptly, check the oil level to make sure this wasn’t the cause. On electric start models, there should be a light on the starter panel indicating the oil alert system has been triggered.

On motors with a reduction gear, the gear is in a separate case with its own oil supply. It has its own filler cap/dipstick and uses the same oil as the engine. The case should only be about half full of oil, which will be well below the top of the filler neck.

Spark Arrester

No matter the model, the muffler on your engine is designed to be used with a spark arrester where required by law. The arrester can be accessed by removing the muffler shield. The arrester itself will be held in the muffler by one screw. To clean the arrester, scrub off any deposits with a wire brush. If it has any splits or holes, it should be replaced.

Air Cleaner

There can be up to three types of air filters inside the air cleaner that need occasional cleaning:

Paper elements can be cleaned by knocking them against a hard surface to loosen dirt.
Foam elements should be washed with a mild detergent or non-flammable solvent. Once dry, dip the filter in clean motor oil and squeeze out any excess liquid.
Cyclones should be disassembled and wiped clean. Any dust inside the cleaner housing should also be wiped out before reassembly.

Propane (LPG) Powered Engines

If you have an LPG-powered version of the GX270 or GX390, there are a couple differences in operation.

Since LPG is a gas, there won’t be any visual signs of leaks. Instead, smell the area around the engine. If you detect any trace of LPG, have the fuel system repaired before starting the motor.

The choke lever increases vacuum to help pull gas into the combustion chamber. Once the engine is running, the engine will provide the necessary vacuum, and the choke can be opened. There’s no need to wait for the engine to warm up.

Use only SAE 30 weight oil designed for use with LPG engines, or a synthetic 5W-30 oil if using the engine below 32 degrees F (0 degrees C.) A mineral-based multi-weight oil may be fine in other GX motors, but it will damage your LPG model.

Getting Parts for Your GX Series Engineering

No matter what your Honda engine is connected to, you can get parts for it at www.hondalawnparts.com. We’re a certified dealer, covering both small engines and Honda power equipment including generators, water pumps, and mowers. Our advanced search engine can show you factory parts diagrams so you can see exactly what you’re ordering. We ship to both the U.S. and Canada.

Honda iGX Engine Overview

Honda iGX EngineThe electronically-controlled Honda iGX has been making its way into a wide range of equipment including Honda’s own EM and EB series generators. At first glance, it’s easy to confuse a Honda iGX motor with their GX Series, found in pretty much every piece of commercial-grade small engine equipment. That’s understandable since the iGX is a GX at its core, but the iGX has some unique features that change how you need to operate and care for these motors.

What Makes an iGX engine different?

The iGX is based on the GX Series engine, the same design that has been a cornerstone of small engine equipment across the industry, used in everything from generators to pressure washers.

The biggest change is the Electronic Control Unit (ECU.) It can read engine conditions and adjust the governor and throttle, keeping the engine at just the right speed to meet current load demands. The result is fast power response and up to a 15% increase in fuel economy. It’s no wonder that these engines first saw use in generators.

These engines also use CDI ignition with variable timing and a rev limiter. By varying ignition with engine speed, these motors can produce more power over a wide RPM range.

Low Profile Models

For equipment where space is at a premium, Honda offers low profile versions of these engines. These are easy to identify by the large plastic panel next to the recoil starter. This is the cover for the air cleaner. The muffler is located at the rear of the engine, while fuel is stored on the equipment itself instead of a tank bolted to the motor.

The Honda Oil Alert System

The Oil Alert system is designed to protect the engine if it doesn’t have enough oil to stay lubricated. It works a little differently on the iGX than it does on other Honda engines: on some motors, the ECM, located directly above the carburetor, has a small LED light. If it flashes twice, the Oil Alert system has been triggered. On other models, the Oil Alert light is clearly visible next to the ignition switch and will either blink continuously or stay on once the system has been triggered. Most models will shut down to protect the motor, but if a shutdown may be dangerous due to the type of attached equipment, the motor may keep running. If you see the light come on, try to shut down the motor as quickly and safely as possible. Add more oil as needed before starting the engine again.

Starting the Engine

To start an engine with electric start, turn the ignition switch to “Start.” On these engines, the choke is engaged automatically. If it doesn’t start after 5 seconds, release the switch and wait 10 seconds before starting again. If it refuses to start, switch the manual start lever, located next to the ECM, to “On.” Turn the ignition to “On,” then use the recoil starter to start the engine. Don’t move the manual start lever until shutting down the motor.

To start an engine without electric start, locate the fuel lever (lower lever) and choke lever (upper lever) on the carburetor. If you have a low profile engine, which places the muffler and air cleaner behind the engine instead of above it, there will only be a choke lever. If you have an iGX270 or 390, the choke is automatic, so the sole lever is for fuel. Set the fuel lever to open and the choke to closed, as applicable. Turn the ignition switch to “On” and use the recoil starter to start the motor.

Fuses

One or more automotive fuses are used to protect the motor’s electrical system. These fuses are in a clearly marked fuse box on the side of the iGX440, while other motors will have an in-line fuse behind the ignition switch panel on electric start models. A burnt fuse will keep the engine from starting.

Low Power at High Altitude

It should be no surprise when engines make less power at higher altitudes due to the thinner air, but in the case of these engines, this loss in power is due to an incorrect fuel mixture. Honda recommends having the carburetor set up for high altitude use if your motor spends most of its time running at altitudes above 5,000 feet (1,500 m.)

Engine Identification

The serial number and engine model on any iGX can be found on the crankcase directly above the oil drain plug.

Getting Parts for the iGX

www.hondalawnparts.com is a certified Honda Small Engine Equipment dealer, carrying everything you need for Honda small engines and equipment from older lawn tractors to advanced powerplants like the iGX. Our site makes finding parts easy thanks to factory parts diagrams and information built into our search engine. We can ship your order to any address in the U.S. and Canada.

Honda HRX Overview

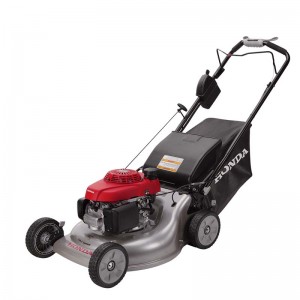
HRX2173HYAPE_IMGLGThe HRX is Honda’s line of top performing mowers, offering all the company’s latest technical advancements including a few industry firsts. What makes these mowers stand out?
Cutting Performance

All HRX mowers use Honda’s MicroCut twin blade cutting system. This design pairs two uniquely shaped blades that sit on top of each other, cutting grass twice in the first pass for smaller clippings when collecting or discharging. When mulching, the dual action chops up grass faster, helping the mower deal with thick and wet grass that would clog other mulching mowers.

These mowers use Honda’s 4-in-1 Versamow System, letting you choose between mulching, bag, or discharge clippings plus a special leaf shredder mode. The bag and deck plug can be attached without tools, and the Clip Director allows clippings to be redirected by moving a single lever, making it easy to switch modes. Continue reading

Which Honda Mower is Right for You?

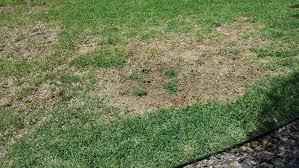
Honda HRRVLA Lawn Mower - Left ViewLooking to buy a Honda walk behind mower? With over a dozen models to choose from spread over three ranges, picking the right one can be confusing. Here’s what you need to know to find the right mower for your needs.
Honda’s Naming Scheme

Honda has four model lines for walk behind mowers: the HRC, HRS, HRR, and HRX. Models within these lines are labeled using three letters that end in “A” like PKA and HZA, based on equipment. Some model names are used for multiple lines. To make this guide less confusing, the model, line, or a combination of the two will be mentioned as it applies to features. Continue reading

Avoid Making These Common Mistakes With Your Lawn

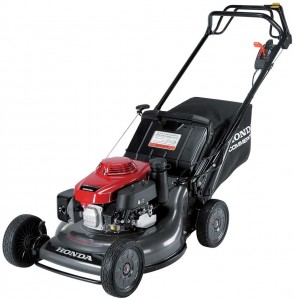
GrassHaving problems getting that high-quality lawn you crave? Before you start spending serious money on new equipment and care, make sure you aren’t making one of these common, easy-to-fix mistakes.
Cutting Too Much Grass

The shorter you cut your grass, the less often you have to mow. However, trimming the blades down to the ground can severely hamper growth, keeping the grass from getting enough light and water to develop the root system. Each grass variety has a height that it grows best at, but in general warm weather grasses like to be around two inches tall, while cold weather grasses are at their best when they’re an inch tall. Trimming a maximum of one-third of the blade length will make mowing easier on the grass. Continue reading

How to Sharpen a Lawnmower Blade

Honda-Lawnmower-Blades-Birmingham-1To get a quality finish and a healthy lawn, your mower needs to be able to make a clean cut across the grass as it mows. This guide will walk you through inspecting and sharpening your mower’s blade to ensure your mower will slice through blades of grass instead of bruising and breaking them.
Removing the Blade

1. Disconnect the spark plug wire to prevent an accidental start.
2. Tip the lawn mower up on its side so that the carburetor is facing up to prevent flooding.
3. Mark the side of the blade facing out with a permanent marker or some spray paint. This way you’ll know which way the blade will need to be installed after sharpening.
4. Unbolt the blades. On some models, including all Twin Blade mowers, there are two bolts that hold the blade onto the engine shaft. Remove these bolts, but do not loosen the smaller center bolt. If the blade wants to spin, wedge a piece of wood between the blade and the deck. Continue reading

11 Most Common Weeds

1024px-Weeds_in_Waterloo,_OntarioWhat is a weed? It’s a plant that you don’t want in your yard. That’s a pretty loose definition, which means weeds can encompass anything ranging from undesirable types of grass and moss to flowers. Here’s what you need to know to identify common weeds and keep them off of your turf.

Dandelion

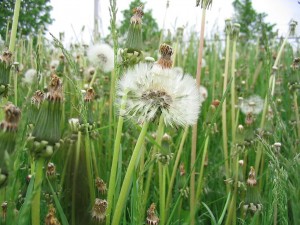
Appearing in the spring and fall, their bright, round yellow flowers and puff ball-like seed stage are easy to identify. Dandelions grow long taproots: if you dig these up by hand, you’ll need to remove at least two inches of this root to keep the plant from growing back. Post-emergent herbicides work well on these plants, especially mature ones in the fall, as the herbicide will be able to penetrate the entire root. If you’re developing your lawn, these should fade away as the grass gets thicker, blocking seeds from the soil.

Crabgrass

What’s wrong with grass growing with grass? Crabgrass grows in large, round clumps that stand out from the rest of your lawn. Overwatering, underwatering, and mowing the grass too short can let crabgrass take hold in your lawn. Pre-emergent herbicides work best, but only if applied at just the right time: contact your local extension office to find out when a treatment will be most effective.

Creeping Charlie/Ground Ivy

Whatever you call it, the nodules of this plant grow long stems, each topped by a single leaf. It grows well in shaded, moist areas with poor soil quality but can sometimes appear in sunny areas. Post-emergent herbicides can kill it off, but it may take several treatments. To keep it at bay, plant grass in the area before it has a chance to grow back.

White Clover/Dutch Clover

This clover with its round white flowers is a popular addition to flower gardens and arrangements. At one time it was planted with other grasses in lawns, but a shift in fashion to more uniform turf has turned this plant into a weed. It likes to grow in areas with poor soil quality, and particularly in soil with low nitrogen levels; correcting soil nutrients can usually halt its growth. Broadleaf herbicide treatment is effective, but it may take several applications in the spring and fall to eradicate it.

Chickweed

With thin stems covered in tiny leaves, chickweed grows in areas with moist soil, shade and good soil. It usually pops up in areas with poor grass coverage and poor drainage. This plant can be pulled out of the soil easily, which stops it from spreading. If you have a large area covered in this weed, crush the stems and apply nitrogen, which will be absorbed directly into the plants, killing them. If this weed is a regular problem, apply a pre-emergent herbicide in the spring and fall.

Annual Bluegrass

This blue-green grass appears in late summer, growing in clumps that are much thinner than crabgrass, and can even blend in to fescue lawns. It likes to sprout in poorly-drained soil, overwatered areas, and scalped soil, sprouting seeds on its tips when it germinates. A pre-emergent herbicide can prevent germination, but if this grass is already present, bag your clippings to prevent the seeds from spreading.

Broadleaf Plantain

This perennial has wide leaves and long stems covered in seeds. It tends to appear in areas with thin grass coverage and compacted soil, and thrives in droughts and overwatered areas. Hand-pulling plants and post-emergent broadleaf herbicides work best to remove these plants, while aerating can keep them from coming back.

Violet

While prized by flower growers, this turf nuisance appears in shaded areas with thin coverage. Despite the name, the flower’s pedals can be white, purple, or any shade of lavender in between the two extremes. Steady application of a post-emergent broadleaf herbicide can keep this plant at bay.

Henbit

While other weeds on this list thrive in less than ideal conditions, this plant with its tall, square stems covered in small leaves and small purple or pink flowers grows best in the same conditions as desirable grasses. Post-emergent herbicides can get rid of these plants, while a fall application of pre-emergent herbicide can keep new seeds from taking root.

Wild Onion and Garlic

While different plants, they’re both recognized by their long, thin shoots. Garlic plants have hollow stems, while onion stems are solid. Keeping the lawn mowed, even when dormant, can reduce growth. Some selective broadleaf herbicides on the market are designed specifically for these plants; apply these chemicals when the stems are at least two inches tall.

Keep Your Honda Lawn Equipment Ready to Fend Off Weeds

www.hondalawnparts.com is a certified Honda small engine equipment dealer carrying everything you need for your Honda equipment and small engines. We can ship the parts ranging from mower blades to cylinder heads anywhere in the U.S. and Canada.