How to Get Better Performance from Your Snow Blower

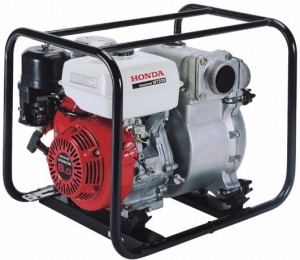
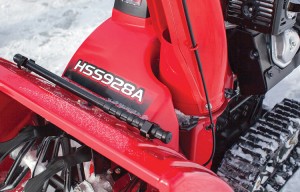
HSS928Do you feel like you’re not getting the best performance from your Honda single or dual stage snow blower? Are you looking for ways to make snow clearing easier on yourself? These tips will help you clear snow faster and avoid common problems with starting and clogging.

Prepare the Area You’re Clearing Ahead of Time

Removing hazards, including rocks, chains, garden hoses and extension cords from the area before it snows will keep you from running over them. Placing markers around the edges of driveways and sidewalks will let you see the area you need to clear once the landscape is covered in snow. This doesn’t just save time by limiting what you clear, it protects your lawn, which can be damaged by your blower’s auger.

Do you get the newspaper? Make sure it’s out of the driveway before you start clearing. The paper and the plastic bag it comes in will have no problem jamming up your auger and breaking the shear pins.

Keep Your Fuel Fresh

There are few places where snow storms are constant, so it pays to be prepared for the next storm whether it’s tomorrow or in a couple months. Straight gasoline starts going stale after a month, but by adding a stabilizer shortly after purchase, the fuel will stay fresh for up to three months, making your machine easier to start. Between storms, keeping the tank topped up will reduce the amount of contact it has with oxygen, keeping it fresher longer.

Move Snow While It’s Still Snowing

This seems counter-intuitive: by clearing snow while it’s falling, you’ll have to go back and remove any remaining snow once the storm stops. However, the less snow your machine has to move at one time, the faster it can work. Clearing snow as it falls also keeps the weight of fresh snow from packing down lower layers, making it easier to remove. That means breaking up the job into two clearings can decrease the total time you have to spend out in the cold.

Throw Snow Where You Want It the First Time

When your snow blower picks up snow, it should be forced through the chute far enough to land outside the area you’re clearing. If it isn’t, changing your methods can keep you from having to make a second pass to move snow you already tried to clear:

– Overlap more with each pass, letting the auger pick up less snow at a time.
– Go slower and increase engine speed.
– Increase the chute angle.
– Aim the chute to work with the wind.

Keep the Chute from Clogging

Wet snow may not be dense, but it likes to stick to the auger housing and chute. If you’re having trouble with chute clogs, go slower, even if the snow isn’t that deep or dense.

Applying polymer car wax to the inside of plastic chutes can keep snow from sticking, while silicone spray lubricant can be used on the surface of the impeller and inside metal chutes to help snow slide through the machine.

Wait Before Refueling

You may be tempted to refill your blower’s fuel tank as soon as possible so you can get back to work, but it only takes a few spilled drops of fuel on a hot engine to start a fire. When your Honda runs low on fuel, take a break to let the engine cool down and your body warm up. Once you’ve refueled, move your snow blower at least 10 feet away before restarting to prevent the ignition of fuel vapors.

Consider a Snow Cab

Wind chill can make cold temperatures dangerous while blowing snow is unpleasant regardless of temperature. A snow cab may not look like much, but it can shield you from these two hazards, making it easier and safer to clear large areas. Honda makes cabs that fit all of their two-stage models.

Plan Ahead for Parts Replacement

Shear pins and belts can break at any time, so it pays to have some extras on hand to keep your snow blower running. Hondalawnparts.com has these parts as well as everything else you need to keep your Honda snow blower working. When you select your model and serial number in our search engine, you’ll see factory parts diagrams and descriptions, making it easy to find the right item for your equipment. Want to add a snow cab or a set of drift cutters? We sell those, too. We ship across the U.S. and Canada.

Picking the Right Snowblower

HS1336iAS Snowblower OperationBuying a snow blower can be confusing: Honda has 14 models, letting you pick from two auger types, three starting systems, and three drive systems, not to mention various widths and snow capacities. Which one is right for you? Here’s how you can narrow down the selection.

Size and Power

For the best performance, you should plan on some overlap with each pass so the effective clearing width will be 20% narrower than the actual auger width. If you’re nearing the maximum capacity of a snow blower, you should plan on a 50% overlap.

Snow density can vary a lot between snowfalls, so it’s hard to directly correlate power to snow clearing ability. Fresh snow can weigh as little as three pounds per cubic foot, while settled snow can top 19 lbs. and packed snow can reach 25 lbs.

When selecting a snow blower, your primary concern should be the width and depth of snow the auger housing can handle. Once you narrow down your choices, choosing a model with a higher pound per minute rating will let you clear snow with less overlap between passes.

Wheel or Track Drive?

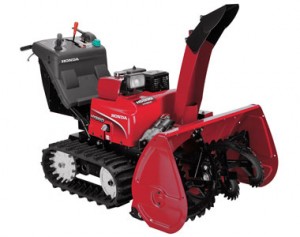
Track drives handle packed snow and slopes better than wheels. Choose a track drive if you need to clear snowbanks, snow that has been driven on. A track drive snow blower is also a good choice if you need to clear snow off of a flat industrial roof.

Snow blowers with wheels are easier to turn, saving time and effort when clearing flat surfaces like driveways and parking lots.

Single or Two Stage?

A single stage snow blower has an auger that spins fast enough to pick up snow and push it out of the chute. This mechanical simplicity makes these machines light and easy to maneuver.

A two-stage snow blower lifts snow off of the ground with a low-speed auger, then pushes it out of the chute with a high-speed impeller. This helps the machine pick up heavy snow and throw it further so it can clear wide areas.

A single stage snow blower like the HS720 is ideal for clearing paved sidewalks and driveways for single or two-car garages and works best for snow under 9 inches thick. If you need to clear larger areas, uneven surfaces or major accumulation, get a two-stage snow blower.

Electric or Recoil Start?

Honda engines are easy to start in cold weather, and all models have a recoil starter, whether it’s the only way to start the engine or it serves as a backup for the electric starter.

The HS720AS uses an AC motor to start the engine, which needs to be plugged into an electric outlet to work. All other electric start models have a built-in 12-volt battery that powers a DC motor so the starter can be used anywhere.

Hydrostatic Drive, Hybrid Drive or No Drive?

Honda’s single stage blowers have no drive system, but as the auger’s rubber paddles scrape against the ground, they help pull the machine along when applying light pressure to the handles.

All but one two-stage Honda snow blower comes equipped with a hydrostatic drive. By varying fluid flow inside of the transmission, the speed can be infinitely adjusted while letting the engine run at full power to operate the augers.

The hybrid power system on the HS1336iAS uses electric motors to operate the tracks. These motors produce maximum torque as soon as they start moving, making it the best model for clearing snow on slopes. The motors can also be used with the engine off for easy transport.

Do I Need Drift Cutters?

These are a must-have if you live in a place that gets frequent heavy snowfall. Snow drifts are created by wind gathering snow in one spot, creating a large hump that resembles a sand dune. Drift cutters are blades that extend above and ahead of the auger housing, slicing through these drifts so the snowfall into the path of the snow blower. This keeps the tops of drifts from collapsing onto the snow blower and the pavement. Drift cutters can be fitted to any two-stage snow blower.

Do I Need a Cold Weather Cab?

Wind chill can make a cold day uncomfortable or even dangerous. At 20°F, a 20 mph wind results in a wind chill of 4°F. A snow cab might not look like much, but by shielding your body from the wind, you’ll be a lot warmer. Honda makes cabs for all two-stage models.

Where Can I Get Parts and Accessories?

No matter which model you choose, you can get all the OEM parts and accessories for your Honda snowblower at www.hondalawnparts.com. Finding parts is easy: check out our “Snow Blower Parts & Accessories” section, or search for your model to see everything that fits your machine. We ship across the United States and Canada.

Servicing the WDP30 Pump

Using the WDP30 Diaphragm Pump

With a rock channel and the ability to handle solids up to 2.4 inches in diameter, Honda’s WDP30 is built to handle the roughest pumping jobs. Here’s how you can keep your diaphragm pump performing at its best.

Maintenance Schedule

Before each use: Check the oil level and air filter on the engine. Inspect the hoses and strainer for signs of damage.
After each use: Flush the pump chamber.
First month or 20 hours of use: Change the oil and grease the pump connecting rod bearing.
Every 3 months or 50 hours: Clean the air filter and sediment cup. Grease the pump connecting rod bearing and check the gearbox oil.
Every 6 months or 100 hours: Check the spark plug and (if equipped) the spark arrester.
Every year or 300 hours: Replace the air filter and spark plug. Change the gearbox oil. Inspect the pump diaphragm and clappet valve.
Every two years: Inspect the fuel line.

Honda also recommends bringing the pump in for service every year or 300 hours to clean the fuel system and check both valve clearance and idle speed.

Spark Plug

Replace the plug if the electrodes are worn down or the insulator is cracked. The electrode gap should be between 0.028 and 0.031 inches or 0.07 to 0.08 mm.

Gearbox Oil

To check the oil, the pump needs to be cold and sitting on a level surface. Remove the connecting rod cover, which is held on by a pair of bolts and washers. Remove the dipstick/filler cap, wipe it clean, and screw it back into the gearbox. Remove it again to check the level.

Here’s how to change the oil:

1. Run the engine for 10 minutes to warm up the oil. This helps it drain faster.
2. With the engine off, remove the two bolts and washers from the connecting rod cover. Remove the cover.
3. Oil will damage the diaphragm, so have a pan ready to catch the oil before it flows down the side of the pump. Remove the oil filler cap from the top of the gearbox followed by the drain bolt and washer from the base of the box.
4. Once the gearbox is empty, reinstall the drain bolt and washer.
5. Add SAE 80W90 GL5 gear oil until the dipstick reads full. It holds about 0.8 quarts.
6. Reinstall the washer, cap, and connecting rod cover.

Flushing the Pump Chamber

1. Disconnect the inlet and outlet hoses.
2. Roll the right wheel of the pump onto a block so that the suction side of the pump is pointed up.
3. Put the end of a garden hose inside the pump inlet and turn on the water. The water can be shut off and the hose removed once the discharge from the pump outlet is clear.
4. Lift the suction side of the pump up to allow any remaining water to pour out of the pump outlet.

Accessing the Clappet Valves

These valves create one-way flow through the pump during operation. Damage can result in leaks that reduce pump performance.

1. Disconnect the spark plug, turn off the fuel valve and flush the pump chamber.
2. Remove the nuts and washers from the intake and discharge ports.
3. Remove both ports. As you do this, note the valve position. These are directional and will need to be 4. reinstalled on the same side and in the same orientation.
5. Inspect the clappet valves. If they’re worn or damaged, replace them. If the case sealing surface is damaged, a wear plate can be installed.
6. Place the clappet valves on the studs. The valve’s flat side should face the pump housing on the discharge side and the port on the intake side.
7. Reinstall the ports and apply a medium-strength thread locker. Torque the nuts to 20 ft-lbs.

Sediment Cup

This cup collects dirt in the fuel before it reaches the engine.

1. Turn the fuel valve to “Off.”
2. Unscrew the sediment cup, located under the fuel valve. Make sure the O-ring is still inside the base of the carburetor and is in good condition.
3. Empty the cup and clean it with a non-flammable solvent.
4. Reinstall the sediment cup.

Spark Arrester

A spark arrester isn’t included from the factory, but it can be fitted to any WDP30 pump to meet local fire safety requirements.

1. Unbolt the muffler from the engine.
2. Remove the screws holding the protector onto the muffler. Lift the protector off of the muffler.
3. Remove the screw holding the spark arrester inside the tailpipe.
4. Clean off carbon deposits with a wire brush. If the arrester is cracked, replace it.
5. Reassemble in reverse order.

Keep Your Pump Running with Quality OEM Parts

Hondalawnparts.com is an authorized Honda Power Equipment dealer, so we’re able to ship factory parts and accessories to your door whether you live in the U.S. or Canada. Check out our pump accessory page, or use our search engine to find parts for your specific model revision.

Caring for Your Generator’s Battery

EB2800iElectric start is one of the best features you can have on a generator, letting you turn a key whenever you need power. However, that starter won’t work if you aren’t keeping up with the maintenance on your generator’s battery. Here’s what you need to know about keeping your generator ready to start the next time you have a power outage, go on camping trip or work in a remote area.

Does My Generator Have a Battery?

The battery is only used to power the generator’s electric starter and has no connection to the unit’s AC power generation system. If your model doesn’t have an electric starter, it doesn’t have a battery.

These current models have electric start, and thus have a battery:
EU3000iS
EM4000S
EB5000
EM5000S
EB6500
EM6500S
EU7000i
EB10000

Honda doesn’t list battery maintenance as part of the regular maintenance schedule, but it’s a good idea to clean the connections at least every 6 months or 100 hours of use. Honda also recommends recharging the battery monthly if the generator isn’t in frequent service.

Battery Handling Safety

Battery components contain lead. Always wash your hands after handling the battery or terminals.

If you spill this acid onto yourself, contact medical personnel immediately and do the following to limit the damage the acid can do to your body:

Eye contact — Flush the eye with water from a cup or container for 15 minutes. Do not use water under pressure, including water directly from a faucet, as this can cause eye damage.

Skin contact — Remove any clothing that came in contact with the acid. Flush the affected area with large quantities of water.

Swallowing — Drink water or milk. Do not induce vomiting.

Accessing the Battery

Current EM series generators store the battery behind a cover directly below the outlets, while earlier open frame generators place the battery behind a metal grid next to the engine. To access the battery on EU Series generators, the entire front panel must be removed.

Once you can access the battery, remove the negative battery terminal first, followed by the positive terminal.

Smaller batteries used in enclosed units have a band that can be unclipped to remove the battery. Larger batteries are held on by a set plate. To remove this plate, loosen the flange nuts on the ends of the plate. Pull the plate off of the battery and slide the battery and battery tray out of the generator.

Battery Electrolyte

The electrolyte level needs to stay between the upper and lower marks on the battery cells. If the level dips below the lower mark, the battery can sulfate, losing the ability to store electrical power.

The lower and upper-level marks are marked on the outside of the battery directly below the terminals. If one of the cells is low, carefully pry up the battery cell caps located next to the terminals. Add distilled water to the cell, then reinstall the cap.

If the battery seems to lose electrolyte rapidly, or the battery is weak despite following maintenance guidelines, have your generator inspected by a dealer. It could be an indication of a dying battery or a faulty charging system.

Cleaning

Any corrosion on the battery or terminals should be cleaned off with a brush and a mix of baking soda and water. This basic solution will neutralize the acid that has collected on these components.

Charging

Charge the battery at 10% of its amp hour rating for three to four hours. It’s common for replacement batteries to have different specifications from the ones originally installed in Honda’s generators. When setting the charge rate, go by the Ah rating printed on top of the battery, not the specifications in your owner’s manual.

Keep Your Generator Running with Genuine Honda Parts

We can’t ship batteries, but if you need anything else for your Honda generator, you can get it from www.hondalawnparts.com. From battery bars to fuses, you can find the right parts for your equipment quickly and easily using our advanced search engine. When you select your model, it will show you factory parts diagrams and descriptions so you can see what you’re ordering and where it fits on your generator. We can ship whatever you need to any address in the USA or Canada.

Generator Safety

Honda generator

A generator makes remote work easier, gives you more options when camping and be a lifesaver when you lose grid power. However, if they aren’t used correctly, they can be dangerous: the CDC estimates around 70 people die each year due to generator misuse. With a little preparation, you can set up your Honda generator to provide the power you need without the risk.

Carbon Monoxide

Dozens of people die each year from carbon monoxide poisoning caused by using a generator.
This odorless gas fills up the spaces on red blood cells that normally carry oxygen, causing asphyxiation. These deaths are caused by using the generator inside or too close to a house. If the engine is inside a garage, the exhaust gases can collect, building up lethal levels of CO.

Why does this happen? Partly it’s because people don’t realize the danger, and partly because they don’t plan ahead to use their generator outdoors. If you’re getting your first generator when you face a major power outage, this probably isn’t going to cross your mind. When you buy a generator, you also need to buy the extension cables needed to get the power where you need it while still keeping the generator in a safe place.

To be safe, the generator should be at least 20 feet away from doors, windows and vents. Plan accordingly, pairing the generator with cords that will carry current into the house where you need it.

Picking the Right Cables

The extension cables you use with your generator should be able to carry the maximum current rated for the outlet, be rated for outdoor use, and the insulator on extension cables should be made out of TPE. Product labeling can be confusing, but you can find the information you need printed on the cable itself. If you see the letters “S,” “E” and either “W” or “W-A,” it meets these requirements. If you see an “O” or “OO,” the cable is also oil resistant, which is good if the cable will be running through a garage.

The wire itself should be thick enough to handle high current loads. Look for “AWG” on the cord followed by a number. This is the wire gauge. A 14 or 12 gauge wire can handle 10-15 amp loads, while 10 gauge can handle loads over 15 amps.

GFCI and Shock Prevention

Most 120-volt duplex outlets on Honda generators come with a Ground Fault Circuit Interrupter (GFCI). This device cuts the circuit if a fault is detected, which can happen if there is a short caused by a failing appliance or a damaged cable. Test the outlet before each use by pushing in the “Test” button. If the reset button pops out, the GFCI is working. Push the reset button to re-enable the outlet. If the red light next to the outlet is blinking, the GFCI has failed and needs to be repaired before the outlet is used.

Protecting the People Restoring Your Power

While you may be safe from electrocution, improper installation can put line workers in danger. If you have your generator wired into your home electrical system, you are legally required to have a professionally-installed transfer switch. This device cuts off the house wiring from the grid, preventing electricity from your generator from reaching outside lines. Without it, a worker could pick up what should be a dead line and be electrocuted.

Fires

Running out of fuel in a mower is a good excuse to take a break, but if you’re using a generator for emergency power, you probably want to keep the engine running. If you have a small spill onto a hot or running engine, the resulting fire could put you in the emergency room. Even enclosed generators can have fires as the result of spilled gas dripping between the maintenance covers or onto the tailpipe.

When it’s time to add more gas, shut off the generator and let the engine cool for 15 minutes. This reduces the chance of starting a fire if fuel drips onto the engine or exhaust.

Move the generator 10 feet away from where you were using it before refilling. Once the tank is full, move it back to where it was. This prevents leftover fumes from igniting when you restart the engine.

Get the Quality Parts and Accessories You Need for Your Generator

Hondalawnparts.com is a certified dealer for Honda Power Equipment and Honda Engines. We carry parts as well as OEM accessories including transfer switches, covers and extension cords. Need help finding the right part? When you select your model and serial number from our search engine, our site will show you factory diagrams and parts listings specific to your generator. We can ship what you need to any address in the United States or Canada.

Setting Up a Honda Submersible Pump

Setting Up a Honda Submersible Pump
A Honda submersible pump is perfect for stationary pumping, powering fountains, clearing ponds and draining basements. However, you can’t just screw on a couple of hoses and put them to use like a standard pump. To put your WS Series to work, you need to get power to the motor, set up a drainage system and make sure you can retrieve it.

Where Can I Use My Pump?

All pumps are rated for continuous use moving water as hot as 104º and can handle brief spikes up to 140ºF. If the pump does start to overheat, a built-in thermal reset will shut off the motor, then restart it once the pump has cooled down.

The WSP50 and WSP100 can handle solids up to two inches in diameter, while Honda’s other pumps are limited to solids up to 3/8 inches in diameter. All pumps can handle muck water. These pumps should not be used to move corrosive or flammable liquids including mine run-off, seawater, and fuel.

The motors used in these pumps are designed for 115 volts, so they’ll work with household current. Power needs to come from a GFCI-protected outlet on a circuit that can supply 15 amps. Most household circuits supply either 15 or 20 amps, so be aware that it can be easy to overload the circuit if you’re running the pump alongside other appliances.

The pump plug should be connected directly to this outlet. Adding an extension cord can increase resistance, shortening the life of the motor. If you’re looking for a pump that can be used far from an outlet, consider getting a WSP53 or WSP73. Both models come with 50-foot power cables.

The operating location needs to meet the ANSE/NEPA 70-1984 standard, which covers ignitable materials. Fuel cans, sawdust, gas heaters and other natural gas appliances should be kept far away from this pump.

Attaching a Rope

You can lift the pump by the handle, but it’s really there to attach a rope so the pump can be lifted out of deep water. Use a strong rope made out of a waterproof material like pure polypropylene or a polyester and propylene blend. Never pull the pump up by the power cord.

Building a Discharge Pipe

The pump needs to be attached to a PVC or ABS pipe that matches the size of the pump outlet. The highest point of the pipe should be at least 15 inches higher than the highest water surface. Outlets on all models use standard pipe threading, so the discharge pipe can be attached using a standard threaded end. A 90-degree elbow can be attached directly to the threaded end when building a pipe for a side discharge pump.

An in-line check valve should be installed in the pipe to prevent backflow. This valve should be 12-18 inches above the pump outlet. The pipe also needs to have a 1/8 inch hole about 5 inches above the outlet to preventing air locking.

Setting Up a Sump Basin

A sump is the lowest point in a structure, whether it’s a boat or a building. A sump basin is a container placed at this point to collect water, which can then be removed by the pump. This basin should be made of concrete, fiberglass or plastic. The diameter of the basin needs to be sized to keep the pump supplied with water to maintain the pumping rate:

Under 24 inches — Up to 35 GPM
30 inches — up to 60 GPM
36 inches — up to 100 GPM
48 inches — up to 150 GPM

If you’re using an existing basin, clean out any debris before fitting your pump.

Setting Up the Float Switch

The distance between the switch and the pump is set by adjusting the clamp that holds the switch cable to the pump. When the switch is level or tilted upward, it will activate the pump. The seals are oil lubricated so they won’t melt if the pump is starved.

If you’re placing your pump in a sump basin, the switch should turn on when the water reaches a height of 13-14 inches. To test this out, pour water into the area around the pump, check that it’s switching on, and repeat. If you’re getting consistent results, the switch is set up correctly.

Missing Something?

Do you need parts for your submersible pump? Hondalawnparts.com specializes in Honda small engine and power equipment including everything from lawnmower engines to these electric pumps. Our site has factory diagrams and descriptions built in so you can be sure you’re ordering exactly what you need. We ship across the USA and Canada.

Using the WT40x Trash Pump

WT40x Trash PumpWhat kind of garbage can you safely move through a trash pump? How do you get the hoses set up to get the highest flow rate? Whether you’re a new owner of Honda’s WT40x trash pump or you’ve used one for years, these tips will help you set it up to work effectively and reliably.

Pre-Use Checks

Before you put your pump to work, there are a few things you should look at to make sure it’s ready to use.

— Look around for puddles from leaking fuel and oil before moving the pump.
— Check the oil level and condition of the air filter.
— Check the tightness of all bolts on the frame, pump, and engine.
— Make sure there’s fresh gas in the fuel tank. The pump should be able to run continuously for around 90 minutes with a full tank of gas.

Connecting the Hoses

Both the suction and discharge ports are designed to work with hoses that are four inches in diameter. The suction hose needs to have a built-in non-collapsible support layer or a braided wire layer to keep it open under negative pressure.

Some hoses have a coupler built into the end, while others need a coupler secured to the hose using a clamp. Use a sealing washer between the suction port and the coupler. This seal should be checked before each use as even a small leak can have a serious impact on performance.

This trash pump can handle solids up to 1 1/6 inch in diameter, but it still needs a strainer secured to the end of the suction hose to prevent larger objects from getting jammed in the impeller. If you need to completely drain a body of water, use a skimmer strainer. Its flat, conical shape keeps the openings submerged for as long as possible to prevent starvation.

Head and Pump Placement

This model has a total head of 82 feet and a maximum suction head of 26 feet. This is the maximum vertical distance that the pump can move water. The suction head is limited by the air pressure pushing down on the water. Expect it to decrease by about one foot for every 500 feet of elevation.

The impeller is better at pushing water than pulling. To get the highest possible pumping rate, try to use the shortest suction head possible, making up the difference with the discharge hose. Friction between the water and the hose also decreases pump performance. Using shorter hoses will help the pump move water faster.

Priming

The pump needs to be primed with water before starting. Remove the cap on the top of the pump housing and pour in four gallons of clean water.

If you skip this step, the pump will overheat, damaging the seals. If you start the engine after forgetting this step, shut it down immediately. Try again once the pump has had some time to cool down.

Starting and Stopping

The choke and fuel valve levers are located directly below the engine’s air cleaner box. Above and to the right of these controls, there’s a third lever that controls the throttle. The engine also has an ignition switch on the starter cover. To start the engine, do the following:

  1. Open the fuel valve.
  2. Set the choke. It can be left open if you’re restarting the engine, but otherwise, it should be pushed closed.
  3. Set the throttle to about 1/3 of the way from the “Slow” position.
  4. Turn on the ignition switch.
  5. Pull the starter grip.

Let the engine warm up, gradually opening the choke. Once the engine runs smoothly with the choke open, you can use the throttle to set the pumping speed. Keep in mind that it can take two or three minutes for water to be pumped from the strainer all the way to the end of the discharge hose.

The pump can be shut off immediately using the ignition switch, but it’s easier on the pump if you first move the throttle to the “Slow” position and wait for the engine to return to idle.

When You Need Parts, Go to Honda Lawn Parts

We may have “lawn” in our name, but we offer parts for everything from Honda’s power equipment and small engine lines. That includes strainers, hoses and replacement parts for the WT40 and the GX390 that powers it. We can ship these parts and accessories to any address in the US. or Canada. To order, visit www.hondalawnparts.com.

Using WB20 and WB30 Water Pumps

WB20 Water Pump Honda

Is your pump not working as fast as you think it should? How long does it take to prime? Are the hoses on right? If you just got a new water pump, using it can be confusing. Here’s what you need to know to get your Honda WB20 or WB30 to perform at its full potential.

Operating at High Altitudes

If you will regularly operate your pump at altitudes above 5,000 feet above sea level, the carburetor needs to be re-jetted to get the air/fuel ratio in line with the available air. Without this modification, the fuel mixture will be too rich, leading to hard starting, poor performance and fouled spark plugs. If an engine with a high altitude kit is run at altitudes below 5,000 feet, the fuel mixture will be too lean, leading to overheating and engine damage. Even with the kit installed, maximum power will go down by about 3.5% for every 1,000 feet above sea level.

Maximum intake head decreases by about a foot every 500 feet above sea level. Above 11,000 feet, the pump will need to be at the same height or slightly lower than the surface of the water being pumped.

Setting Up the Pump

A reinforced hose and strainer should be fitted to the pump’s inlet port, while a standard hose can be used with the pump outlet. Be sure to check the hose clamps for tightness: small air leaks can have a major impact on performance.

The total head for the WB20 is 105 ft, while the larger diameter inlet and outlet of the WB30 limits its total head to 85 ft. Both pumps have a maximum suction head of 25 ft. When setting up your pump, try to get it as close to the level of the water as possible: you’ll get better performance with a shorter suction head than a shorter outlet head.

If you need to run the discharge hose across a roadway, place it so it goes perpendicular to the flow of traffic. Place boards on both sides of the hose to keep vehicles from driving over the hose.

Priming

Remove the cap next to the pump discharge outlet and add clean water until the pump chamber is completely filled. Screw the cap back onto the pump.

If you accidentally started the engine without priming the pump, shut it off immediately. Once the pump has had time to cool down, prime the pump and restart the engine. Running the pump without priming it will cause overheating and seal failure.

Starting the Pump

To start the engine, you’ll need to adjust the choke, fuel valve, throttle, and ignition. The choke lever is located directly below the air cleaner box on the carburetor, and the fuel lever is below that. The throttle is to the right of the air box, and the ignition switch is on the opposite side of the engine below the recoil starter.

To start the engine, the fuel valve and ignition switch need to be on. If the engine is cold, close the choke. Move the throttle out 1/3 of the way from the “Slow” position. The engine should start after one or two pulls of the starter grip.

Operating the Pump

Slowly open the choke as the engine warms up. Once the choke is open and the engine is running smoothly, adjust the throttle to set the pumping speed. It can take a couple of minutes before the pump has moved enough water to have it flowing out of the end of the discharge hose.

Stopping the Engine

Set the throttle to the “Slow” position and wait for the engine to return to idle. Turn the ignition switch off. The engine will shut down. Close the fuel valve. In emergencies, the engine can be shut off immediately using the ignition switch.

Get Everything You Need for Your Pump from One Place

www.hondalawnparts.com is a certified dealer for Honda Power Equipment and Honda Engines, so we’re able to supply you with everything you need for your pump. That includes the hoses and strainers you need to move water as well as seals, spark plugs and other components to keep the pump and engine working. Browse our selection of pump accessories or use our search engine to find parts for your specific model. We ship across the U.S. and Canada.
Using WT20 and WT30 Trash Pumps

Using WT20 and WT30 Trash Pumps

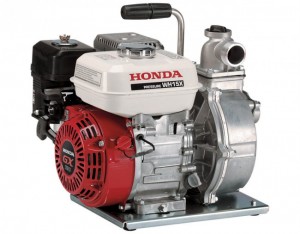
Honda’s WT20 and WT30 pumps make it easy to move dirty water, but improper use can lead to poor performance and even damage to the pump. Here’s what you need to know to set up and use your pump so you can get the most from it.

Placing the Pump

Always keep the pump at least three feet away from buildings and awnings to prevent fires from engine heat and buildup of deadly carbon monoxide from the exhaust.

The WT20 has a maximum total head of 85 feet, while the WT30 can lift water up to 82 feet. Both have a maximum suction head of 26 feet. The pump will work faster with a shorter head. When making a choice between suction and outlet head, go for a shorter suction head. This will decrease power demands on the pump, increasing the pumping rate.

Before Use

Check the pump for signs of gas and oil leaks, and make sure the bolts on the pump are tight.

Clean off any dirt around the starter and muffler.

Inspect the hoses for cuts and other damage. Make sure the sealing washer that goes in the suction hose connector is good condition and that both connectors are secure. Check the strainer at the end of the suction hose, clearing it of debris and checking the connection.

Check the oil level, air filter, and fuel tank. Oil Alert will turn the engine off automatically if the oil level is too low, but checking ahead of time will keep you from having unexpected shutdowns.

Attaching the Suction Hose

The parts attaching the suction hose to the pump inlet should be installed in this order: sealing washer, hose coupler, hose clamp ring, suction hose and hose clamp. These pumps can handle solids up to 13/16 inch in diameter: anything larger can damage the impeller and housing. To keep this from happening, the suction hose should always be used with a strainer.

The parts that connect the discharge hose should be installed in this order: hose connector, discharge hose, and hose clamp.

Priming the Pump

Remove the filler cap on the top of the pump chamber and fill the chamber with clean water. Screw the cap back onto to the pump chamber.

If you started the engine without priming the pump, stop the engine immediately. Let the pump cool completely before priming the chamber and restarting the engine. If the pump is used when dry, the resulting heat can destroy the pump seals.

Starting the Engine

The controls for the engine are located directly below the air cleaner box.

– Move the fuel valve lever to “On.”
– If the engine is cold, move the choke lever to “Closed.” If the engine is warm, leave the choke open.
– Move the throttle lever about 1/3 of the way from the “Slow” position.
– Turn the ignition switch to “On.”
– Pull the starter grip. The engine should fire up after the first or second pull.

If the choke is closed, open it gradually as the engine warms up.

Setting Pump Speed

Once the engine is warm and it’s running with the choke open, move the throttle to the “Fast” position. The pump will pull water through the hoses. After water comes out of the outlet hose, the throttle can be set to get the desired pumping speed.

Stopping the Engine

The pump can be stopped immediately by turning the ignition switch off. Unless you have an emergency, it’s better to move the throttle lever to “Slow” and let the engine reach idle speed before turning the ignition switch. Once the engine is off, move the fuel valve lever to the “Off” position.

After Use

Remove the case drain plug and cover drain plugs from the base of the pump case. Once water stops dripping out of these openings, remove the filler cap on the top of the pump case and pour in some clean water. This will flush out any dirt or debris left inside the pump. After this water has drained out, the drain plugs and filler cap can be screwed back into the pump.

The Parts You Need for Your Honda Pump are Just a Few Clicks Away

Hondalawnparts.com carries replacement parts and accessories for all Honda power equipment. Our pump accessory section has the hoses, clamps, and seals you need to use your pump, and our parts section has everything you need to maintain your equipment. Not sure what part to order? Select your model and serial number, and our site can show you parts using factory descriptions and exploded parts diagrams. We ship across the United States and Canada.

Help Your Lawn Survive the Summer

Help Your Lawn Survive the Summer

Summer is a trying time for lawns with excessive heat, long dry spells, sudden storms and weeds. These tips will help you fight back against these threats so you can keep your grass looking green all season long.

Is Your Grass Dead or Dormant?

If conditions become too difficult for grass to grow, it can go into dormancy. In this state, the blades will turn brown. It may look dead, but the root system remains active. Most grass varieties can stay dormant for 4-6 weeks.

The best thing you can do for dormant grass is leave it alone. Don’t try to water the lawn to bring it back and don’t mow it. Let it recover in the fall. Once some green returns to the grass, you can resume watering and mowing.

High traffic areas will see more fatigue, going into hibernation before the rest of the lawn. Don’t be surprised if you see brown areas where people frequently walk. Adding some stepping stones in these areas can help keep people off of the grass.

Watering

Large quantities of water in short bursts helps support deep root growth, making the grass more drought resistant. Ideally, the grass should be watered between 5-9 am. to give time to absorb water and let the turf dry out. Watering overnight can leave moisture on the blades, opening the turf to fungal infections.

Use a rain gauge or a straight-sided can to measure water dropped on the ground by rain and sprinklers to prevent over-watering. If you’ve installed new sprinklers, you can measure their output by putting two or three rain gauges nearby when they’re active.

Mowing

If the layer of thatch is more than a quarter inch thick, roots will grow into it instead of burrowing into the soil. Thatch thickness can be kept down by making use of your mower’s mulching abilities. Honda’s MicroCut blades can mulch grass even when it’s wet, creating a layer of easily digested plant material. In turn, this helps the microorganisms in your lawn take care of the harder material that makes up the thatch layer.

Dull blades will tear the tips of the grass, making it more prone to infection. The blade edges should be straight and have the sharpness of a butter knife. If you see jagged edges on the tips of mowed grass, the blade is too dull.

Taller grass acts as shade and helps grow deeper roots. When summer temperatures are at their peak, warm-season grasses should be kept at a height of 2-3 inches, while cool-season grasses can be allowed to grow up to 4 inches.

Fertilizing

Stop fertilizing a month before your area sees peak summer temperatures. Lawn chemicals can burn the existing grass, and it can spur extra growth that won’t be ready to withstand the heat. If you have a serious problem that can only be helped with fertilizer, go for an organic mix. It will release slower than chemical-based fertilizers, making it less likely to burn the grass.

Weeds, Insects, and Mold

With the right mowing and watering techniques, new grass growth should push out most weeds. If you do have weed problems, keep in mind that post-emergent herbicides usually need to be applied at temperatures below 85ºF. Grubs will start hatching mid-summer. If they become a problem, grub control can be applied immediately.

Ideally, fungus should be treated before summer is in full swing. If it shows up later in the season, treatment will require treatments every two to three weeks to keep it at bay. Proper watering techniques should avoid most mold, but there’s not much you can do if you have repeated nighttime rainfall.

Keep Your Mower Running

Hondalawnparts.com is a certified dealer for Honda Power Equipment and Honda Engines. That means when you order from us, you’ll always get a quality OEM replacement. Finding the right part is easy: just select your model and serial number in the search engine and it will show you factory parts diagrams and descriptions. We ship across the U.S. and Canada.