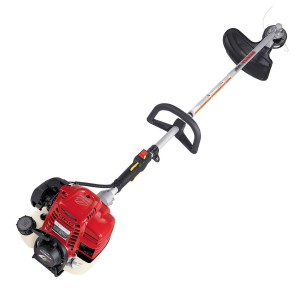
Tips for Tilling

Tips for Tilling Honda Tiller

Breaking ground is the first step to building a garden, whether you’re planting vegetables or decorative plants. These tips will help you get the most out of your Honda tiller and your new planting project this season.

When to Till

You may want to break ground as soon as possible to start planting, but there are a few conditions that should be met to get the most out of tilling:

The ground should be at least moderately dry. Wet, muddy ground will compact from the weight of the tiller, making it hard for roots to penetrate. Pick up a handful of soil and squeeze: if the soil falls apart, it’s dry enough. If it forms a ball, it’s too wet.

The ground should be warm. The soil temperature should be at least 60 degrees F (15 degrees C.) If you don’t have a thermometer, push your hand into the soil. If you can keep it there for a full minute, the soil is warm enough.

Wind should be at a minimum so that the newly broken soil won’t blow away.

It needs to be late in the evening. While tilling can kill off existing weeds, dormant plants can start growing once they’re exposed to sunlight. Tilling just before the sun goes down will keep these weeds from getting the sun they need to restart growth.

Applying Fertilizer and Nutrients

If you’re going to use fertilizer, till the soil to break it up, then till again once the fertilizer has been spread to help mix it in.

Adding nutrients to correct soil deficiencies can adversely affect new roots. Ideally, these additives should be applied in the fall after harvest season, tilling the soil to integrate them.

Setting the Depth Bar

The bar holds the tiller back, helping it dig into the soil instead of just rolling over the surface. Setting the bar lower will help the tiller go deeper and reduces ground speed, helping the tines go through hard soil. Ideally, the tiller should be tilted slightly rearward while in operation. The bar should be adjusted so that the blades consistently reach a depth of 5 inches for leafy vegetables and flowers, and around 8 inches for root vegetables.

Setting the Throttle

In most cases, you’ll want to use your tiller at full throttle. However, this can be a bit much when going through soft soil, causing the tines to throw out chunks of unbroken soil instead of chopping it up. Lower the throttle accordingly until you get the right soil consistency.

Using the Handlebars to Control Depth and Speed

While it may seem like a good idea to go over ground that wasn’t correctly tilled, cutting through the soil a second time can actually compact it, making it harder for plants to grow. Getting a good cut through the soil the first time is critical.

If the tiller is moving too fast, push down on the handlebars. The depth bar will dig into the soil and help keep the tiller in place so the tines can dig deeper. Once the tiller is cutting at the desired depth, let up on the handlebars to start moving forward again.

If the tiller stops moving forward, lessen the pressure on the handlebars and move them side to side until the tines get traction again. If the tiller still doesn’t want to move, raise the depth bar.

Keeping Your Tiller in Top Condition

When you need parts for your Honda tiller, visit www.hondalawnparts.com. We’re a certified Honda Small Engine Equipment dealer, which means we can provide you with everything you need for maintenance and repairs. Finding parts is easy thanks to our advanced search engine that has built-in factory diagrams and descriptions. We can ship your order to any address in the U.S. and Canada.

Honda GS Engine Overview

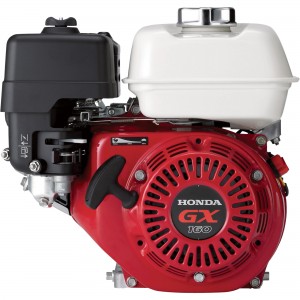
honda gs engineThe horizontal shaft Honda GS can be found in a wide range of residential lawn and garden equipment as well as commercial equipment that puts a premium on low weight. No matter what your GS engine is powering, there are a few things you should know about it to get the most out of your motor.

Controls

Honda makes three versions of these engines, each with their own unique control setup. The controls can be found just to the right of the fuel tank, although some equipment may use remote levers for these functions. All model have a metal loop handle to control the choke: pulling it out closes the choke. Next to the choke, you’ll see one of three controls:

A gray manual throttle lever – Moving the lever up opens the throttle, increasing engine speed.
A red ignition switch lever – Moving the lever up will enable the ignition. Pushing it down will stop the engine.
An engine stop switch – Turning it to the right enables the ignition. Turning it to the left will stop the engine.

Engine Oil

Some versions of the GS come with Honda’s Oil Alert system. It uses a float inside the crankcase to detect low oil levels. If the level is too low, it will shut off the engine to prevent damage. If the engine stops suddenly without any clear external cause, check to make sure the oil level is correct.

The oil drain bolt is located on the bottom edge of the engine, directly below the muffler. The dipstick is part of the cap on the filler neck, located to the right of the drain plug. To check the oil level, the dipstick must be inserted into the filler neck without screwing it down. Honda recommends using 5W30 or 10W30 oil for most operating temperatures, or SAE 30 for temperatures above 50 degrees F (10 degrees C.) When changing the oil, the fresh oil should come up to the top of the filler neck. It should take about 20 ounces (0.58 liters) of oil to fill the crankcase.

Engine oil should be changed after the first month or 5 hours of use, then every 6 months or 50 hours thereafter. If the engine is used under heavy load or high temperatures, change the oil every 25 hours.

Air Cleaner

The air cleaner box, located above the fuel tank, can be opened by pressing in two tabs on the side of the cover. Below this, there’s a foam filter, a plastic grid, and a paper filter. Wash the foam element in a mild detergent or clean it with a nonflammable solvent, then soak it in clean motor oil once it has dried. Squeeze out any excess oil before installing. Remove dirt from the paper element by tapping it against a hard surface. The air filter should be replaced every two years or 200 hours of operation.

Spark Plug

The spark plug should be gapped between 0.028-0.030 inches (0.70-0.80 mm.) It should be checked every 6 months or 50 hours of operation and replaced every two years or 200 hours of operation.

Spark Arrester

The arrester is a metal sleeve that fits inside the exit of the muffler and can be added to any GS series motor to meet local safety requirements. To access it for cleaning, take off the muffler protector by removing three bolts around the outside edges. The arrester itself can be removed by removing a single screw. Use a wire brush to remove any deposits, and replace the arrester if it shows signs of damage.

Fuel

The fuel tank is designed to hold fuel up to the bottom of the filler neck. This engine is designed to run on gasoline with no more than 10% ethanol (E10.) A stabilizer should be used if the fuel will be stored more than 30 days, and even stabilized fuel should be replaced after 90 days.

If you need to drain the fuel system for storage or to remove stale fuel, use the drain on the carburetor, located directly below the air filter. It has a place to attach a hose which can be inserted into a fuel tank to capture the exiting fuel. Use a flathead screwdriver to open the valve directly above the drain to let the fuel flow out. If you’re storing the engine, start the motor and let it run until it dies to ensure the fuel system is completely empty.

High Altitude Use

Honda recommends having the carburetor jets changed if you use your GS motor at altitudes above 5,000 feet (1,500 meters) to better match fuel delivery with the available air. If you have an engine with an automatic throttle, the throttle mechanism may need to be adjusted if the motor doesn’t want to slow down once the load has been removed, or it takes a while to return to speed once the load has been reapplied.

Getting Parts for Your Honda GS Engine

www.hondalawnparts.com is a certified Honda Engines dealer offering everything you need to maintain and repair your GS Series motor. Our site has factory exploded parts diagrams built in to help you find the parts you want to order, and we can ship those parts across the U.S. and Canada.

Honda GX Engine

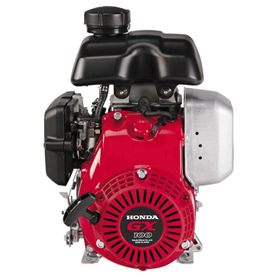
GX100_imgmedChances are if you own any commercial-grade small engine equipment, you have at least one Honda GX Series engine. Available in horizontal and vertical shaft versions and displacements ranging from 98 to 389 cc, this series of motors can be found in just about any type of small engine equipment you can think of. Here’s what you need to know about this motor’s quirks, from starting to troubleshooting.

Controls

There are many variations on these models and individual pieces of equipment may leave controls on the engine or move them to a remote control center, typically on the device’s handle.

The main controls are located on the carburetor, which will be directly below the air cleaner housing. Some models will have a throttle lever at the very top, almost against the air cleaner housing. Next, on the carburetor body itself, there will be a choke lever. Below that, some models have a fuel valve.

For starting, the throttle should be set to 1/3 of the way from “Slow.” On models with the lever on the engine, move the lever left to open the throttle. The choke should be closed unless the engine is already warm, and the fuel valve should be open.

On electric start models, the engine is started by turning the key or switch to “Start.” After 5 seconds, if the engine hasn’t started, release the switch and wait 10 seconds to let the starter motor cool before trying again. If the engine won’t start, set the switch to “On” and use the recoil starter.

Checking the Oil and the Oil Alert System

The dipstick is built into the oil filler cap. To check the oil level correctly, the dipstick needs to be wiped off and then inserted into the engine without threading it back into the filler neck. When adding oil, the oil level should come to the edge of the filler neck.

Some models are equipped with Honda’s Oil Alert system. This will automatically shut off the engine if the oil level gets too low. If your motor stops abruptly, check the oil level to make sure this wasn’t the cause. On electric start models, there should be a light on the starter panel indicating the oil alert system has been triggered.

On motors with a reduction gear, the gear is in a separate case with its own oil supply. It has its own filler cap/dipstick and uses the same oil as the engine. The case should only be about half full of oil, which will be well below the top of the filler neck.

Spark Arrester

No matter the model, the muffler on your engine is designed to be used with a spark arrester where required by law. The arrester can be accessed by removing the muffler shield. The arrester itself will be held in the muffler by one screw. To clean the arrester, scrub off any deposits with a wire brush. If it has any splits or holes, it should be replaced.

Air Cleaner

There can be up to three types of air filters inside the air cleaner that need occasional cleaning:

Paper elements can be cleaned by knocking them against a hard surface to loosen dirt.
Foam elements should be washed with a mild detergent or non-flammable solvent. Once dry, dip the filter in clean motor oil and squeeze out any excess liquid.
Cyclones should be disassembled and wiped clean. Any dust inside the cleaner housing should also be wiped out before reassembly.

Propane (LPG) Powered Engines

If you have an LPG-powered version of the GX270 or GX390, there are a couple differences in operation.

Since LPG is a gas, there won’t be any visual signs of leaks. Instead, smell the area around the engine. If you detect any trace of LPG, have the fuel system repaired before starting the motor.

The choke lever increases vacuum to help pull gas into the combustion chamber. Once the engine is running, the engine will provide the necessary vacuum, and the choke can be opened. There’s no need to wait for the engine to warm up.

Use only SAE 30 weight oil designed for use with LPG engines, or a synthetic 5W-30 oil if using the engine below 32 degrees F (0 degrees C.) A mineral-based multi-weight oil may be fine in other GX motors, but it will damage your LPG model.

Getting Parts for Your GX Series Engineering

No matter what your Honda engine is connected to, you can get parts for it at www.hondalawnparts.com. We’re a certified dealer, covering both small engines and Honda power equipment including generators, water pumps, and mowers. Our advanced search engine can show you factory parts diagrams so you can see exactly what you’re ordering. We ship to both the U.S. and Canada.

Honda HHT Trimmers: A Step by Step Guide to Fuel System Maintenance

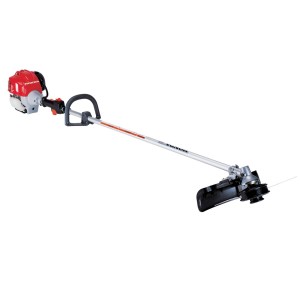
Honda hht trimmerHonda trimmers are designed to go the distance, lasting many years, as long as they’re properly maintained. For the HHT trimmer, fuel system maintenance is a key way to ensure that the equipment is operating efficiently and safely over the long-term. Varying maintenance requirements and routines are needed throughout the year, based on temperature, season, and frequency of use. Here’s what equipment owners need to know to get the job done and keep their trimmer in great shape.
Continue reading

10 Tips for Keeping Your Lawn Well-Watered This Summer

When it comes to watering your lawn, many people are unaware that there are certain techniques and times of day that can help improve your lawn’s uptake of moisture and reduce your water bills. Over watering, under watering and not allowing water to reach the roots of your lawn can all cause more harm than help. Here are ten tips for improving your watering routine this summer:

1. Give It Time – As the weather heats up, many people run outside to get a jump on watering. This actually keeps your lawn from building a strong root network. Instead, wait for the grass to darken and show visible signs of distress before you add water. This forces the roots to grow deeper in the early spring months which makes the lawn more resilient long term.
2. Water Less Frequently – Similar to the reasons above, spacing out your watering days more allows your lawn to make better use of its roots. If you water too close together the ground will begin to get soggy and roots will recede or rot away. Water thoroughly and then give your lawn several days to absorb the water and put it to use before you water again.
3. Water Deeply – Your lawn needs water to reach the roots. If water sits on top of the blades of grass but never gets to the soil your grass will be subject to a number of foliage based diseases. Consider drip irrigation or a soaker hose to put water close to the roots.
4. Water Early – Watering during the middle of the day causes heat to be magnified on your grass from the sun. Watering late at night encourages fungal growth during the cool hours. Instead, water early in the day so that the dew on the blades of grass can evaporate before the sun reaches its peak but the water has time to seep down into the soil.
5. Don’t Over Do It – Overwatering costs a lot of money, but it also causes your soil to erode and increases the risk of diseases. Use a rain gauge to measure how much water is falling on your lawn and cut it off once you have reached 2-3″ of waterfall uniformly across your lawn.
6. Fertilize – Fertilization helps provide adequate nutrients that your native soil may be lacking. Using a spreader from your local landscaping shop you can evenly distribute fertilizer across your lawn. Do not water after you have fertilized as this will wash the nutrients away and into the storm drains.
7. Aerate – Aeration is another key way to improve your watering capabilities. By creating pockets in the soil, water and fertilizer are able to reach roots more directly. A powered aerator can be used on the lawn one to two times each season for best results.
8. Watch the Weather – Pay attention to when rain is expected and don’t water in advance. After the rain comes, wait several days to let your lawn dry out a bit before you resume your watering schedule.
9. Mow Frequently – The goal is to help water reach the roots of your lawn. If you are leaving your lawn to grow longer so that you don’t have to cut it as frequently, you may be preventing water from reaching the roots at all. This will work against you instead of for you.
10. Know Your Grass Type – Not all grass is created equal. Some types of grass need less water than others, and some combinations of grass support one another by taking advantage of changing water conditions. Learn about the grass in your lawn and determine the best watering pattern for you. For more information about keeping your lawn in top shape this summer, visit hondalawnparts.com. They have a full selection of Honda OEM replacement parts and accessories necessary for keeping your equipment running smoothly for a grass lawn.

How to Safely Operate a Honda HHT25S Trimmer

Honda HHT35SThe HHT25S can be fitted with a trimmer head to make quick work of weeds or a blade for cutting down saplings and thick brush. All that power also means this trimmer can cause serious injury from flying debris and blade thrust, but these dangers can be minimized by using this equipment correctly. Continue reading