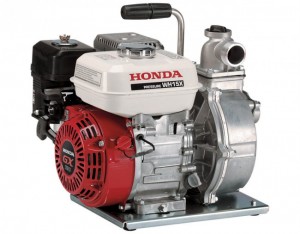
With a rock channel and the ability to handle solids up to 2.4 inches in diameter, Honda’s WDP30 is built to handle the roughest pumping jobs. Here’s how you can keep your diaphragm pump performing at its best.
Maintenance Schedule
Before each use: Check the oil level and air filter on the engine. Inspect the hoses and strainer for signs of damage.
After each use: Flush the pump chamber.
First month or 20 hours of use: Change the oil and grease the pump connecting rod bearing.
Every 3 months or 50 hours: Clean the air filter and sediment cup. Grease the pump connecting rod bearing and check the gearbox oil.
Every 6 months or 100 hours: Check the spark plug and (if equipped) the spark arrester.
Every year or 300 hours: Replace the air filter and spark plug. Change the gearbox oil. Inspect the pump diaphragm and clappet valve.
Every two years: Inspect the fuel line.
Honda also recommends bringing the pump in for service every year or 300 hours to clean the fuel system and check both valve clearance and idle speed.
Spark Plug
Replace the plug if the electrodes are worn down or the insulator is cracked. The electrode gap should be between 0.028 and 0.031 inches or 0.07 to 0.08 mm.
Gearbox Oil
To check the oil, the pump needs to be cold and sitting on a level surface. Remove the connecting rod cover, which is held on by a pair of bolts and washers. Remove the dipstick/filler cap, wipe it clean, and screw it back into the gearbox. Remove it again to check the level.
Here’s how to change the oil:
1. Run the engine for 10 minutes to warm up the oil. This helps it drain faster.
2. With the engine off, remove the two bolts and washers from the connecting rod cover. Remove the cover.
3. Oil will damage the diaphragm, so have a pan ready to catch the oil before it flows down the side of the pump. Remove the oil filler cap from the top of the gearbox followed by the drain bolt and washer from the base of the box.
4. Once the gearbox is empty, reinstall the drain bolt and washer.
5. Add SAE 80W90 GL5 gear oil until the dipstick reads full. It holds about 0.8 quarts.
6. Reinstall the washer, cap, and connecting rod cover.
Flushing the Pump Chamber
1. Disconnect the inlet and outlet hoses.
2. Roll the right wheel of the pump onto a block so that the suction side of the pump is pointed up.
3. Put the end of a garden hose inside the pump inlet and turn on the water. The water can be shut off and the hose removed once the discharge from the pump outlet is clear.
4. Lift the suction side of the pump up to allow any remaining water to pour out of the pump outlet.
Accessing the Clappet Valves
These valves create one-way flow through the pump during operation. Damage can result in leaks that reduce pump performance.
1. Disconnect the spark plug, turn off the fuel valve and flush the pump chamber.
2. Remove the nuts and washers from the intake and discharge ports.
3. Remove both ports. As you do this, note the valve position. These are directional and will need to be 4. reinstalled on the same side and in the same orientation.
5. Inspect the clappet valves. If they’re worn or damaged, replace them. If the case sealing surface is damaged, a wear plate can be installed.
6. Place the clappet valves on the studs. The valve’s flat side should face the pump housing on the discharge side and the port on the intake side.
7. Reinstall the ports and apply a medium-strength thread locker. Torque the nuts to 20 ft-lbs.
Sediment Cup
This cup collects dirt in the fuel before it reaches the engine.
1. Turn the fuel valve to “Off.”
2. Unscrew the sediment cup, located under the fuel valve. Make sure the O-ring is still inside the base of the carburetor and is in good condition.
3. Empty the cup and clean it with a non-flammable solvent.
4. Reinstall the sediment cup.
Spark Arrester
A spark arrester isn’t included from the factory, but it can be fitted to any WDP30 pump to meet local fire safety requirements.
1. Unbolt the muffler from the engine.
2. Remove the screws holding the protector onto the muffler. Lift the protector off of the muffler.
3. Remove the screw holding the spark arrester inside the tailpipe.
4. Clean off carbon deposits with a wire brush. If the arrester is cracked, replace it.
5. Reassemble in reverse order.
Keep Your Pump Running with Quality OEM Parts
Hondalawnparts.com is an authorized Honda Power Equipment dealer, so we’re able to ship factory parts and accessories to your door whether you live in the U.S. or Canada. Check out our pump accessory page, or use our search engine to find parts for your specific model revision.

