Servicing the Carburetor on Your Honda Engine

Honda Servicing the Carburetor on Your Honda Engine

Is your Honda engine not running right? If obvious issues with fuel and spark have been checked, there’s a good chance it’s an issue with the carburetor. This guide will walk you through diagnosing and repairing your carburetor to get your motor working again.

How Carburetors Work

Gas flows in through the fuel line to the float bowl. This bowl has a float connected to a needle valve: once the bowl is full, this float closes the valve, stopping fuel flow.

Gas inside the bowl flows into the pilot jet, which maintains minimum fuel flow, and the main jet, which adds fuel as air flow increases. These are located above the Venturi, a restricted airway that increases air speed through the intake to help mix the fuel with the air.

The throttle valve is just beyond the Venturi, controlling the flow of fuel and air to the engine. The choke valve is before the jet and Venturi, restricting air flow to increase the ratio of fuel to air. This richer mixture makes it easier to run the engine on cold fuel that doesn’t want to atomize.

If everything is working correctly, the float valve keeps just enough fuel inside the bowl to feed the jet, which feeds the right mix of air and fuel into the engine to run efficiently.

Symptoms of Carburetors Problems

Most issues stem from gasoline varnishing and either restricting the jets or keeping the throttle or idle valves from moving. To keep this from happening, always use fresh, stabilized fuel, and drain the fuel tank and carburetor when storing your equipment for the season.

If the engine only wants to run with the choke closed, the main jet is probably clogged. Once the choke opens, the fuel mixture becomes too lean for the engine to run. On some motors, the automatic choke will engage when the engine speed drops, then disengage once the engine speeds up again, causing it to surge when idling.

If the engine doesn’t want to idle regardless of throttle position, the pilot jet is probably clogged.

If the seals break down, they can let air into the engine that hasn’t been mixed with gas, leaning out the mixture. This causes overheating and poor performance.

Rebuilding the Carburetor

Let the engine cool for at least a half hour before attempting this repair. Although the engine may not seem hot, the muffler can stay warm long after the motor has been shut down, making it a possible source of ignition.

1. Drain the fuel the same way you would if you were storing the engine at the end of the season. This may require unscrewing a bolt on the bottom of the carburetor, removing the float bowl, or tipping the motor to pour the fuel out of the tank.

2. Disconnect the cable connected to the throttle and the cable or springs connected to the choke. Unbolt the carburetor and separate it from the engine.

3. Turn the carburetor upside down and remove the large bolt that is now facing up. This will let you lift off the float bowl. It may need a couple of taps to help separate it from the seal.

4. Slide out the pin holding the float to the carburetor. Gently lift up the float: a small bump can dislodge the pilot jet.

5. The main jet can be unscrewed with a small flathead screwdriver. If the jet won’t slide out, try pushing on it from behind with a small Allen key.

6. The jet should be cleaned with a carburetor jet cleaning kit. These thin needles can push out any debris, but care should be taken not to scratch the jet opening, which can increase the jet size, adding too much fuel to the intake. Replacement jets are inexpensive so it may be easier to just put a new one in.

7. Spray the inside and outside of the carburetor with carburetor cleaner, ensuring all holes flow freely and the throttle and choke move without sticking. If the pilot jet is clogged, it can be accessed by removing an adjustment screw on the outside of the carburetor. If there is a small metal tab on the top of this screw, pull up on the head to reveal the true end of the adjuster. Check the service manual for the correct position of the adjustment screw when reinstalling.

Reassemble in reverse order, replacing old parts with new ones and cleaning around the engine to prevent any debris buildup from entering the intake port.

Get the Parts You Need for Your Carburetor

www.hondalawnparts.com is a certified Honda Engines dealer, letting us offer the full line of OEM components, accessories and tools including carburetor jets, seals and rebuild kits. Our site has built-in factory diagrams, making it easy to find the parts you need, and we can ship those parts to any address in the U.S. or Canada.

How to Order Genuine Honda Parts Online

17f3e1b4bf5ce7e2822f36d65bfb8db4xwww.hondalawnparts.com is a certified Honda Small Engine Equipment dealer. That means we carry all the OEM parts you need to maintain Honda equipment including generators, water pumps, and lawn care equipment as well as Honda engines found in a wide range ofthird-partyy equipment. How do you get the right parts for your Honda? Here’s what you need to know from identifying your model to finding compatible parts on our site.

Finding Identifying Information for Your Honda

To get the right part, you first need to know what you’re ordering the part for. Honda sells complete equipment as well as engines found in a wide range of industrial, agricultural, and lawn care equipment. For this reason, parts are divided into equipment and engine categories, even on Honda-built equipment, with model numbers and serial numbers issued for both categories.

On equipment, the model and serial number are usually printed together on a tag. Here’s where you find this information:

  • Generator – On the base of the frame, on the bottom of the case, or near the handle
  • String trimmer – On the shaft, either next to the support handle or on the bottom directly ahead of the engine
  • Walk behind mowers – On the deck behind the engine. Older mowers separate this information into two tags
  • Riding mowers, tractors and tillers – The model number is on the hood or the frame cover next to the seat. The serial number is on the side or rear of the frame
  • Single stage snowblowers – On the rear of the frame or on the top of the housing
  • Two stage snowblowers – The model number is on the side of the auger housing, while the serial number is on the rear of the frame
  • Pumps – On the side of the motor. Some pumps have a second frame or pump tag located on the pump housing
  • Power carriers – On the rear of the frame, just behind the bucket

On engines, the model number is on a large sticker on the engine. Engine model names always start with the letter “G.” The serial number is stamped on the side of the engine. It will always be 5 letters followed by a 7 digit number. String trimmers have this information printed on a small tag on the back of the engine cover.

Still can’t find the serial and model number? Check out our “Honda Parts By Series” page to see photos and diagrams showing where the labels are located.

Finding Parts

Once you know your model and serial number, finding the parts you want is easy. Start by selecting between one of the options on the left side of our homepage: Honda Engine Parts, Honda Parts by Series, or Honda Equip Accessories. If you hover over “Parts by Series” you’ll see a few popular options, but don’t worry if you don’t see your model listed: just click on the link, and you’ll be able to search our entire catalog.

From there, just select your model type, model number, and component category using the drop-down menus. This will bring you to a page with an exploded parts diagram and parts descriptions so you can identify the parts you need and add them to your cart.

If you need a common maintenance item and know the part number, we also have the Honda Popular Parts section to quickly find what you want.

I Can’t Find My Honda’s Information. Now What?

Our site includes factory parts diagrams and lets you browse models based on their equipment category. By narrowing down the possibilities and comparing the diagrams with your equipment, you should be able to figure out what you own and what part you need.

I Don’t See a Listing for My Walk-Behind Mower

For some reason, Honda adds a “K” between the 8th and 9th digits to their model numbers in their parts information. That means if the tag says you have an HR123-567890 model, it will be listed in the catalog as an HR123-567K890.

Ordering Made Easy

Individuals looking for genuine Honda parts just have to type in their info and our site will show all of the relevant parts. From there it’s easy to click each part, view a diagram, and add only what you need to the cart. HondaLawnParts.com is a one-stop shop for anyone who needs quality OEM parts.

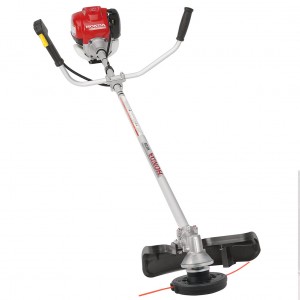
Honda HHT Trimmers – Maintenance Tips to Keep them Running Smoothly

HHT35SUKAT_PE_IMGLG

Now that you have purchased your new Honda HHT Trimmer, there are a few things you should know before you begin to operate the machine. Please note that the trimmer requires special oil and recommended fuel. Read the owner’s manual before you begin operation of your new trimmer. You might also want to follow these maintenance tips to keep your machine running properly each time you use it:

Continue reading

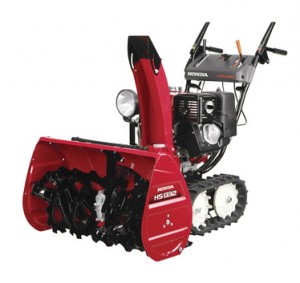
Maintenance Tips for a Honda HS1132 Snowblower

Honda_HS1332_snowblower_left_track_viewWhen it comes to making sure that the Honda HS1132 snowblower can perform powerfully and efficiently for many years to come, nothing is more important than regular maintenance. Whether it’s preventative procedures that keep the engine in top shape, or restorative processes that replace parts and maximize efficiency, maintenance is absolutely the most important aspect of power equipment ownership. Those new to Honda snowblowers or power equipment in general should keep in mind a few basic areas of concern throughout the winter and during off-season storage preparations. Continue reading