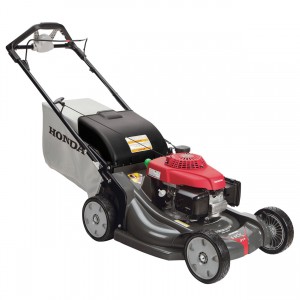
Storing Your Honda Mower

HRR and HRS Mowers: Honda Quality and Innovation for the Home OwnerFall is over, and that means it’s finally time to stop mowing. Before you put your Honda mower into storage, there are a few things you should do to protect your machine and make it easier to put back to work next spring.

Fuel

All gasoline, even if it’s treated with a stabilizer, will turn stale during long-term storage, leading to problems with lacquering and corrosion. Honda recommends draining the fuel system if the mower will be stored for longer than three months.

If your engine has a sediment cup, removing this cup and turning the fuel valve on will let the tank and fuel system drain out. GCV engines don’t have this cup, but the fuel tank can be drained by removing the gas cap and tipping the mower on its side. Collected fuel can be used in your car’s fuel tank.

Once the tank is empty, start the engine and let it run until it stalls. This removes any remaining fuel in the lines and carburetor.

Oil and Lubrication

Even slightly used oil contains acidic compounds left over from combustion that can damage your mower during storage. Changing the oil now will protect your engine. As long as you don’t start the engine when it’s cold, it’s fine to use oil recommended for summer temperatures. For most engines, that’s 10W30 motor oil.

HRC mowers come with sealed cables that don’t require maintenance. Cables on all other models should be covered in a light oil or silicone spray to prevent rust. Water displacers and penetrating oils like WD-40 and Liquid Wrench will eventually drip off of the cables, leaving them unprotected.

Honda recommends lubricating the cylinder with oil. To do this, remove the spark plug, pour one teaspoon of oil through the plug hole, Pull the recoil starter several times: this will spread the oil across the cylinder wall and push out any excess. Reinstall the plug. When you start your mower next year, don’t be surprised if it smokes for a few seconds: that’s just the oil burning off.

Cleaning

Now is a good time to clean the grass bag. Rinse off the fabric with a garden hose to remove trapped dirt and debris. Let the bag drip dry before storage.

Do not use a pressure washer or garden hose to clean the rest of your mower. This can force water into the engine where it can mix with the oil and seep through bearings, damaging components. Use a brush to remove dirt and debris collected around the engine, particularly around the cooling fins. A putty knife can be used to remove grass cakes onto the mowing chamber.

Use touch-up paint to cover up areas where the original paint has chipped off. Exposed metal parts can be protected from rust by applying a light coating of oil.

Battery

Electric start models have a small battery inside the box that houses the start button. This battery should be removed and charged both before and after long-term storage.

An automotive battery charger is too powerful for this battery. Honda makes a low amperage charger specifically for these batteries. The battery can be attached to this charger for up to 24 hours. Charging longer can cause overheating, damaging the battery.

Storing

Your mower should be stored in a clean, dry place. Keep the mower away from sources of ignition, including power tools, heaters and electric motors: even with the tank and carburetor drained, there may be enough fuel residue to release flammable vapors.

Don’t cover the mower with a tarp. This can trap moisture, promoting rust.

The handle can be folded down to save space:
1. Remove the grass bag and frame. These can be stored separately or placed on top of the mower.
2. Loosen the knobs on the handle joints.
3. Tilt the top of the handle forward, making sure that the cables aren’t being kinked.

Get the Quality Parts You Need for Your Honda

Want to get a few things fixed before the next mowing season? Hondalawnparts.com is a certified Honda Power Equipment and Honda Engines dealer, so we carry everything you need for your mower from bags to blades. Finding parts is easy: just select your model and serial number, and our site will show you parts listings and factory information specific to your mower or engine. We can ship your order to any address in the United States or Canada.

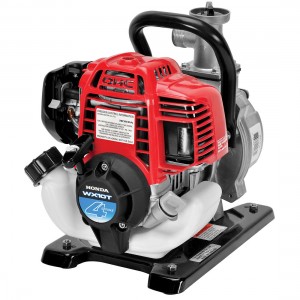
Using the WX10 Water Pump

WX10 water pumpThe WT10’s small size and efficient Mini 4 Stroke engine make it perfect for pumping out sumps, removing puddles and powering fountains and garden-sized irrigation systems. These tips will help you get the most out of this model.

Choosing a Pumping Location

The most important consideration when setting up a water pump is head, the vertical distance between the surface of the water being pumped and the end of the discharge hose. This pump has a capacity of 121 feet of total head and 26 feet of suction. That means the surface of the water can be as much as 26 feet below the pump. However, reducing head, and suction head, in particular, will increase performance. When setting up your pump, try to place it as close as possible to the body water being moved, making up the distance with the outlet hose.

Speaking of hoses, the shorter they are, the less fluid resistance there will be, which increases pumping speed. The suction hose must be reinforced to keep it from collapsing under pressure. While there are several options for outlet hoses, choosing the widest hose available will reduce friction losses.

Connecting the Intake Hose

The order the parts need to go onto the pump intake will depend on whether you have the included standard connection system or you’re using Honda’s separate hose connector.

Standard connector: washer, hose coupler, clamp ring, hose clamp and hose
Separate hose connector: packing without tabs, male coupler, packing with tabs, female coupler, hose

When using the separate hose connector, flip the levers toward the pump intake to clamp the female coupler onto the male coupler.

The hose must always be used with a strainer clamped onto the inlet, and this strainer must be fully submerged during use. A standard strainer is included with the pump, but there are other designs available for pumping from shallow bodies of water.

Connecting the Discharge Hose

Unlike the intake hose, this hose isn’t under pressure, so it only requires a hose connector and hose clamp to attach to the pump outlet.

To use the included garden hose adapter, screw the adapter on just tight enough that it doesn’t leak, then screw in the garden hose. Keep in mind that the reduced diameter of the hose will reduce pumping performance.

Priming

Operating the pump when dry will cause the seals to overheat and fail. If you start the pump without priming it, shut it off immediately and give it a few minutes to cool off.

The filler cap is located to the right of the pump outlet. Remove the cap, pour in water until the chamber is full, and reinstall the cap.

Starting, Running and Shutting Off the Pump

1. Set the choke to “Closed” if the engine is cold, or “Open” if the pump was just running.
2. Set the throttle mid-way between “Slow” and “Fast.”
3. Press the priming bulb until fuel can be seen inside the fuel return tube next to the bulb.
4. Turn the ignition switch to “On.”
5. Hold the handle on top of the engine with one hand while using the other to pull the starter grip.

Once the engine is running, gradually open the choke as the engine warms up. At this point, the pumping speed can be adjusted by moving the throttle.

Once you’re done pumping, move the throttle to “Slow” and turn the ignition switch off.

Chamber Flushing

After using the pump, let the engine cool down and flush the pump chamber to remove any remaining water or debris. The pump drain plug is located on the bottom front of the pump housing. Once the water has drained out, pour water through the pump chamber the same way you would when priming the pump.

Everything You Need for Your Honda Pump

We may have “lawn” in our name, but www.hondalawnparts.com carries everything you need for your Honda small engine or outdoor equipment including water pumps like the WX10. We have a section on our website dedicated to pump accessories including hoses, seals and strainers, or you can use our search engine to find replacement parts specific to your pump. We ship across the U.S. and Canada.

Servicing the iGX390 Engine

Honda iGX EngineIt may be Honda’s most advanced small engine, but that doesn’t mean the iGX390 is hard to work on. Here what you need to know about maintaining this engine so it continues to deliver top-level performance and reliability no matter what it may be powering.

Maintenance Schedule

Oil: Check before each use. Change after the first month or 20 hours of operation, then every 6 months or 100 hours.
Air filter: Check before each use, clean every three months or 50 hours, and replace the paper filter element every year or 300 hours.
Spark plug: Check every 6 months or 100 hours, and replace every year or 300 hours.
Spark arrester: If equipped, clean every 6 months or 100 hours.
Sediment cup: Clean every 6 months or 100 hours.
Fuel tube: Check every two years and replace as needed.

Honda also recommends taking this engine into a dealer once each year to take care of more difficult tasks like checking valve clearance and cleaning the fuel system.

Which Engine Do I Have?

The location of some components is different between standard and low profile designs. Standard iGX390s have a fuel tank on top of the engine, while low profile engines use a side-mounted or remote fuel tank.

Oil

Oil Alert will shut down the engine if the oil level gets too low. If your engine has an hour meter, an indicator light on the controls will turn on when the system is triggered and the ignition is in the “ON” position. If your engine doesn’t have an hour meter, the indicator light will blink when the engine stops or you try to start it.

The dipstick is built into the oil filler cap, while the drain plug is below and to the left of this cap. When checking the oil level, do not screw the cap into the filler neck. Always use a new washer with the drain plug when changing the oil. Both versions of this engine hold 1.2 quarts of oil. 10W30 motor oil is recommended for all temperatures.

Air Filter

Standard engines have an airbox located next to the muffler. To access the air filter, remove the nut on top of the air box, followed by the box itself. Remove a second wing nut and slide off the foam and paper filter elements.

On low profile engines, the airbox is next to the recoil starter. To access the foam filter element, squeeze on the tabs on the cover and swing it to the left.

To clean a paper filter, knock it against a hard surface or use compressed air under 30 psi to push away surface dirt.

To clean a foam filter, wash it in warm, soapy water or a nonflammable solvent. Once dry, soak the filter in clean engine oil and squeeze out any excess.

Sediment Cup

This cup uses gravity to collect dirt in the fuel before it can reach the carburetor jets.

1. Turn the fuel valve to “OFF.”
2. Unscrew the sediment cup from the bottom of the carburetor. It should come off with an o-ring and a filter. If you have a low profile engine, you’ll need to take off some parts to access the cup: Remove the air filter cover and foam filter element, then unscrew the 5 bolts and 6 nuts holding the airbox to the carburetor.
4. Wash the cup with non-flammable solvent and allow it to dry.
5. Reinstall the cup in reverse order, using a new O-ring and lining up the tab on the filter with the tab on the cup.

Spark Plug

The plug is located between the muffler and the fuel tank. Disconnect the spark plug cap, then use a 13/16 inch plug wrench to remove the plug. The plug gap should be between 0.7-0.8 mm.

Spark Arrester

The arrester is optional and can be fitted to any iGX390. If you have a standard engine, you’ll need to remove the air box to get access to all of the muffler protector screws.

1. Remove the screws from the muffler protector. There are two 5 mm screws on the right side, two 5 mm screws on the top, and one 6 mm screw on the left side.
2. Remove the two 5 mm screws holding the spark arrester inside the muffler opening.
3. Clean the arrester with a wire brush.
4. Reassemble in reverse order.

Need Something for Your Honda Engine?

From drain plug washers to major components, if it’s for a Honda, you can get it from www.hondalawnparts.com. As an authorized Honda Engines dealer, we’re able to offer a wide selection of OEM parts, and we can ship those parts to any address in the U.S. or Canada. Not sure what you’re looking for? Our site can filter results by your model and serial number, and it has built-in parts diagrams and factory descriptions so you can find what you need quickly and easily.

Servicing GC Series Engines

Honda GCThey may not be commercial engines, but Honda’s GC engines have proven to deliver reliable, efficient power in a wide range of mowers and home power equipment. Here’s everything you need to know to keep the horizontal shaft GC and vertical shaft GCV running reliably.

Maintenance Schedule

First 30 days or 5 hours of operation: Change the oil.
Every 90 days or 25 hours: Clean the engine air filter
Every 120 days or 50 hours: Change the oil. Check the flywheel brake (if equipped.)
Yearly or every 100 hours: Check the spark plug and spark arrester (if equipped.)
Every two years or 200 hours: Replace the spark plug and air filter element.

Oil

These engines are designed to use oil that meets SAE classification SJ or later. 5W30 and 10W30 are recommended. SAE 30 can be used at temperatures above 50ºF.

To check the oil, remove the dipstick from the filler neck. Wipe off any oil, then reinsert the dipstick without screwing it back into the engine.

To drain the oil on a GC engine, remove the dipstick followed by the drain bolt and washer on the base of the engine. Once the oil has drained, screw the drain bolt back in, using a new washer to get a tight seal.

To drain the oil on a GCV engine, remove the dipstick and tilt the engine, letting the old oil flow pour out of the oil filler neck.

Add oil via the filler neck. GC engines hold about 20 ounces of oil, while GCV engines hold about 12 ounces of oil. The oil level should come to the top mark on the dipstick.

Air Filter

To access the filter, push in the two tabs on the airbox cover and swing it out of the way. When reinstalling, the paper fins on the filter element should face out toward the cover.

To clean the filter, tap it against a hard surface or use compressed air to blow out any dirt between the pleats. Limit air pressure to 30 psi; higher pressures can force dirt into the filter medium.

Spark Plug

To remove the spark plug, disconnect the spark plug cap and clean out any surrounding dirt to keep it from getting into the engine. Use a spark plug wrench or socket to remove the plug from the cylinder head.

The spark plug gap should be 0.028-0.030 in. Replace the plug if it has signs of damage to the electrode or insulator.

When reinstalling the plug, tighten it by hand, then turn another 1/8-1/4 turn. If you’re putting in a new plug, turn the plug ½ of a turn to crush the washer and get a tight seal around the combustion chamber.

Flywheel Brake

This brake is included in some versions of the GCV. To check the brake, start the engine, set the throttle lever to “Fast” and release the brake lever. The engine should stop quickly. If it doesn’t, check the brake for wear:

1. Remove the three flange nuts from the top of the recoil starter. Remove the starter from the engine.
2. Remove the fuel tank and set aside. The fuel line does not need to be disconnected.
3. Check the thickness of the brake shoe, located next to the flywheel. If it’s under 3 mm, have the brake replaced by a service technician.
4. Reassemble the engine in reverse order.

Spark Arrester

This metal screen can be added to the exhaust pipe of any GC or GCV to comply with local fire codes.

To clean the arrester, wait at least 30 minutes after the engine has been on to ensure the exhaust is completely cool. Remove the three bolts holding the protector onto the muffler, then remove the bolt or screw holding the arrester inside the tailpipe.

To clean the arrester, scrub off any carbon with a wire brush. Replace the arrester if it is damaged or splitting. Reassemble the arrester and muffler in reverse order.

Storage

Wait until the engine has been off for at least half an hour to ensure it’s completely cool. Clean off any dirt using a moist rag. Do not use a pressure washer or garden hose: this can force water inside the engine.

Once clean, fix paint chips by adding a layer of touch-up paint and coat unpainted metal with a light oil. Remove the spark plug and pour one to two teaspoons of clean engine oil into the cylinder. Pull the starter several times to distribute the oil around the cylinder and piston, then reinstall the plug. It’s normal to have a smoky exhaust when the engine is first started. This is just the oil burning off.

Need Something for Your Honda Engine?

Hondalawnparts.com is more than an online retailer: we’re an authorized Honda Engines dealer, so we’re able to ship OEM parts across the U.S. and Canada. Our search engine can filter results by model and serial number so you’ll only see factory parts listings and diagrams specific to your model.