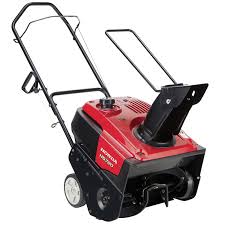
Few things are more important to snow thrower ownership than regular service and preventative maintenance. Luckily, most of these tasks can be performed at home on a regular basis, according to maintenance schedule requirements and careful guidelines for each required service item. The HS720AM series of snow throwers comes with a helpful, included instruction manual that clarifies everything from basic safety precautions to maintenance procedures, the timing of each service interval, and what’s required to keep this powerful and helpful piece of equipment in like-new condition for many years after purchase. A quick review of these guidelines makes it even easier to tackle winter storms with efficiency.
Safety Reminder: Take Precautions to Avoid Serious Injury
Snow throwers are large, powerful pieces of equipment that can cause serious injury if a few key precautions aren’t taken before the engine is turned on. First and foremost, dress appropriately: Recommended attire includes gloves, boots, a heavy jacket, and anything else that will keep the cold out and improve equipment handling. Before getting started, check the clearing area for any debris, including large rocks, that might cause damage to the equipment or lead to injury during operation. Make sure to operate the snow thrower when bystanders and pets have been placed inside or cleared the area, and ensure that proper maintenance is undertaken throughout the winter to avoid equipment damage and associated risks.
Getting Started: The Maintenance Schedule
Every HS720AM series snow thrower comes with a maintenance schedule, located in its instruction manual, that clarifies when to perform certain maintenance tasks. From auger checks to oil changes, the maintenance schedule breaks down required service by the number of hours the equipment has been used.
Key Areas That Will Require Careful Maintenance
With the maintenance schedule reviewed, it’s time to become familiar with the regular maintenance checks, and service intervals, that are required by a few key areas of the equipment. Keeping these guidelines in mind will make maintenance easier, quicker, and safer throughout the winter months.
1. Oil Change
Oil changes are one of the best ways to keep the snow thrower’s engine in excellent condition. Honda recommends that equipment owners change the oil each year after the snow thrower is removed from service and prepared for another season of snowy weather. For new equipment owners, an oil change should be performed after the first 5 hours of equipment use. For others, oil changes need to occur only every 50 hours.
Additionally, oil levels should be checked prior to each use of the snow thrower. For optimal results in cold weather, Honda recommends using a 5W-30 engine oil when adding or changing the oil in this model.
2. Spark Plug
The spark plug should be checked for damage and cleanliness each year before and after storage, as well as after every 100 hours of snow thrower use. A full spark plug change should occur after every 150 hours of snow thrower use. If the spark plug is damaged, it can be replaced before the 150-hour threshold. If cleaning is required, simply clean the equipment with a stiff brush to remove old carbon deposits.
3. Auger
The auger should be checked for clutch lever free play each year after the snow thrower is removed from storage. To check free play, pull the clutch lever until it shows a bit of resistance. Next, measure the distance between the lever and the snow thrower’s handle. Optimally, this distance should be between 7.5 and 8 inches. If it isn’t, follow the adjustment instructions found in this model’s instruction manual.
4. Belt Tension
Belt tension should be checked periodically throughout the winter by removing the spring cover to expose the belt and engaging the auger clutch lever. The length of the exposed clutch should measure between 2.95 and 3.15 inches. If the measurement falls outside this range, an adjustment is required.
5. Auger Paddle and Scraper Blade
The auger paddle and service blade make frequent contact with the snow and the ground, which can wear these parts down and make the snow thrower less effective over time. The auger paddle has a 5/8-inch service limit while the scraper blade has a maximum ground clearance of between 1/16-inch and 1/8-inch. If either measurement falls outside these ranges upon a regular inspection, make the adjustment.
6. Chute Guide Lever Cable
Rarely, adjusting the chute guide lever cable may be necessary to maintain full mobility of the discharge chute. Instructions for how to do this can be found in the HS720AM instruction manual.
Get OEM Honda Snow Thrower Parts from HondaLawnParts.com
Sometimes, Honda snow throwers require new OEM parts instead of a quick check or adjustment. When new parts are the only way to keep the equipment operating at peak efficiency and power, visit HondaLawnParts.com to find a perfect fit for the HS720AM series or any of Honda’s snow thrower models. OEM parts ensure full compatibility and long-term durability, giving snow throwers the power to last through even the toughest winter season.

