
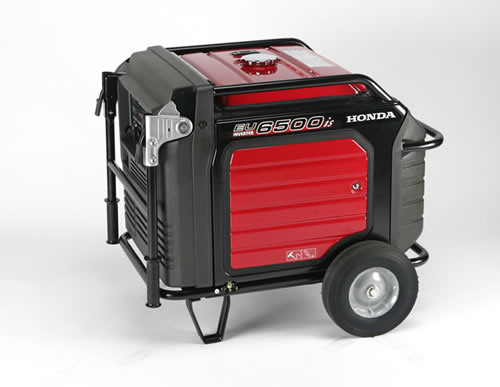
 Generator Honda generators are legendary when it comes to long-term durability and dependability, but they still require careful maintenance in order to run at peak efficiency and to stand the test of time. Those who opt for the company’s powerful EU6500is generator can benefit from following the maintenance schedule and performing a few key tasks before each use and after several months of sustained generator operation.
Safety Comes First for Those Performing Maintenance
Generators are powerful pieces of equipment and, even during maintenance, they can present serious safety risks to those who don’t follow a few basic guidelines. Before performing maintenance, ensure that the equipment’s engine is cooled off and that it stands no chance of accidentally turning on. This means draining fuel and disconnecting the spark plug as a way to ensure added safety. The equipment should not be tipped or tilted in any direction not recommended by the operator manual, and should be worked on only in a well-ventilated environment that offers plenty of room to maneuver. Pets and other bystanders should not be near the generator during maintenance, since this only increases the likelihood of mistakes and serious accidents.
The Maintenance Schedule: An Important Tool for Generator Owners
Maintenance is the best way to keep the Honda EU6500is generator safe from damage and to ensure high levels of efficiency at all times. The best guide to generator maintenance is the included maintenance schedule, which can be found in the operator manual. This schedule shows when and what to check before, during, and after operation, and recommends a series of benchmarks and timelines for common maintenance needs. It’s the easiest way to attend to all of the generator’s needs over its long lifespan. The schedule contains information relating to all of these key maintenance requirements:
– Engine Oil Change
Oil levels should be checked prior to each use, with a full change coming 20 hours after first using a new generator and every 100 hours thereafter. Those who use the generator less than 100 hours should perform an oil change every six months instead. Oil is accessed by removing the maintenance cover and twisting off the oil cap, revealing a dipstick that shows the current level of lubrication. Drain oil while it’s warm, but not hot, into an approved container for eco-friendly disposal. Replace oil with 5W30 during very cold months or 10W30 during most warmer months of the year.
– Air Filter Service
The air filter should be cleaned after 50 hours of use, or every three months. Those who use their generator in a drier and dustier environment will probably want to perform the cleaning procedure even more frequently, however, as dust will clog the air filter more frequently overall. The filter should also be checked before each operation. When cleaning the air filter, simply remove it from its holder and use a combination of dish detergent and warm water to remove excess dirt from the foam. When fully cleaned, replace the air filter and secure the cover appropriately.
– Spark Plug Service
Every 100 hours, or after 6 months of generator use, the spark plug should be checked and adjusted. During this time, it’s important to check the spark plug for any damage or corrosion. The spark plug should also be properly adjusted so that the gap allows for easy engine ignition and efficient operation when generating power. After 300 hours of use, or after each year of ownership, the generator’s spark plug should be fully replaced with an OEM part made by Honda. If damaged, the spark plug should be replaced earlier during a routine inspection to avoid more serious damage to the generator.
– Sediment Cup Cleaning
Honda recommends cleaning the sediment cup after 100 hours of use, or every six months, whichever milestone comes first. The sediment cup and its corresponding O-ring should be washed in a flame resistant solvent until all sediment has been removed and the cup’s surface is free of any lingering residue or debris. The piece should then be reattached as necessary and tightened so that it resumes normal functionality.
– Spark Arrester Service
Spark arresters are a crucial way to boost generator safety, and should be cleaned after 100 hours of generator service. This process involves simply removing the spark plug from the generator and using a brush to shed any carbon deposits or other dirt build-up that might reduce the arrester’s functionality. If the part shows damage during service, replacement should be pursued instead.
– Battery Service
The battery should be removed from the equipment on a monthly basis so that it can be cleaned and fully recharged. It’s important to follow safety instructions in the operator manual during this process, as battery acid could be released when using improper procedures. This could cause serious injury.
– Fuse Replacement
The fuse must be replaced as soon as it blows, since the engine will refuse to start otherwise. Replace the fuse by removing the battery cover, pulling out the fuse holder cover, and removing the fuse. Replace with an OEM Honda fuse for continued good operation.
Get Honda Generator Parts at HondaLawnParts.com
Generator owners looking for OEM Honda parts need look no further than HondaLawnParts.com and its online parts search tool. Whether by model number, engine type, or part number, it’s easy to find perfectly compatible parts from Honda’s own factories that will provide excellent service over the long life of the generator.
