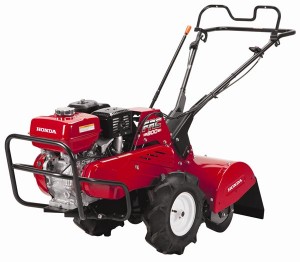
 Those who are new to the Honda rear-tine tiller often have a large number of questions about how best to prepare the equipment for its first outing and then put it to use accordingly. For those who want to make sure that they’ve placed all of the levers and controls in the proper position for a good tilling process, there are a few basic tips and guidelines to follow from start to finish.
Pre-Operation Reminders: Don’t Forget Safety and Maintenance Checks
Tillers are powerful pieces of equipment that require both proper safety precautions and proactive maintenance checks prior to each use. To ensure the safety of all involved, be sure to conduct any maintenance or tilling activities away from bystanders and pets, in an area that has been checked for rocks and other big debris. Fill the equipment’s oil and fuel compartments prior to starting the engine and, if any maintenance must be done, make sure the equipment has had time to cool after recent use. When handling tines or conducting maintenance, wear safety gloves or goggles to protect against serious injury.
Before starting the equipment, a few key things must be checked: Engine oil levels should be verified and optionally topped off. Fuel should be placed into the tiller so that it can operate continuously. The air filter and spark plug should also be checked prior to starting the tiller, since these two things can either make it significantly easier or more difficult to start the engine in the first place.
A Guide to Starting the Engine
Starting a tiller engine is pretty similar to starting a lawn mower or other landscaping equipment, so those homeowners familiar with those procedures will feel right at home. Get started by turning the Honda tiller’s fuel valve to the “on” position and then set the choke to “closed.” Turn the engine switch on, and move the throttle lever about a third of the way toward the “fast” position. Pull the starter grip until the engine turns on, and then move the choke lever back to the “open” position to ensure the tiller keeps running.
Operation: What to Know About Tine Depth, Gear Speed, and More
Using the Honda tiller after the engine turns on means controlling things like tine depth, forward and reverse gear selection, and other controls. Those new to the equipment should keep a few things in mind when deciding how best to control their tiller.
1. Forward Gear Selection
To adjust the forward gear, bring the throttle to the tiller’s slowest position and then let go of the clutch lever. The shift lever can now be placed into the proper gear position. A general guide to the best gear positions is as follows:
– 1, 2, 3 and R: Moving the tiller around the lawn or loading it up for use elsewhere.
– Tine / Wheels Engage 1 and 2: Tilling the earth around the home, with the “1” setting performing that task just a bit slower than the higher-speed “2” setting.
2. Reverse Gear Selection
To place the tiller in reverse, follow the same procedure described above for forward gear selection. After following that procedure, move the shift lever into the “Reverse” position and re-engage the clutch lever so that the engine receives power. Walk backwards with the equipment and, when reverse movement is no longer needed, release the clutch bar and reset the equipment so that it uses one of the many included forward speeds.
3. Tilling Depth
To adjust the tilling depth, operators must change the position of the drag bar. This can be done by loosening the drag bar’s locking bolt and then moving the bar up or down as needed in order to govern the position of the tines. Mid-task adjustment can also be done by pressing down on the handlebars to slightly change the tines’ position, eliminating equipment shakes and stutters as needed.
What to Know When Stopping the Engine
Stopping the engine involves a pretty simple series of steps. Start by releasing the clutch bar, and then adjust the throttle lever so that it is in the slowest position. Turn the engine switch to the “off” position and then make sure the fuel valve has been turned off as well. The equipment is now safe for storage until its services are required in the future.
HondaLawnParts.com Has Everything Tiller Owners Need for Easy Maintenance
Honda’s rear-tine tillers are designed to handle some of the most severe soil types and lawn conditions found in today’s commercial and residential environments, but they may still require maintenance and new parts from time to time. The parts search tool at HondaLawnParts.com allows equipment owners to search for parts based on their tiller’s model number, engine type, or part number required, making it easy to keep up with a variety of common maintenance concerns all season long.
