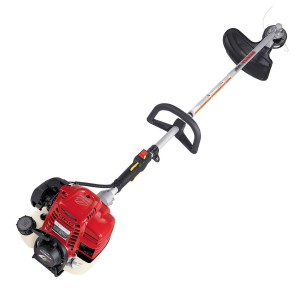
 Just bought a Honda HHT35S? Here’s what you need to know to assembly your new trimmer so that it can be used safely and comfortably.
Important Information for Your Health and the Health of Your Trimmer
Before installing the Kwik-Loader or brush/wood blade components, move the ignition switch to the “STOP” position and disconnect the spark plug.
Always wear gloves when working around the cutting line head and saw blade.
The engine in this trimmer is tested in the factory, then all fluids are drained before being packaged. While there may still be a little oil inside the crankcase, this is not enough to protect the internal components: add the included oil before starting the motor.
Tools for Assembly
The following tools will be needed to assemble your Honda HHT35S:
4 mm hex (Allen) wrench
A torque wrench with a range of at least 0-25 ft-lbs.
8 mm and 17 mm sockets
Parts
Before you start putting your new trimmer together, check the box to make sure nothing is missing. This is what you should find inside:
An instruction manual
A set of ANSI Z87.1 standard safety glasses
Bottle of oil
Shoulder harness – single strap (loop handle models) or full harness (U-shaped handle models)
Debris Shield with built-in line trimming blade
Cover
10 mm lock nut
Two rectangular spacers
Four 5 x 28 mm bolts with washers
One large washer
A pair of round spacers labeled “A” and “B”
10 inch wide 50 tooth saw blade
Blade cover
Kwik Loader head
Collar
Two pieces of 0.095 in. diameter trimmer line
If your model has a U-shaped handle, the trimmer should already have the top of the handlebar holder screwed in loosely with four bolts and washers.
Handlebar Installation
Loop handles are fitted at the factory. U-shaped handles need to be mounted to the shaft.
1. Remove the four 28 mm bolts and washers from the top of the handlebar holder, then set the holder top aside.
2. Place the handlebar on the bottom of the holder. The throttle handle should be to the left of the shaft. When mounting, the handlebar can be positioned upright, at a flat angle in line with the shaft or anywhere in between; choose the angle that you find the most comfortable.
3. Place the holder top over the handlebar and reinstall the bolts and washers, torquing them to 3.6 ft-lbs. (5 Nm.)
4. Check the tie straps holding the throttle cable. They should be positioned so that the cable runs underneath the shaft, then up to the right side of the trimmer.
Kwik Loader Shield and Head Installation
1. Turn the trimmer over and look at the end of the shaft: just above the gear case, there is a mount with four holes. Place one of the rectangular spacers on this mount followed by the debris shield and a second spacer.
2. Place washers on four 5 x 28 mm bolts and screw them into the holes, torquing them to 2.5 ft-lbs. (3.4 Nm.)
3. Find the hole on the side of the gear case opposite of the driveshaft and insert a 4 mm hex wrench. Check to make sure this is keeping the drive shaft from turning.
4. Slide the components onto the driveshaft in this order: spacer “A,” spacer “B,” the large washer and finally the Kwik-Loader head.
5. Slide the collar onto the driveshaft, lining up the triangular face with the indent in the head so that the two pieces fit flush. Tighten the collar by turning it counter-clockwise: the driveshaft has a left-handed thread.
6. Remove the 4 mm hex wrench.
Brush/Wood Shield and Head Installation
1. The shield attaches to a mount just above the gear case. Place one of the rectangular spacers on this mount followed by the shield and the second spacer. 2. Insert four 5 x 28 mm bolts and washers into the holes, tightening them to 2.5 ft-lbs. (3.4 Nm.)
3. Locate the hole on the opposite side of the driveshaft of the gear case. Insert a 4 mm hex wrench and check to see if this stops the driveshaft from turning.
4. Slide the components onto the driveshaft in this order: spacer “A,” blade cover, blade, and spacer “B.” The blade cover should be installed with the white markings facing the debris shield.
5. Screw the 10 mm lock nut onto the shaft. Since the driveshaft is left-hand threaded, the nut will need to be turned counter-clockwise. Tighten the nut to 14 ft-lbs. (20 Nm.)
6. Remove the 4 mm hex wrench from the gear case.
Adding Oil
1. Place the trimmer on a level surface and remove the oil filler cap/dipstick located on the rear of the engine opposite of the fuel cap.
2. Add the entire bottle of oil included with the trimmer. If this oil isn’t available, add 3.4 oz (100 cc) of SAE 10W-30 oil.
Where to Buy Honda Trimmer Parts
www.hondalawnparts.com has everything you need for your Honda trimmer from trimmer line to carburetors. As an OEM dealer, they carry genuine factory parts and can ship to anywhere in the U.S. and Canada, often for a low flat rate.
