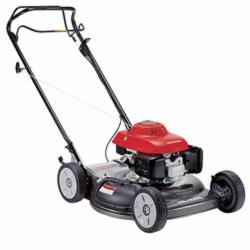
 To keep your lawnmower running at peak performance, regular maintenance on your Honda lawnmower is essential. Changing the belt on your lawnmower is one of these regular maintenance procedures. The first time you replace your Honda lawnmower belt, may be a little daunting. However, with the proper tools and information, this maintenance procedure is easy to do yourself, even for the most inexperienced mechanic.
This article explains the procedure to replace the belt on your lawnmower and includes a few tips along the way. Keep in mind that the best source of information is always the manufacturers operations manual – read the instructions before you begin to replace your Honda Lawnmower belt and most importantly – keep safety in mind.
The first step is to purchase a replacement belt. Refer to your Owner’s Manual to find the belt part number. Next, go to www.hondalawnparts.com, and select the Honda Popular Parts tab, then select the “Belts” option and choose the belt that you need. Select a shipping option and checkout.
Once your part arrives, you will need the following set of tools to change the Honda Lawnmower belt:
- 14mm socket wrench with socket extender
- Crescent wrench
- Long flat head screwdriver
- Pair of needle nose pliers
- Pair of gloves
How to change the lawnmower belt:
- Move the mower on to a large blanket or a tarp, to catch spillage. Gas and oil might not spill, but it is best to be prepared.
- Make sure the mower is off and engine is cool.
- Remove the wire and boot from the spark plug then turn off the fuel valve.
- Turn the mower on its side to access the mower blade.
- Make sure the blade is secured with some form of support: this could be a block of wood or a brick. This is to make sure the blade doesn’t fly off or fall when removed. Put the block on the bottom and move the blade against it.
- Use the 14mm socket wrench to remove the bolts and washers holding the blade to the mower.
- Remove the blade carefully, making sure to keep anything sharp away from the body.
- Use the socket to remove the lower Roto-Stop assembly. This may be tight and require a hard blow to the socket wrench handle. After removing the bolt, remove the lower assembly.
- Use the flat head screwdriver to remove the Roto-Stop Spring.
- The pair of needle nose pliers will fit in the tight space to remove the clutch cable.
- Remove the upper Roto-Stop assembly.
- Next, remove the two debris shields. The rear wheels cover one of the screws holding the first shield in place. Setting these wheels to the lowest setting will make the screw accessible.
- Rotate the mower transmission to release the old belt. Place the crescent wrench on the bottom and use it as a handle to turn the transmission.
- Remove the old belt from the crankshaft drive pulley.
- Before completely removing the old belt, the tension spring on the transmission needs to be removed as well. Use the needle nose pliers to undo the spring.
- The old belt should now be completely free.
- Get the new belt ready for installation.
- Now place the new belt in the drive pulley mounted on the transmission.
- Use the flathead screwdriver to help reconnect the tension spring.
- Turn the transmission to release the tension. This will allow the belt to be placed around the crankshaft drive pulley.
- Reinstall the two debris shields and replace all the screws. Put the rear wheels back to their original height.
- Replace the upper Roto-Stop assembly next. Remember to attach the clutch cable as well as the Roto-Stop tension spring.
- Put the lower Roto-Stop assembly back on and secure it with the middle bolt. Hand-tighten it to hold the assembly on, then use the socket wrench to finish the job.
- The mower blade goes on next. Make sure there is a blade support in place before attaching. Put the blade (or blades If there are more than one) on the lower Roto-Stop assembly. Use the socket wrench to secure it with the bolts and washers. The bolts need a certain amount of torque, so consult the manual to see the manufactures specifications on just how much.
- Remove the blade support and stand the mower back upright.
- Last, but not least, turn the fuel valve back on and attach the spark plug wire and boot.
- Congratulate yourself for a job well done!
Again, this maintenance procedure may seem complicated, but when the directions in the Operations Manual are followed step-by-step, this procedure is easy. www.hondalawnparts.com has a wide range of accessories and parts available. Use the Parts Diagram Lookup tool to find the parts that you need and order easily online.
