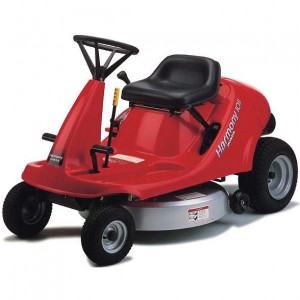
 No matter how well you maintain your Honda H1011 riding lawnmower, eventually you will have to replace the drive belt due to normal wear and tear or it breaking. For those that decide to do it themselves, the following paragraphs will serve as a guide.
Preparing to Install a New Drive Belt
The first thing to do to prepare for the installation is find a solid, level surface and park the mower. Then, shift the riding mower to neutral, apply the parking brake, and put the PTO clutch lever on “off”. Next, remove the key from the ignition and the spark plug to prevent spontaneous starting.
Secure the riding mower by blocking the front and rear wheels from moving. This is easily done by placing a wooden block in front of and behind one of the front wheels, and then place a wooden block in front of and behind the rear wheel, opposite of that one. Then, release the parking brake. The riding mower should still be secure and not move. Finally, with the height adjustment lever, lower the mower deck all the way down to the ground.
Installing the New Drive Belt
The first step to installing the new drive belt is to locate the old drive belt. It is located between the mower deck and rear axle, underneath the mower. The drive belt and blade belt are attached to two separate pulleys, connected to the engine. Once the drive belt is located, examine it for damage. Look for an actual break, or tears and cracks. If the drive belt is damaged, it will have to be replaced.
Before the drive belt belt is removed for replacement it must be disconnected from its pulley. To do this, first remove the blade belt. Locate the U-shaped bracket that partially covers the blade belt pulley. Remove this bracket by taking out the two bolts that attach it to the mower frame. Make a mental note of how this bracket is attached to the mower frame because it has to be reattached in the exact same position. With heavy gloves, pull the blade belt off of its pulley.
Then, loosen (do not remove) the belt guide that is bolted to the frame close to the drive belt pulley. Take off the rear cover. Below the spark plug, on the frame, holding down a metal access plate, there is a self-tapping screw. Remove this screw and the plate. On the right side of the frame, there is a belt holder that is held down by a single flange nut. Remove this flange nut. This will enable the belt holder to detach from the transmission pulley. Allow it to fall clear off of the pulley.
At this point, if your riding mower has a gear transmission, make sure the parking brake is locking down the clutch pedal. If your mower has a hydrostatic transmission model, detach the drive belt tensioner arm spring from the left rear of the frame by using a spring removal tool.
Then, loosen (do not remove) the belt guide that is bolted to the top of the clutch pulley. Do this by loosening the center bolt on the pulley just enough to allow the drive belt to come off of the pulley. Release the parking brake, and pull the drive belt off of the pulley on the clutch tensioner arm. Then remove the drive belt from the engine and transmission pulleys as well. The drive belt should be completely removed.
In reverse order of the preceding drive belt removal steps, replace the old drive belt with a new original equipment manufacturer (OEM) Honda drive belt. Once the new drive belt is installed, release the parking brake. Then, verify that the drive belt is tight and appropriately routed through all of the pulleys, belt guards, and clutch tensioner arm, just as the old drive belt was routed.
When the installation is verified, reconnect the spark plug and start up the mower. It should start up with no problem. Complete a few light passes and listen for squealing noises. If there are any noises, stop the riding mower immediately and re-inspect the drive belt installation.
Honda recommends using OEM parts for any repair. OEM parts are guaranteed to be compatible with your Honda Riding Mower. Honda OEM parts can be purchased directly through www.hondalawnparts.com. The website has a user-friendly Online Parts Lookup Tool, that makes ordering parts easy.
