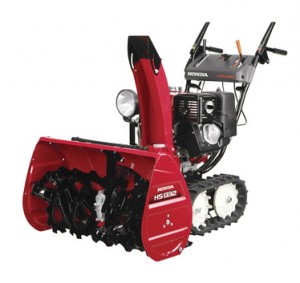
 For those just getting acquainted with Honda’s HS1132 snowblower, it can often seem intimidating to learn all of its functions and put it to good use. The good news, however, is that this piece of equipment is specifically designed to be user-friendly, especially in residential environments and for first-time buyers. Rather than letting early confusion win the battle, follow the guide below to learn how to turn the equipment on and start clearing snow with ease.
A Brief Safety Disclaimer for Equipment Owners
Clearing snow is serious work, and it could put equipment operators at a serious risk of injury if they don’t abide by some basic safety rules. Before even turning the equipment on, snowblower owners should check the area to be cleared for debris or ice build-up. If possible, remove those obstructions in an effort to reduce maintenance, snow clearing time, and the potential for injury.
Never clear snow when others are standing nearby. Usher all pets and people indoors in advance, and make sure they understand how important it is to steer clear of the equipment. Dress appropriately for the weather and wear protective goggles to guard against airborne debris. Start the equipment outdoors only, preferably on a flat surface, in an effort to reduce injuries and accidents.
Starting the Engine
The HS1132’s engine is actually very easy to start. Begin by placing the shift lever to “N” and the transmission release to “engaged.” Turn the fuel valve on, and pull the choke knob until it is in the “closed” position. Move the throttle to fast and start the engine.
Let the engine warm up for a bit before taking the snowblower out to clear walkways and driveways. Remember to adjust the snowblower out of its “neutral” mode that was set prior to starting the engine, since this will allow the equipment to move forward and actually discharge snow appropriately.
Stopping the Engine
The process used to stop the engine is also rather simple. Release both the auger and drive clutch levers that are used during snow clearing to keep the equipment moving and productive. Next, shift back to “N” and adjust the throttle to “slow.” Turn the engine switch to its “off” position and close the fuel valve. The equipment can now be safely moved to storage until its services are required once again.
Clearing Snow
Like starting and stopping the engine, clearing snow requires a few steps so that the job can be done quickly and efficiently. Start by placing the throttle in the “fast” position and then adjusting the foot pedal as needed. Use the chute crank to place the discharge chute in the proper position, accounting for the snow’s height, distance, and desired resting place.
Finally, squeeze the auger lever to engage the augers and begin the snow intake process. Keep the auger levers engaged as long as snow is being cleared, releasing them only to pause the process or stop the equipment. To keep the snowblower moving forward, the operator should also be squeezing the drive clutch lever at all times. This engages the self-propulsion mechanism and ensures that the task is done as efficiently as possible.
A Few Important Snow-Clearing Tips
Clearing snow is generally pretty straightforward, but Mother Nature has been known to throw some curveballs throughout the winter season. To handle more challenging winter landscapes, consider a few tips that can give the snowblower a better chance at getting the job done.
1. If snow has become exceedingly deep, don’t bother placing the snowblower’s throttle to the “fast” position. While great for shallower snow depths, this setting can actually exacerbate conditions and cause blockages in deeper snow. Instead, use the “slow” setting and clear areas more deliberately. Be prepared to clear snow from the auger using a snow clearing bar in conditions like these.
2. Always prefer a narrower clearing swath than a wider one. It’s much easier to go back and forth over an area several times, using a narrower path, than it is to remove obstructions and deal with a lower power level from the engine.
3. If the snow depth is greater than the auger height, clear it in stages by going over the area several times. By clearing in layers, the equipment will avoid being overwhelmed by wintry precipitation.
A Reminder: Removing Obstructions from the Auger Housing
The auger housing is bound to suffer from at least one obstruction throughout the winter, whether it’s compacted snow or some kind of debris found along walkways around the home. It’s absolutely essential to clear obstructions only with the included snow clearing bar, an only with the proper gloves, in order to avoid injury. Augers can do real damage to operators if they aren’t careful, but the proper equipment and procedures can greatly reduce this risk.
Where to Buy Honda OEM Parts: HondaLawnParts.com
The parts lookup tool at HondaLawnParts.com makes it easy to find the right part for any need. Sortable by part and model number, or engine type, equipment owners can make quick work of any maintenance procedure using this intuitive tool.
