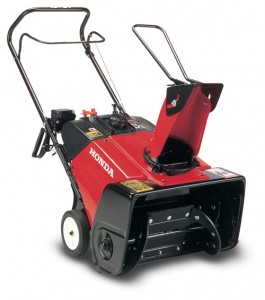
 While most snowblower owners are relieved to own the equipment on a particularly stormy and snowy day, they’re even more relieved when warmer weather permits them to put the snowblower back in the garage and move on to more enjoyable parts of the year. Even so, that excitement shouldn’t cause snowblower owners to forget the significant importance of conducting pre-storage maintenance. Whether it’s an inspection of the equipment, parts replacement, or things like fuel maintenance and lubrication, this preventative maintenance will help reduce costs, extend the snowblower’s useful life, and make it easier to get started when temperatures cool off once again.
Start with a Thorough Inspection of the Snowblower Prior to Storage
Though snowblowers make it easy to clean up winter’s messes, the process of removing snow and tossing it aside is certainly not easy on the equipment itself. That’s why snowblower owners should always make it their top priority to inspect the equipment for maintenance concerns prior to off-season storage. In particular, equipment owners should check the following parts and inspect for wear and tear, damage, debris, or related concerns:
– Auger and auger housing
– Drive belt
– Auger belt
– Engine
– Auger paddles
– Scraper
– Tires
If any of these items shows excessive wear and tear, cracking, or damage, it should be replaced prior to placing the snowblower in storage. As a general rule, equipment owners will want to make sure they secure OEM replacement parts when conducting any maintenance. This ensures better compatibility and, in most cases, a greater durability of the new parts than could be offered by non-OEM options.
Fuel and Lubrication: What to Know Before Snowblower Storage
A thorough inspection of the snowblower for damage and required replacement parts is only the beginning. The next stage of the process is to consider what must be done with the snowblower’s fuel, oil, and general lubrication. Typically, there are a few general guidelines that can be followed in order to make this process a bit easier and more straightforward.
1. Drain or Stabilize Remaining Fuel
Some snowblower users prefer to keep their fuel tank either completely or partially full during storage. This isn’t necessarily a problem, but stale fuel can be a bit frustrating to deal with during the next winter season. Avoid stale fuel by adding the proper amount of stabilizer prior to storage. Otherwise, fully drain the fuel tank prior to storage and allow the equipment to run until it turns off due to a lack of gasoline.
2. Check and Change Oil
Oil levels should be checked and, if necessary, the oil should be changed prior to off-season storage. In some cases, proper oil levels and clean oil may allow equipment owners to put off a full oil change until they remove the equipment from storage at the beginning of the following winter.
3. Lubricate Joints and Bearings
Finally, don’t forget to apply a light and mild lubricant to the snowblower’s joints, bearings, and other areas where corrosion could occur during storage. This is a great way to extend the snowblower’s longevity and reduce maintenance over the long-term.
Clean the Equipment Thoroughly Before Storage
The final piece of the puzzle when preparing for off-season snowblower storage is to make sure that the equipment has been thoroughly cleaned in advance. Any remaining dirt or ice could cause the equipment to suffer from corrosion or even engine problems when it’s removed from storage next winter. When cleaning the equipment, make sure to follow a few rules in order to get the best results:
– Check and Clean the Auger Housing First
The auger housing sees the most action throughout the winter, since it comes into direct contact with snow, dirt, and debris. This makes it a common place where excess dirt and grime are found at the end of the winter. Clean this area first and clean it thoroughly, so that the augers are protected from ongoing damage during the spring and summer months.
– Use a Mild Dish Soap and Cloth to Clean the Snowblower
Harsh chemicals and abrasive materials will only cause the snowblower to be more exposed to corrosion over time. Instead of resorting to these heavy-duty cleaning accessories, rely instead on conventional dish soap and a gentle, cotton cloth. This will suitably remove all of winter’s grime without damaging the paint, exposing the metal, or inflicting long-term damage on the equipment.
– Dry the Snowblower Before Storage
Don’t store a damp snowblower. By drying the equipment off after cleaning, rust will be less likely and the snowblower will remain a bit cleaner as it sits in a garage or toolshed in anticipation of next winter’s biggest storms.
For Honda Snowblower Parts and Accessories, Visit HondaLawnParts.com
Conducting maintenance means using the right OEM parts, fluids, and more. HondaLawnParts.com offers a unique parts lookup tool to customers, making it far easier to complete maintenance with the best results for snowblower quality and longevity.
