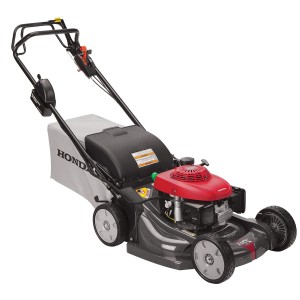
 Most people find it hard to get excited about mowing the lawn or getting the weekly landscaping done, but almost everyone loves getting new equipment to help them get the job done even quicker and more easily. That’s certainly what the Honda HRX can do for today’s homeowners, with powerful features under the hood and a comfortable, ergonomic design that makes it a bit less fatiguing to take care of the lawn each week. For those who are just setting up their new Honda HRX mower, however, there are a few things to know and understand so that setup goes quickly and so that the mower is as durable as possible when it’s powered on and ready to go.
Safety Tips: Don’t Get Injured During Mower Setup!
Mower operation can result in serious injury, especially for new equipment owners, unless they take a few precautions. The most important of these is to simply review the equipment manual prior to setup and assembly. Be sure to understand the mower’s basic features and its safety controls, and make sure to read any information pertaining to engine preparation, ignition, and maintenance. By understanding the mower’s key features and its safety protections, and remembering that proactive maintenance is the key to operational integrity, it will be easy to get the job done without risking severe injury or emergency. With that in mind, here’s what to know when setting up the new mower.
1. Handlebar Setup
By default, the mower ships with its handlebars pushed all the way forward. This makes it a bit more compact while it’s in transit, but the handlebars obviously need to be adjusted before mowing can begin. The handlebar adjustment knobs should be turned so that they’re in the “unlocked” position in order to move the handle’s position. When the knobs are unlocked, simply guide the handle up and backward until it’s in a semi-upright position. Adjust the handle as needed for comfort while mowing, and then lock the adjustment knobs so that no movement takes place while work is ongoing.
2. Battery
For safety reasons, new HRX mowers have the battery disconnected when they’re unboxed. Get the mower ready by first charging the battery, then connecting it to the mower, and then inserting the key required for ignition. A new battery with a full charge should allow the mower to perform well even when it’s turned on for the first time.
3. Grass Bag Assembly
The grass bag is shipped in its own packaging, away from the metal bars that give it its shape and expand its internal capacity for clipping storage. Expand the frame as shown in the owner’s manual, and lock the legs into place. With the frame expanded and sturdy, simply slide the frame into the grass bag until the top of the frame reaches the top of the bag. Install the plastic security clips to keep the bag in place atop the frame.
4. Engine Oil
For safety and cleanliness reasons, all new mowers arrive without oil preinstalled in the oil tank. Oil absolutely must be added prior to mowing, or the engine will suffer immediate and expensive damage. Honda recommends a standard SAE 10W-30 oil for use with the HRX, which is the oil most ideal for warm environments. Be sure to keep adding oil until it registers at the “fill” line on the included dipstick.
5. Fuel
Just like oil, fuel is left out of the mower while it’s stored and shipped to new owners. The equipment simply won’t start without fuel in the gas tank, so be sure to fill the gas tank to capacity before attempting first ignition. As with virtually all Honda mowers, the HRX requires unleaded gasoline. New owners should be sure to avoid ethanol fuels or those with a higher ethanol concentration, as these can cause engine problems.
6. Registration
Though optional, registration of the mower with Honda is a highly recommended final step when assembling the mower and getting it ready for its first task around the home. Mower registration allows Honda to communicate about important matters, including the proximity of local repairs shops, the availability of key accessories, and other issues over time.
HondaLawnParts.com Offers Access to a Full Range of OEM Replacement Parts
The key to keeping a new mower in like-new condition over its long life is to conduct regular maintenance and, when the need arises, to use only replacement parts made by Honda in its own factories. HondaLawnParts.com gives customers access to a parts lookup tool that provides only OEM parts for common repairs, from air filters to new blades and much more. The lookup tool filters parts according to the mower’s model number, the part number required, or even the engine model found “under the hood.” This makes it an asset for those who are new to Honda mowers and their regular maintenance requirements.
