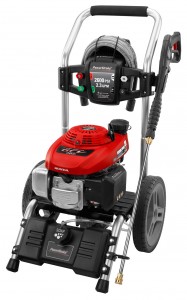
 Honda’s GCV 160 can be found in everything from pressure washers to lawn mowers, but whatever your motor is powering, it still requires the same maintenance. Here’s what you need to know to keep your Honda small engine running reliably for years to come.
Maintenance Schedule
Before each use: Check the air cleaner and the oil level.
First month or 5 hours of operation: Change the oil.
Every season or 25 hours: Clean the air cleaner
Every season or 50 hours: Change the oil, check the spark plug, and inspect the flywheel brake pad.
Every 100 hours: Check the blade, brake, clutch, and spark arrester (if equipped.)
Every 200 hours: Replace the air cleaner and spark plug.
Every two years: Check the fuel line for cracks and damage.
Honda recommends bringing this motor to a service center for the following maintenance.
Every 100 hours: Check the valve clearance, fuel tank, and fuel filter.
Every 150 hours: Adjust the idle speed.
Fuel
This engine is designed to use standard automotive unleaded with an octane rating of 86 or higher and no more than 10% ethanol (E10) or 5% methanol. The tank should not be filled past the base of the filler neck. When closing the tank, twist the fuel cap until it makes an audible click. Always move the equipment at least 10 feet (three meters) away from the fueling location before starting to prevent the ignition of gas fumes.
Oil
Honda recommends 10W30, but 5W30 can also be used, or SAE 30 so long as temperatures are above 50 degrees F (10 degrees C.) This oil should meet API standard SJ or later.
To check the oil, remove the dipstick from the filler neck, wipe off any oil, and reinsert it without screwing it back into the neck. Remove the dipstick again and look for oil. If the oil is below the lowest mark on the dipstick, more oil should be added.
To change the oil, make sure the fuel valve is set to “OFF,” remove the dipstick, and tilt the engine, letting the oil drain into a container for recycling. Once the oil has drained, tilt the engine back so that it’s level and add fresh oil. Reinstall the dipstick.
Air Cleaner
The filter can be accessed by pushing in on the tabs at the top of the cover and swinging the cover downward.
To clean the filter element, tap it against a hard surface to loosen dirt or blow it out using compressed air with a pressure of 30 psi or less. Wipe out any dirt inside the cover before reinstalling the filter.
Spark Plug
Note that there are two spark plugs specified for this engine. The one you’ll need depends on whether or not it’s being used to power a pressure washer.
To access the spark plug, remove the spark plug cap and unscrew the plug using a spark plug wrench. The plug should be replaced if it’s fouled, has a cracked insulator or worn electrode or is otherwise damaged.
The spark plug gap should be set to between 0.028 and 0.030 inches (0.70 to 0.80 mm.)
When installing, make sure the sealing washer is at the base of the threads. The plug should first be screwed in by hand to prevent cross-threading, then tightened down with the plug wrench. Turn the plug 1/8-1/4 turn after it seats if it has been used. New plugs should be turned 1/2 turn after seating to compress the washer.
Flywheel Brake Inspection
To access the brake, start by removing the three flange nuts on the top of the recoil starter. Remove the recoil starter from the engine.
Next, slide the fuel tank off of the engine without disconnecting the fuel line. If there’s fuel in the tank, set it next to the engine while keeping it level.
The flywheel brake is located next to the flywheel and has a large spring attached to it. The brake shoe will need to be replaced if it’s less than 3 mm thick. Honda recommends having this done at a service center.
Reinstall the tank and recoil starter in reverse order, making sure there are still three spacers on the studs that pass through the tank to hold everything in the correct position.
Spark Arrester
The arrester is an optional piece of equipment, but it can be added to any GCV160 to meet local fire regulations.
To access it, remove the three 6mm bolts holding on the muffler protector, then remove the screw holding the arrester inside the muffler. Use a wire brush to remove any carbon buildup. The spark arrester should be replaced if it has any holes or cracks. Reinstall in reverse order.
Getting Parts for Your GCV 160
When you need parts for Honda small engines, visit www.hondalawnparts.com. We’re a certified Honda dealer, and we can ship OEM replacements for anything on your motor to any address in the U.S. and Canada.
