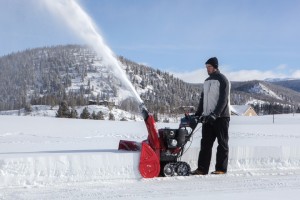
 Winter is here, and that means a constant battle between snowfall and your driveway. These tips will help you get the most out of your Honda snowblower, keeping the pavement uncovered with as little effort as possible while reducing the chance of breakdowns.
1. Prepare Your Property Ahead of Time
Before the first snowfall, take the time to remove any obstacles that could get clogged in your snowblower including chains, outdoor lights, extension cables, and garden hoses. Set up markers near gravel and landscape features as well as the edges of your driveway and sidewalk. Already have frozen ground? A masonry bit can drill a hole through the dirt for your marker.
2. Prepare Your Snowblower Ahead of Time
If it’s a cable, hinge, or linkage, it needs to be lubricated. Plastic parts need PTFE lube, metal parts need a light oil, and the components inside the auger housing and chute need some silicone spray lubricant. The axle for the rear wheels should be lubricated with a high-quality marine grease to protect it from moisture.
Remove the shear pins and make sure the auger moves separately from the axle. If they’re rusted together, extreme forces will act on the snowblower instead of the pin, causing major damage. Lubricate the axle with some light oil.
If your snowblower has a metal chute, wax the inside of it with a polymer car wax to keep snow from sticking. If the wax is a spray or has the words “synthetic” on the bottle, it’s polymer-based.
Change the oil and replace the spark plug. If you have particularly cold weather in your area, consider a synthetic oil, as it will stay thin even in extreme temperatures. Check the belts and skid shoes for wear.
3. Get the Right Fuel
If you have gas left over from summer lawn care, dump it in your car’s fuel tank and get some new gas. Cold temperatures reduce the fumes from gasoline, which allows refineries to make blends that are more volatile for easy starting. Since snowblower use is unpredictable, this fuel should be treated with a stabilizer so it’s ready to ignite whether you use it this week or two months from now.
4. Start Snowblowing Early
It may make sense to wait until snowfall stops to blow off your driveway all at once, but it can be far easier on your machine if you use it based on the amount of snow on the ground. Working with less than 6 inches of snow at a time puts less strain on your snowblower and helps it push the snow further to reduce the height of the snowbanks flanking the cleared area. Sometimes, this is enough to get the snow out of the way with a single pass instead of having to clean up after the snow lands on a different part of the pavement.
5. Don’t Forget Your Newspaper
Rolling the auger into a frozen newspaper can cause serious jams, breaking shear pins and belts. If you subscribe to the paper, make sure you pick it up before your snowblower does.
6. Work in Smaller Strips
Dealing with thick or wet snow? If your snowblower wants to clog, move your snowblower so it’s working on a strip of snow that’s 1/2-1/3 as wide as the auger.
7. Take a Break When You Need to Refuel
The fuel tanks on small engines are usually mounted directly above the carburetor to allow gravity to feed the float bowls. That means it’s right next to the engine, and in turn trying to add fuel when the tank runs dry means you could spill a little on hot motor components, causing a fire. Instead, use the opportunity to go inside and warm up while the engine cools down, returning after 10 minutes or so to refill the tank.
8. Stock Up on Parts Before You Need Them
If you have spare shear pins and belts on hand, you can get your snowblower up and running quickly after either part breaks. That means you finish clearing the snow without having to make a trip to the local repair shop, or worse, waiting for it to open. If you have a Honda snowblower, you can get everything you need from www.hondalawnparts.com. We’re a certified Honda small engine equipment dealer, carrying parts for all of their equipment and motors, and we can ship your order anywhere in the U.S. and Canada.
