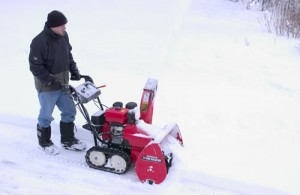
 The Honda HS928 snowblower is a powerful way to deal with the worst of winter’s weather. Even so, that same power needs to be properly controlled and safely managed by operators if they wish to get the job done quickly, efficiently, and without running the risk of serious injury. Before getting started with the HS928 snowblower and all of its excellent features, be sure to review safety guidelines, basic operating instructions, and the skills needed to handle clogged intake chutes and other common headaches.
Safety Precautions are Key for Snowblower Users
The HS928 can handle a serious amount of wintery precipitation, but it leverages the power of a fast-moving auger and a powerful engine to do so. Extreme caution should be exercised when using the snowblower in order to avoid injury. Before using the equipment, check all areas to be cleared and ensure that there is no sizeable debris in the snowblower’s path. This will reduce the risk of damage and injury, and minimize the size and frequency of clogs. In addition to removing debris, all bystanders and pets should be instructed to remain inside during all snow clearing.
When starting the equipment, make sure to place the snowblower on a solid, flat surface in an open area. Never start the snowblower indoors, and be sure not to start the equipment on an absorbent surface. Following these guidelines will make the engine easier to start, and will reduce the overall impact of potential fuel spills or other unexpected circumstances.
Starting the HS928’s Engine
The HS928 snowblower is relatively easy to start, even on the coldest winter days. To get the engine going, start by placing the throttle lever in the “N” position. Set the transmission lever to “engaged” and turn the fuel valve on so that gasoline can flow into the engine. Next, pull the choke knob to “closed” and set the throttle lever to “fast.”
The engine ignition switch should be turned into the “on” position, allowing the engine to fully access its fuel supply. With all of these controls in place, go ahead and start the engine by either pulling the starter grip or using the equipment’s built-in electric starter. If using the starter grip, pull the grip slowly at first before accelerating the pull. For electric starters, make sure the cord is fully grounded and connected before pressing the ignition button.
Allow the engine to warm up for a few moments, since this will help the equipment acclimate to the cold weather without slowing down or stopping altogether. With the engine properly warmed up, gradually move the choke knob from “closed” to “open.”
Stopping the Snowblower’s Engine
In the event of an emergency, the engine can be stopped simply by turning the ignition back to “off” from its “on” position. This is not the preferred method of stopping the equipment prior to storage, however. When an emergency is not ongoing, a slightly different procedure applies.
To stop the engine prior to storage, release the auger lever and drive clutch lever. Adjust the throttle back to “neutral,” and bring the throttle to the “slow” position. Turn the engine ignition switch off and, before placing the equipment in storage, make sure to turn the fuel valve off so that fresh fuel is no longer available to the engine. Place the equipment safely in storage until it’s needed next time.
Clearing Snow with the HS928
To start clearing snow, move the throttle to “fast” if snow is light or moderate in depth. For deeper amounts of snow, it’s a good idea to slow things down and place the throttle into its “slow” position. The same slower throttle speed is recommended for those equipment owners dealing with wetter, denser, or more heavily packed snow overall.
Next, set the foot pedal to the correct position for snow clearing and use the chute crank to adjust the discharge chute so that snow is thrown in the proper direction. Squeeze the auger clutch lever to begin clearing snow, and squeeze the drive clutch lever to engage the snowblower’s forward movement through self-propulsion.
Removing Obstructions from the Intake Area
The best way to remove clogs while clearing snow is to use the Honda’s included snow clearing bar. When a clog presents itself, be sure to turn the equipment off entirely and disconnect the spark plug. This will prevent against unwanted engine starts. With the equipment safely turned off, use the snow clearing bar to break up snow and ice, freeing the auger. Never use hands, with or without gloves, to perform this task. When the obstruction has been removed, clean off the snow clearing bar and reattach it to the clips found on top of the snowblower.
HondaLawnParts.com Can Help with Maintenance and Repairs
For the best collection of OEM Honda parts for snowblowers and more, equipment owners should visit HondaLawnParts.com. The site offers a great parts lookup tool that can separate parts by model number, engine type, and part number, making regular maintenance easy throughout the winter months.
