Changing oil in a small engine is usually straightforward, but generators have some quirks due to their design and the way they’re used. Here’s what you need to know from getting oil out of an engine that has no obvious drain plug to ensuring proper break-in on a device that can go unused for months at a time.
Checking the Oil
It’s possible for oil to burn or leak during operation, especially on engines that have seen a lot of hours of use. Always check the oil before each use, and each time you need to fill the tank. Most generator engines come with Honda’s Oil Alert system, which will shut down the engine if the oil level is too low to protect the motor from damage; being proactive about topping up the oil will prevent unexpected shutdowns.
To get the correct reading when checking the oil, remove the dipstick/filler cap, wipe it off and insert it back into the filler neck without screwing or pushing it in.
When to Change the Oil
On most models, Honda recommends changing the oil after the first month or 20 hours of use, then every 6 months or 100 hours thereafter. You should always replace the oil in the first month, but it’s a good idea to replace the oil after 20 hours of use, even if it has already been changed. That short interval is there to ensure any metal particles left over from break-in don’t stay in the engine where they could cause premature wear.
After the break-in, it’s important to change the oil after the specified time, even if it hasn’t been used. This removes water and other contaminants that may have migrated into the oil during storage.
Draining the Oil on Small Portable Generators
On some models like the EU 2000, the engine doesn’t have a drain plug and the entire unit is surrounded by a case to reduce noise. Once the maintenance panel has been removed to access the engine, the dipstick can be removed and the entire generator tilted so that the oil flows out of the filler neck. This neck has a lip that will pour the oil onto a tab on the cover and then into your oil pan. If you’re having trouble positioning the generator for drainage, a marine oil change pump can be used to transfer the used oil from the crankcase to a suitable container.
Draining the Oil on Frame-mounted Generators
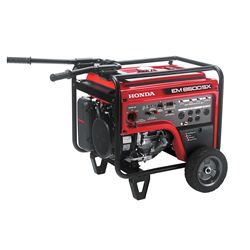
Unlike smaller units, these generators leave the engine fully exposed. The drain plug is located at the base of the engine next to the dipstick, and the frame will clear the drainage area, so the generator does not need to be tilted. Instead, set the generator on a support such as a set of bricks or blocks of wood to lift it off of the ground and slide the oil pan underneath the engine to catch the oil.
Filling the Crankcase
Honda’s engines are designed to be filled while level with the oil coming up to the edge of the filler neck. A funnel will be needed to fill engines that don’t have a drain plug.
Recommended Oil
While Honda Power Equipment oil is the best choice, the engine used in your generator is designed to use multi-weight engine oil, just like your car, making lubricants readily available. 10W30 is recommended for current engines in most conditions, while 5W30 can be used in extreme cold and SAE 30 can be used in warmer temperatures; check your engine owner’s manual for specific temperature recommendations. This oil should at least meet SAE’s SJ standard, which should be true of any oil purchased in the last couple years.
Get Your Generator Working with Help from Honda Lawn Parts
If you need anything for your Honda generator, you can get it from www.hondalawnparts.com. We sell everything from major components to Honda’s own OEM oil so you can be sure your generator will be ready to use whether you use your generator for construction, recreation or as a home backup. We ship parts and accessories across the U.S. and Canada.

