
 The Honda WT20 can move water and debris safely without damaging the pump, but only if it’s set up and used properly. These are the steps you’ll need to take to ensure this trash pump works safely and reliably.
Safety First!
This pump is only designed to move water that is not intended for human consumption. Pumping flammable liquids could cause an explosion, while pumping acids, chemical solutions or any other corrosive liquid could damage the pump.
Before using the WT20, make sure you understand how to operate it properly, and in particular how to shut it off in an emergency. Always shut the pump off if you need to leave the area for any reason.
Always refuel the pump in a well ventilated area. Keep sparks and flame away from the engine, and always wipe away any spilled gasoline before starting the motor. Using the pump in an enclosed space may result in carbon dioxide buildup from the exhaust which can be lethal.
For several minutes after the pump is shut down, the engine and muffler will remain hot and touching either of them could cause severe burns.
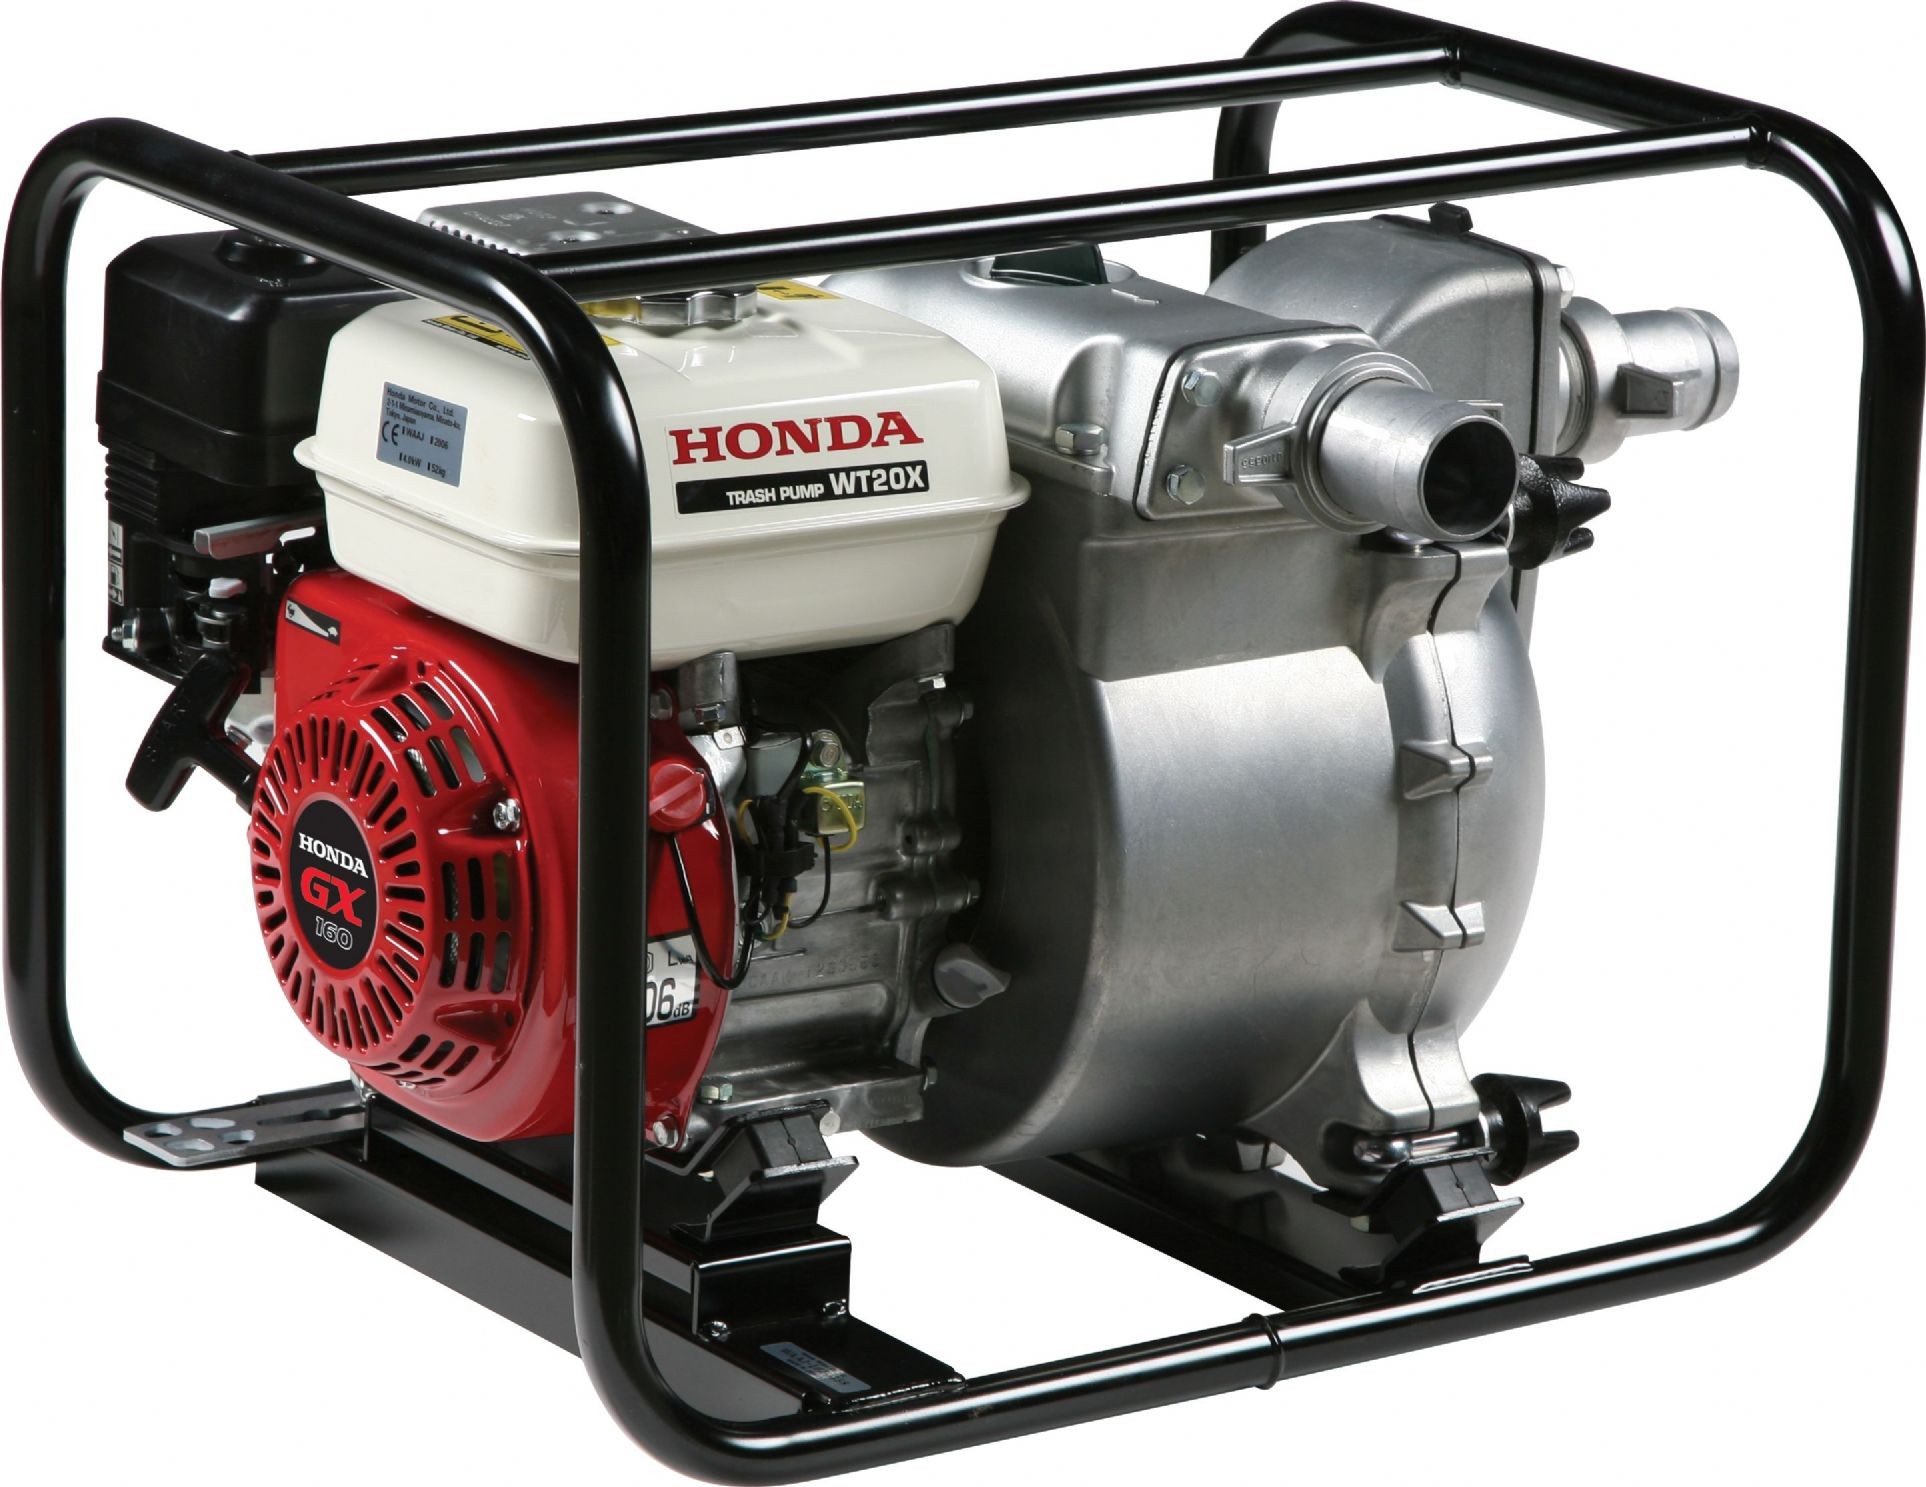
Controls & Features: Where is everything?
On the side with the model label, the oil filler cap/dipstick is near the bottom by the pump housing, and the drain plug is directly below near the engine base. The discharge port is at the upper right. Looking at the top facing this side, the fuel tank is on the left and the priming tank is on the right.
Looking at the side with the starter, the carburettor is located on the left with the air cleaner screwed on above it. The choke lever, fuel valve lever and sediment cup are near the bottom of the carburettor. The throttle lever is just to the right above the starter handle.
On the pump housing side, the suction port is at the top, while the cover drain plug is on the bottom.
On the back, the air filter assembly is on the upper left with the muffler next to it. Below that is the cap covering the spark plug.
Pump Placement
For the best performance, place the pump as close to water level as possible to reduce the pumping head and use hoses that are as short and as wide as possible to reduce fluid friction. Discharge capacity is greater than suction capacity, so the height between the water and the pump should be less than height between the pump and the end of the discharge hose. A smaller elevation change and shorter suction hose will also decrease priming time.
Hose Installation
The suction hose should be attached using the included strainer, clamp ring and clamps. A sealing washer, hose coupler and hose will need to be provided. The washer and hose coupler should be installed on the pump inlet with the clamp ring and hose fastened to the coupler. The strainer should be firmly attached to the inlet end of the suction hose using the provided clamp.
The discharge hose should be attached to the discharge port using a clamp. Both items will need to be provided for this pump.
Both the suction and discharge ports on the WT20 are two inches (60 mm) in diameter.
Priming the Pump
Once the hoses have been attached, remove the filler cap located on the top of the pump and fill the pump chamber with water. Reinstall the cap. Running the pump without priming it first can cause heat build-up that will destroy the pump seal.
Starting the engine
Move the fuel valve lever to “On.” If the engine is cold, move the choke lever to “Closed.” If the engine is being restarted, set it to “Open.”
Move the throttle 1/3 of the way past “Slow.”
Turn the ignition switch to “On.”
Pull the starter grip until some resistance is felt, then pull quickly to turn over the engine. The motor should start.
If the choke was closed earlier, open it gradually as the engine warms up.
Setting engine speed
Once the engine is running, move the throttle to “Fast” to prime the pump. After water is flowing through the pump, moving the throttle toward “Fast” will increase pump speed while moving it to “Slow” will decrease it.
Stopping the engine
In an emergency, the engine can be switched off immediately by turning the ignition switch to “Off.”
Under normal circumstances, set the throttle to “Slow,” turn the ignition switch to “Off” and turn the fuel valve lever to “Off.”
If the pump won’t be used for a while, the pump chamber should be drained and flushed. Remove the case drain plug, cover drain plug, and priming tank filler cap. Pour fresh water into the priming tank and let it flow out of the pump. Reinstall the cap and plugs.
Where to buy Honda Pump Parts
www.hondalawnparts.com carries more than just lawn equipment: they have OEM parts for all of Honda’s small engine equipment including the WT20 and can provide the hoses and clamps you need to put your trash pump to work.
