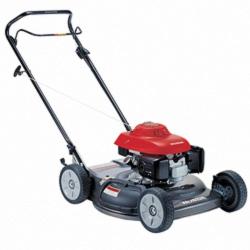
 For many homeowners, summer is synonymous with lawn care, and that means ensuring that your Honda lawnmower is in good working condition. Old or worn air filters and spark plugs can result in overheating, power loss, erratic operation, and a failure to start properly. Fortunately, with a few easy steps you can have your Honda lawnmower back up and running like new.
The following is a step-by-step guide to finding and replacing the air filter and spark plug on your Honda Lawnmower.
Air Filter
It is important to use the correct air filter for your Honda lawnmower. Residential push-behind Honda lawnmowers come in a number of different models. To find the correct model of your Honda lawnmower, check the plate on the mower deck closest to the handle. The model number should begin with the letters HR. Use this sequence of letters to find the appropriate parts online at HondaLawnParts.com.
Air filters come in two basic types – foam and paper. Foam air filters can be cleaned while paper filters should be replaced every 200-300 hours of operation. Once you have determined the correct type of filter for your model of lawnmower, you can begin the process of replacing the old filter.
- Begin by turning off the engine and allowing it to cool.
- Locate the air filter housing unit on the left hand side of the lawnmower.
- Find the retaining clips (on most Honda models this is located at the top of the black plastic cover).
- Push in and down to loosen the cover. There will be hinges at the bottom, so pull down and out to remove the cover completely.
- Remove the air filter and place it to the side. The air filter will be rectangular piece of plastic (usually black or blue), holding a series of triangular shaped ridges.
- Use a rag or compressed air to clean out any grass or dust particles that may be stuck on either side of the housing unit (the cover or the part attached to the mower).
- For a paper filter, dispose of the used filter and install the new filter into the housing unit. (skip to step 11)
- For a foam filter, clean with water and a cleaning solution. DO NOT WRING the filter- simply squeeze it out.
- Place the foam filter to the side and let dry.
- Soak the filter with lightweight filter oil, squeezing out excess.
- Place the filter back into the air filter housing.
- Attach the housing cover at the bottom by attaching it to the hinges.
- Push forward until you meet the clamps at the top and hear a CLICK.
Spark Plug
Incorrect spark plugs can damage the engine by overheating the fuel and potentially causing damage to the pistons, crankcase, and even some electrical components. Using the model number found on the deck of your machine, make sure to check a site like HondaLawnParts.com to make sure you get the right part for your needs.
Lawnmower spark plugs typically need to be replaced after every 100 hours or a season of use. Obvious cracks or other damages are also signs that it should be replaced.
To check and change your spark plugs, follow the following steps:
- Turn off your lawnmower’s engine and let your machine cool.
- The spark plug will be located at the front of the engine covered by a thick insulated piece of rubber called the boot or cap. You can locate it by following the single wire that leads away from it.
- Firmly grip the cap, pull, and twist it off the spark plug. You should be able to remove this with your fingers, if not, try needle nose pliers.
- The spark plug should now be exposed. Check and clean any debris on the plug or around it.
- In order to remove the spark plug, you will likely need a ratchet and spark plug socket. The socket should reflect the size of the plug so that you are able to get a good grip.
- Place the ratchet over the spark plug, apply light pressure, and rotate your ratchet counterclockwise.
- Pull out the spark plug and examine it for any obvious damage including cracks, oily film/residue, a green/yellow glaze, or brown ash deposits.
- Whether you are putting in a new spark plug or simply putting back the old one, make sure to lightly grease the threads with oil. This should make it easier to install and uninstall later.
- Screw your spark plug back into the machine using your hand by turning to the right.
- Once the plug is in place, you can use your ratchet for the final tightening. DO NOT OVER TIGHTEN.
- Once the spark plug is in, replace the cap, pushing it onto the plug until you hear a secure snap.
- Your lawn mower should be ready to run.
To extend the life of your Honda lawnmower, proper and timely maintenance is of the utmost importance. To find out more about the maintenance schedule for air filters and spark plugs for your Honda Lawnmower, or where to find parts, contact www.hondalawnparts.com.
