
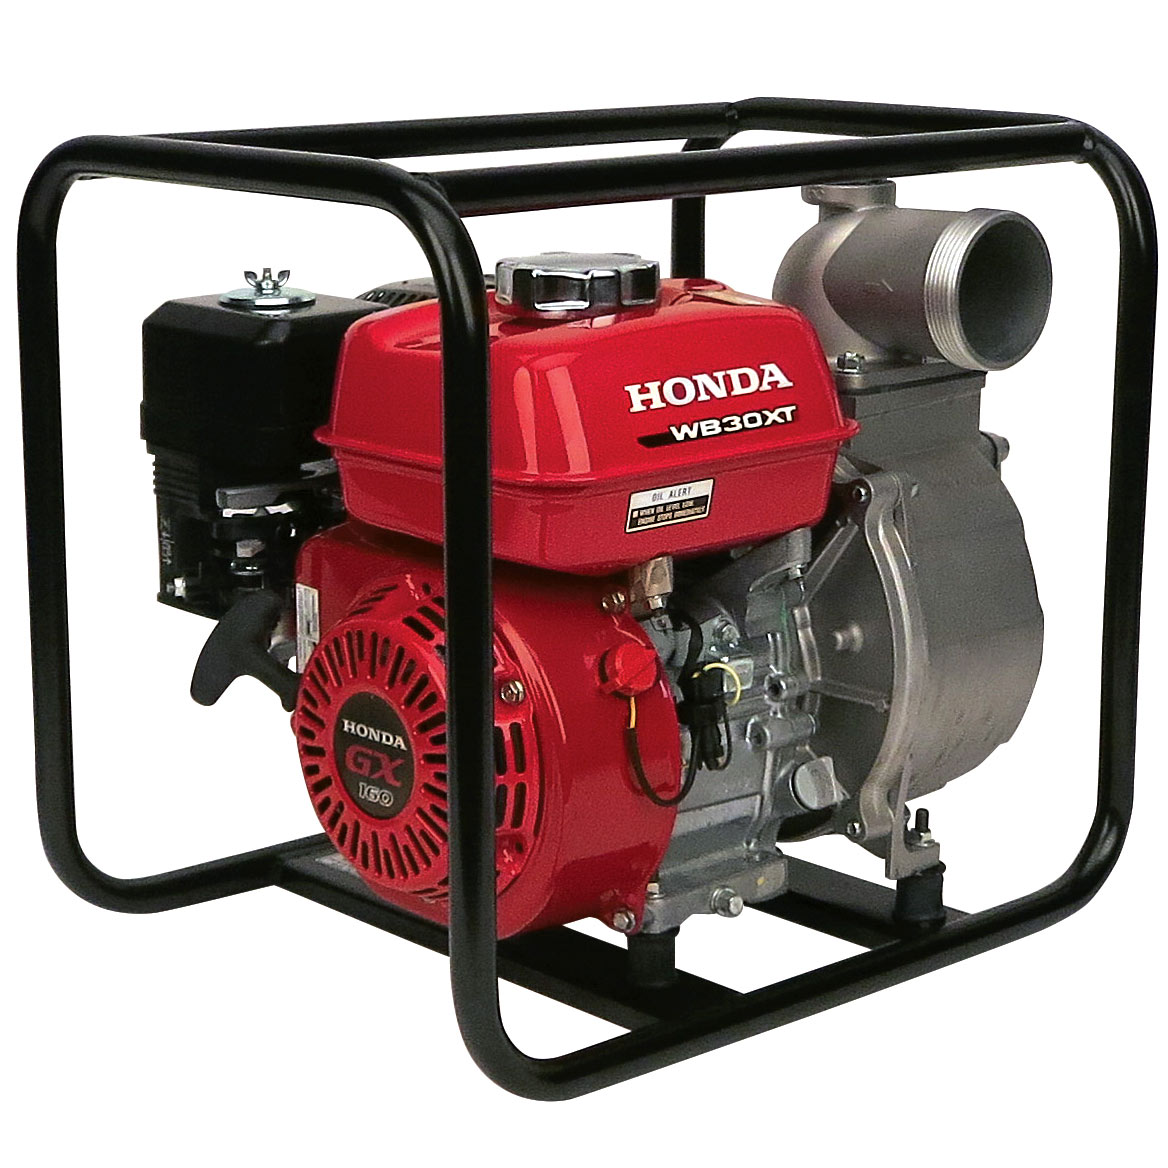
 To use a water pump, you simply put the suction hose in the water in the water you want to move, the discharge hose where you want the water to go, and then start the engine, right? This may work to a degree, but it takes a few more steps to get the best performance out of a pump like Honda’s WB30X.
Safety Disclaimer
This pump is only designed water that is not intended for human consumption. Pumping any other fluid could cause pump failure and possibly injury.
Always keep the pump at least three feet (one meter) away from building walls and other equipment to reduce the risk of carbon monoxide build-up. Never operate the pump indoors.
Before doing a pre-start check-up, ensure the pump is sitting on a level surface and the ignition switch is set to “Off.” Check the pump for signs of oil or gas leaks, remove any excess dirt, and check that all nuts, screws, bolts, clamps and connectors are tight before starting the engine.
Placing the Pump
To get the best performance from this pump, place it as close to water level as possible and use the shortest, widest diameter hoses that will get the job done. Together, this reduces fluid friction for higher output while cutting priming time.
The WB30X can pump up to 290 gallons per minute (1,100 liters per minute,) but this capacity decreases as the pumping height, or “head,” increases. Average flow is cut in half with a total head of 60 feet (18 meters,) while the pump will have difficulty moving any water once total head approaches 100 feet (30 meters.) Discharge head capacity is greater than suction head capacity, so the intake should make up a smaller part of the total head than the discharge.
Suction Hose
A strainer and hose clamp ring are included with this pump, but a hose, hose connector and two clamps will need to be purchased separately.
To attach the hose to the suction port, screw on the hose coupler with a sealing washer between it and the port. Slide a hose clamp onto the hose, then use the clamp ring to attach the hose to the coupler. Finally, secure the hose clamp over the hose and connector to ensure a tight seal. The included strainer should be attached to the other end of the hose using a hose clamp.
Discharge Hose
A discharge hose, hose clamp and hose connector will need to be provided for this pump. Attach the connector, then secure the hose to the connector using the clamp.
Priming the Pump
Before starting the engine, the pump needs to be primed. Skipping this step could cause overheating which will destroy the pump seal. The priming tank is located at the top of the pump housing. Remove the cap and fill the chamber with fresh, clean water. Screw the cap back on before starting the engine.
Starting the Engine
1. Begin by moving the fuel valve lever to “On.” Set the choke to “Closed” if the engine is cold or “Open” if it is warm.
2. Move the throttle to about 1/3 of the way from the “Slow” position, then turn the ignition switch to the “On” position.
3. Gently pull the starter grip until it starts to resist, then pull hard to turn over the engine. Once the motor is running, slowly return the handle to the starter, letting it reel in the cord.
If the choke was closed earlier, it should be opened gradually as the engine warms up.
Setting Engine Speed
Once the engine is running, move the throttle to “Fast” and let the pump self-prime. Once water is flowing out of the discharge hose, output can be controlled by adjusting the throttle. Moving it toward “Fast” increases flow, while moving it to “Slow” decreases it.
Stopping the Engine
IN CASE OF EMERGENCY turn the ignition switch to “Off.”
When shutting the engine off normally, start by setting the throttle to “Slow.” Turn the ignition switch to “Off,” then turn the fuel valve lever to “Off.” Remove the priming chamber cap and flush the chamber with clean, fresh water. Once the water has drained from the pump, reinstall the cap.
Where Can I Get Parts and Accessories for My Honda Pump?
www.hondalawnparts.com carries anything you may need for your WB30X including OEM replacement parts and all the hoses, clamps and seals needed to put this pump to work.
