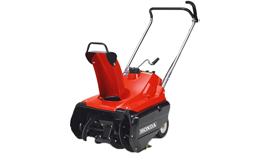
 Snowblowers are undoubtedly durable, but their long-term endurance is helped greatly by regular maintenance procedures that compensate for wear and tear, keep fluids in check, and ensure that the equipment’s engine can run without incident throughout even the most challenging snow clearing jobs. For those who might be new to the Honda HS35 snowblower, there are a few general guidelines to keep in mind that will make maintenance easier, snowblower longevity longer, and snow clearing work a great deal more efficient.
Always Keep Safety in Mind During Maintenance Work
Though maintenance might not involve the full amount of power provided by the Honda HS35 snowblower, it still can pose serious risks to the equipment operator if proper precautions aren’t in place. Before performing maintenance, ensure that the engine has cooled off from any recent operation. Always work on the snowblower either outdoors or in a well-ventilated indoor space, and ensure that the equipment is placed on a surface that is flat, level, and solid. This will prevent unwanted fuel spills and reduce the potential for environmental damage that might result. Always remember to wear protective gloves and eyewear to guard against burns, cuts, and other injuries.
The Maintenance Schedule: A Great Point of Reference for Snowblower Users
Honda’s maintenance schedule is a great reference for those who want to keep regular maintenance procedures in check. Generally, the maintenance schedule has four categories: Before each use, before initial operation each winter, before storage, and every five years. Before each use of the equipment, the schedule recommends checking the oil, spark plug, and several other features.
Prior to using the equipment after it has been in storage, the user manual recommends a full oil change, auger and blower check, spark plug check, and several other procedures. The same is true of pre-maintenance procedures and those that must be performed at least every five years. When performing these maintenance procedures, here is what operators need to keep in mind.
1. How to Perform an Oil Change
To change the snowblower’s oil, simply remove the filler gauge and tilt the handle downward. This will drain the oil until the reservoir is completely empty. As with all fluid changes, oil should be drained into a proper container for safe, eco-friendly disposal afterward.
With the oil completely removed, go ahead and put new 5W30 oil into the chamber until it reaches the upper limit notch on the equipment. Tighten the filler gauge appropriately and dispose of the drained oil before continuing use of the snowblower.
2. Spark Plug Maintenance
A clean spark plug is absolutely essential when starting the snowblower throughout the winter season. To clean the spark plug, simply remove it from the spark plug housing by removing the cover and cap. Use a wrench to loosen the spark plug and then separate it from the equipment. Inspect the part for any wear and tear, or visible damage, that might have occurred previously. If the spark plug is significantly damaged, replace it with an OEM part.
If the spark plug shows no signs of serious damage, clean it with a dry cloth and remove all of the carbon deposits around the part. When it has been thoroughly cleaned, use a wrench to tighten it back into place and then make sure the cover and cap are placed back into place as well.
3. The Auger Clutch Cable
Adjustment of the auger cable will ensure that the snowblower’s belts don’t slip during operation. To adjust the auger clutch cable, tighten the outer nut near the cable by giving it two or three turns to the right. When the cable is sufficiently tightened using the outer nut, be sure to tighten the inner nut in the same direction to secure the apparatus and ensure that the new position is preserved throughout the rest of the winter. This tightening and adjustment procedure should be performed on an annual basis after removing the snowblower from storage.
4. Replacement of Auger Rubber Parts
Rubber auger parts should be replaced at least once each season to accommodate for the significant wear and tear that results from typical snow clearing. To do this, loosen the nuts and bolts that hold the auger and its rubber components in place under the auger housing. Remove the older rubber parts, and push the collars into the holes in the replacement parts. Secure the new rubber parts using the nuts and bolts removed earlier.
5. Auger Housing Guard and Scraper
The scraper and auger housing guard should generally be flush with the ground to encourage easier clearing of compacted snow or ice. If they don’t appear to be flush, loosen the four bolts that hold the housing and scraper in place. Adjust each component until they’re in the proper position for snow clearing, and then tightly fasten the bolts back into place to preserve the scraper’s new position.
HondaLawnParts.com is a Great Resource for Snowblower Maintenance
Whether it’s OEM Honda HS35 parts or lubricants, HondaLawnParts.com is an excellent resource for existing equipment owners. With an online parts lookup tool and plenty of options available, those equipment owners looking to keep their snowblower in top shape throughout both the winter season and summer storage will easily find exactly what they need.
