
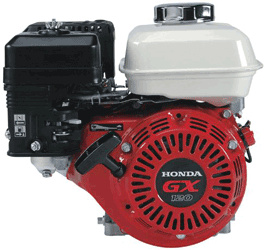
 The GXV120 is a vertical shaft engine that is mostly seen in walk-behind mowers. As with any Honda, it delivers outstanding reliability, but only if it’s properly maintained. This guide will walk you through the basics of keeping your engine serviced.
Before You Begin
All maintenance should be performed with the engine off. Giving the engine time to cool will reduce the chance of burns, especially when working around the muffler.
Maintenance Schedule
- Before each use: check the air cleaner and the engine oil level
- Every three months or 50 hours of operation: Clean the air cleaner and check the flywheel brake pad for wear.
- Every 6 months or 100 hours: Change the oil, check the spark plug and clean the spark arrester (if equipped.)
Honda recommends taking the engine in for service every year or 300 hours to have the valve clearance checked and the fuel system cleaned. The fuel line should also be checked by a technician every three years, and the flywheel brake pad should be replaced by a professional when it is worn down.
Oil
Honda recommends 10W40 automotive motor oil under most conditions, but 10W30 can be used at temperatures up to 90°F (35°C) and both 20W40 and 20W50 at temperatures above 14°F (-10°C.) This engine holds 0.63 quarts (0.6 liters) of oil.
To check the oil, remove the filler cap and wipe off the dipstick. Insert the cap back into the engine without screwing it in, then pull it back out. Oil should show up between the upper and lower marks on the stick.
To change the oil, remove the filler cap followed by the drain plug, located directly below the filler neck. Let the oil drain into a suitable container. Reinstall the drain plug, then pour fresh oil into the filler neck, checking the oil level with the dipstick. Once the oil is at the right level, screw the filler cap back onto the neck.
Air Cleaner
To access the air cleaner, remove the wing nut on the cover. Once the cover has been lifted off, the filter can be removed by unscrewing two more wing nuts.
The GXV120’s filter has an inner paper element and an outer foam element. To clean the paper element, simply tap it against a hard surface to knock the dust loose. To clean the foam element, wash it in soap and water and let it dry. Soak the foam in clean engine oil and squeeze out any excess. If either filter element is damaged or torn, replace it.
Spark Plug
To remove the spark plug, unplug the cap and unscrew it with a plug wrench.
If the electrodes are dirty, clean them with a wire brush. The plug should be gapped to 0.028-0.031 inches (0.7-0.8 mm.) Replace the plug if the electrodes are worn or the insulator is damaged.
To reinstall the plug, thread it into the engine by hand to ensure it doesn’t cross-thread, then tighten it down with the plug wrench. Tighten 1/8-1/4 turn after it seats if the plug was previously used, or 1/2 turn if the plug or plug washer is new to ensure a tight seal. Reattach the plug cap.
Spark Arrester (Optional)
This part doesn’t come with the GXV120 from the factory, but it can be added to comply with local fire laws.
To access the arrester, remove the muffler assembly by unscrewing the three 6mm nuts on the surface of the muffler protector.
To clean the arrester, slide it out of the muffler and remove any deposits on it with a wire brush. If the arrester has holes or cracks, it should be replaced.
To reinstall the arrester, slide the arrester back into the muffler over the large gasket, then slide the muffler components onto the studs in this order, from the engine outward: small gasket, arrester/large gasket/muffler, identification plate (optional) and muffler protector.
Where to Get Parts for the Honda GXV120
Whether you need to replace the spark plug, add a spark arrester, or do a complete rebuild, you can get everything you need from www.hondalawnparts.com. We’re a certified Honda Small Engines dealer, so we carry OEM parts to replace everything on the GXV120. Our site even has factory parts diagrams and descriptions to make it easier to find the right part. We ship parts across the U.S. and Canada.
