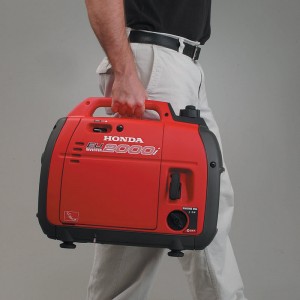
 The key to a long-lasting generator is consistent maintenance that aligns with the recommendations in Honda’s operator manual. From general maintenance tips and guidelines to a helpful schedule for common procedures, the manual will serve as the best point of reference for commercial and personal equipment owners who wish to keep their generator running efficiently for many years to come. Those new to Honda generators can follow a few specific tips in order to ensure long-term enjoyment of their generator purchase.
Safety Disclaimer: A Few Words of Caution Before Maintenance
Generators aren’t just a safety risk while in operation. In fact, conducting maintenance exposes equipment operators to many of the same risks that would be faced while the equipment is running. Before getting started with regularly scheduled maintenance, make sure that the equipment has had time to cool down if used recently. Operators should work only in a well-ventilated or outdoor environment, using a solid and level surface that guards against fuel spills or equipment balance issues. Ensure that the engine is off and that spark plugs or other wires are disconnected, since this will prevent unwanted ignition that might cause very serious injury.
The Importance of Maintenance and the Maintenance Schedule
Generator maintenance keeps the equipment running at peak efficiency, which means that it uses fuel more sparingly and works for a longer period of time during a power outage or another major event. Regular maintenance also ensures that the generator runs a bit more quietly than it would if key parts are neglected, which can be a significant boon to sanity if the generator needs to run overnight or for multiple consecutive days.
The best way to ensure a high level of efficiency and a low level of noise, is to simply follow the guidelines mentioned in the operator manual’s maintenance schedule. This schedule recommends certain types of maintenance based on the number of hours the generator has been in use, and is a great reference that will keep everything running smoothly until the generator is retired or replaced with another model. The maintenance schedule highlights the following key procedures:
– Engine Oil Change
Honda recommends checking engine oil levels each time the generator is used, with an oil change required after first 20 hours of use and every six months thereafter. Oil is checked and changed by removing the maintenance cover and the oil cap and dipstick, and reading the oil level registered on the dipstick at the time of removal. Typically, Honda recommends 10W30 oil for its generator engines, though this may vary based on climate and other concerns.
– Air Filter
The air filter should also be checked prior to each generator use. Equipment owners should clean the filter after 50 hours of use or every 3 months, whichever comes first. Cleaning can be performed with warm water and a mild detergent, like dish detergent or other typical soaps. If the air filter shows signs of damage, it should be replaced with an OEM filter instead.
– Spark Plug
Spark plug adjustments should take place every 100 hours, or after six months of use. The spark plug requires full replacement once per year, or after 200 hours. As with the air filter, a spark plug that shows signs of significant damage should be removed and replaced with an OEM Honda spark plug that fits the generator, as this will ensure continued operation at the highest levels of efficiency. For full replacement, Honda recommends the CR5HSB spark plug model, available from most authorized retailers.
– Spark Arrester
The spark arrester is a key part of the generator, and a great way to ensure both efficiency and safe operation. Because this part is located near the generator’s muffler, that part should be allowed to cool down after any recent use before spark arrester maintenance is performed. Honda recommends spark arrester service and cleaning after every 100 hours of use, or every six months, whichever comes first.
To perform this key part of the maintenance schedule, remove the muffler protector by removing the six screws holding it in place. Next, loosen the 6mm bolts that keep the muffler and spark arrester in place. Remove those bolts and then remove the muffler and spark arrester carefully. Use a stuff brush to free any carbon deposits from the surface of the spark arrester, and inspect the part for damage. if required, replace the spark arrester rather than cleaning off built-up carbon and dirt deposits. Reinsert the spark arrester and tighten the arrester, the muffler, and the muffler cover, as needed.
Honda Generator Parts are Easy to Find at HondaLawnParts.com
When performing maintenance tasks, some parts will simply show too much damage to be cleaned and placed back into the generator. This is when an OEM part, with the same high level of quality as Honda generators themselves, is required. HondaLawnParts.com allows generator owners to search for parts online using the equipment’s model number, part number, and engine model, for quick maintenance work and replacement throughout the year.
